Zapier
This article explains how to use the GiveWP Zapier Add-on. Learn how to connect your Zapier account to your GiveWP integration and more.
The first step to implementing Zapier with GiveWP is to download and install the Zapier Add-on. You’ll also need to activate your Zapier license in order to get one-click updates and access to our Priority Support.
GiveWP on Zapier
Now that you have the Zapier Add-on activated properly it’s time to create some Zaps! You will first need to gain access to the GiveWP Zapier App:
Click here to Get the GiveWP Zapier App
When you click on the link above you will see the following page:
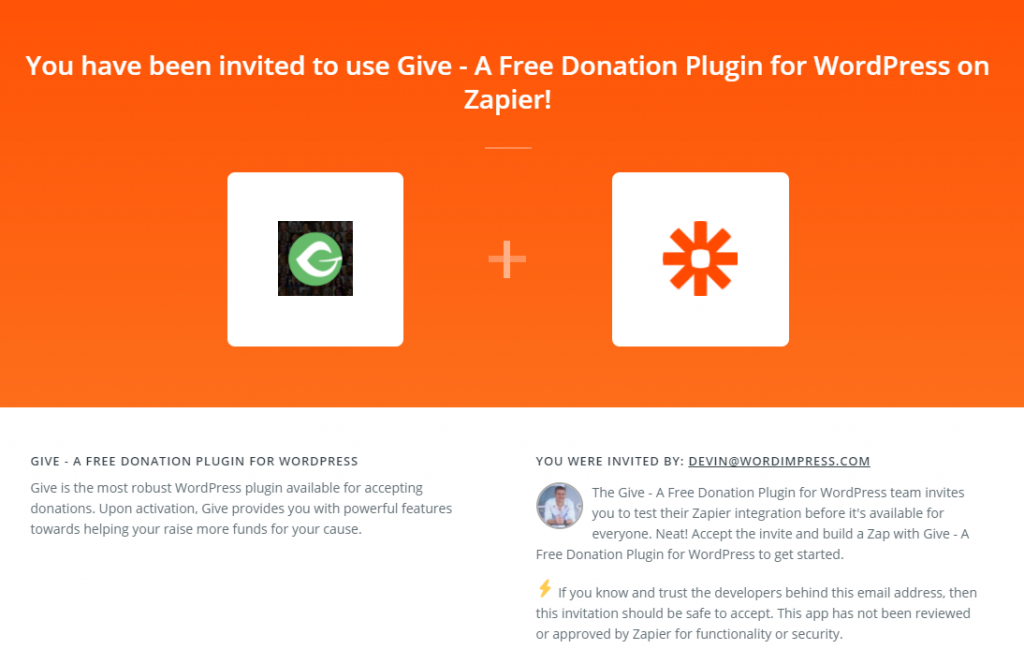
Click Accept Invite & Go To Dashboard to continue.
Creating Zaps
Once you have properly setup the GiveWP Zapier Add-on and accepted the App invite you can now start integrating with hundreds of services. If you are new Zapier, please read up on triggers and actions. For an example, let’s create a GiveWP integration with Slack. The first screen you’ll see is to select a trigger and action:
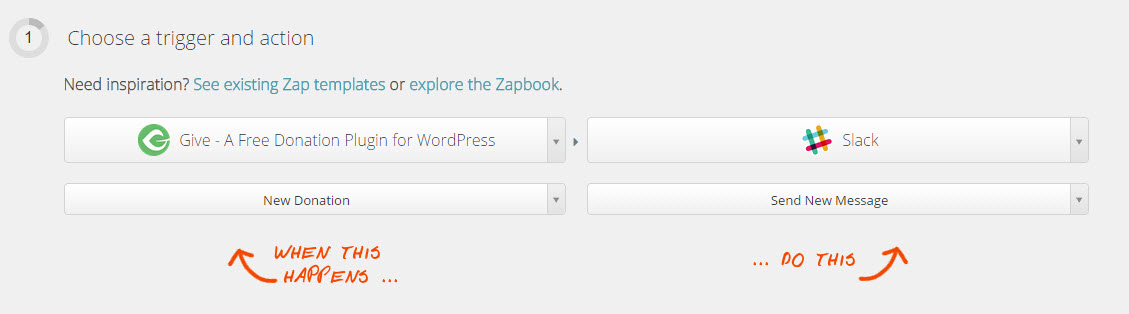
Notice how I have selected “GiveWP” as my trigger app and “Slack” as the action application. Below that, I have specified “New Donation” as my specific trigger.
Next, you will be asked to connect to your GiveWP integration if you haven’t setup a Zap before:

You may create yourself an API key for your integration under Users > Your Profile > GiveWP API Keys. Learn more about the GiveWP API.
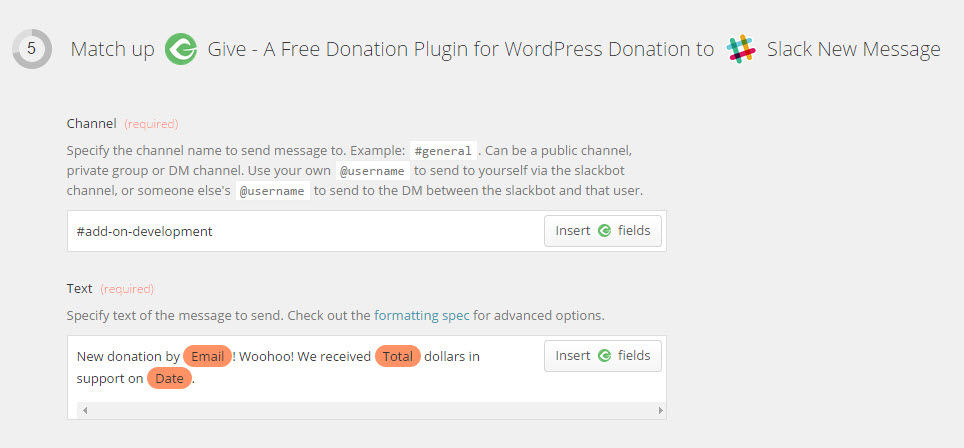
Once you have the accounts properly connected between your two applications it’s time to match up the data as you see fit. For Slack, I’ll want to send a message to a specific channel with certain fields included like the donor’s email, the form used to donate, and the total donated:
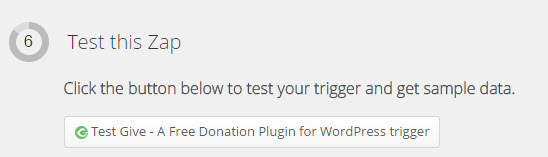
Now that the Zap is setup, it’s time to test it:
Bingo! It works:

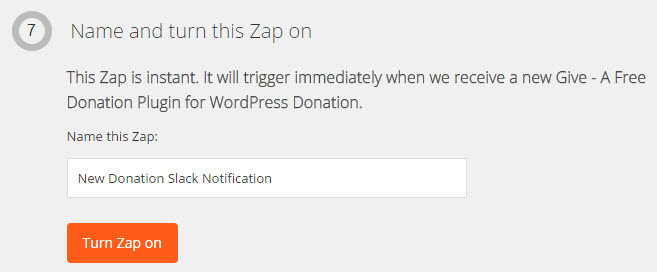
Now it’s just time to provide a good name and confirm:
Advanced Zap Case Study: Recurring Donations
To set up a Zap that does more complex things, you should use the “continue if” step at Zapier. One such use-case is to determine if a donation is the first one on a subscription or simply a one-time donation.
If you only want to trigger some action on the third party app for the initial donation on recurring subscription, you can add a “continue if” step on Zapier that essentially says “only continue if these certain things are true.”
In the case of subscription donations, there is a difference between the status of the donation between initial donations and renewals. Initial donations (as well as one time donations) are given a status on GiveWP’s API of “Complete” while renewals are given a status of “Renewal.”
So your “Continue If” step should check the post status of the donations, and only continue if it matches “Complete” That will prevent the Zap from continuing for renewal donations.
To distinguish between a one-time donation and the initial donation of a subscription, your Zap can look for a status of “Complete” and then check the payment_meta__subscription_id field. This field will contain a zero (“0”) if the transaction is a one-time donation, and it will contain a non-zero numeric value that matches the ID of the GiveWP subscription if it is the initial donation of a subscription.
Testing Zaps
You may have noticed a new tab setup within you GiveWP settings page when you activated this plugin:

This tab exists to provide you with helpful instructions, quick links, and testing triggers.
We just setup a Slack integration when a New Donation occurs in GiveWP. Now, we could test this by creating a new test donation, but we don’t want to have to go through that trouble. Rather, clicking “New Donation” will run test data to all triggers setup on Zapier with that integration. If I had configured more than just Slack, for instance MailChimp as well, to run an action when a new donation is made then clicking the test trigger would run both.
Frequently Asked Questions
As an illustration, if you establish a field named “Custom Text,” its corresponding identifier on Zapier will be “payment_meta__custom_text.”


