Gift Aid
Gift Aid allows charities in the UK to opt-in and claim an extra 25% for every £1 their donors give. The Gift Aid Add-on enables your organization to collect donations with Gift Aid enabled and report on those donations easily. The UK Gift Aid program can help add up to 25% to your total donations.

Note: Do you need guidance on downloading, installing, or activating GiveWP Add-ons? Read our docs about that here.
Level up Gift Aid using the Visual Form Builder
The Visual Form Builder introduces a new and intelligent way to share Gift Aid with potential donors, via a customizable block baked into the builder. All you have to do is have GiveWP and the Gift Aid add-on active, and you’re ready to add in a Gift Aid block.
Adding Gift Aid to your Donation Form
Make sure that you are on the Build tab of the Visual Form Builder so you can add in the Gift Aid block.
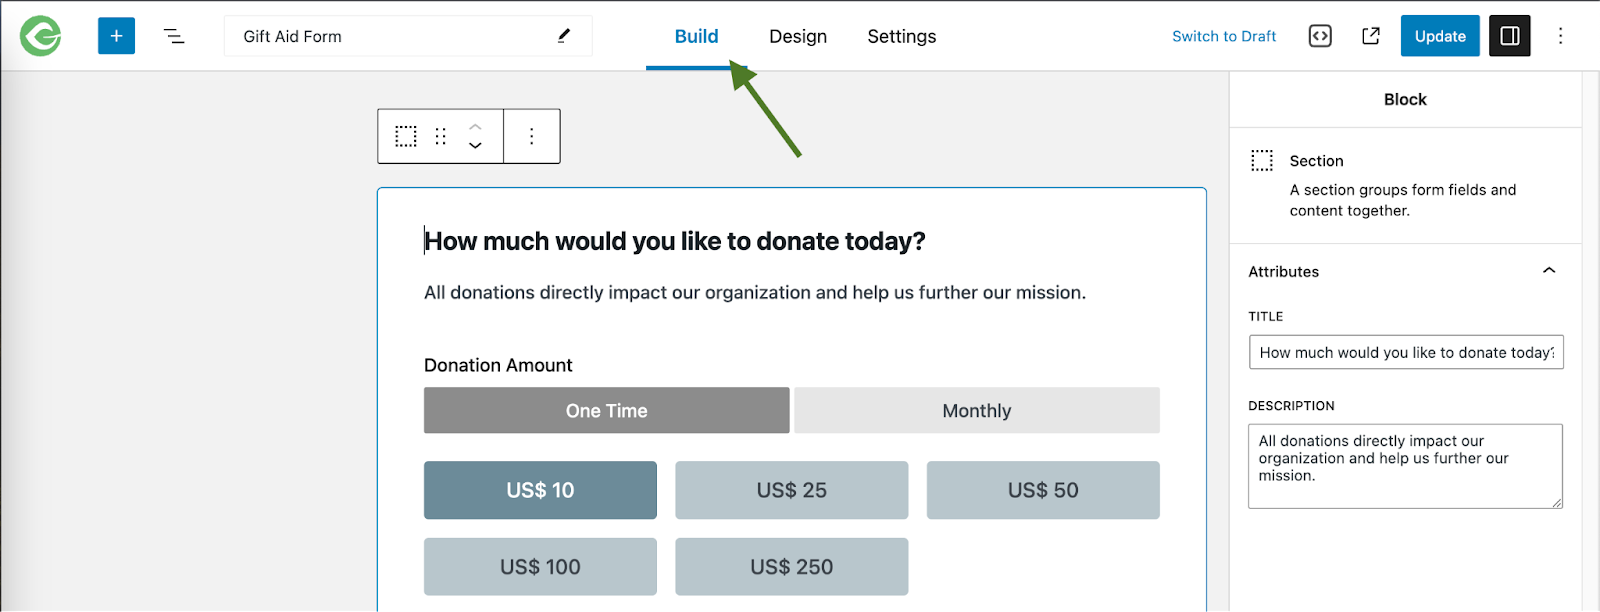
Add the Gift Aid block by using the “Add Block” button below the selected section, or use the button on the top left of the builder. Once the block is added, select it in the form to access the options on the right-hand side of the builder.
After you’ve added the block, you’ll note a few things that make this block behave differently than other fields, sections, and blocks:
- The Gift Aid block will only show on a form using British Pounds as the currency.
- The Gift Aid block will only display on a form that includes a Billing Address block.
- The Gift Aid block only displays for donors who are donating as individuals. If your form has a company name field, the Gift Aid block will disappear when a donor types anything into the Company name field.
These features ensure you aren’t offering Gift Aid to donors who shouldn’t claim it.
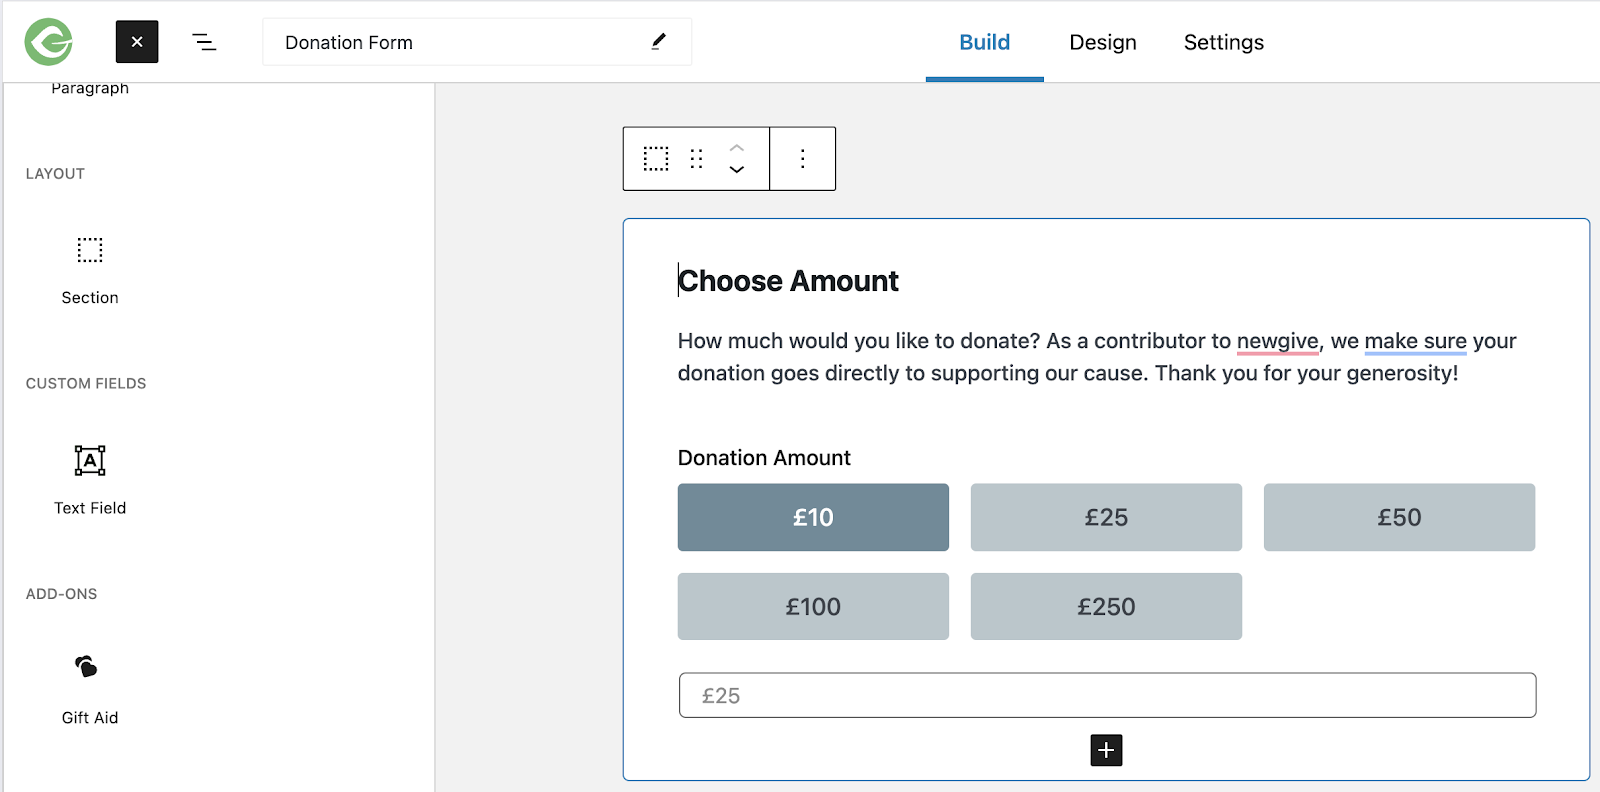
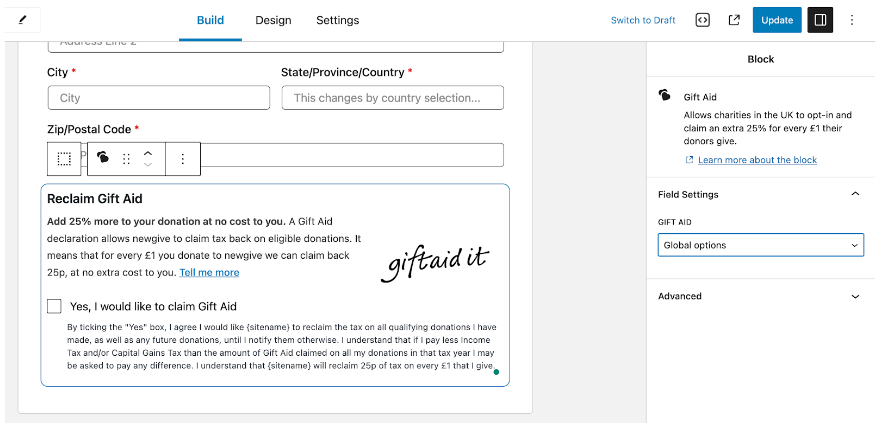
Drag the Gift Aid block from the blocks panel on the left and drop it anywhere you want it to display on the form, preferably after the Address block.
You’ll find an array of customizable settings and fields available. Explore these to build out the perfect user experience for your donors:
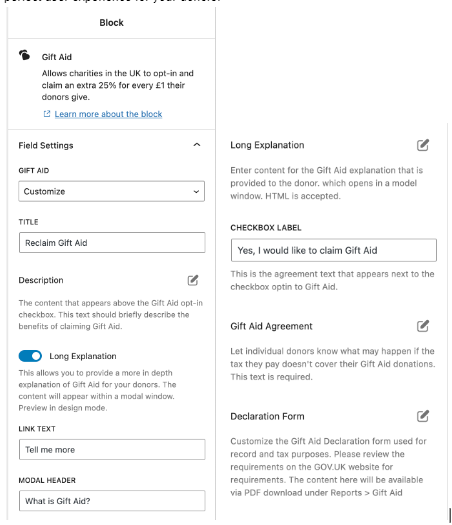
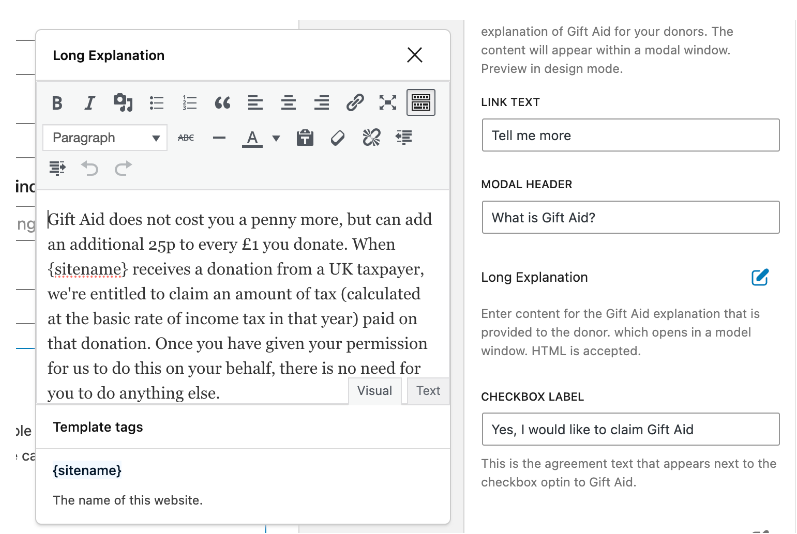
Click the “Edit” icon to customize the Description, Long Explanation, Gift Aid Agreement, and Declaration Form settings. You can use these fields to share additional information about your cause, or inform donors about the benefits of selecting Gift Aid when they donate.
Once you are happy with the settings, update the form and you are ready to go. The Visual Form Builder helps put the power of creative form building with maximum functionality in your hands. By building a better experience for your donors with the benefits of Gift Aid, you bring more funding to your organization
Not ready to move to the Visual Form Builder? You can read all about Gift Aid implementation and settings below.
Gift Aid for Versions One and Two
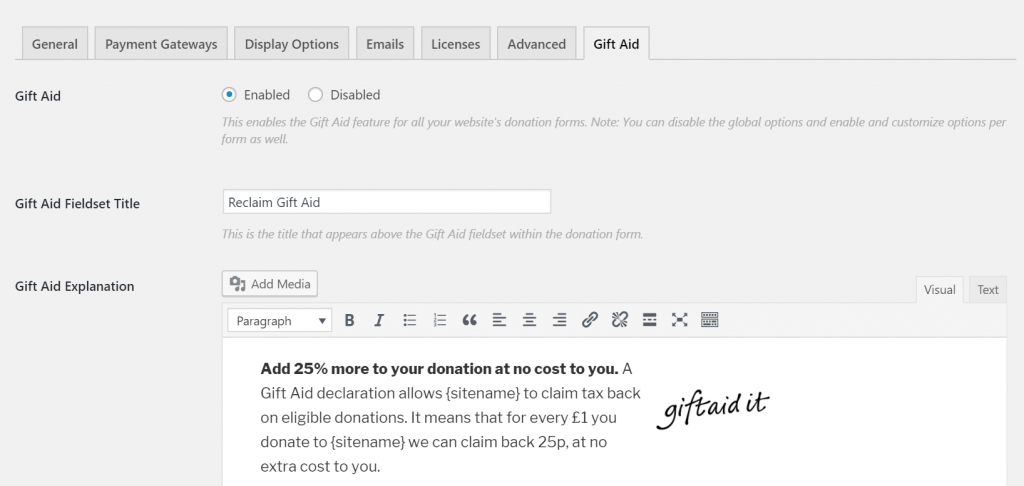
Enable Gift Aid
Upon activation of the GiveWP Gift Aid add-on you will not notice any noticeable change. You’ll first want to go to “Donations > Settings > Gift Aid” and enable the Gift Aid setting.
The Gift Aid General Settings page allows you to set the global configuration for all of your forms. These settings can be over-written per-form as well.
Settings Type: Radio Button
Options: Enabled | Disabled
Default: Disabled
Once you activate GiveWP Gift Aid, you’ll be able to see the settings screen above, found in “Donations > Settings > Gift Aid”. But nothing will yet be enabled. To enable Gift Aid for your forms, set this setting to “Enabled”.
Once you select “Enable”, you’ll see all the general settings available to you.
Gift Aid Fieldset Title
Settings Type: Text field
Default: “Reclaim Gift Aid”
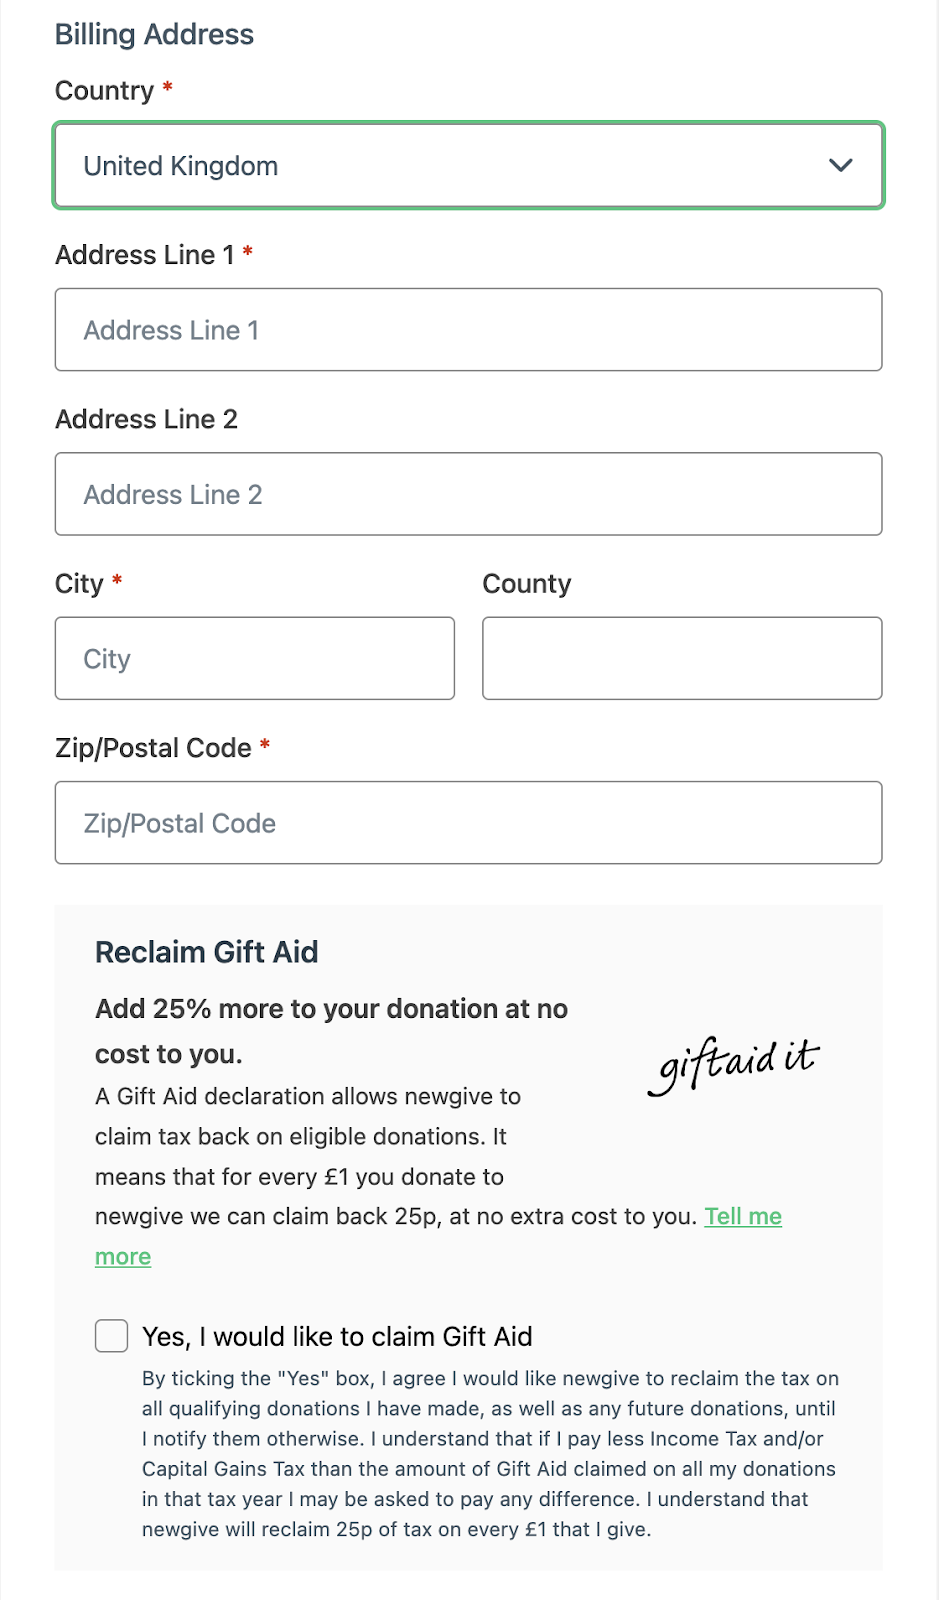
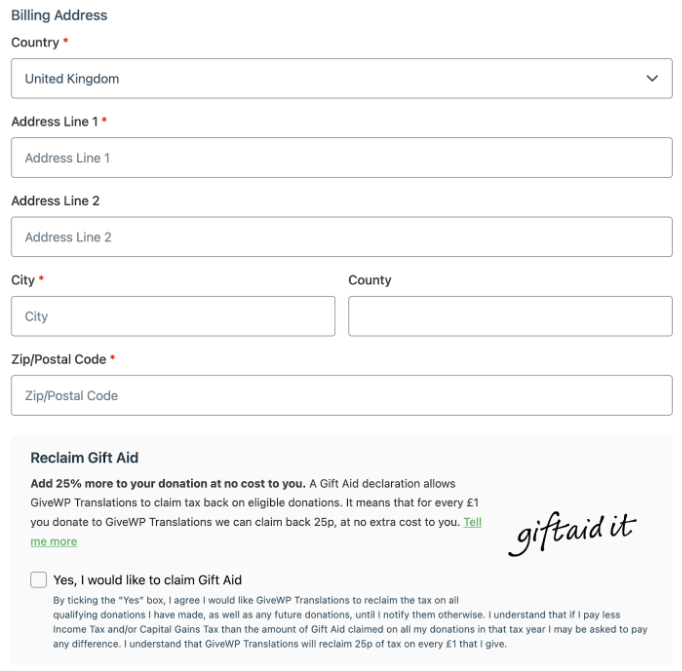
This is the label that appears above the Gift Aid section in the form.
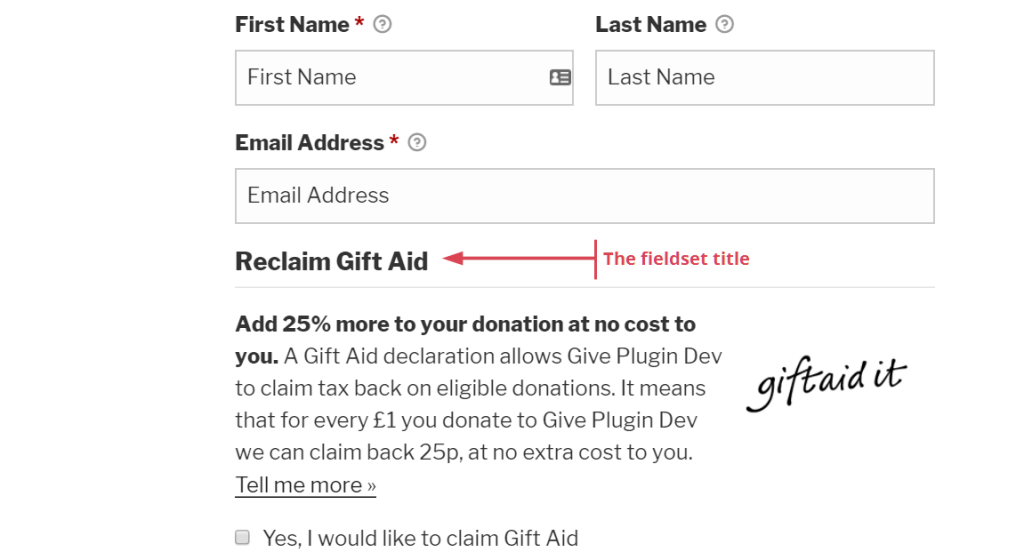
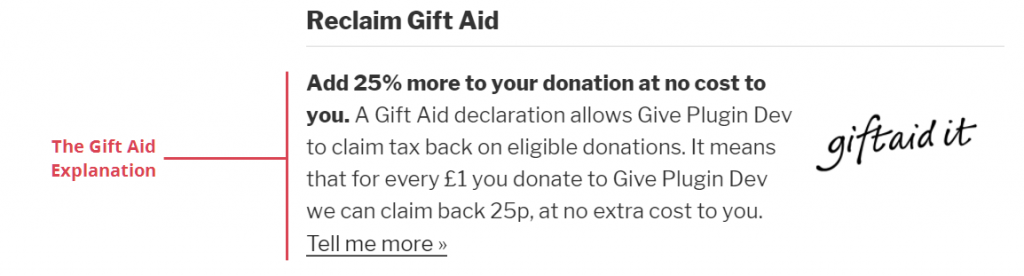
Gift Aid Explanation
Setting Type: Rich Text Editor
Default: “Add 25% more to your donation at no cost to you. A Gift Aid declaration allows {sitename} to claim tax back on eligible donations. It means that for every £1 you donate to {sitename} we can claim back 25p, at no extra cost to you.”
This section appears in your form directly below the fieldset title. It’s a simple way to inform your donors exactly what Gift Aid is and how your organization can benefit from it.
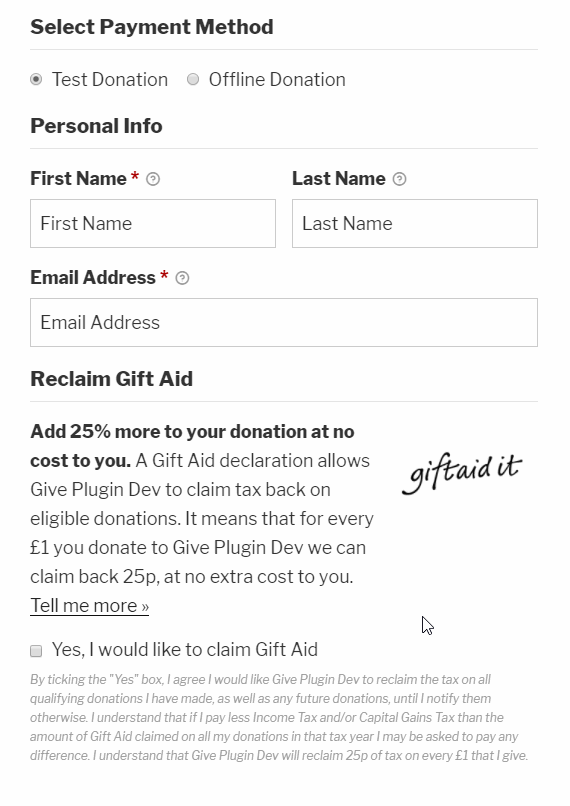
Gift Aid Checkbox Label
Setting Type: Text field
Default: “Yes, I would like to claim Gift Aid”
This is the label attached to the checkbox indicating that the donor will opt-in to use Gift Aid with their donation. The checkbox is required by the Gift Aid program. The text should be written from the donor’s point of view.

Gift Aid Agreement
Setting Type: Text field
Default: “By ticking the “Yes” box, I agree I would like {sitename} to reclaim the tax on all qualifying donations I have made, as well as any future donations, until I notify them otherwise. I understand that if I pay less Income Tax and/or Capital Gains Tax than the amount of Gift Aid claimed on all my donations in that tax year I may be asked to pay any difference. I understand that {sitename} will reclaim 25p of tax on every £1 that I give.”
This text appears directly below the checkbox opt-in. This helps your donors know exactly what they are agreeing to in detail. While this is not required by the Gift Aid program it is highly recommended. See screenshot above for an example.
Long Explanation
Setting Type: Radio buttons
Options: Enabled | Disabled
Default: Enabled
If you want to provide much more detailed information about Gift Aid, you can enable the “Long Explanation” feature. This adds a link at the end of the “Gift Aid Explanation” text, saying “Tell me more >>”. When that is clicked your long explanation is displayed in a modal window so that your donors don’t have to leave your site at all. We know that when donors are led away from the donation page, it’s possible they won’t come back. This allows them to learn everything they need to learn without ever leaving your donation page.
Declaration Form
Setting Type: Rich Text Editor
Default: A tightly formatted template optimized for PDF generation
This is the form that your donors need in order to file their Gift Aid for their own tax purposes. The default settings is a HTML template that is ideal for PDF generation. PDF generation can be tricky so getting complex or creative with this template can cause breakage. We recommend keeping this as simple and clean as possible.
The template supports HTML, Images, and the following template tags for dynamic generation:
{first_name}— the donor’s first name{last_name}— the donor’s last name{gift_aid_address}— the mailing address the donor provided when opting-in to Gift Aid{donation_date}— the date the donation with Gift Aid enabled was made.
Read more about Gift Aid Declaration requirements
Passing Gift Aid Information to Emails
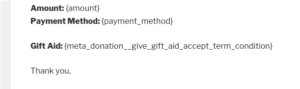
If it’s necessary to pass whether or not a donor opted-in to Gift Aid into an email, this can be done using a meta email tag.
{meta_donation__give_gift_aid_accept_term_condition}
Note: There are two underscores between “donation” and “give”.
This will either pass in “on” when a donor selects the checkbox, or will pass nothing if the donor doesn’t opt-in.
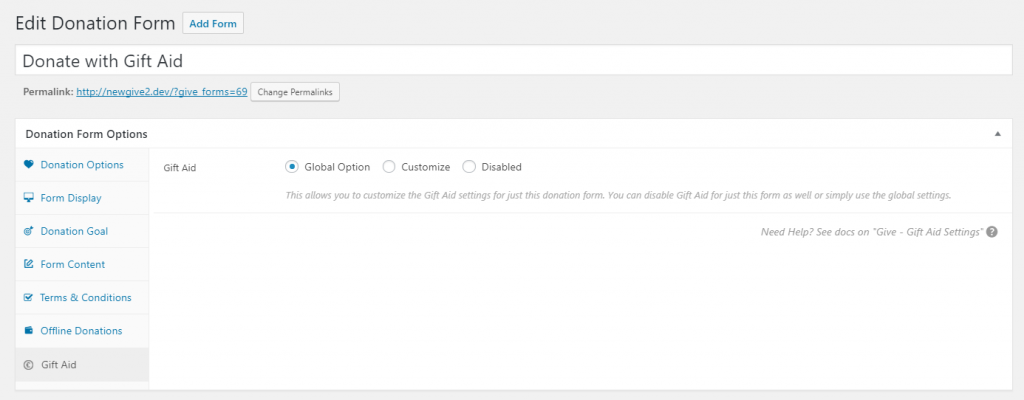
Gift Aid Per Form Options
After enabling and configuring the general Gift Aid options, you also have the ability to customize these settings per form. Navigate to the “Gift Aid” tab in your GiveWP form edit screen and choose “Customize” or “Disable”.
Downloading Declaration Forms
Declaration forms can be downloaded a number of ways:
- Donors are able to download their declaration forms immediately after completing a donation using the link at the bottom of the Donation Confirmation page.
- Donors with access to a Donor Dashboard can download declarations at any time by navigating to a specific donation and clicking the download link.
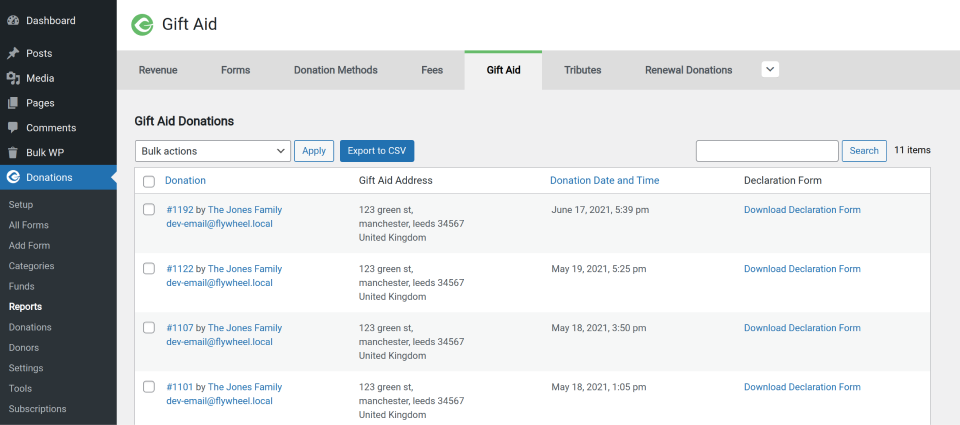
- If your donor has lost access to a declaration form, you can download and email one by navigating to Donations > Reports > Gift Aid.
Gift Aid Reporting
As you collect donations with Gift Aid enabled, you’ll need to report on that to the UK government in order to receive your Gift Aid funds. GiveWP helps you do that with our Gift Aid reporting tools. You can access our Gift Aid Reports by going to “Donations > Reports > Legacy Reports > Gift Aid”.
Bulk Actions
Setting Type: Dropdown Select field
Options: Delete Entries | Download Declaration Forms
At the top of the Gift Aid reports page is a Bulk Options tool. Similarly to the WordPress native Posts and Pages Bulk actions tool, you can select multiple Donations and apply bulk actions to them. Here you have two options:
- Delete Entries — this will delete all the donations you’ve selected. Use with caution. This will permanently change your donation stats and remove the donations from your donor history table for your donors.
- Download Declaration Forms — this will download all the declaration forms you’ve selected together as one ZIP file.
Gift Aid Report Columns
In the main Gift Aid Report, there are 4 columns displaying donations that have Gift Aid activity associated with them.
- Donation sortable — details about the relevant Gift Aid enabled donation. You can click on the Donation ID to go to the Donation Details screen from here.
- Gift Aid Address unsortable — The address the donor provided for their Gift Aid address.
- Gift Aid Opt-in Date and time unsortable — the date and time of the donation when the donor opted into Gift Aid for your organization.
- Declaration Form unsortable — you can download the declaration form for that particular donation here as a PDF. This is useful for times when donors contact you asking for the form.
Gift Aid Exports
You can export all your Gift Aid-related donations with one simple tool. Navigate to “Donations > Tools > Export”. There you’ll see an export tool called “Gift Aid Donations”.
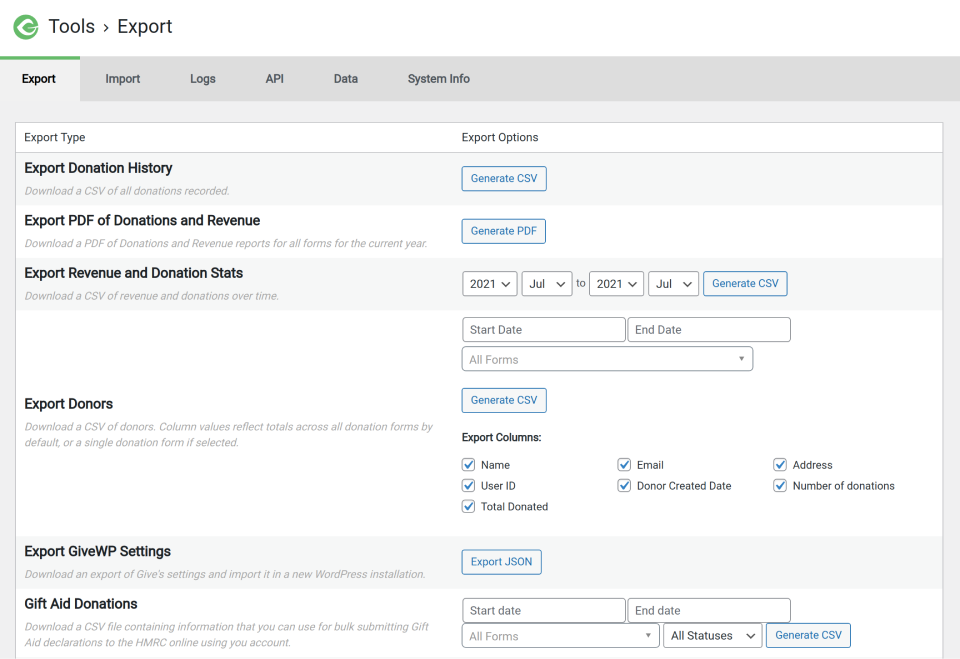
The Gift Aid Export Tool
Three fields can be configured to export your Gift Aid donations:
- Start Date
- End Date
- Donation Form
All of these are optional. If you go to this page and click “Generate CSV”, you’ll get all relevant Gift Aid donations for all forms for your entire donation history.
You can optionally limit the date-range of the export by setting a start and end time.
You can also set the tool to export the Gift Aid relevant donations for just one form. If you do not choose a form, then the export will pull the donations from all forms and optionally limit the date range based on your date selections.


