If you’ve ever wanted to really go to town with your Give donation email receipts, this is how you do it. It’s also a good tutorial for learning a bit about themeing in WordPress in general.
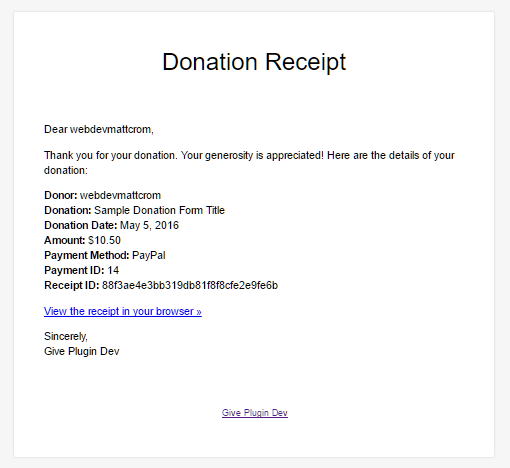
Out of the box, Give has a very simple, minimalist template for all your donor emails. For many, this might be just fine. But for most folks, you’re going to want to spice it up a bit. After all, this is another point of contact with your donors and you want to make a great impression.
We previously discussed ways to enhance your “Thank You” page. The email receipt is a bit more transactional than the “Thank You” page; but that doesn’t mean that you can’t add some flair to it.
Give has a powerful templating system built into it which allows you to add your own custom HTML email templates. It’s one of those hidden gems of the plugin because there’s no setting for this. Instead, it works just like overriding your single Give form page does — in your theme files.
For this tutorial, the main features of a dramatic donation email receipt are defined as follows:
- It needs to look really polished
- It needs to strongly reinforce your organization’s brand
- It needs to be responsive
- There needs to be some sections to the email, not just a header, the info, and a footer
- It needs to retain the ability to customize the logo and the donation information using the Give email settings
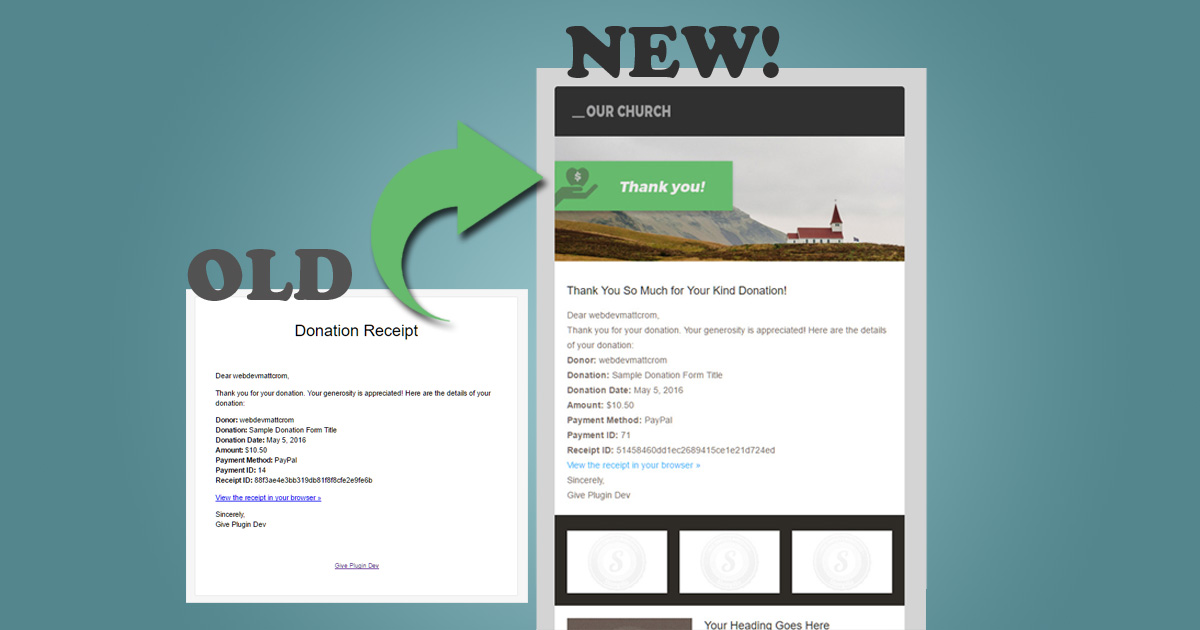
In the end, this means we’re taking your donation email receipts from this:
To this:

This tutorial will walk you through exactly how to accomplish that.
Choose Your Poison
People learn best in different ways, so this tutorial comes in three varieties:
- Jump straight into the code by exploring the Github repo here.
- See it all happen in a walkthrough screencast tutorial you’ll find at the end of the article
- Or keep reading below.
TOOLS YOU NEED:
In order to do this, there’s a few things you should be familiar with:
- Basic principles of child themeing
- An IDE or code editor
- A local environment (We recommend Desktop Server)
- Basic knowledge of HTML/CSS and PHP
Lastly, you’re going to need to create your responsive email template. That’s honestly the hardest part. Responsive web design is challenging enough on its own. Doing it across email clients AND screens is extremely challenging.
Fortunately, there are several really good online resources for responsive HTML email templates. In this tutorial I used a service which I just learned about called Stamplia. They have a free, online responsive email template drag-and-drop builder which fits the bill perfectly. The AFTER image you saw above is one of their free templates with my own images and content added in.
The best part about the Stamplia builder is that it has a Download tool which generates all the markup in one file for you, with all the necessary CSS and HTML output exactly right. It also stores all your images in a sub-folder named exactly right for your markup. Being able to build your email directly in the browser and then download the markup is really convenient.
For now, I’d suggest starting with Stamplia. But here are several other very useful tools you might want to dig into later:
- Beefree.io is an excellent tool for creating beautiful email templates with a lot of pricing options.
- Litmus is more of a premium online email builder. There’s a free trial, then you have to pay. If you create responsive emails regularly then the price is definitely worth it.
- Zurb has some really solid responsive email templates that you can just download and go to town with. It’s very easy to just design in browser with these babies.
- If you really want more of a responsive email Wireframe, and want to learn a ton along the way, then Cerberus is your style.
- MailChimp also has a download tool. You can also design your email completely in MailChimp then export the HTML for use as well. Those guys are leaders in responsive email so that’s definitely worth a look as well.
The Walk-through
OK, now that we know what we’re dealing with and have our tools ready, let’s jump into the details.
Setting up your Theme Files
 The first thing we need to do is setup our email template files in your theme correctly. Remember, Give has it’s own email template files that leverage the WordPress template hierarchy. So when you place those files in your custom theme or child theme, they will be used for the email instead of Give’s own files.
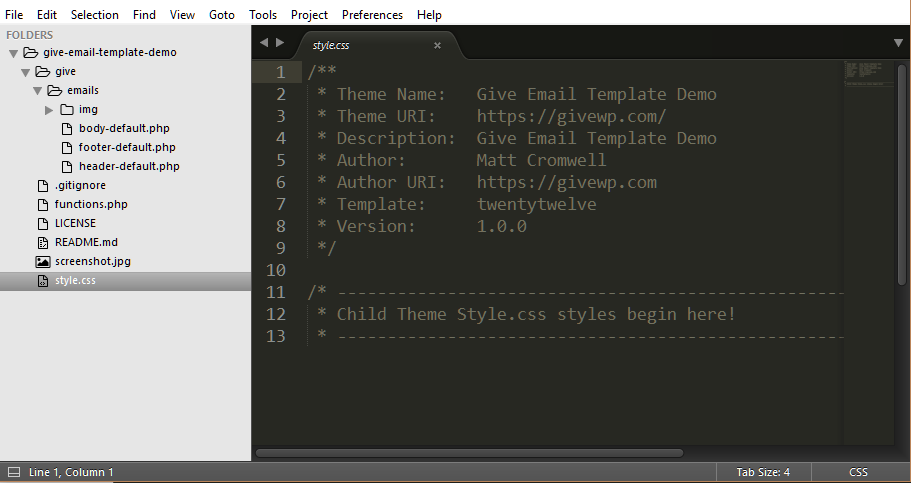
So, first grab the files in Give. You’ll find them in “wp-content/plugin/give/templates/emails.” You’ll see two sets of files. One with “-default” at the end and one without that. You want to select and copy all of these:
- body-default.php
- footer-default.php
- header-default.php
Now go to your theme and add a sub-folder in it called “give.” Inside of that folder, add another one called “emails.” So now it should look like “wp-content/themes/your-theme/give/emails.”
Paste the template files from the Give template into that “emails” folder.
Now your theme is fully in control of the look and feel of your donation receipt email templates!
Getting the markup inside those files:
You’re kind of on your own for this step since everyone’s markup is going to be different here. But here are general tips you need to keep in mind as you break up your HTML template into these three different files:
- Don’t delete the PHP header of any of those three files.
- The header is obviously for the <head> of the template. But I would personally put everything ABOVE the actual content of the email in there.
- Body-default.php should be the main content of your email.
- Footer-default.php should just be closing out the template.
- Make sure you close your PHP tags properly but don’t close it at the end of any of these files.
Pointing your Images to the right place:
If you pasted everything correctly into those files, you should be able to go into your Give Settings, to the Emails tab, click on “Preview Donation Receipt” and you’ll see at least the correct layout and content of your new email template.
But you’ll notice that none of the images work. When you downloaded the template, that markup was able to just reference the images from a relative path. That’s not going to fly with WordPress or with email in general. Those images are staying on your server, but need to be served wherever your donor happens to open their email from.
In order to do that, we need to do two things:
- Put the images into your theme folder.
- Point the template markup to find the images in the right place.
So grab your email template export folder from Stamplia. In there you’ll see a folder called “img.” Copy that whole folder and paste it into “wp-content/themes/your-theme/give/emails” so that it now looks like “wp-content/themes/your-theme/give/emails/img.”
Next, we need to update the markup to point dynamically to those img sources. There’s many ways you could do it, but this is the function I am using:
function get_give_email_images() {
    $images = get_stylesheet_directory_uri() . '/give/emails/img/';
    return $images;
 }
It just simply returns the URL of that images folder. This makes it relatively straight-forward to update our markup to point the image tags to the right place dynamically.
So scan through your body-default.php file for your first <img> tag. The source probably looks something like this: src="img/image1.jpg". We’re going to replace the “img/” with our helper function so it looks like this: src="<?php echo get_give_email_images(); ?>image1.jpg".
Now go through any of your template files that have images and update them accordingly. Now, when you refresh the Email Preview page you’ll see all the images appear as they should.
Configuring the Logo to be updated from Give Settings:
This step is somewhat optional, but helpful for understanding how you can leverage different Give options directly in your custom emails. Currently, the logo in this email is static. If you are building this site for a client they might go into their email settings and update the logo and nothing will happen. If you want to give them the ability to update their logo in your custom email, here’s what you need to do:
- Get the logo option value
- Replace the logo image source with the value of the logo option
Give has a built-in helper function for getting options easily. All you need to do to get the value of the email logo setting is this:
$header_img = give_get_option( 'email_logo', '' );
Once you have that value all you need to do is update your image source of the logo.
But! What happens if your client decides they don’t want the logo on the email receipt at all anymore? If you simply replace the src with the option value, and that option doesn’t exist then all the email receipts will show a broken image. Not awesome. Here’s what we’ll do instead:
 <?php if( ! empty( $header_img ) ) : ?>
     <div id="template_header_image">
         <a href="<?php echo get_home_url(); ?>">
             <img src="<?php echo esc_url( $header_img ); ?>" alt="<?php echo get_bloginfo( 'name' ); ?>">
         </a>
     </div>
 <?php endif; ?>
This basically says “Only output all the markup of the logo image — the wrapper div, the link, and the image tag — IF there’s a value in the logo setting.
You’ll notice that I also added the name of your website as the alt tag of the image, and the homepage of your website as the link that wraps the logo image as well.
Get the Donation Receipt Content:
Lastly, we have to make sure that whatever is entered into the Donation Receipt text editor is output correctly in the email itself.
This is the easiest part. In order for Give to render the dynamic content of your Give Donation Receipt settings into this template, it searches through the HTML for a special string: {email}. Then it dynamically replaces the setting content with that string.
So all you need to do is wherever you want your email content to be in your template, put {email} and you’re done.
Wrap It Up
Naturally, your imagination is the only limit to what you can do here with this set-up. The most important thing to remember is that this is another point of contact with your donors. Hitting the right balance of being useful, informative, personal, but also encouraging them to find out more about your organization takes some trial and error. You might find that you created a dramatic and beautiful template that might be just overwhelming to your donors. The good thing is that you can always come back to this tutorial to refresh exactly how you did this and make any tweaks you need to keep iterating and improving your donor receipts.
If you’ve created a great donor receipt, we’d love to see screenshots. Link it up in the comments below. Thanks!
Screencast of the whole process