ActiveCampaign
ActiveCampaign is a powerful tool used for email marketing campaigns, email automation, and as a customer relationship management system that can assist your fundraising efforts and build donor relationships.
The GiveWP ActiveCampaign Add-on provides a way for you to segment donor newsletter opt-ins into ActiveCampaign’s automation engine with lists and tags. This segmentation will allow you to get more insight as to who your donors are and how they are giving to your campaigns. To integrate with ActiveCampaign you need the following:
- A paid Active Campaign Account or a Free Trial Account
- The GiveWP WordPress plugin
- The Active Campaign Add-on
- An Active Campaign URL and API Key
Note: You can always access your add-on purchase, receipts, downloads and licenses from your account on the My Account page.
After your Active Campaign add-on is activated, navigate to GiveWP > Settings. You’ll see a section called Active Campaign. In that section, input your ActiveCampaign URL and API key. Then, choose where to enable your newsletter opt-in, assign tags, email lists, and define a customized text display for the actual form opt-in.
Getting Started with ActiveCampaign
After you’ve signed up for an ActiveCampaign account, you’ll gain access to its dashboard. At the heart of ActiveCampaign are Lists and Tags.
Lists are ways to segment your donors into different groups, while tags allow you to add certain attributions to a donor. Both Lists and Tags can be used in Email Automation.
To create a new List, navigate to the Lists (list icon) on the left panel and click the Add a List button on the top right of the page.

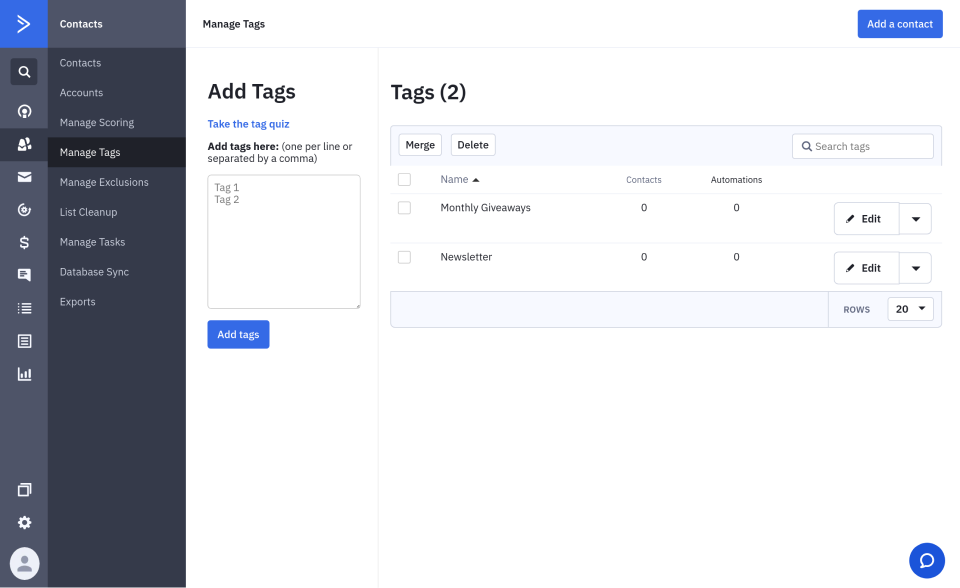
To create Tags, navigate to the Contacts (people icon) on the left panel and click the Manage Tags in the menu. On this page you can create new tags, by adding tag names and then clicking Add Tags. You can also edit tags on this page after they are created.
When you’re all set with your Lists and Tags, look for the Settings (gear icon) on the left panel. Next, click on Developer in the menu to access your API URL and API Key.

Configuring Active Campaign with GiveWP
Now that you have access to your ActiveCampaign API URL and API Key, copy and paste both into your ActiveCampaign Add-on Settings in WordPress under GiveWP > Settings > ActiveCampaign and click Save changes.
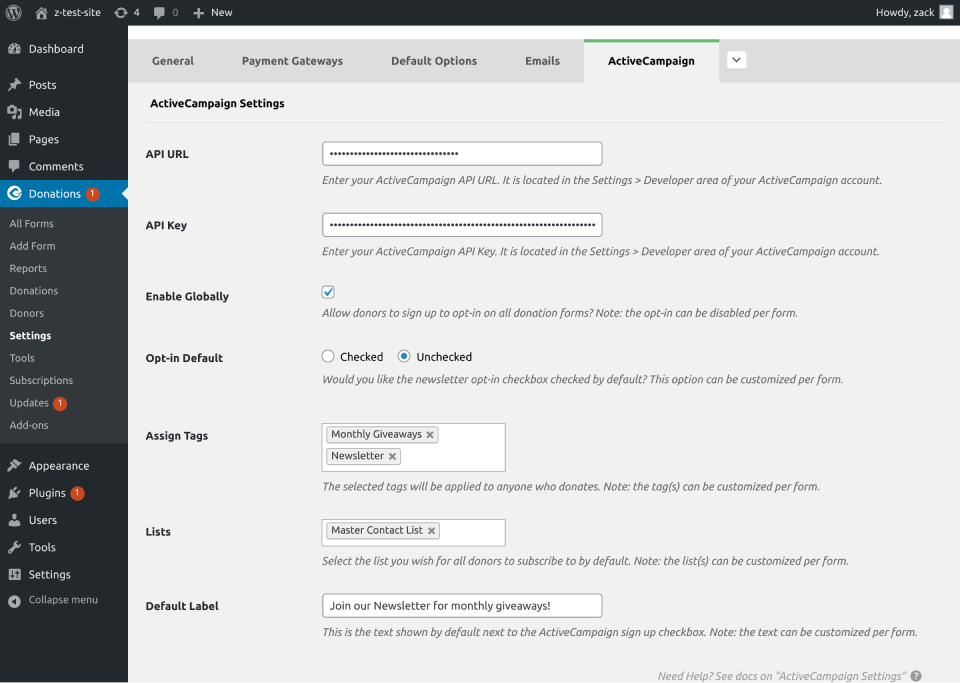
From here you can also set the following global options:
- Enable Globally — Enabling this sets these settings as the default for all your forms, both existing and future. This can be overridden per form as well.
- Opt-In Default — This option sets whether the Global Opt-in setting will be checked or unchecked by default when a donor visits a form.
- Assign Tags — Choosing one or more tags here will assign those tags to donors on a global level.
- Lists — This sets the global default for which of your ActiveCampaign lists your donors will be added to when they opt-in on one of your donation forms.
- Default Label — This sets the global default language for how the opt-in is described. This can be overridden per form.
Setting Individual Form Settings
Now that you have ActiveCampaign integrated with GiveWP and have your global settings configured, you can now configure each form, or new forms to use Active Campaign in different ways.
Note: Any changes you make on individual forms will override the global settings you just set. If you want your form to inherit the settings from your global settings, don’t change anything for your individual form and it will adopt those settings.
To configure ActiveCampaign settings per form, go to Edit the form you want to configure. Now with the ActiveCampaign Add-on activated and configured, you’ll see a ActiveCampaign menu section on the left under Donation Form Options in which you can use Global Options, Customize, or Disable.
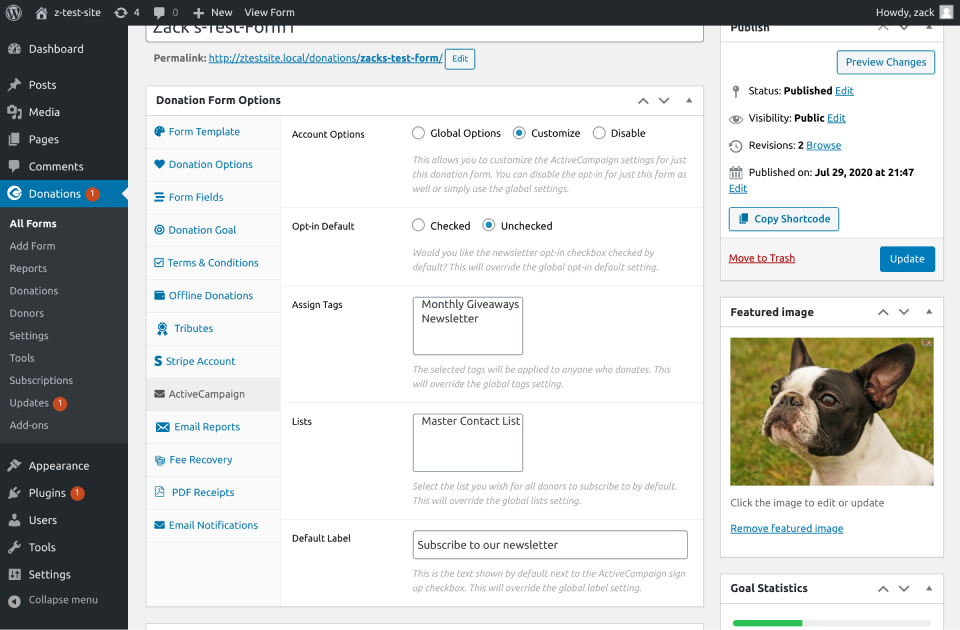
- Global Options will use options that have already been set under
GiveWP > Settings > ActiveCampaign. - Customize will allow you to set specific settings that will override global settings for just this specific form.
- Disable will remove the ActiveCampaign Opt-in for this form.
Be sure to save your individual form settings when finished.


