How to Accept Stripe Donations on Your WordPress Website
Stripe has become one of the most popular online payment processing platforms. Luckily for nonprofits, accepting Stripe donations with GiveWP is startlingly easy.

Stripe has become one of the most popular online payment processing platforms. Luckily for nonprofits, accepting Stripe donations with GiveWP is startlingly easy and comes with no up-front costs.
This tutorial will walk you through the features of our most popular payment gateway including how to connect to Stripe, configure the various settings for Stripe and GiveWP, and how to test Stripe donations using test cards.
Step 1: Register for Stripe and Get GiveWP
Before you can start accepting Stripe donations with GiveWP, you will need to have a few things set up in advance.
The first step is to make sure your organization is eligible for a Stripe account. Sign up for free on their website before continuing if you haven’t already.
You will also need the main GiveWP donation plugin for WordPress. It comes with a built-in Stripe Gateway and no up-front costs. We also have a premium add-on with more features to enhance Stripe donations your GiveWP-powered site. The add-on is included in all of our Pricing Plans.
There are a few differences between the free Stripe gateway and the Stripe Payment Gateway add-on. If you’re not sure which you should use, check out the documentation.
Step 2: Integrate Stripe with GiveWP
Once you’ve signed up for Stripe and chosen to use the add-on or the core gateway, you need to connect your account.
Connect to Stripe
No matter which method you choose, the add-on or the core gateway, you can connect to your Stripe account easily with the blue Stripe connect button. To find it, navigate to Donations > Settings > Payment Gateways (tab) > Stripe settings (link).
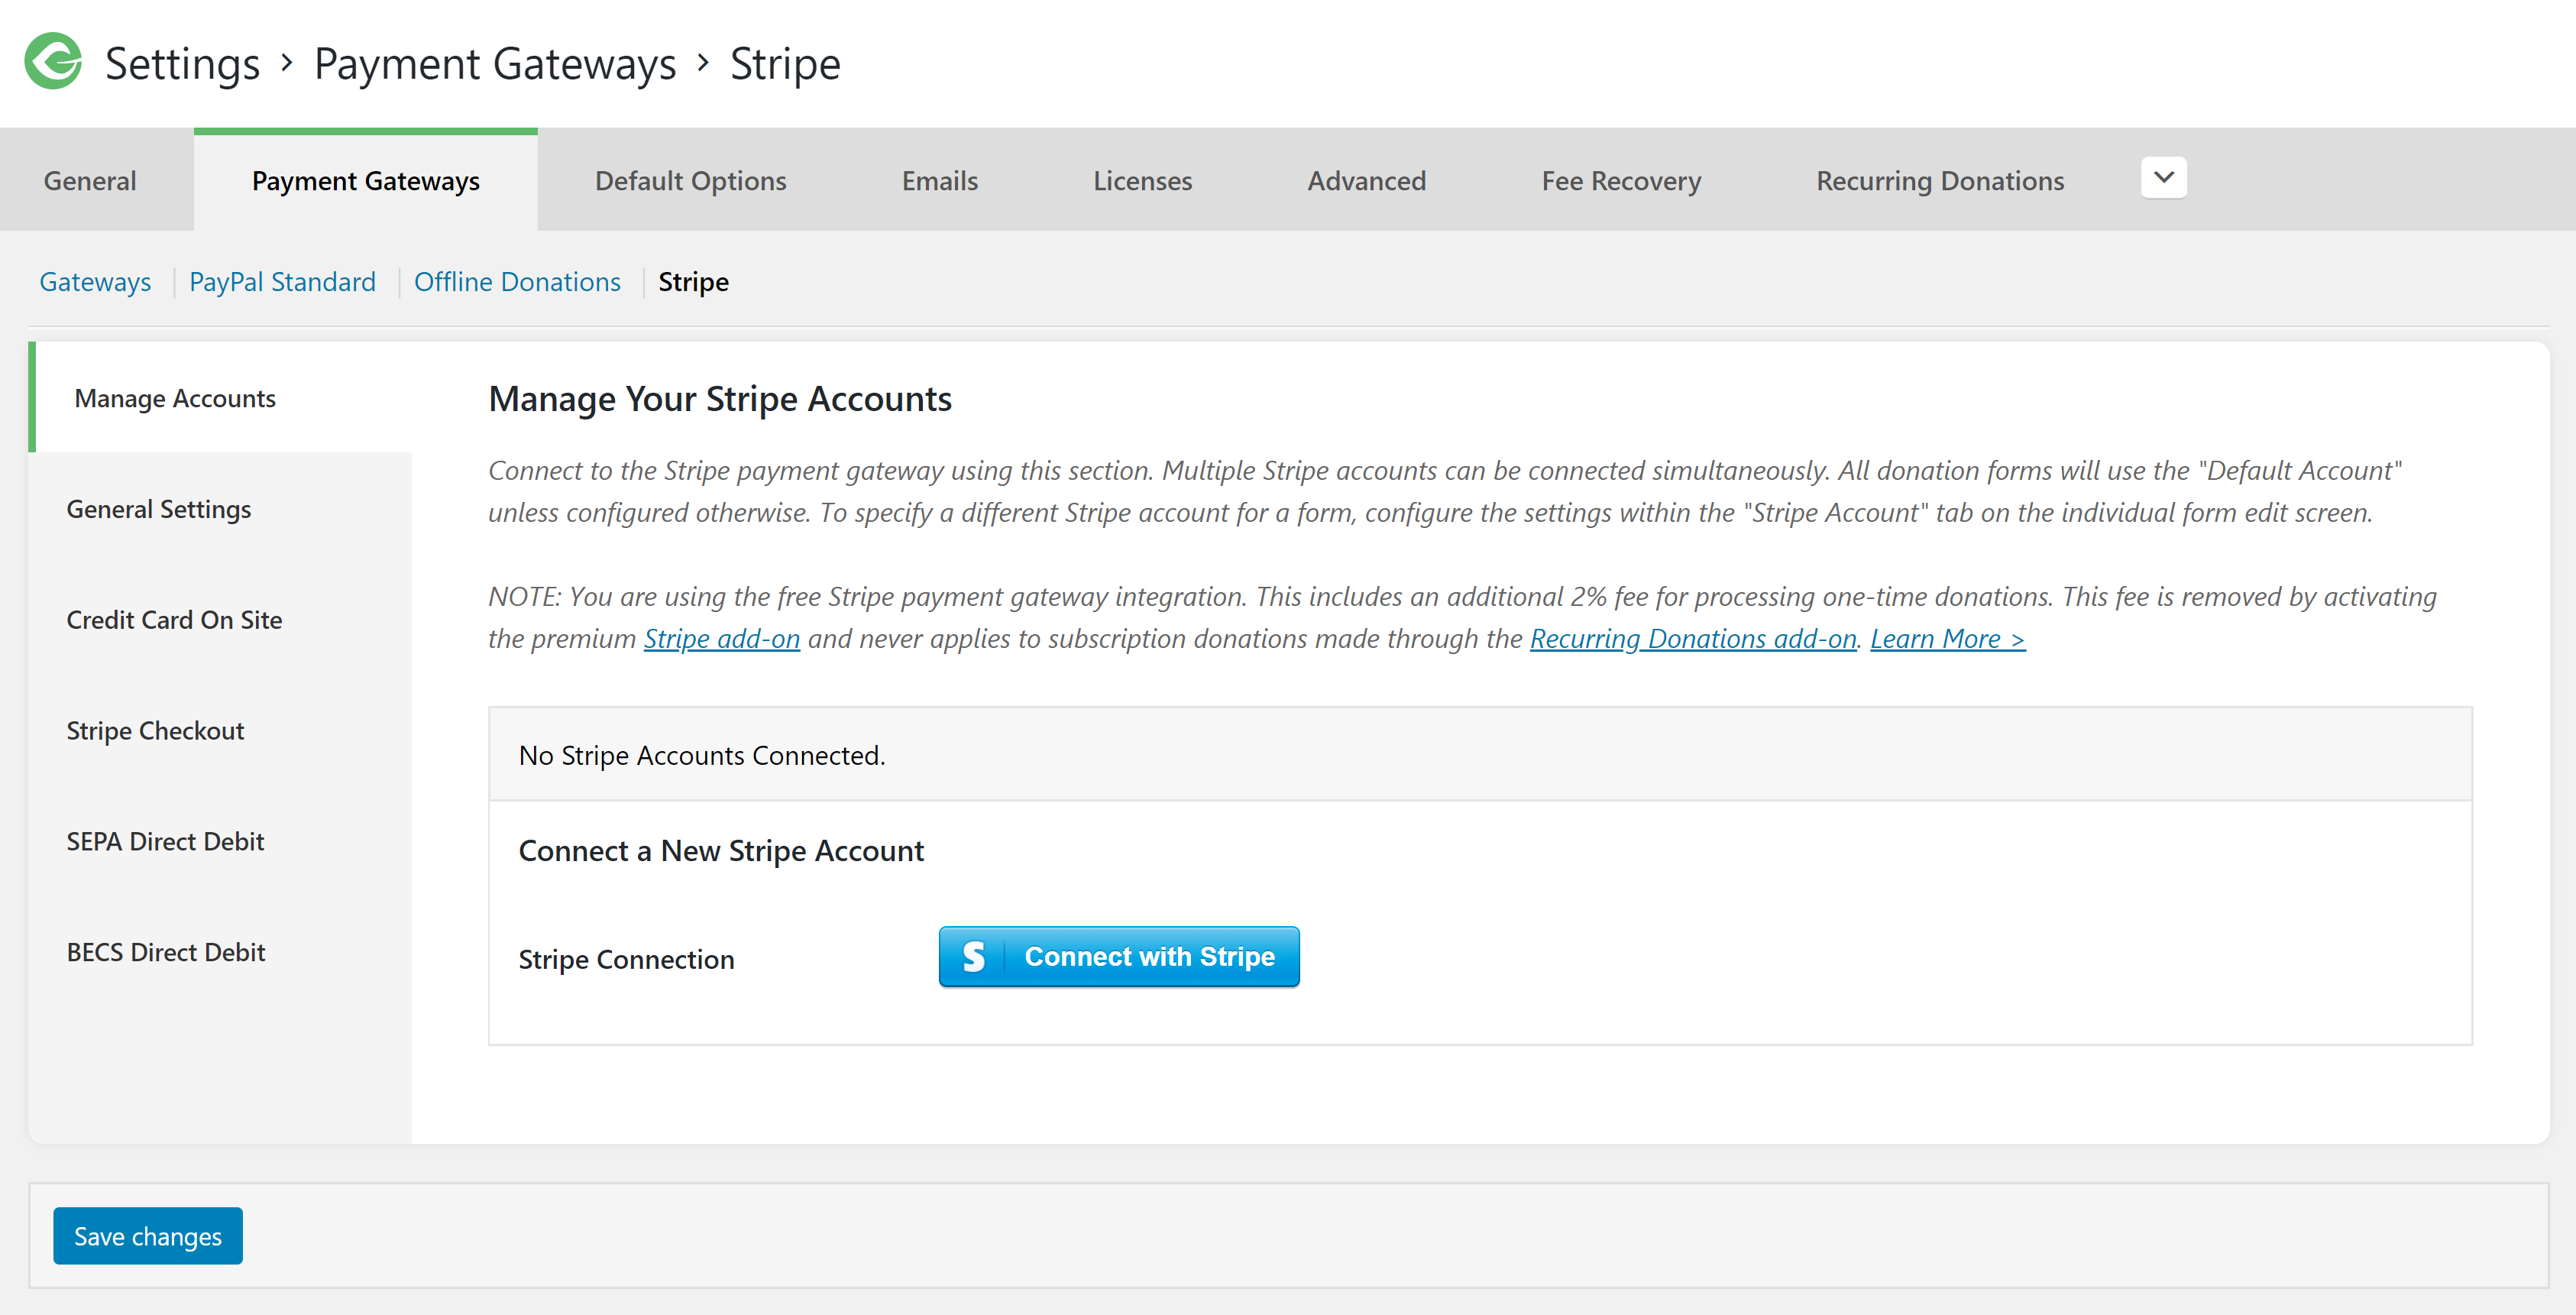
Keep in mind that if you have multiple Stripe, you can connect those as well. We’ll cover that a little later on. For now, select the account you want to connect to first.
Configure Settings in Stripe
Once you’ve connected your Stripe account, you’re redirected back to your WordPress website in the Stripe payment gateway settings. If you’ve already navigated away from your Stripe settings, go to Donations > Settings > Payment Gateways (tab) > Stripe Settings (link).
Now we’ll make sure your website can communicate with Stripe to properly mark donations as complete. First, find the webhook listed on the page just below where you connected your Stripe account. It’s also shown in the popup you see when you’re redirected back to your website from your Stripe connection screen.
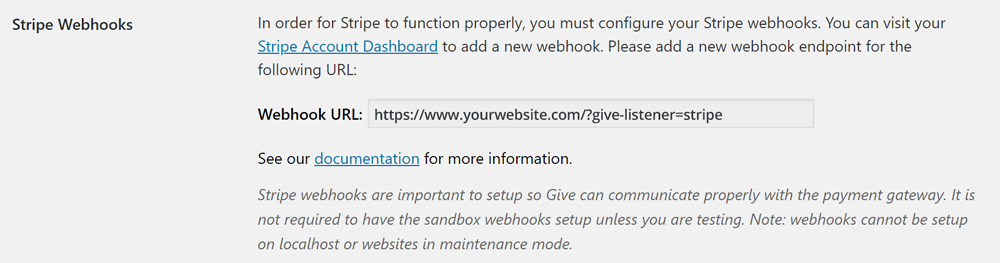
Copy the URL listed and go to your Stripe account dashboard. Find the “Developers” link in the menu and navigate to the “webhooks” section. You can also follow the link in your Stripe settings page on your website directly to the right location in your Stripe dashboard.
Choose “Add Endpoint” and enter the webhook URL you copied from your website. Then select the latest API version as well as the option to receive all events.
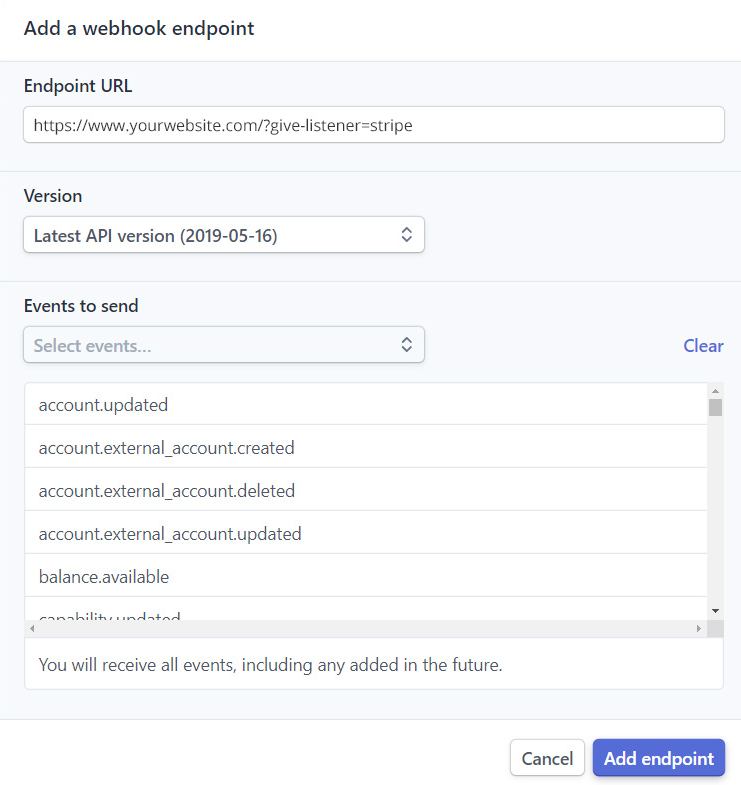
Now toggle to “View Test Data” on your Stripe Dashboard and repeat this process.

Like What You’re Reading? Subscribe Here!
Newsletter Opt-in
Configure Settings in GiveWP
Now, go back to your WordPress dashboard on your website to the GiveWP Stripe Settings. Make sure that the “Statement Descriptor” is something that your donors will instantly recognize. The only time they are going to see it is in the context of a card or bank statement, so avoid being cute or clever. It’ll go a long way toward also avoiding charge-backs and fraud complaints.
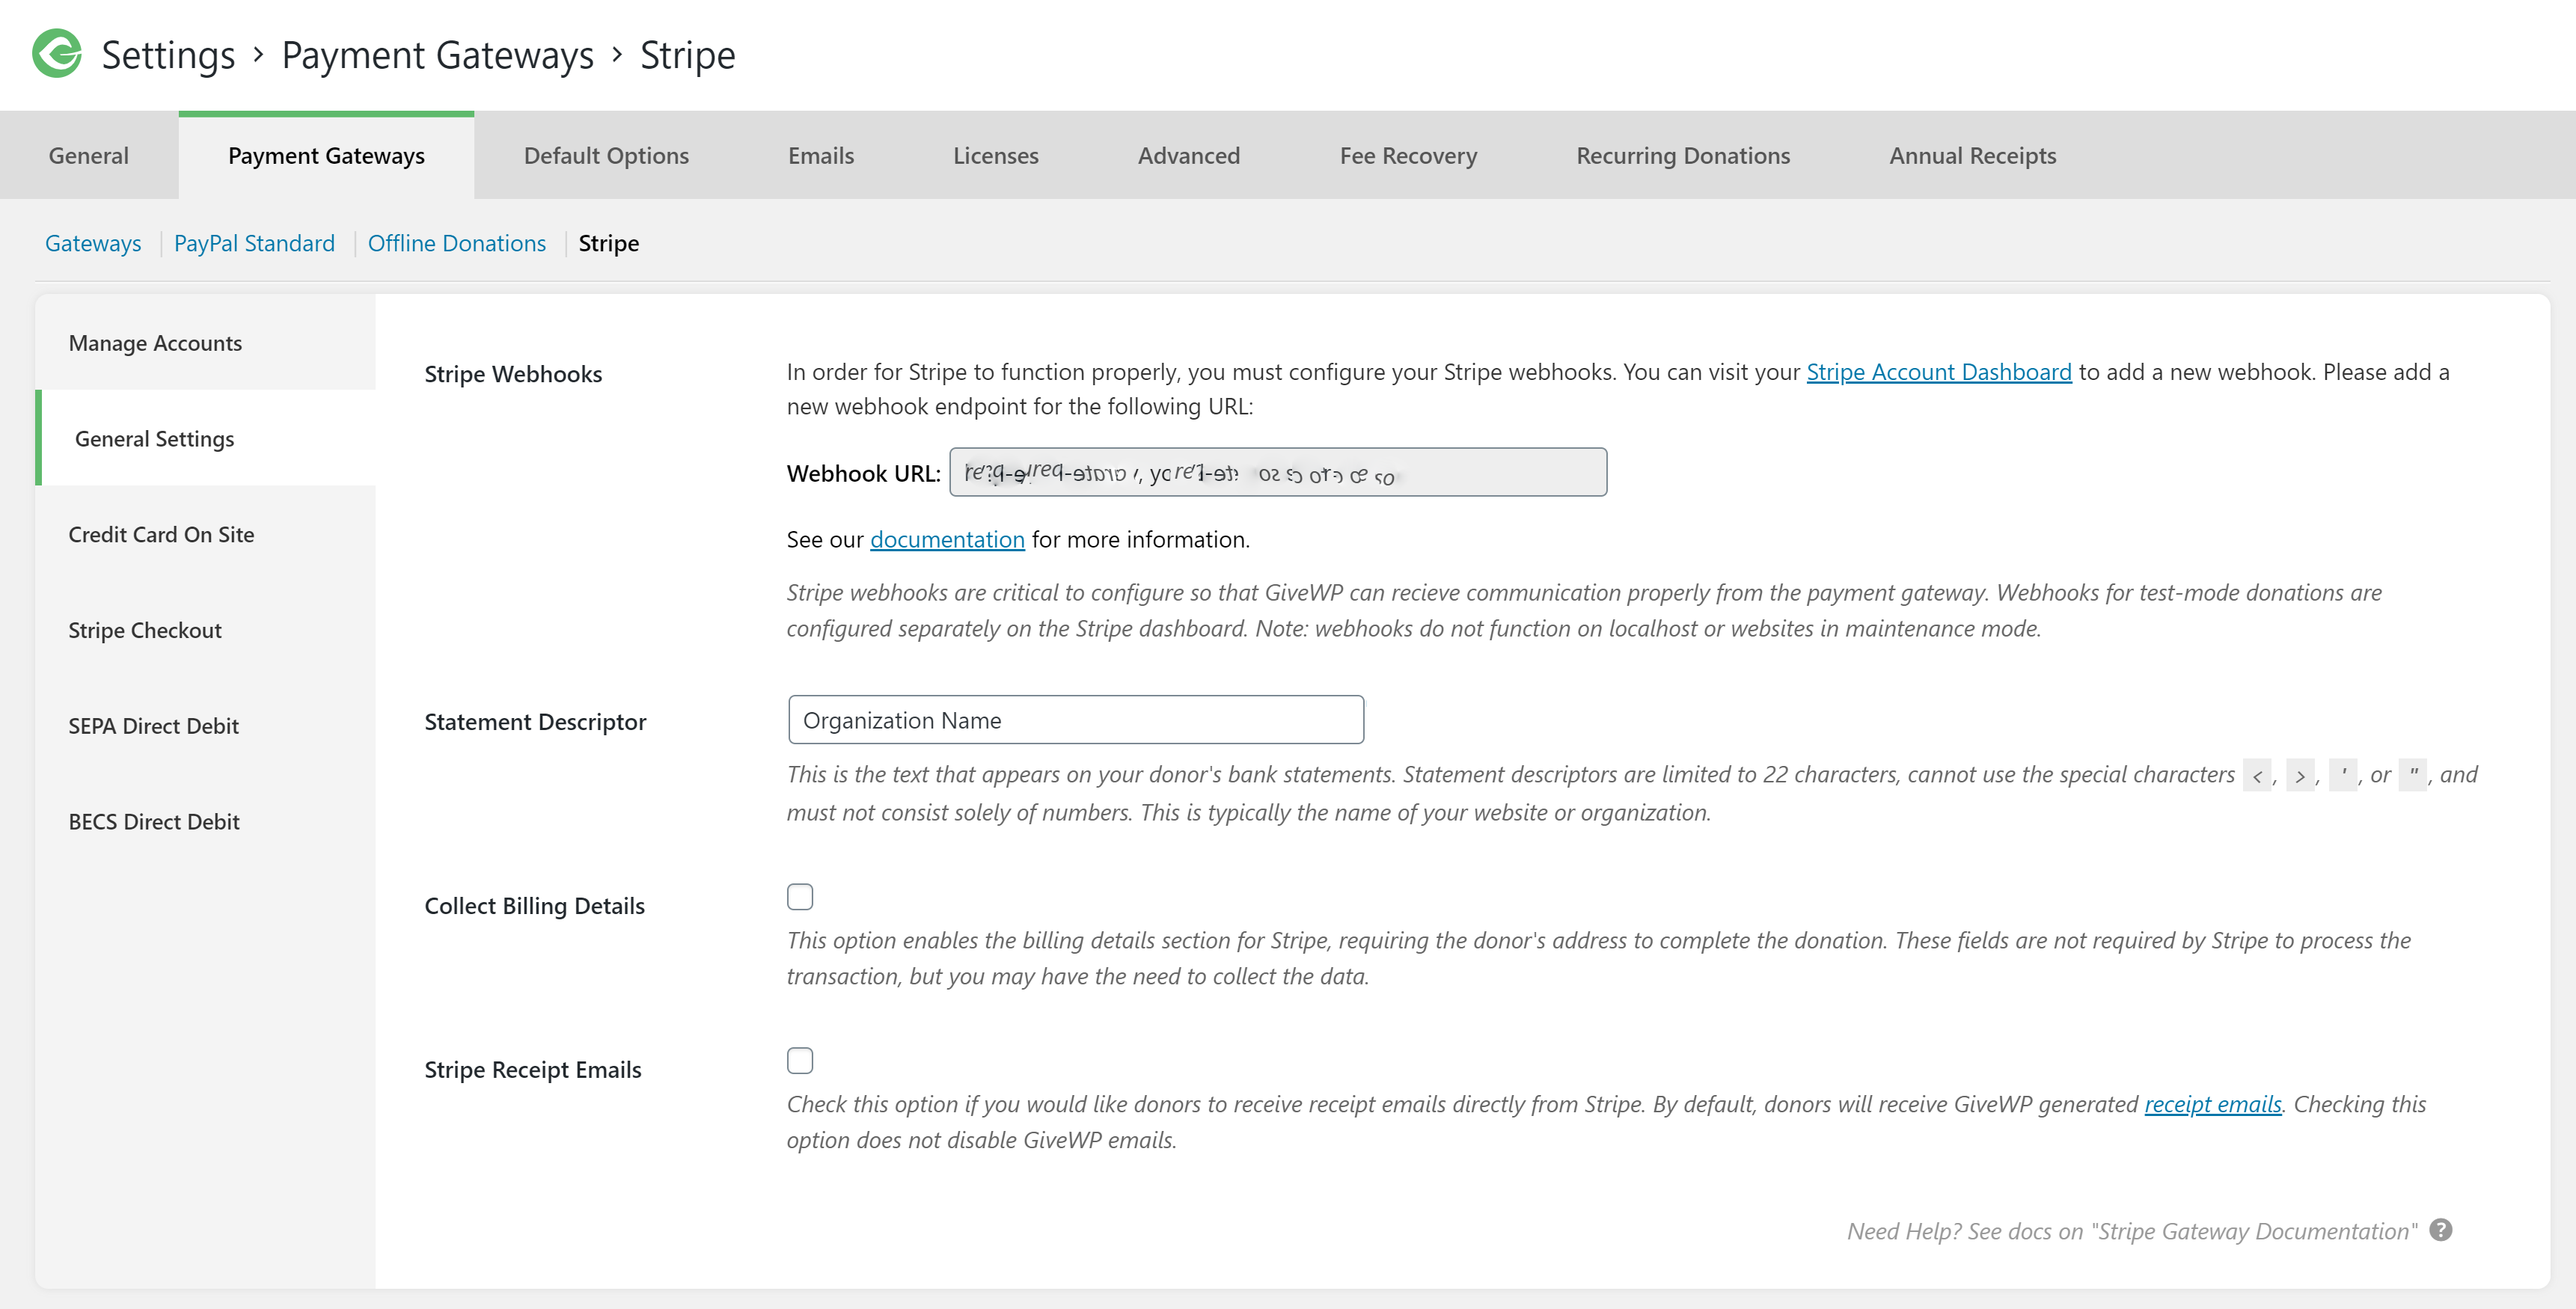
You can use the rest of the default settings to immediately begin accepting donations, or configure each individually. Once your settings are in place, all you need to do is save them.
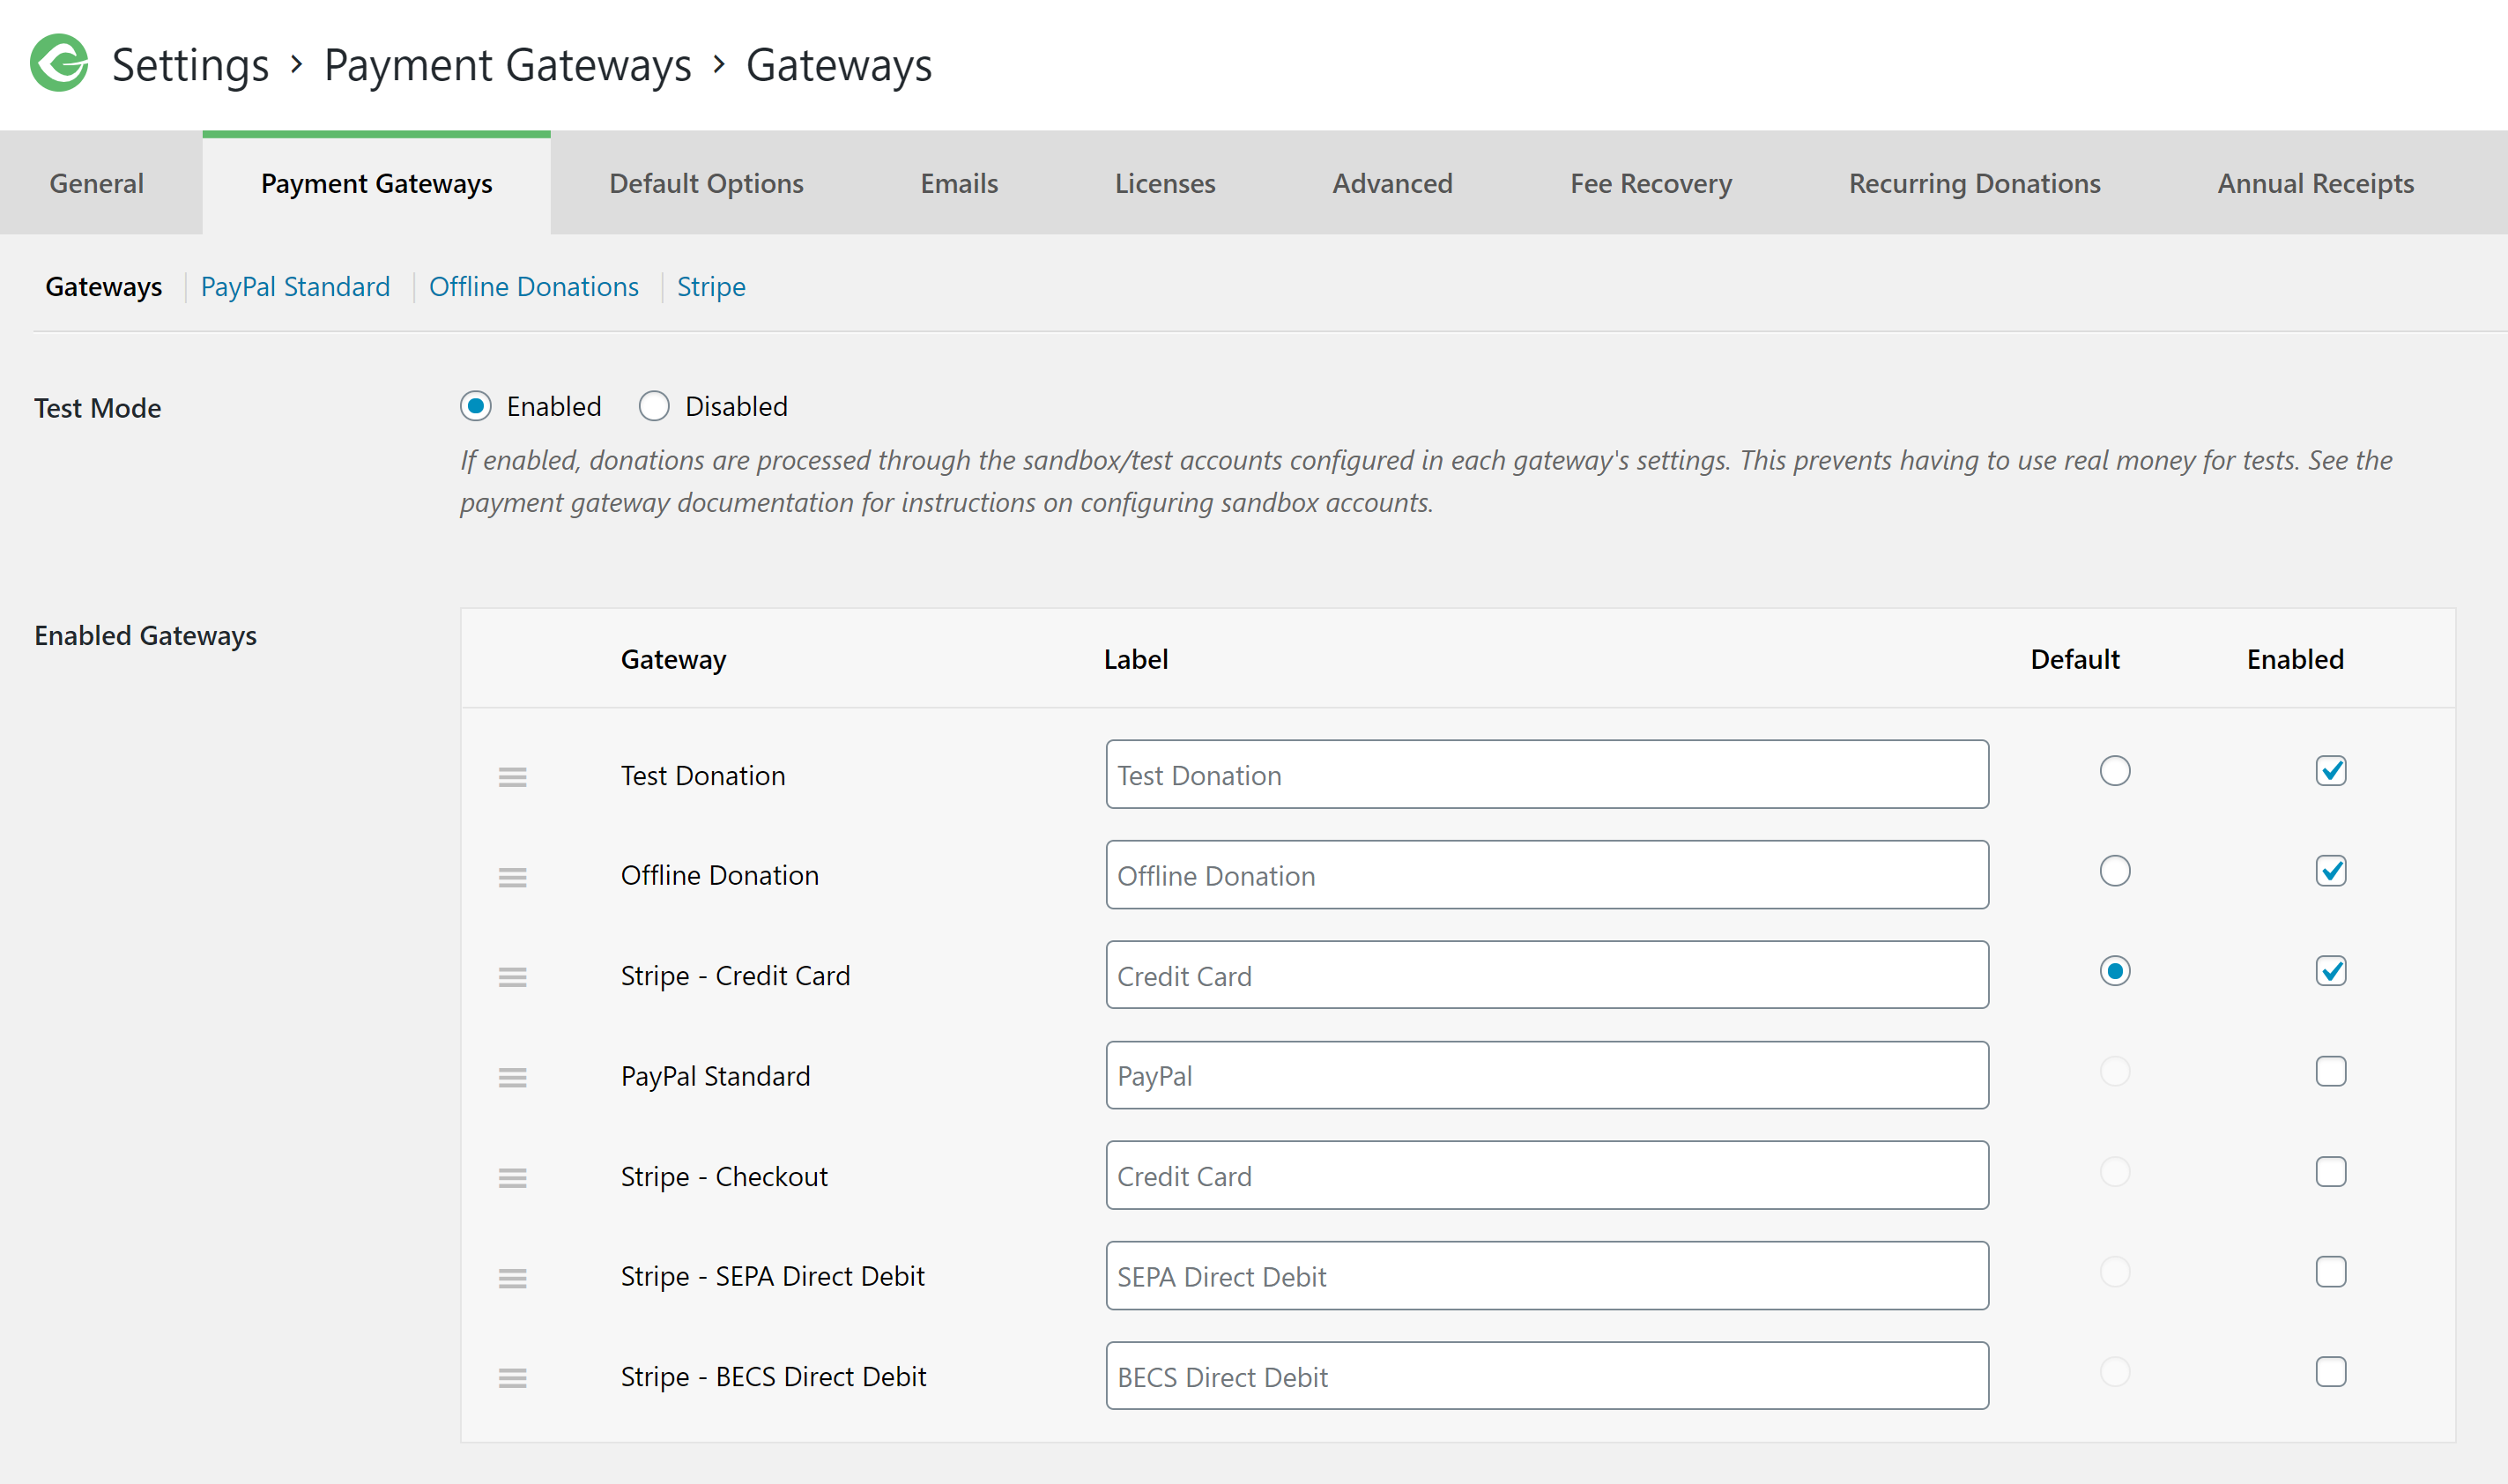
Then, enable the gateway using the checkbox on the main Payment Gateways settings section. Now you can choose Stripe as the default payment gateway for your donation form!
Step 3: Create Your Donation Form
If you don’t already have a donation form set up to use with your Stripe Gateway, create one now. If you need help learning how to set up a donation form, visit our documentation.
Activating Stripe in the global payment gateway settings will automatically turn on Stripe as a possible gateway for all your existing forms.
Step 4: Test Your Stripe Donations
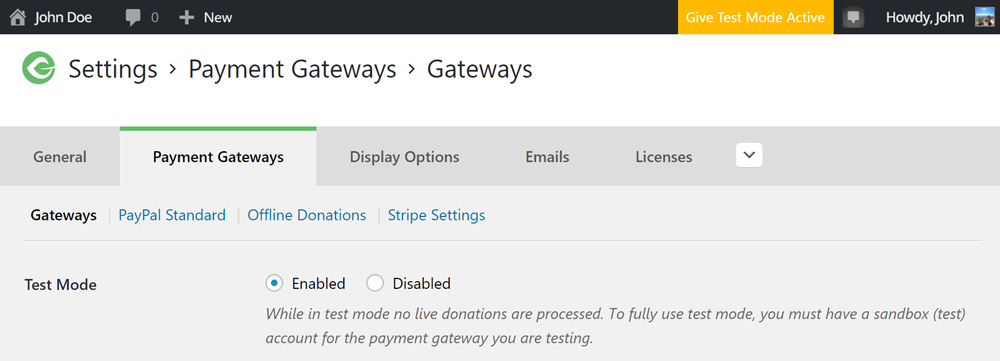
Before accepting live donations with Stripe, it’s imperative that you use GiveWP’s Test Mode to test the procedure and account for all possible outcomes. Read more about Test Mode in the documentation.
To test, toggle GiveWP into Test Mode by going to Donations > Settings > Payment Gateways and activating “Test Mode.” Then, open your donation form in a new incognito window and complete a test payment using one of Stripe’s test credit card numbers.
To test a successful donation, use the following cards:
4242 4242 4242 4242 (use any 3 digit CVC and an expiration date in the future).
To test unsuccessful donations (where Stripe returns an error), use these card numbers:
4000 0000 0000 0127 Charge is declined with an incorrect_cvc code.
4000 0000 0000 0069 Charge is declined with an expired_card code.
4000 0000 0000 0119 Charge is declined with a processing_error code.
You can also find more test numbers in the Stripe documentation.
Once you’ve successfully tested Stripe from GiveWP’s side, you can also go and check how the information is handled on Stripe’s side. Simply head to dashboard.stripe.com and log in.
Be sure to toggle the Stripe Dashboard into Test Mode using the toggle on the left-hand column. If you don’t activate this feature, you will not see your test donations from GiveWP.

Step 5: Going Live
Once you’ve configured and tested Stripe, all that’s left is toggling GiveWP into Live Mode by disabling Test Mode. This enables your forms to accept donations with the Stripe payment gateway using active credit cards.
That’s it! You’re ready to accept Stripe donations!
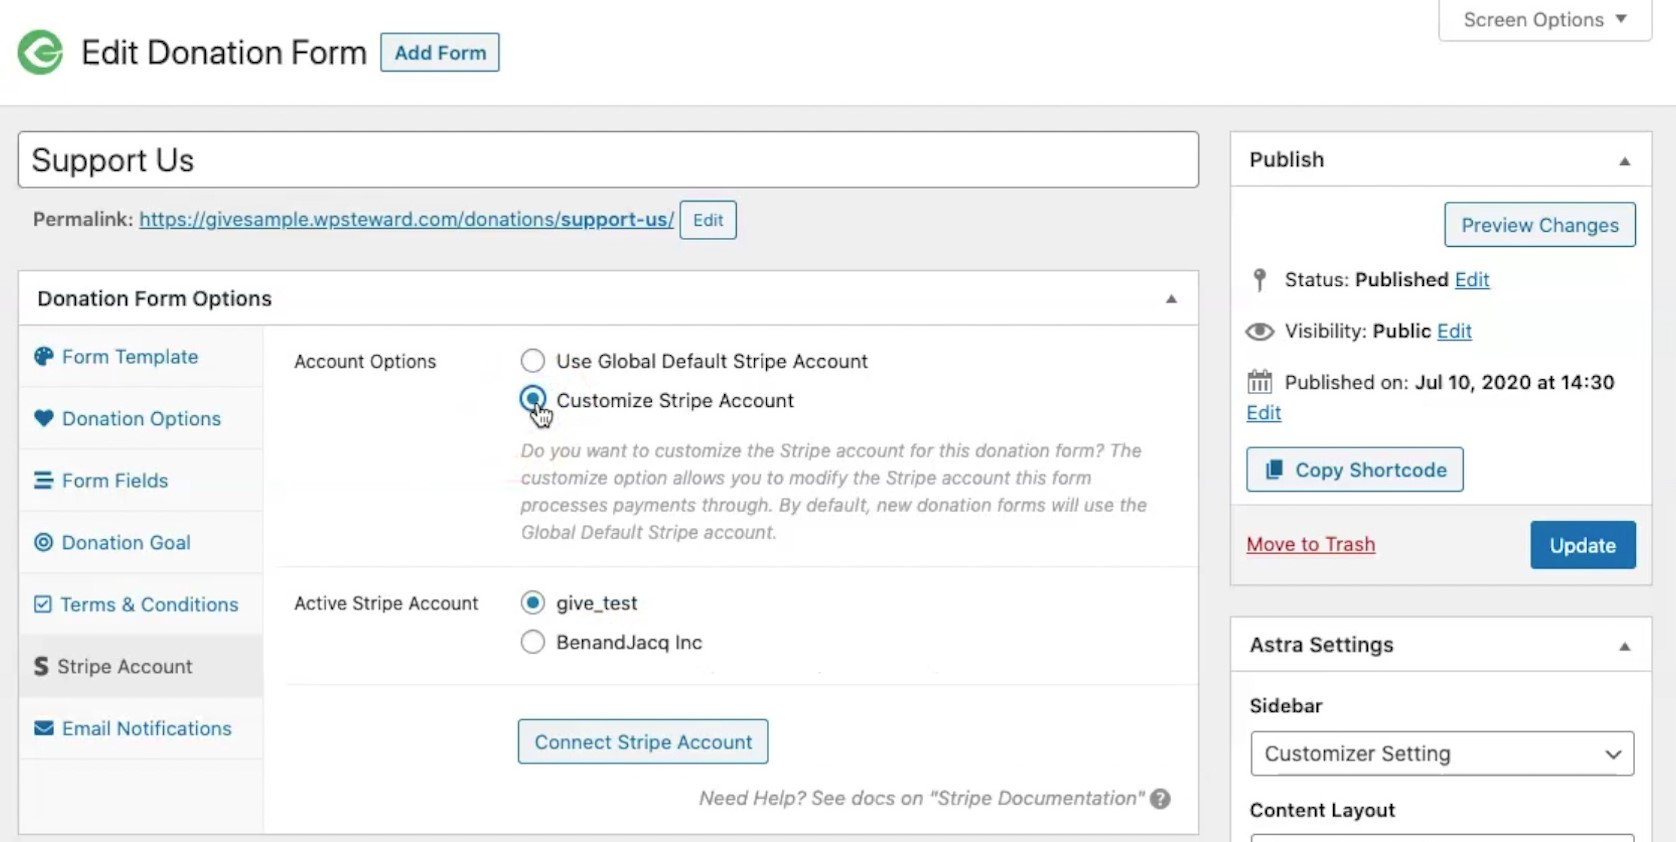
Step 6: Add Multiple Stripe Accounts
Lastly, if you have multiple Stripe accounts to connect, repeat this process for each one. Once you’ve added all your accounts, you will have an option of which account you want to connect on each form you create.
Need More Information on Stripe Donations?
If you need any of the tools and resources mentioned above, you can find them in the Stripe (free) documentation. Our team is also here to help if you have any questions. Feel free to reach out.
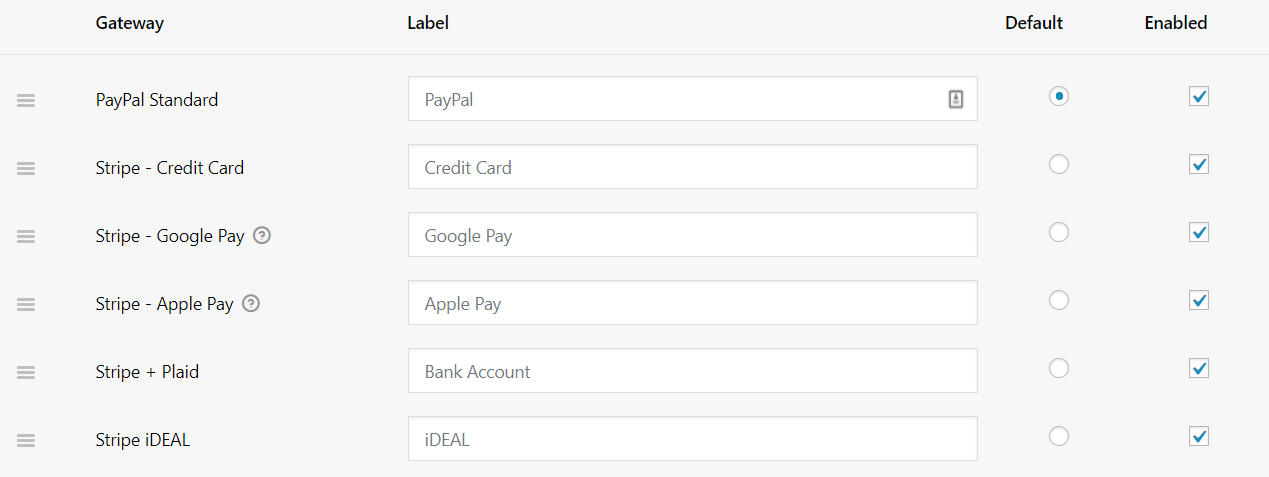
If you’re looking for more Stripe gateway features, like Apple Pay and Google Pay, they’re available with the add-on.
About the Author
Ben Meredith
Ben Meredith is our Head of Support at GiveWP. He’s also the founder of The WP Steward and the author of the popular Better Click To Tweet Plugin.