Stripe (Free)
The free Give plugin supports collecting credit card donations via the Stripe payment gateway. This article explains how to configure your Give installation to work with Stripe.
Articles in this section:
 Using Multiple Stripe Accounts on a Single GiveWP Site
The Stripe payment gateway charges an additional 2% for processing one-time donations. Stripe may charge additional transaction fees to Stripe Subscriptions (used by Recurring Donations), which Give cannot remove.
Activating the Stripe Gateway
Navigate to Give > Settings > Payment Gateways > Stripe.
From there, use the Connect button to connect to your Stripe account.
After that, you can follow the prompts to connect your existing Stripe account, or sign up for a new account.
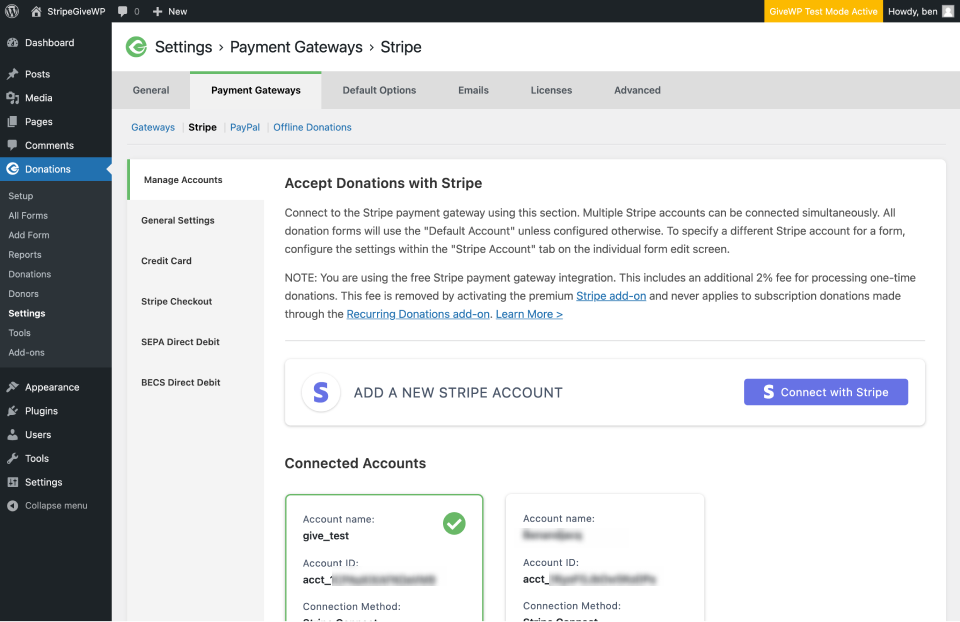
The Manage Accounts tab allows for connecting to multiple Stripe accounts from a single Give-powered website. Once you’ve added all the accounts you need, you can configure individual forms to use a specific Stripe account in the Payment Gateways block settings.
Connecting Stripe and Your Webhook (required)
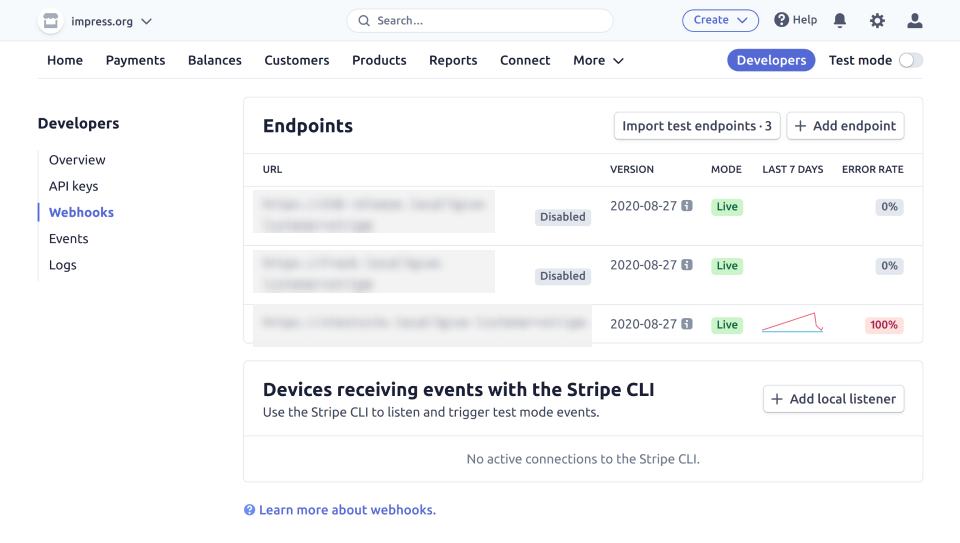
For donations to be marked as complete on your Give site, you must configure the webhook at Stripe. On the settings page at Give > Settings > Payment Gateways > Stripe, the webhook URL is pre-populated on the page. Copy that to your clipboard for later use.
Click the link in the paragraph just above the webhook URL or navigate to:
On that page, click the “Add endpoint” button and paste in your webhook URL.
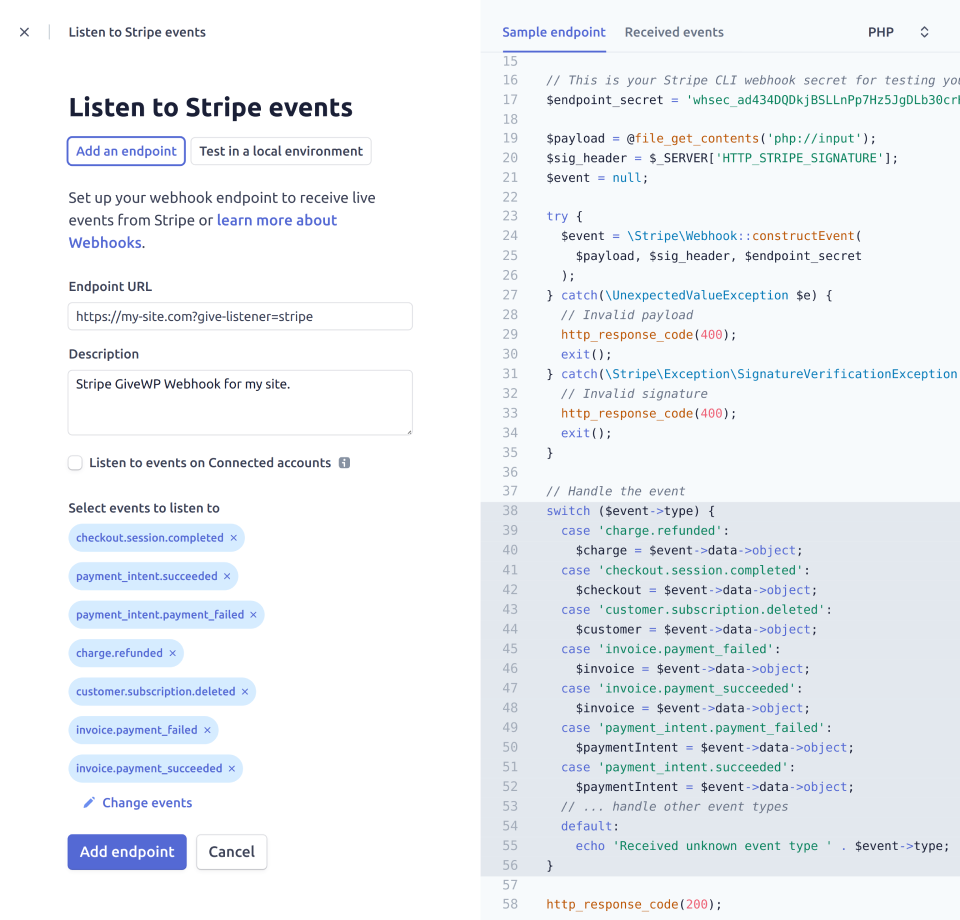
The webhook is a one-way message from Stripe to your Give site to alert the site of events on the Stripe side. Select the following Events:
- charge.refunded
- checkout.session.completed
- customer.subscription.created
- customer.subscription.deleted
- invoice.payment_failed
- invoice.payment_succeeded
- payment_intent.payment_failed
- payment_intent.succeeded
The most common problem that indicates a webhook issue is donations having a status of Pending or Processing instead of Completed on the Give side, even though they are complete at Stripe. In addition, donor receipt emails will not be sent unless a donation has a Completed status.
Note: In order to process Test Mode donations, you’ll need to repeat the same steps with Stripe’s dashboard toggled into test mode.
General Settings
Stripe Webhooks
Settings Type: Text Input
Options: Your Site URL followed by /?give-listener=stripe
The webhook should be copied and pasted to your Stripe account dashboard. Learn how to set it up in the above section.
Statement Descriptor
Settings Type: Text input
Options: any 22 alphanumeric characters.
Default: Site Title
This is the text that appears on your donor’s bank statements. Statement descriptors are limited to 22 characters, cannot use the special characters <, >, ', or ", and must not consist solely of numbers. This is typically the name of your website or organization.
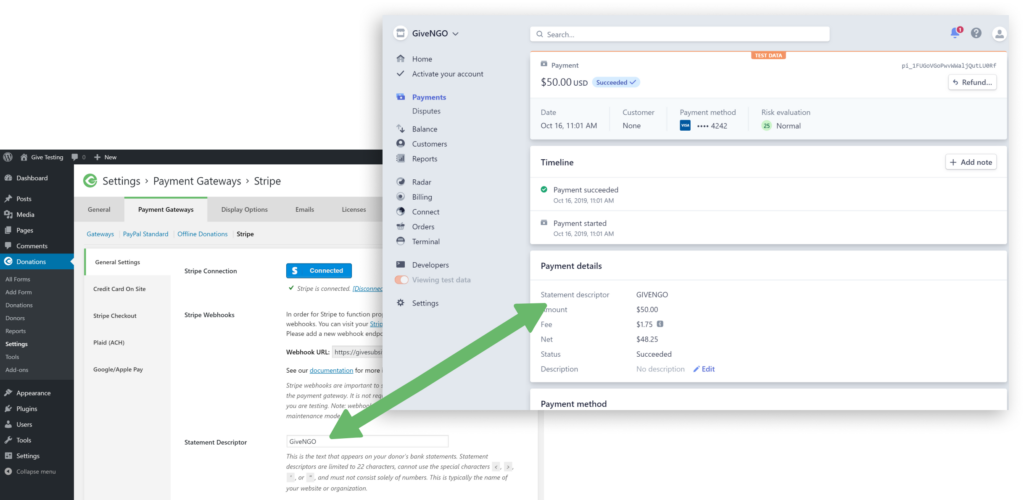
This allows you to customize the info that displays on bank statements.
Note: There must be a value in this field for Stripe to function properly. A default value of your site name is typically set, but in rare circumstances, this field appears blank by default. In that case, save a value here to restore functionality.
Collect Billing Details
Settings Type: checkbox
Options: checked | unchecked
Default: unchecked
This setting allows you to collect Address data along with donations, so that donation records include addresses at Give. The address is not necessary to process the donation at Stripe, but you may have a need to collect it. Note that address data, if collected, is store both on the individual donation, and on the donor record.
Stripe Receipt Emails
Settings Type: checkbox
Options: checked | unchecked
Default: unchecked
In addition or instead of sending Give’s generated receipt emails each time someone donates through your website, you have the option to send emails to your donors directly from Stripe instead.
You can enable this and disable Give generated receipt emails in the Emails > Donor Emails tab. This setting does not change whether Give emails are sent, only the one from Stripe. To avoid duplicates, configure Give email settings separately.
Apple Pay and Google Pay Settings
The Apple Pay and Google Pay settings are now configured directly in your Stripe dashboard via the Stripe Payment Element payment gateway. This means you can use the free Give core plugin and still offer Apple Pay and Google Pay options. You can see more details on how to configure these settings in the Stripe Element Gateway document here.
Stripe Settings for Option-Based Forms
The remaining settings on the main Stripe page apply to the older Legacy and Option-Based Forms.
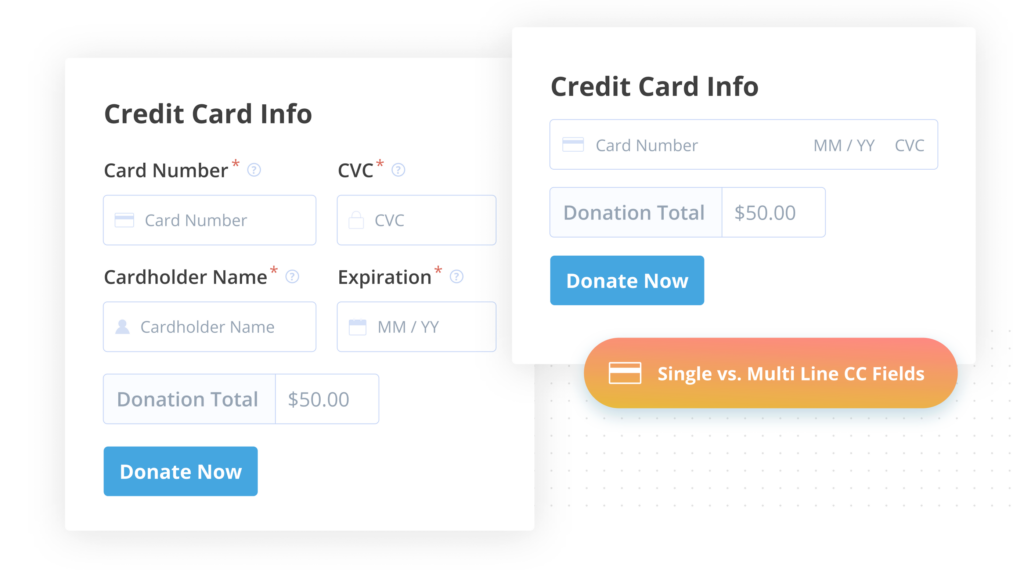
Credit Card – Credit Card Fields Format
Settings Type: radio buttons
Options: Single Field | Multi Field
Default: Multi Field
This setting allows you to choose how the credit card fields are displayed on the form. The default is Multi Field which displays separate inputs for Card Number, CVC, Cardholder Name, and Expiration date.
The other option is Single Field which houses all of those various pieces of data in a much smaller single input.
Stripe Checkout
Checkout Type
Settings Type: Radio buttons
Options: Modal (Stripe Elements) | Redirect (Checkout 2.0)
Default: Modal (Stripe Elements)
The Modal option essentially is a Stripe-styled modal popup that offers a different interface to pay than the default Give credit card fields. The modal uses Stripe Elements for each of the payment data fields in order to keep those fields secure within an iframe.
As an alternative, the “Redirect” option allows your donor to use the checkout interface and pay with either a credit card, Apple Pay, or Google Pay. This method is SCA compatible and fully supported by Stripe and Give.
When Redirect (Checkout 2.0) is selected, the only other option on this page is to edit the Processing Text. When Modal (Stripe Elements) is selected, all the following options will appear.
Checkout Heading
Settings Type: Text Field
Default: Your Site Title from the General Settings page
This is the main heading within the modal checkout.
Checkout Background Image
Settings Type: File Upload
This background image appears in the header section of the Stripe checkout modal window and provides better brand recognition that leads to increased conversion rates. The recommended minimum size of background image is 400x200px. The supported image types are: .gif, .jpeg, and .png.
SEPA Direct Debit and BECS Direct Debit In Specific Locations
Frequently Asked Questions
The free version of Stripe is different from the Premium add-on version in important ways. These FAQs help clarify those differences.
FAQ’s
Give automatically disables partner fees in the following countries:
– Brazil
– India
– Malaysia
– Mexico
– Singapore
– Thailand
How to Connect Stripe the Right Way
– Go to Donations > Settings > Payment Gateways.
– Click on Stripe.
– Select Connect with Stripe and complete the secure onboarding flow.
– Ensure no API keys are entered — they’re not needed in these countries.
Pro tip: Stripe Connect is recommended for all Give users and ensures the smoothest donation experience.
If the webhook is not correctly configured according to the instructions above, your site will keep all donations marked as Pending. Follow the instructions above to configure the webhook.
Note also that development sites on localhost or behind firewalls will prevent the webhook from reaching the site, and always leave all Stripe donations marked as pending.
No. The 2% fee is applied only to one-time donations.
No, not at all. The 2% fee applies to one-time donations processed via the Stripe gateway when using the Stripe gateway.


