How to Create a Donation Form in WordPress
Donation forms inspire giving and increase your online donations. Here’s how to create one in WordPress using GiveWP.

Accepting online donations is essential to the online fundraising process. You could simply add a “Donate Now” button to your WordPress website. But you’ll need a powerful donation form if you want to increase your donations.
Donation forms go beyond a button, inspiring giving and improving the donor experience. They also provide an opportunity to tell your story and showcase your brand. However, not all donation forms and plugins are the same. You need a solution that’s responsive, easy to set up, and works with your existing site tools.
The WordPress-powered donation forms from GiveWP offer all of this and more. Let’s explore how you can start accepting more online donations by creating your own form in WordPress.
Download GiveWP
GiveWP donation forms are free to create and use. But before you create your first form, you’ll need to download GiveWP on your WordPress website.
From your admin dashboard, navigate to the Plugins page and click Add New Plugin. Search for GiveWP, select Install Now, and then Activate.
After activating GiveWP for free, you’ll go through a quick onboarding process. This process helps us tailor your experience to fit your needs and create your first form.
Create a Basic Form
At the end of the onboarding process, you’ll find a basic donation form ready to use. All you need is a title, and you’re ready to hit publish!
You can explore the Visual Donation Form Builder (next section) or different form templates, such as the Multi-Step form, for a more robust option.
Create Forms With the Visual Donation Form Builder
The easiest and most flexible way to create donation forms is through the new Visual Donation Form Builder. It allows you to use a drag-and-drop editor, making form creation more intuitive and easier than ever.
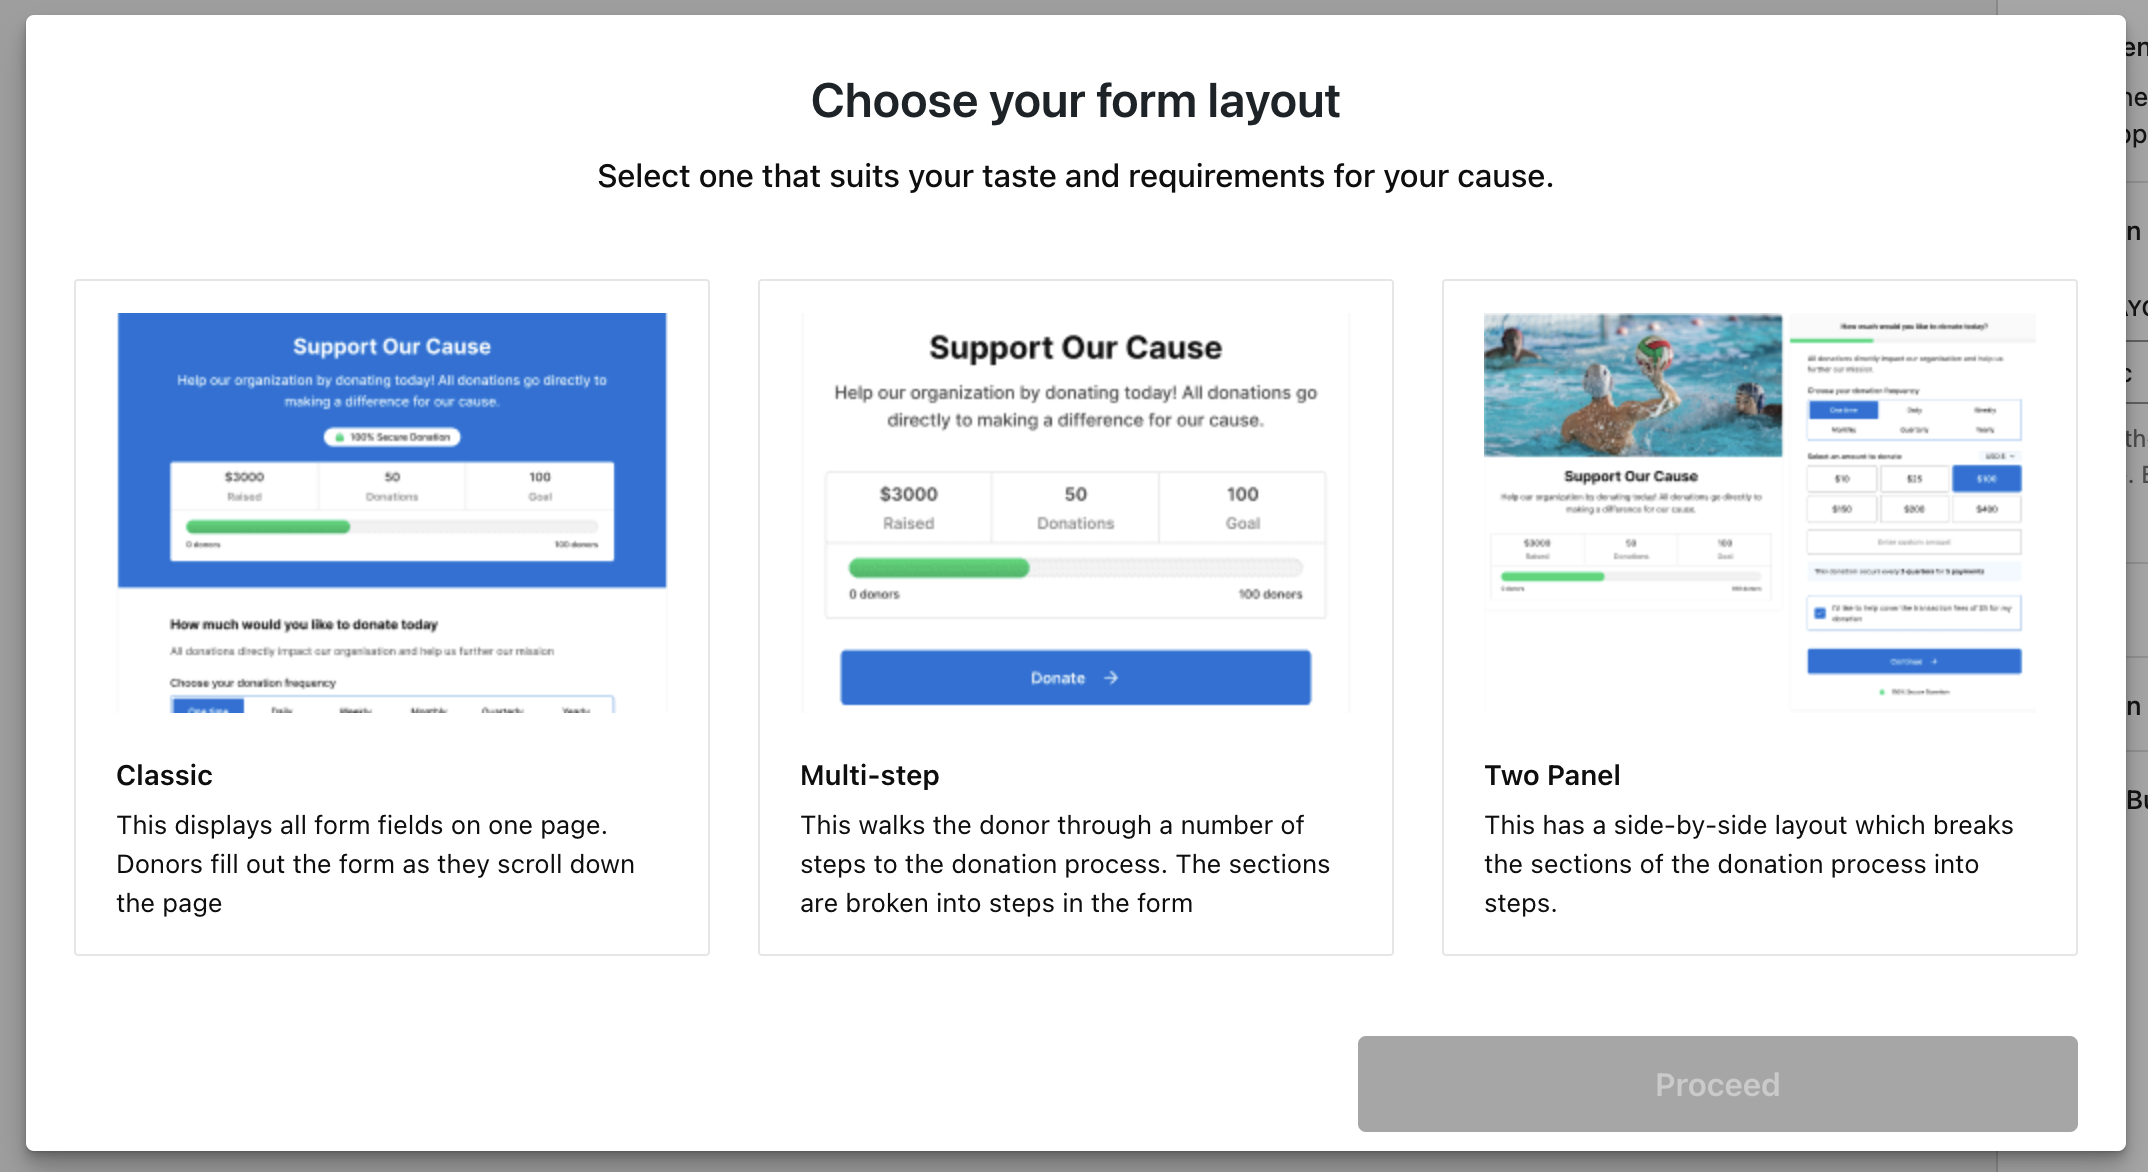
The Visual Donation Form Builder offers three different form layouts: Classic, Multi-step, and Two-Panel.
- Classic: Displays all form fields on one page. Donors fill out the form as they scroll down. the page.
- Multi-step: Walks the donor through a number of steps in the donation process. The sections are broken into steps in the form.
- Two-Panel: Has a side-by-side layout that breaks the sections of the donation process into steps. It is only available in the Visual Donation Form Builder.
Getting Started
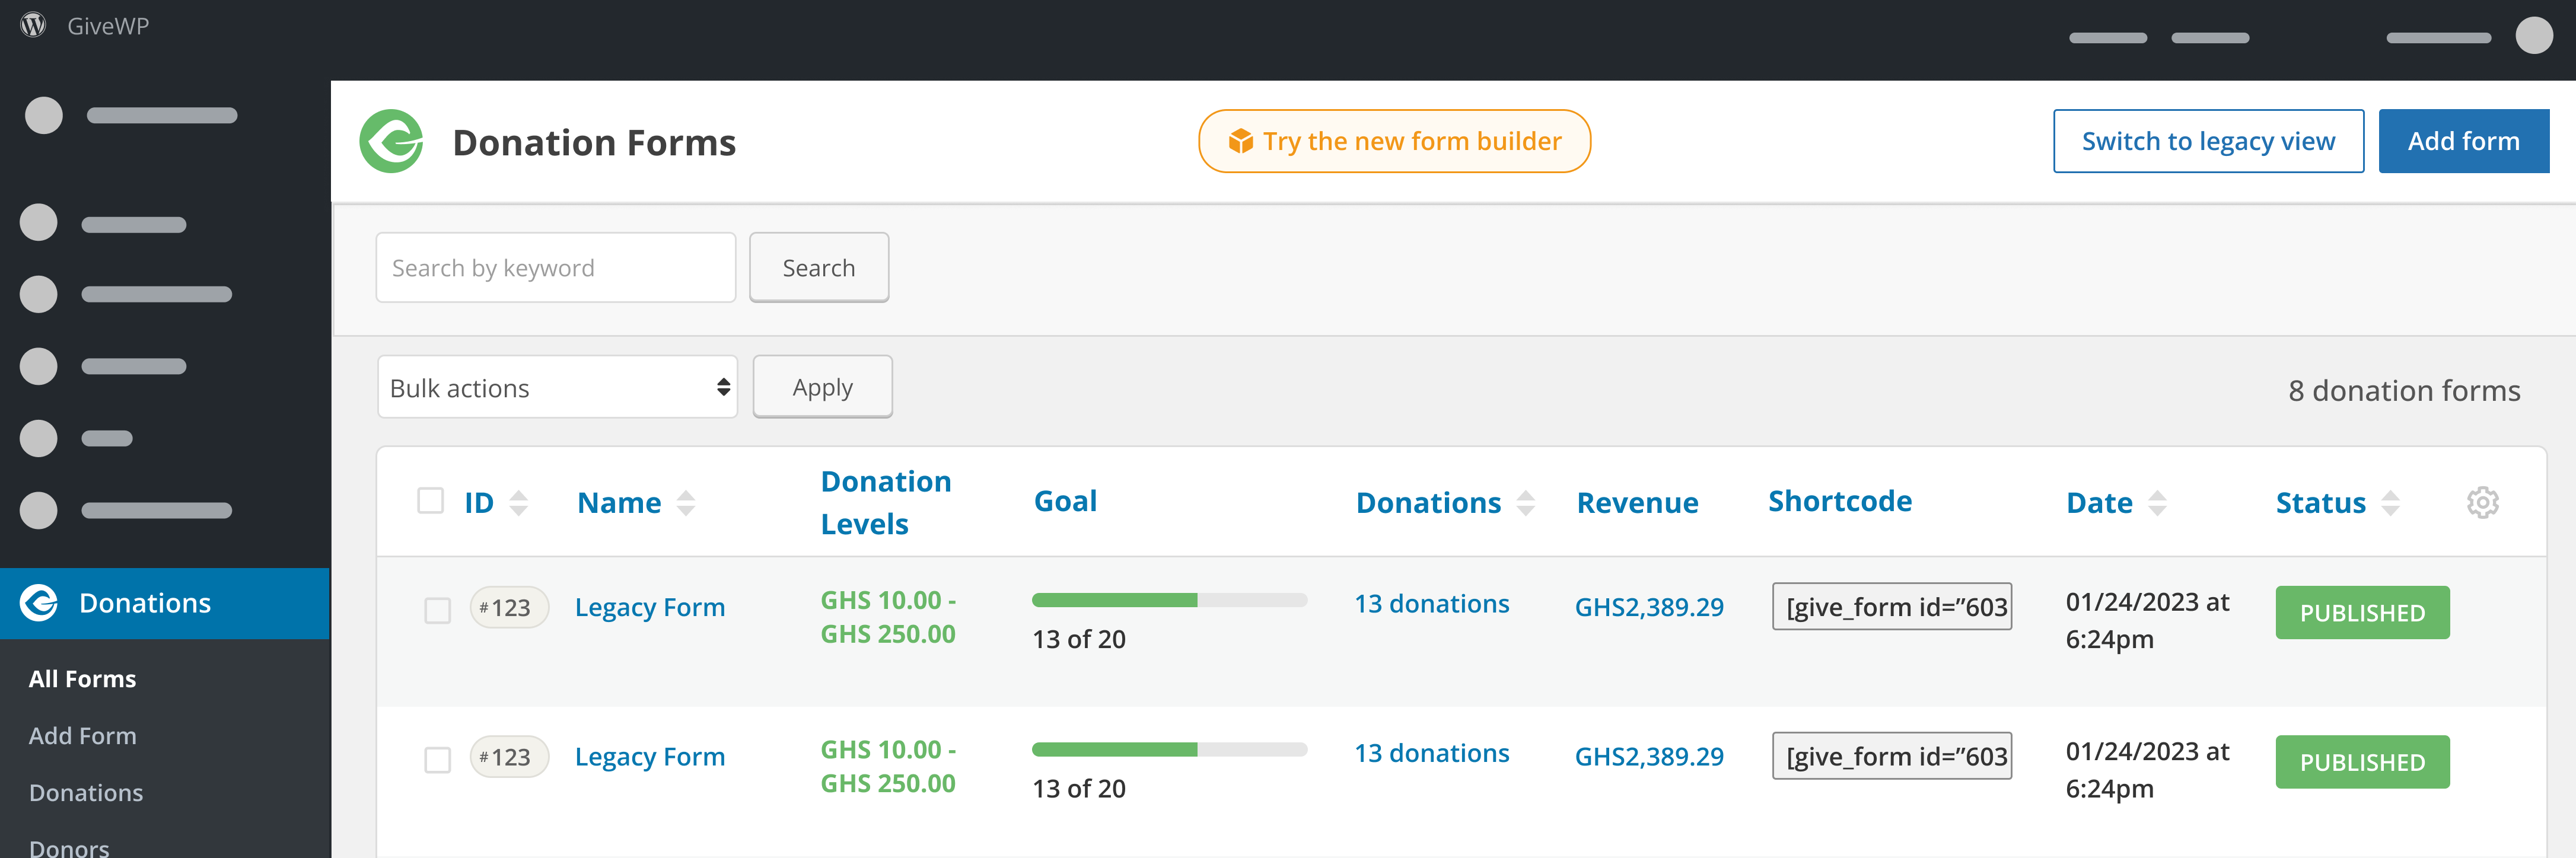
To get started, locate the Donations tab from your admin dashboard. Then, select Try the new form builder.
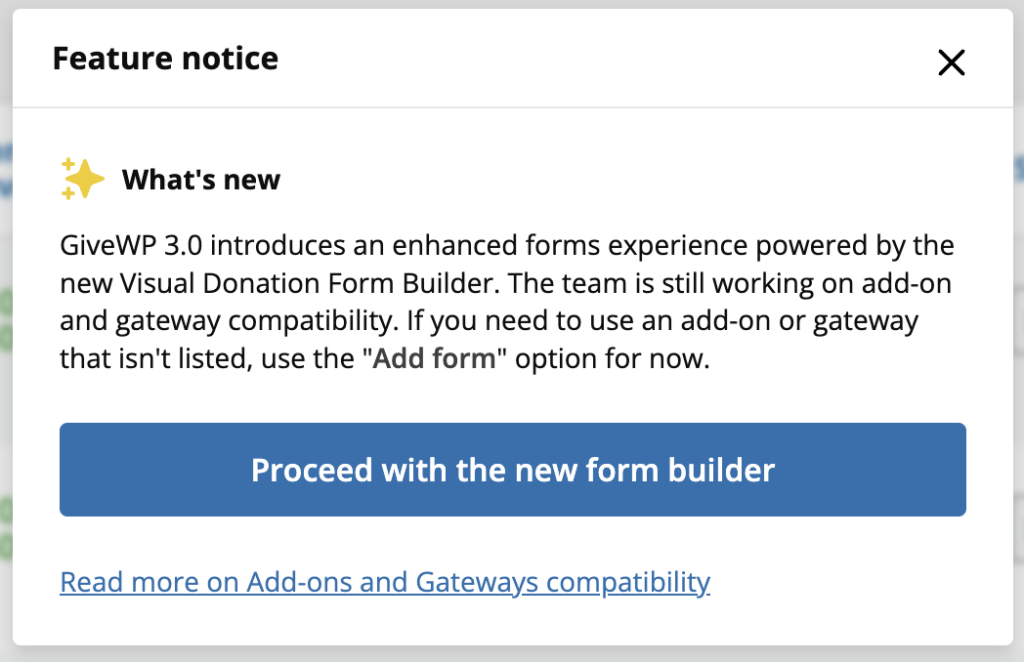
Choose Proceed with the new form builder to start using the Visual Donation Form Builder.
Next, choose a layout option on the form layout screen.
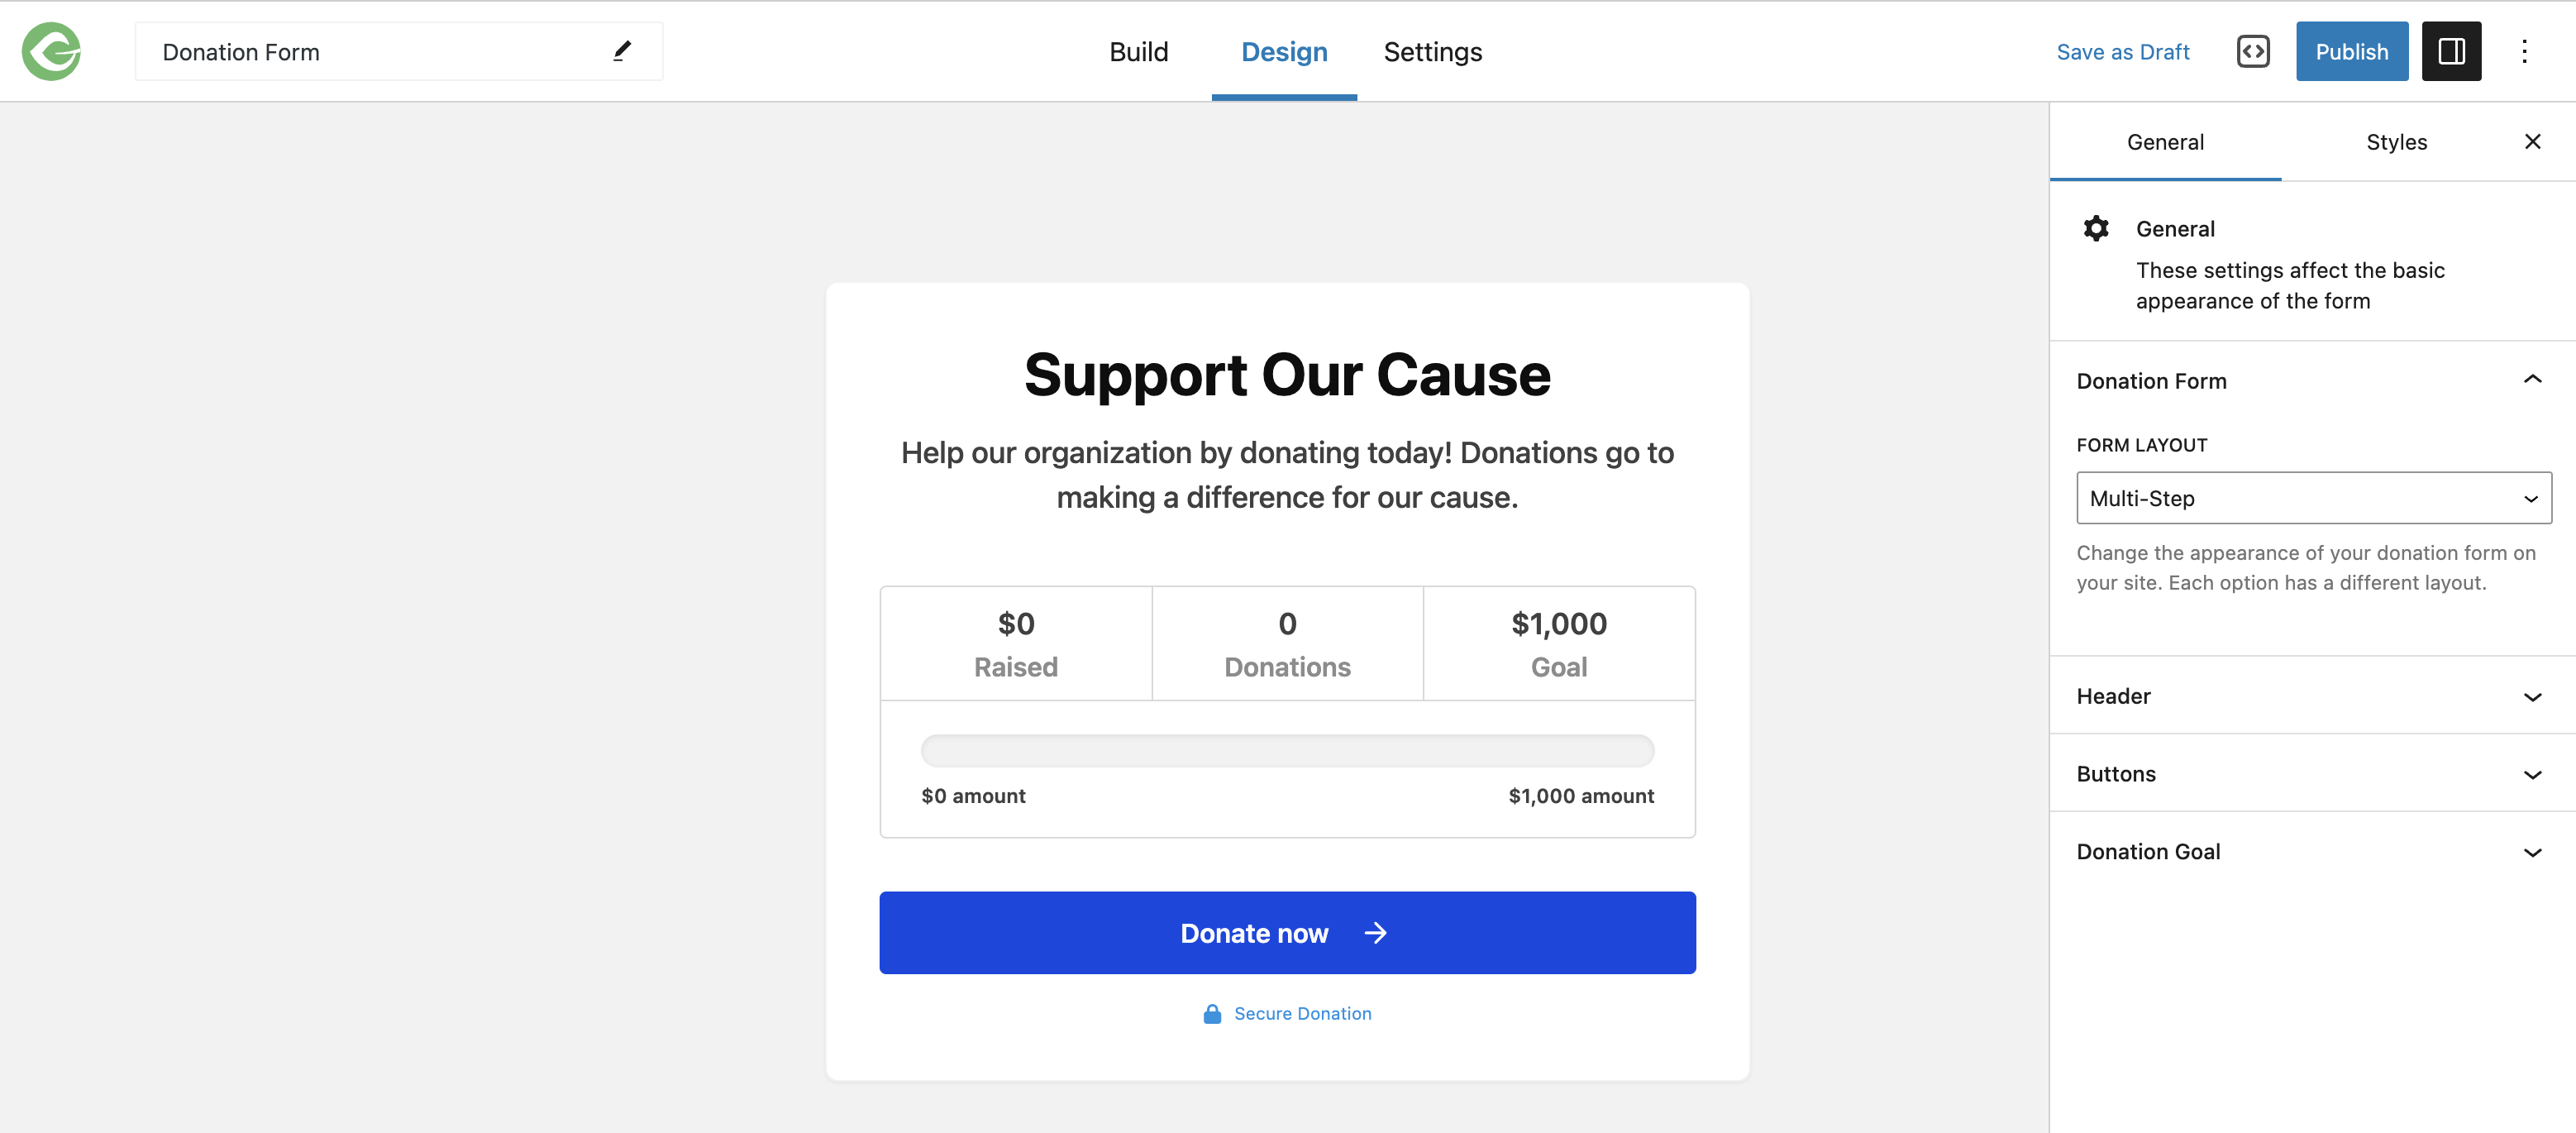
Select Proceed. You should see the Design screen:
Designing Your Form
In the Design editor, you can manage various settings, including:
- Form Layout: Change the layout of your form from the one you chose when you created it.
- Colors: Choose a primary and secondary color for your form. Depending on the design you choose, these control the color of different parts of the form.
- Header: Show or hide the header and individual header parts. Change the Heading and Description text.
- Donation Goal: Enable or disable the donation goal, choose the goal type, and change the value. (Note that if you hide the header, your goal will be hidden on the form even if you have it enabled, as it’s part of the header. You’ll still be able to track your goal in the admin.)
- Custom Styles: Add custom CSS to style your form exactly the way you want, beyond the limitations of the provided settings. Learn more about styling GiveWP donation forms with CSS.
Editing Your Form
After selecting your style preferences, you can edit the form using the Build editor.
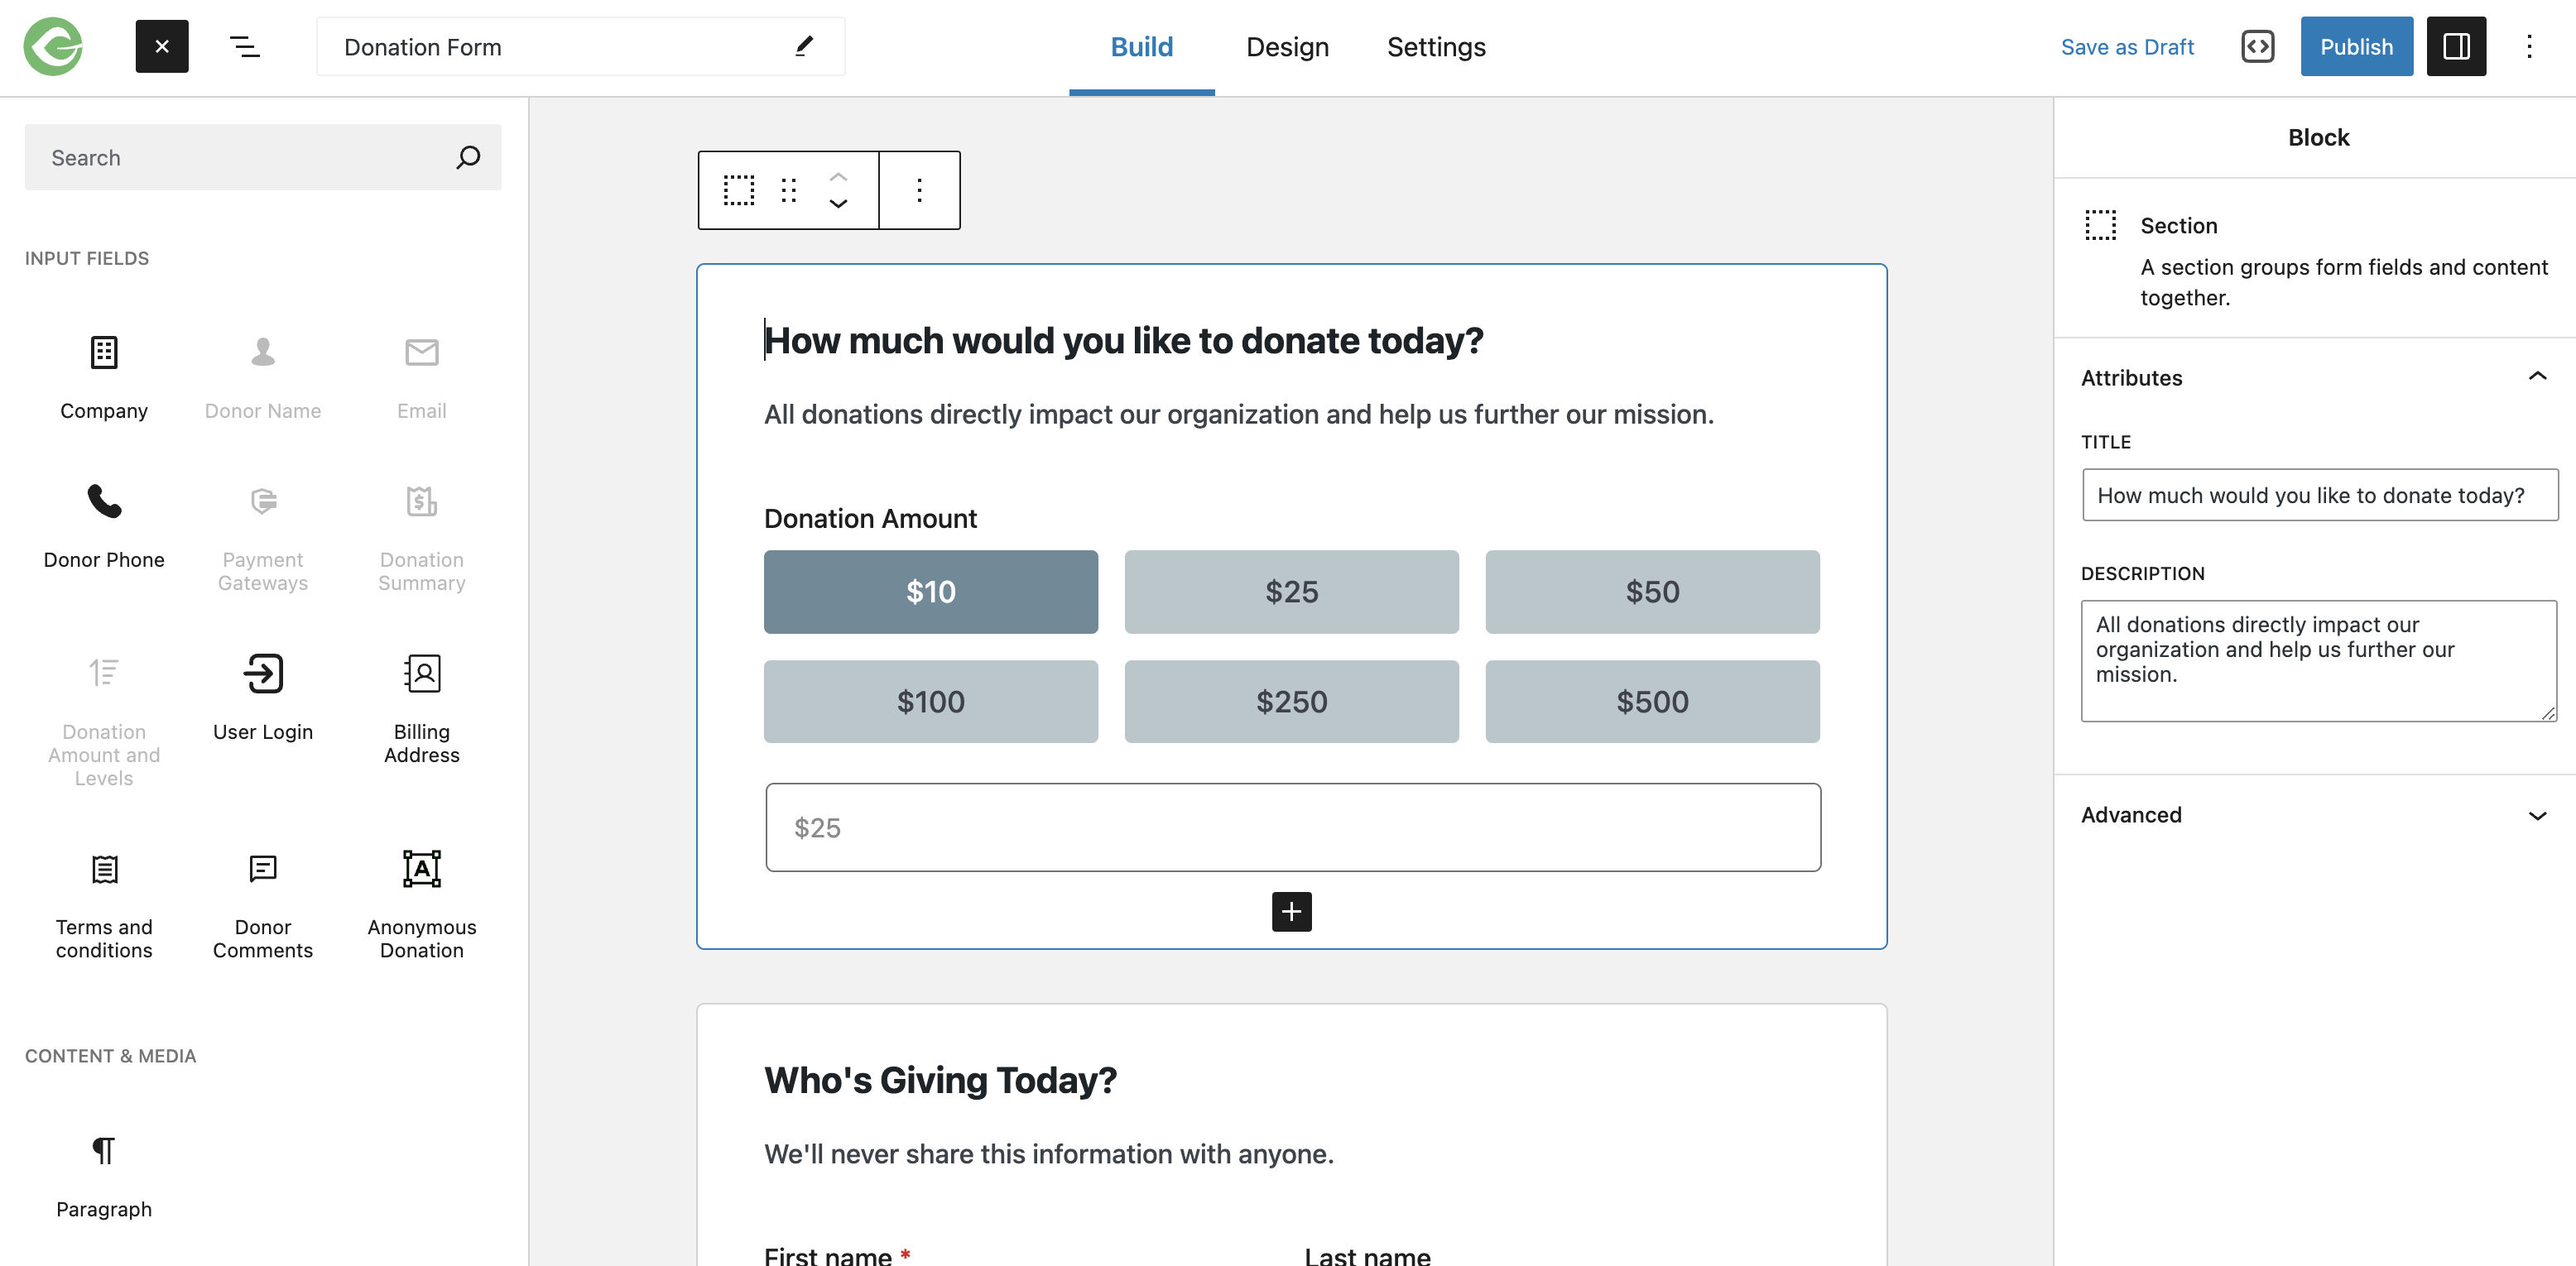
This editor is where you will manage the following:
- Form-wide settings: These settings affect how your form functions and is presented, as well as the form page. They include Summary, Donate Button, Donation Goal, User Registration, Donation Confirmation, Form Grid, and Email settings.
- Block settings: A block is a form field, group of related form fields, or other content that you can add to sections on your form. These settings belong to a specific block inside the form. Settings for a block may include title and description settings, field labels, field placeholders, and more. Each block has its own settings.
- Form sections and content: A section is a group of blocks (form fields and other content) on your form. Each section of your form has a title and description that you can edit.
You can further customize your form by adding form field blocks. To add a new field, click on the plus sign on a section and add a new block. Or, you can drag a new field in from the blocks menu on the left side of the editor.

There are restrictions on certain form fields. The following fields are required to publish your form but can only appear once:
- Donor Name
- Payment Gateways
- Donation Summary
- Donation Amount and Levels
Additional Settings
Additional settings to help you get the most out of your donation forms are available in the Settings tab.
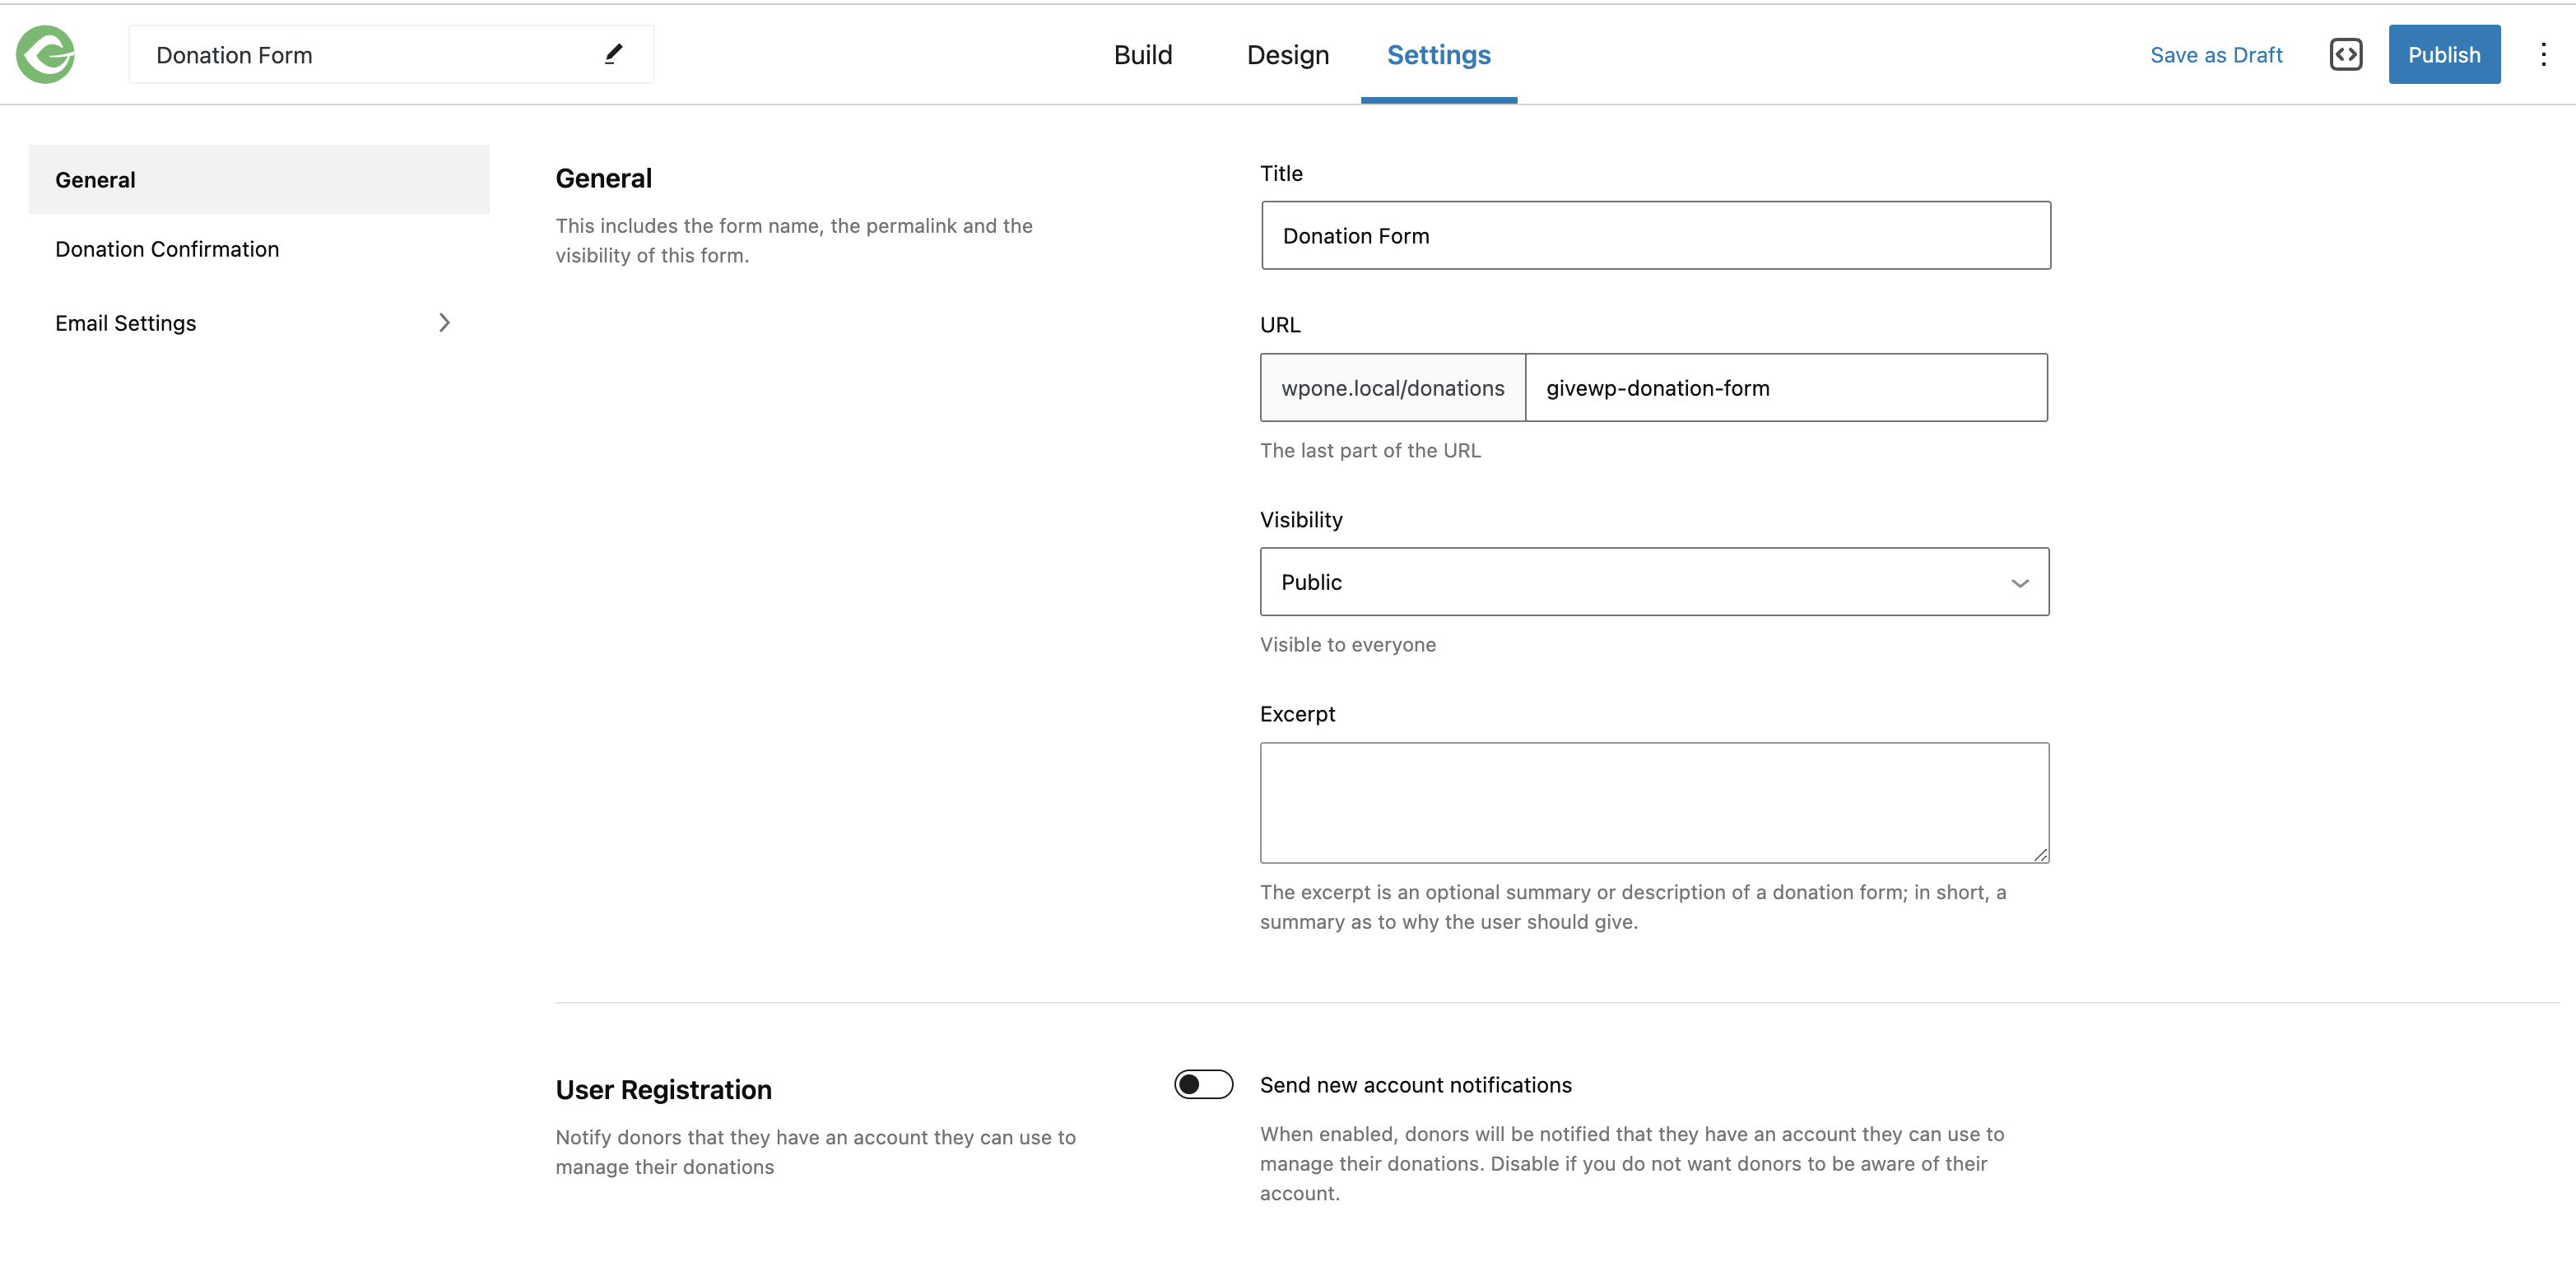
Here is an overview:
- General: These settings allow you to change the title, URL, and visibility. You can also add an excerpt, allow donors to receive account notifications, and customize the Form Grid display.
- Donation Confirmation: These settings allow you to add a header and a description that will appear after a donation is completed.
- Email Settings: GiveWP sends emails to you and donors. You can customize those emails by enabling Customize email options.
Publishing Your Form
When you’re finished editing your form, and you want to publish it to your website, you can use the Publish button in the upper right of the editor. Alternatively, you can Save as Draft and come back to finish it later.
Create Forms With the Option-Based Form Editor
You also have the ability to create forms using our option-based editor. Here, you have the option to create a form using the Classic, Multi-step, or Legacy templates.
- Multi-step Form: Walks the donor through a number of steps in the donation process. This template is ideal for embedding in other pages or posts on the site because of its fixed smaller width and small space requirements.
- Classic Form: Ideal for forms displayed by themselves on the page. Donors fill out the form as they scroll down the page.
- Legacy Form: Ideal for developers and others who want to be able to more directly style things and create their own interfaces.
To create one of these forms, navigate to the Donations tab from your admin dashboard. Then, select Add Form. You should see this page:
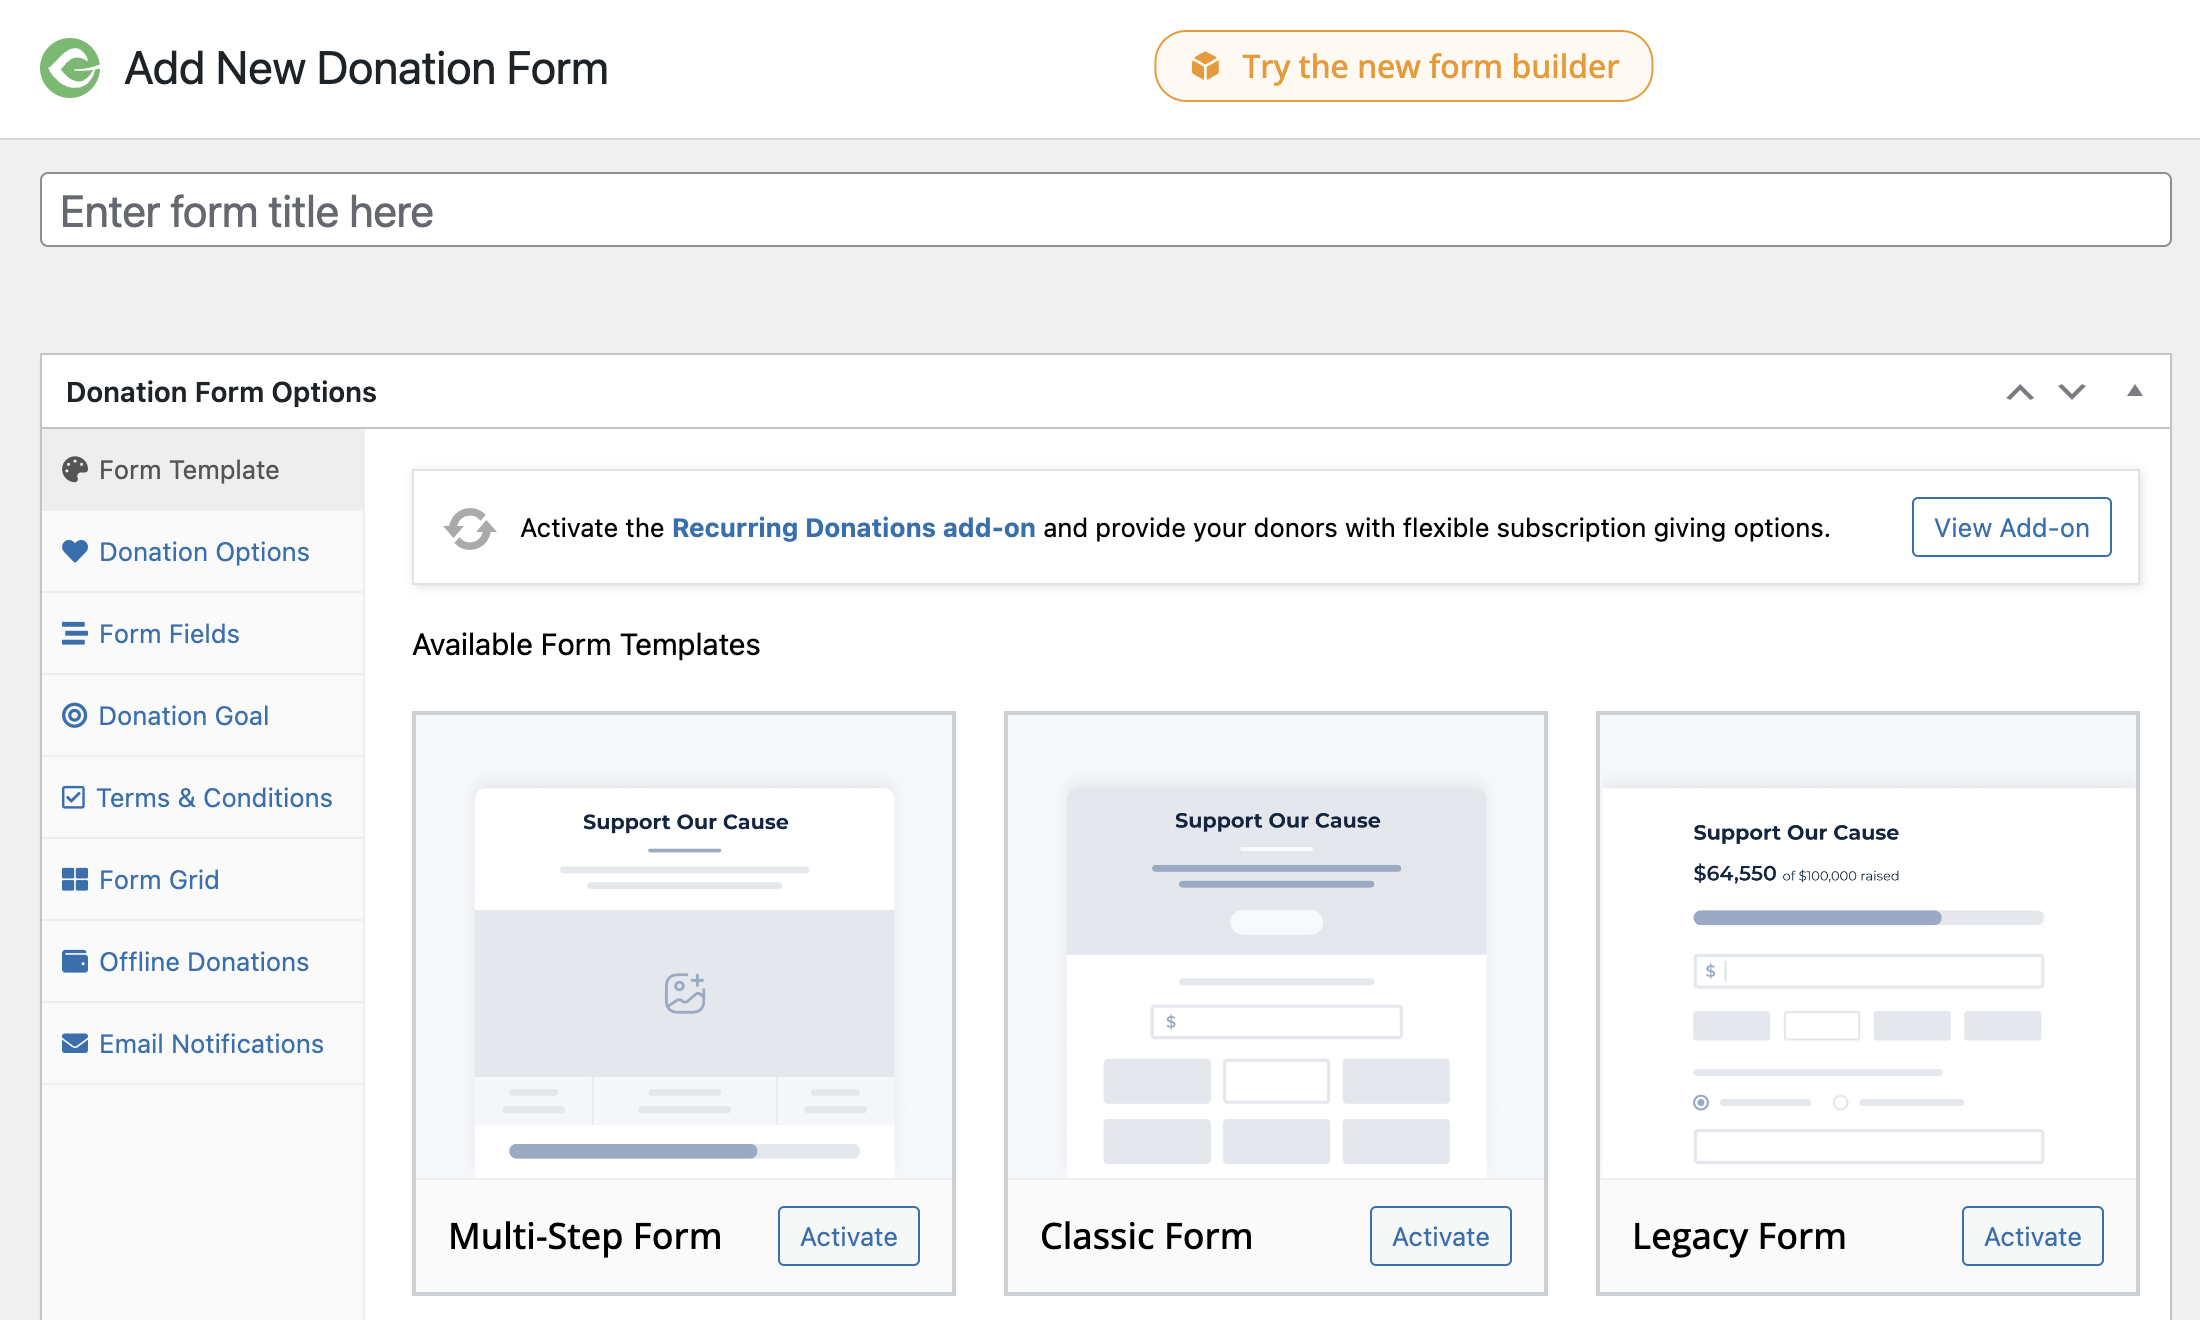
Once you’re there, activate the desired form. You will then be taken to its settings where you can customize template and donation options, form fields, and more.
GiveWP Donation Form Tips
Besides all of the customization options for your GiveWP forms, take them further with additional capabilities:
- Embed forms throughout your site. Forms can be used as stand-alone pages or embedded as a block or with a shortcode.
- Duplicate any form. It is possible to duplicate GiveWP forms with one click. Simply navigate to Donations > All Forms, hover over the form you want to duplicate, and click the link that says Duplicate.
- Migrate your current forms. If you create forms in the option-based editor, you can migrate your forms without disrupting donations. The 2-step process makes upgrading your forms quick and easy.
- Add images to your forms. With the Visual Donation Form Builder, you can add a header image. The header image settings are in the Design area of the Visual Donation Form Builder under the Header section. These settings provide options for uploading an image file and placing it in the background, above, or center of the header content.
Start Creating Donation Forms in WordPress With GiveWP
Online donations are an integral part of fundraising, and you need a simple yet powerful tool that helps you create and manage them.
GiveWP is here to help. With it, you can easily create forms for your WordPress site and earn more online donations.
Download GiveWP or view all plans to get started!
About the Author
Alexis Bryan
Alexis is a member of the content team at StellarWP. As a content marketing specialist, she enjoys writing, being creative, and working with the greater team on all things WordPress.