Access Control
The Access Control section gives advanced options for how your donors interact with sensitive data on your website.
Note: Having Trouble with user access? See our “Troubleshooting User Access Issues” guide.
Session Lifetime
Options: 24 Hours | 48 Hours | 72 Hours | 1 Week
Default: 1 Week
This setting determines how long a donors “session” is kept active after they donate. This allows them to see their donor information securely within their browser without having to login to your site. Once this period expires, they will not be able to see their Donor History or Donor Confirmation page any longer.
Limit Donations Displayed
Options: Any whole number
Default: 1
In order to prevent unauthorized access to the complete donation history associated with an email address, GiveWP limits access for logged out donors who submit a donation. In order to gain access to the full donation history, donors must prove that they have access to that email address.
This setting allows you to specify how many donations logged out donors have access to without any verification. For security, lower numbers are recommended.
Email Access
This allows your donors who do not have an account on your site to be able to request temporary access to see their donation history. This is done by sending them an email with a secure link which they can access from any device for a period of 7 days. Here’s how it works from the Donor perspective:
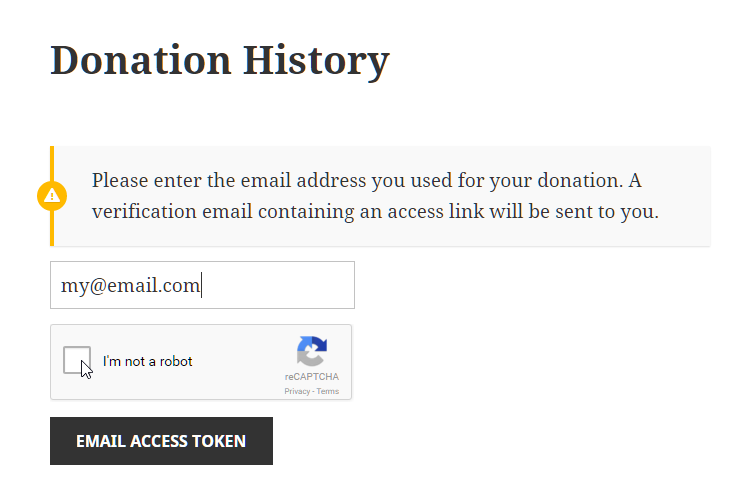
- They navigate to your Donor History page and they will see a form like this:

- The Email Access Token form
Note that the Captcha is an option in your settings, you don’t have to enable it.
- They enter their email and pass the Captcha and an email will be sent to them with a unique URL.
- They click the URL from their email and it will take them back to your site and they’ll see their Donation History no problem. This access is available to them for 7 days.
As the site admin, you have the option to enable email access with or without the captcha feature. There’s a link in the settings which takes you to the site where you can generate a Captcha Key for yourself.
reCAPTCHA Settings
Entering these keys is optional, but what it does is protect your Email Access form from being spammed with requests. Because the Email Access form is just one field asking for any email address, it’s an easy target for spambots. reCAPTCHA is a strong form of spam protection that is relatively easy to setup and configure.
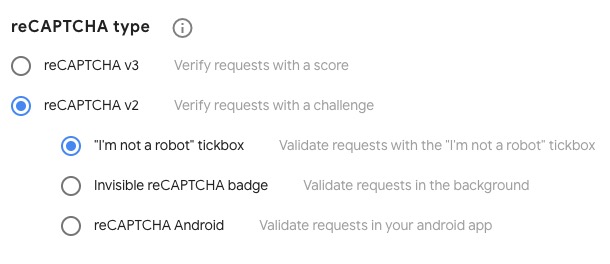
Note: It’s important to note that you need to use reCAPTCHA v2, otherwise, GiveWP will be unable to generate the reCAPTCHA field on the access form. After selecting reCAPTCHA v2, make sure you select the “I’m not a robot” tickbox, as per the image below:

- Go to the reCAPTCHA website
- Click on the blue button in the top-right that says “Get reCAPTCHA”
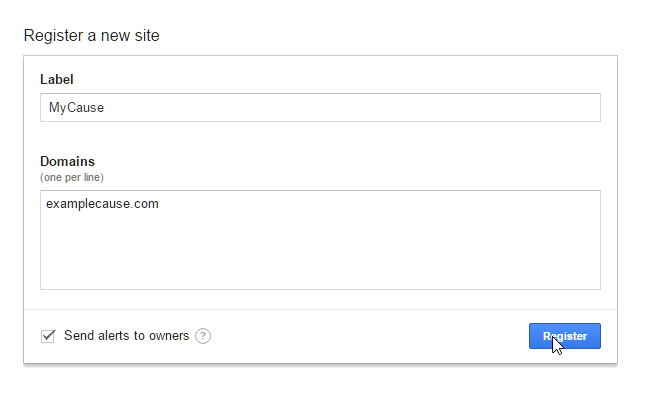
- AT the bottom of that page, fill out the fields in the “Register New Site” box

reCAPTCHA Register New Site - After clicking on “Register”, you’ll be redirected to the “Adding reCAPTCHA to your site page. We’ve taken care of all the difficult parts. All you need to do is copy and paste the Site Key and Secret Key into your settings and you’re done!
Now your Email Access form is protected with reCAPTCHA.

