AWeber
Note: GiveWP was designed to be the best fundraising tool available, and because of that, it’s constantly evolving. After careful consideration, this add-on has been deprecated for newer versions of GiveWP that include the Visual Form Builder.
If this add-on is currently in use, it will require sticking with older versions of GiveWP — which is not recommended. Instead, users are encouraged to explore the add-ons currently compatible with the latest versions and take advantage of the ongoing improvements to fundraising features.
AWeber is a service that helps you manage email subscription lists and reach visitors of your site through a rich set of email marketing tools. The GiveWP extension for AWeber helps you connect the service to GiveWP, and allows donors to subscribe to your email lists on AWeber.
Add-on Install and Activation
The first step is always downloading and installing your Add-on and activating your License key.
Note: If you need assistance installing and activating GiveWP Add-ons, please read our detailed doc on that here.
Requirements
The AWeber GiveWP Add-on allows you to provide your donors the option to opt-in to your email lists with the popular AWeber mail marketing tool. In order to integrate AWeber with GiveWP you need the following:
- An active AWeber account
- The AWeber GiveWP Add-on
- The free GiveWP WordPress plugin
Getting Started
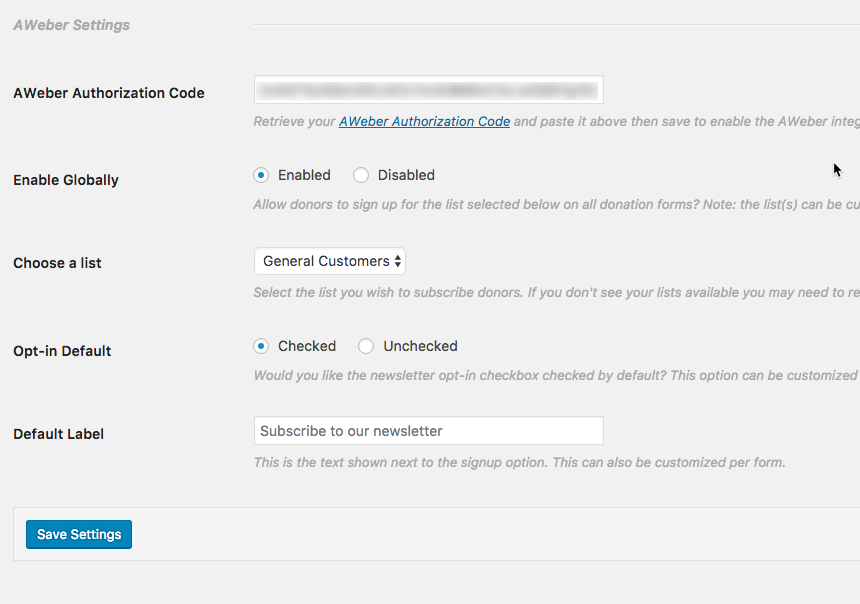
After your AWeber Add-on is activated, go to GiveWP > Settings and click on the Add-ons tab. There, you will see a section called AWeber Settings.
Connecting AWeber to GiveWP
Within the settings tab you will see an option called “AWeber Authorization Code“. This code is necessary for GiveWP to integrate with AWeber.
To get the authorization code, click the link below in the field’s description that says:
“Retrieve your AWeber Authorization Code and paste it above then save to enable the AWeber integration.”
.You’ll be redirected to a new tab. There you’ll see the following:
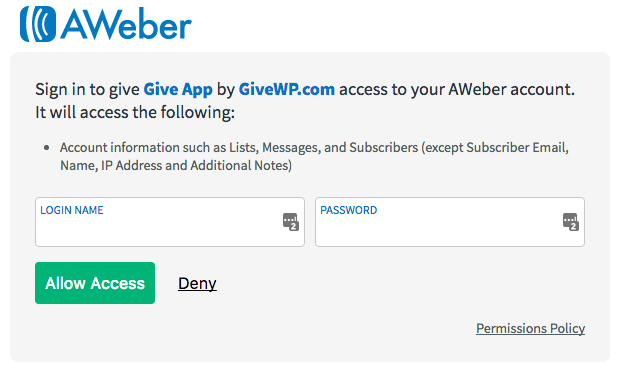
Use your own AWeber credentials to login, and click “Allow Access”.
Once you sign in and allow access you will be shown your authorization code:
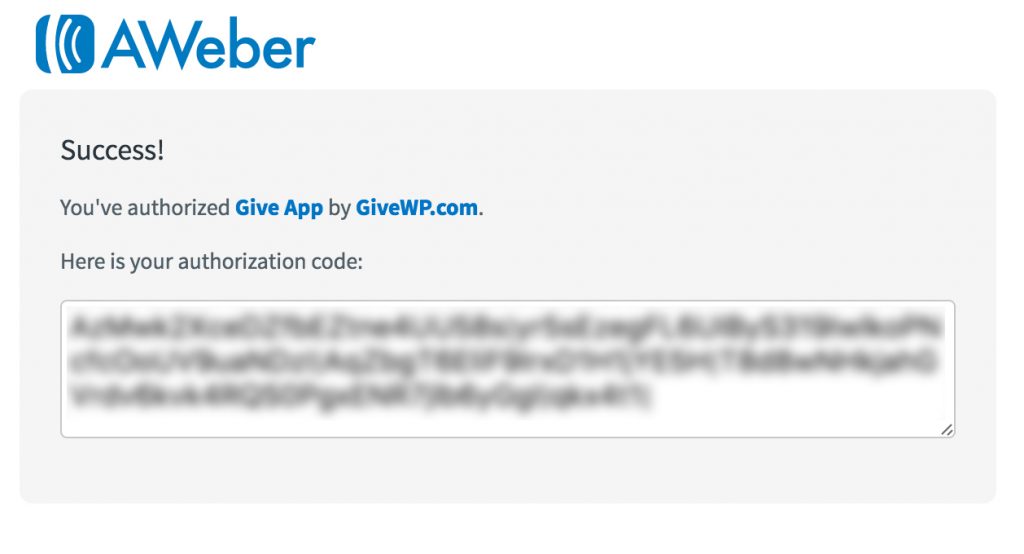
Copy the key and paste it in the “AWeber Authorization Code” code input field.
Note: GiveWP never requests any subscriber data such as emails or communications. The “GiveWP App” is limited only to populating your AWeber lists in your WordPress Dashboard, and sending your Donor names and emails to your AWeber account.
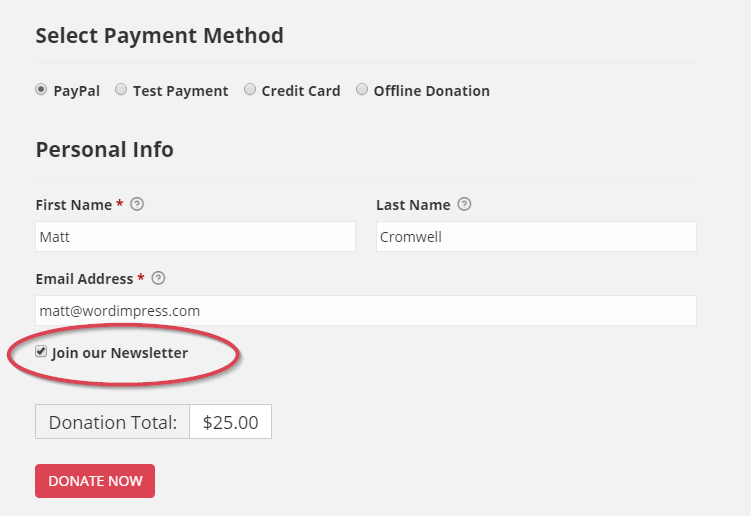
The Donor Experience
Once configured, you can choose whether all or only select donation forms have an additional subscribe checkbox added to them. This checkbox informs your donors that they can now opt-into your AWeber email newsletter when the checkbox is checked.
Understanding the Per Form Settings
In the GiveWP > Settings screen, you previously chose your Global settings. You can override these settings per form as well. For example, you may have multiple AWeber email lists. Generally, you probably will want your donors to go into a list called “Donors”. But maybe you have one donation form that is for a special event called “Annual Gala”. Perhaps for that one form you want those donors to go into the “Annual Gala” AWeber list. Here’s how you do that.
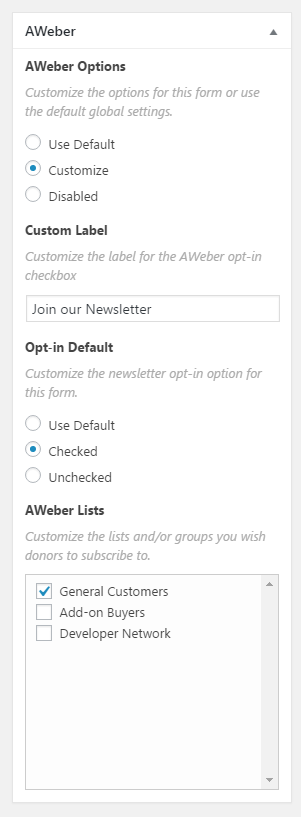
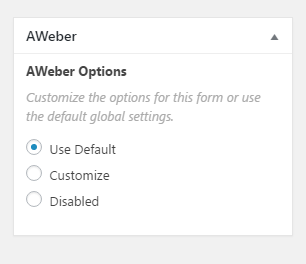
Go to your “Annual Gala” GiveWP form, and in the right-hand sidebar, you’ll see a sidebar section called “AWeber”. There you’ll see three options:
- Use Default — this form will inherit the Global settings from GiveWP > Settings > Add-ons
- Customize — You’ll see options to customize how this one form uses AWeber.
- Disabled — AWeber will not be used on this form at all.
Customize Options
If you choose “Customize”, you’ll see three additional options that allow you to integrate AWeber with this form differently than the Global Default.
- Custom Label — create a different opt-in label than the Global Default.
- Opt-in Default — change whether the AWeber checkbox on your form is checked or unchecked by default.
- AWeber Lists — choose a different email list than the Global Default.