Paymill Gateway
Paymill is a European credit card processor that enables you to accept credit card donations directly on your website. This article will help you install and configure the Paymill add-on so you can accept donations quickly and easily.
Requirements and Setup
In order to accept payments with Paymill using Give you will need to have an active Paymill account, the Paymill Give Add-on, and the Core Give plugin installed and activated. See here for instructions on installing and activating Give Add-ons.
Note: You can always access your add-on purchase receipts, downloads, and licenses from your Give Account dashboard.
After your Paymill Add-on is activated, go to “Donations > Settings” and click on the Payment Gateways tab. There you will see the default Payment Gateways (PayPal Standard, Test Payment, and Offline Donations). You should also see Paymill as an option as well. Click on that to enable Paymill as your credit card Gateway for your website.
If you would like to accept credit cards directly on your website with Paymill you will need an SSL certificate.
Obtaining your Paymill API Keys
Once you have activated the Add-on it’s time configure the setup to accept donations.
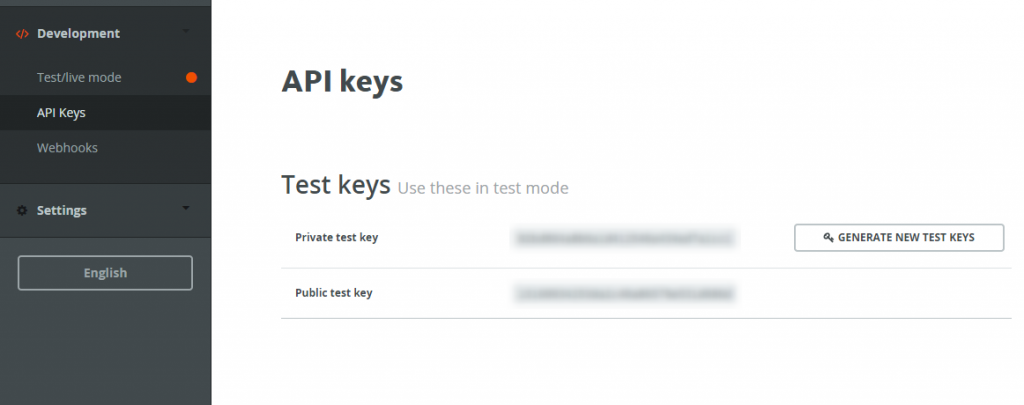
After logging into Paymill with your Paymill account, you’ll see a screen with a dark vertical menu on the left like the image above. Click on the Development item, and then the sub-menu item called API Keys. There you’ll find both Test Public and Private Keys and Live Public and Private Keys.
Test Keys are great for testing your donation forms before pushing your site live. When you are ready to go live, make sure to update your Paymill Add-on with the Live Public and Private Keys.
Copy each key and go to your WordPress site. Go to “Donations > Settings” and click on the Payment Gateways tab. There you’ll see a section called Paymill Settings. Paste each key into it’s respective field, then hit save.
That’s all there is to it. Now when your donors come to your site, they’ll be able to use credit cards to donate to you directly in the currency of your country and not have to be redirected to another site.
Testing Paymill
Testing is fairly straight-forward with Paymill. Here’s a quick list:
- Make sure Give is in “Test Mode“
- Enter your Test API Keys which are found in the same place you retrieved your Live API Keys previously.
- Use the Paymill Test Credit Cards found here.
Activating Your Premium Add-on License
Now that your Add-on is activated and configured, you should activate your License Key. Your License Key is not required for the Add-on to function, but as long as your license is active, you’ll have access to our Premium Support Forum and as well as receive automatic updates to your plugin on your WordPress site whenever we push important updates out to your Add-on. This is particularly important for Payment Gateways as there can be necessary security upgrades, or changes to the Payment Gateway API that require an update.
When you purchased your Add-on you should have received a confirmation email that had both a download link and your license key. Save that license key somewhere safe in case you need it again in the future.
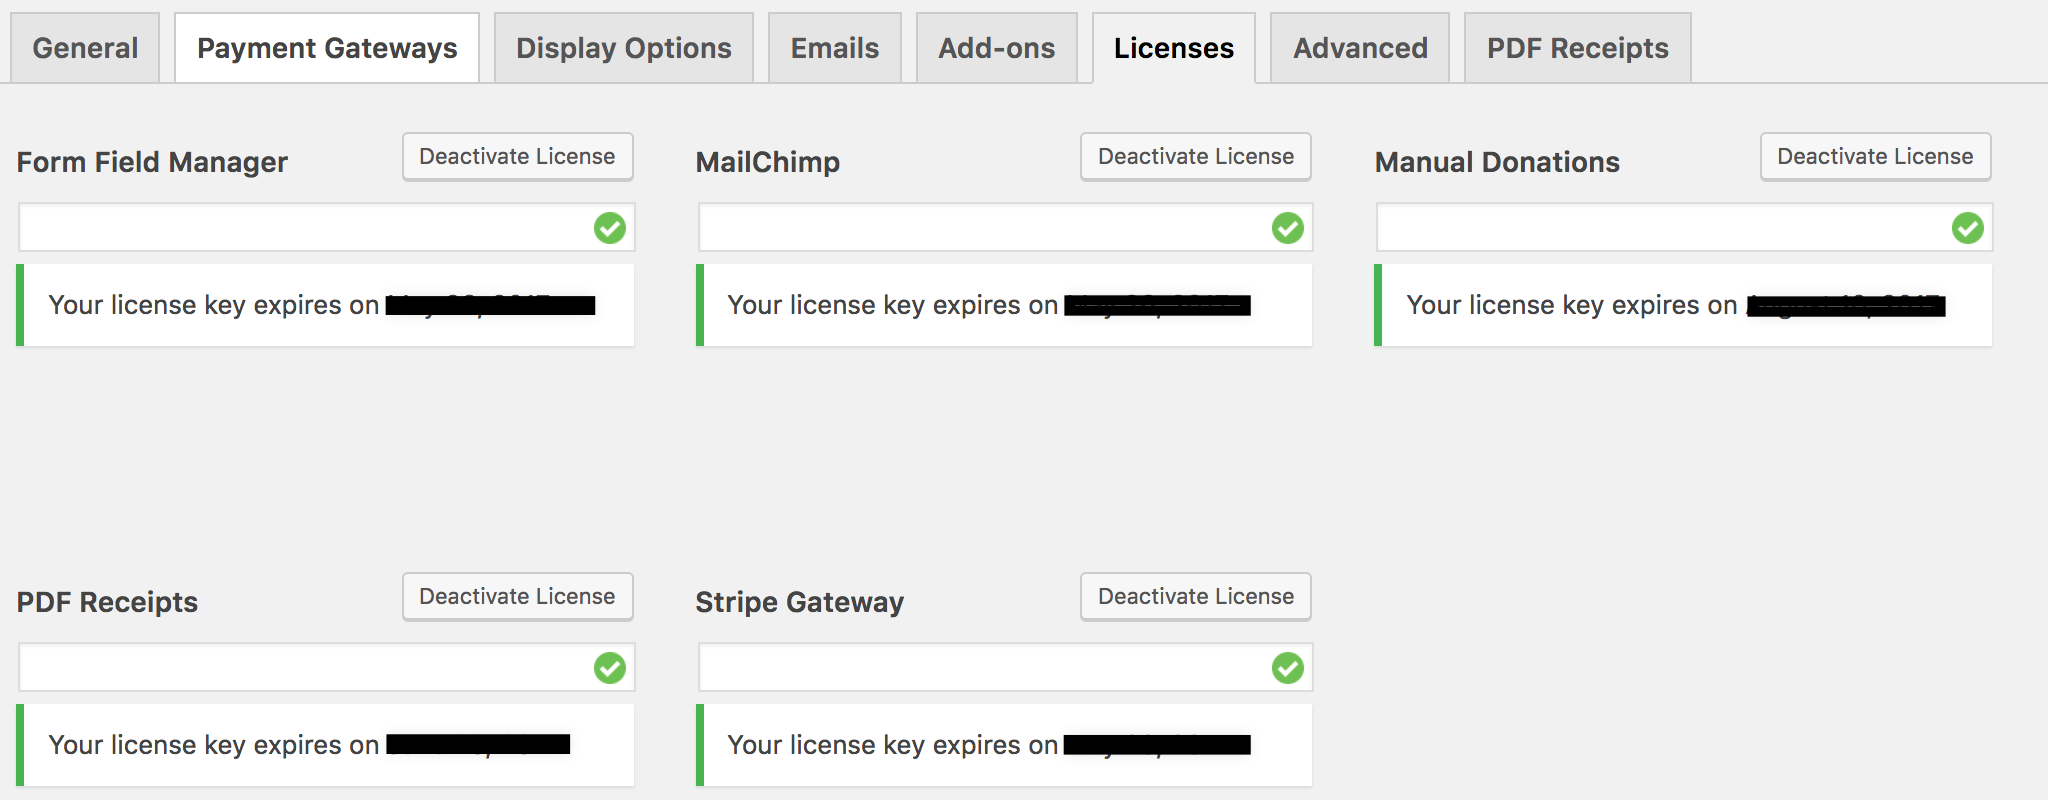
To activate your license, copy that license key from your email, and login to your site. Next, navigate to “Donations > Settings” and click on the “Licenses” tab. There you will see a list of your Premium Give-Add-ons and a field to enter the license key. When you’ve entered the correct key and clicked “Save Settings” you’ll see a green checkmark in the license key field indicating that the license has been successfully activated.
Retrieving Your Add-on License
If you misplaced the original email, you can always retrieve your license by logging into GiveWP.com and clicking on the “Account” menu item, then clicking on My Account. There you’ll see several tabs available to you. The first one is called “Purchases”. There you will see a list of all your purchases with GiveWP.com. On the far right you’ll see a link called “View Licenses”. Click that and you’ll be able to copy all of your premium Add-on licenses.
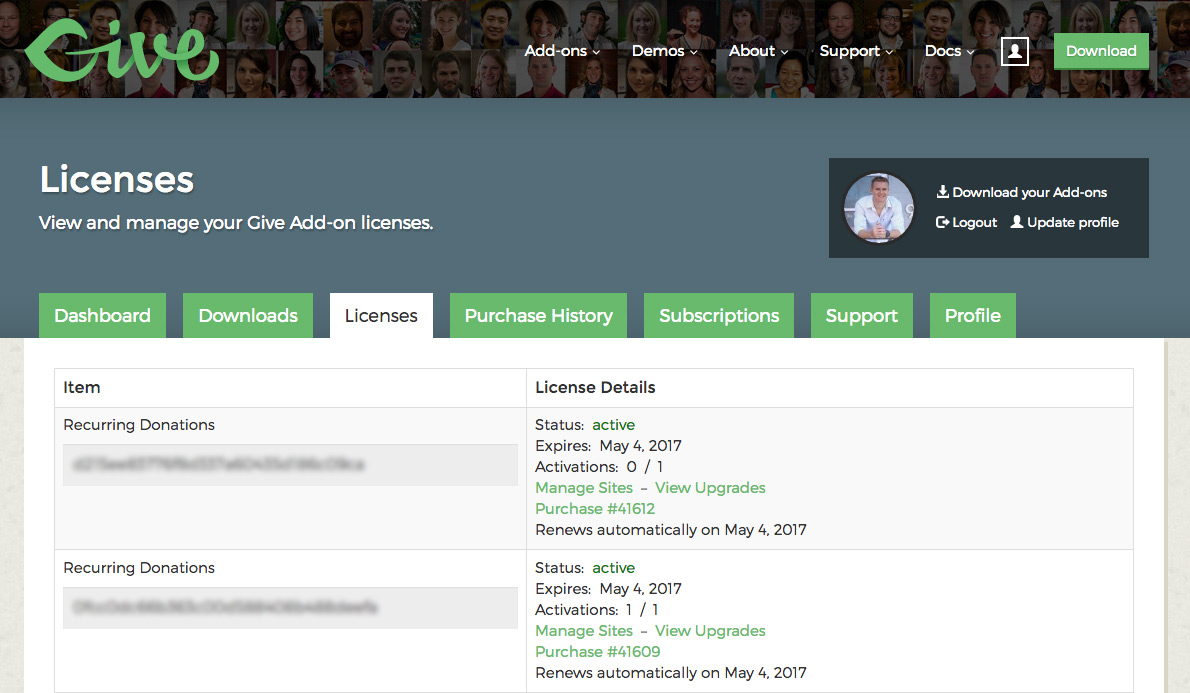
You can also view your license within the “My Licenses” tab.
Common Questions
The following section provides helpful troubleshooting information should you experience trouble with the add-on or integration.
Common Questions
Unfortunately, our Paymill add-on does not currently support recurring donations


