GiveWP Events
Opt-in to Event Tickets
GiveWP’s Event Tickets block is tailored to enable your organization to sell event tickets through your donations forms. With this feature, you can create detailed event listings, set ticket levels, and provide information essential for your attendees.
Follow these steps to use the Event features:
- Navigate to GiveWP > Settings in the admin dashboard.
- In the General tab, locate the Beta Features sub-tab.
- In the Beta Features page, set Event Tickets to Enabled.
Create An event
Your first step to begin working with the Event Tickets Block is to create an event. Here’s a step-by-step guide that will walk you through that process:
- In your site admin, go to GiveWP > Events.
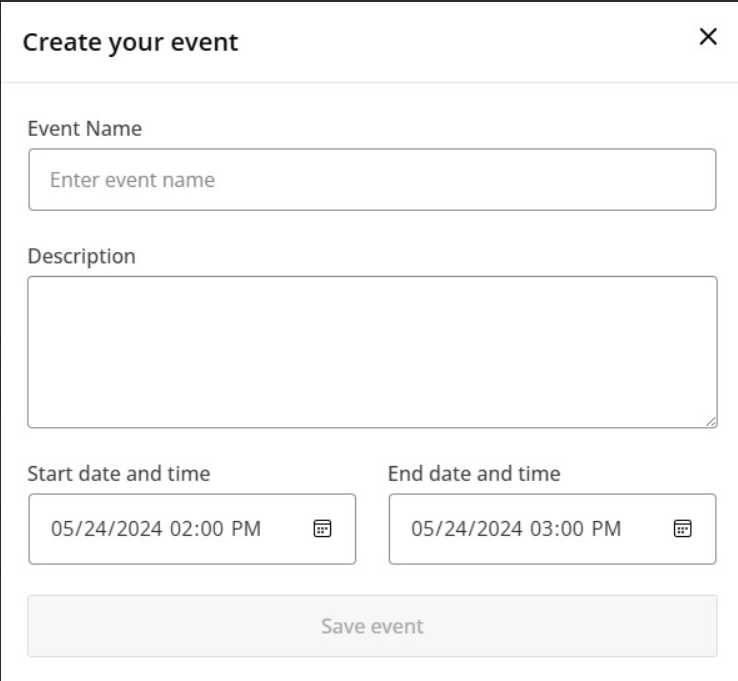
- Use the Create Event button to start creating your event.
- Fill out the details for your event; including title, description and dates and times the event will occur.
- Use the Save Event button to finish creating your event.
After creating your event, you will arrive on the Event Overview page where you can review and change your event information or add tickets.
Add Tickets to an Event
Your next step before going live with your event is to create the tickets.
- Access the Event Overview page.
- Use the Add Ticket button to open a new ticket creation form.
- Fill in the ticket details; including the ticket name, description, price, and capacity.
- Use the Save Ticket button to finish creating your first event ticket.
Tip: Leave the Price field empty for Free tickets and the Capacity field empty for unlimited tickets.

After creating your ticket, you’ll return to the Event Overview page, where you can verify that the ticket has been successfully added to the event. If needed, you can add more tickets from this page.
Add an Event to a Donation Form
Integrating events into a form is a breeze with the Visual Donation Form Builder, thanks to the Event Tickets block. Follow these steps to add an event to your donation form:
- Create a new form or edit an existing form using the Visual Donation Form Builder.
- In the Build tab, access the block menu, and insert GiveWP’s Event Tickets block.
- Once the block is added, select the event you want to show tickets for.
- Publish or Update the form, and your event tickets will appear on your website.
Note: The Event Tickets features only work with the Visual Donation Form Builder. They are not available for the Option-Based Form Editor, and we do not have plans to make them compatible.

Edit an Event After Adding It to a Form
You can only edit event details and tickets in the GiveWP > Events area inside your admin. You can’t edit event details or tickets directly inside a donation form, but there is a convenient link that will take you to the correct settings page.
How Donors Get Event Tickets
Donors can get tickets to your event as soon as you add the Event Tickets block to your donation form and publish it. Here are some details you should be aware of:
- Event Tickets can only be published on a donation form, not a website page.
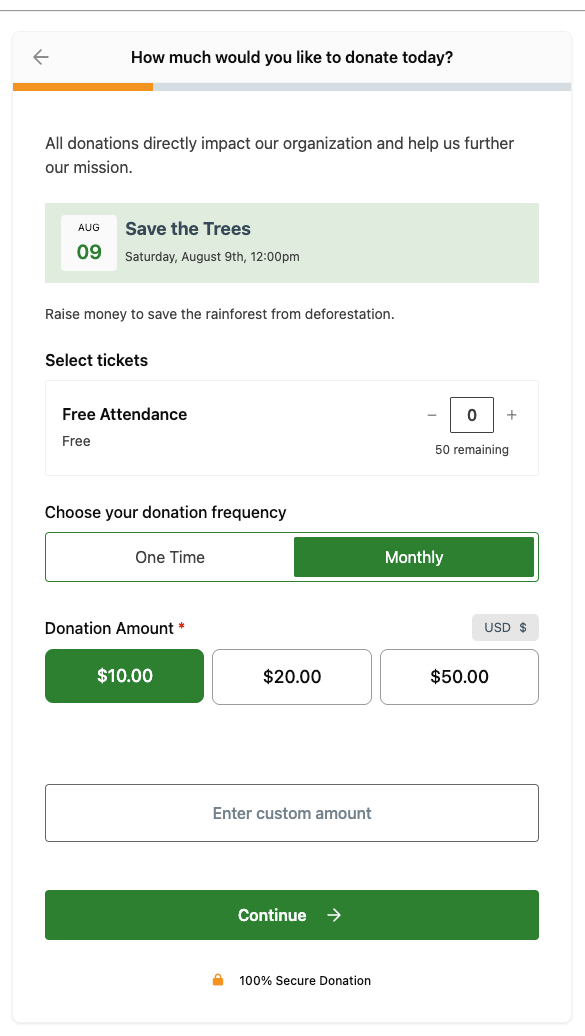
- There is currently no way to offer tickets without a donation, since the donation form requires the Donation Amount block.
- Donors can use the + and – selectors to choose as many tickets as they need and submit the donation form to complete the process.
View Event Attendees
Accessing an attendees list is an indispensable feature for event organizers, offering valuable insights into participant attendance and engagement. You can follow the steps below to access the attendees list:
- Navigate to the GiveWP > Events page in the admin dashboard.
- Select an event to view attendees.
- On the Event Details page, locate and open the Attendees tab.
- In the Attendees tab, you’ll find a list of event attendee names and emails, listed by individual ticket.
Note: If an attendee has more than one ticket, they will appear in the list multiple times because the list is organized by individual ticket.

Leave Feedback for Event Tickets
Feedback helps determine important next steps in a feature’s development, including new functionality or improvements to the way a feature works. For the Events feature, feedback can be provided two ways:
- Using the modal displayed in the bottom right corner of the Events Beta page in the admin interface.
- Adding comments through the Feedback website.
Opt-out of Event Tickets
The feedback modal located in the bottom right corner of the Event Beta page includes a convenient link to the settings page to opt out of the beta program. If you would like to opt out of the Events Beta or any upcoming beta programs, you can do so manually by following these steps:
- Navigate to GiveWP > Settings in the admin dashboard.
- In the General tab, locate the Beta Features sub-tab.
- In the Beta Features page, set Event Tickets to Disabled.
Note: You have the flexibility to enable or disable the Events Beta at your convenience while it remains in the beta phase.


