How to Install and Activate GiveWP Add-ons
Add-ons allow you to extend the power and functionality of GiveWP. This documentation shows you how to install, activate, and license premium add-ons on your site that you purchased here at givewp.com
How to Install GiveWP Add-ons
Add-ons are WordPress plugins and can be installed via a drag-and-drop procedure on the Licenses tab at Donations > Settings > Licenses. Before downloading your ZIP file from the givewp.com website, follow this streamlined process:
- Activate your license
- Download the ZIP file
- Drag and Drop to upload and activate
Activate your license
When you purchased a GiveWP add-on or a plan, you were emailed a license key. For all-access plans, one license key enables access to all of the add-ons in that plan. For single add-on purchases, each add-on has its own license. If you’ve lost the email with the license key or didn’t receive it, you can get the key(s) from your My Account page.
In a new tab or browser window, log in to your website as an administrator and navigate to Donations > Settings > Licenses.
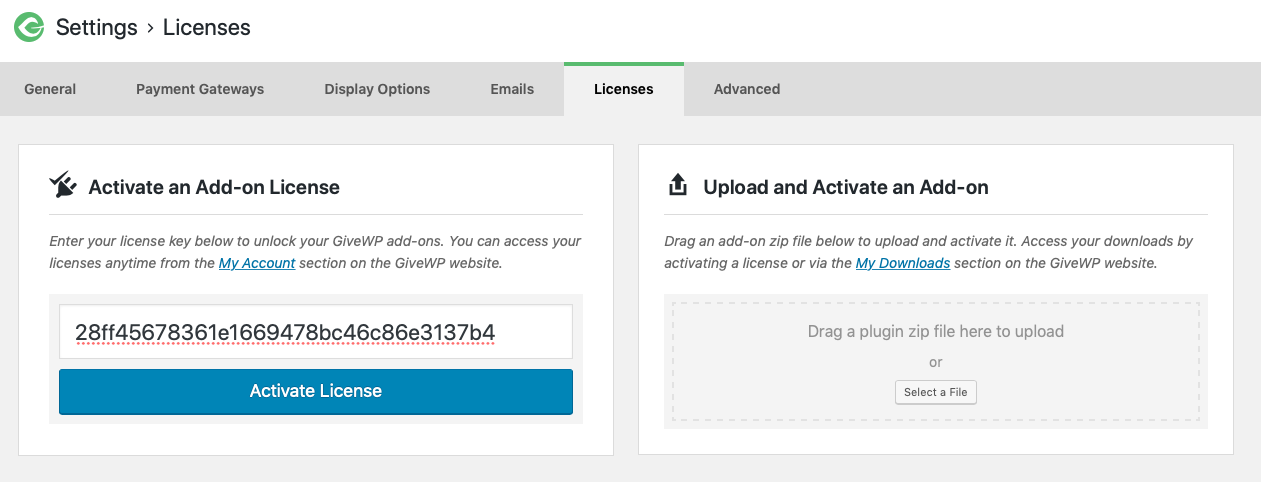
Copy and paste the add-on license key(s) from your GiveWP account into your site. For multiple individual add-ons (not in a plan) you will see that each add-on has an area for it’s unique license key. You can copy in the keys one at a time and refresh the page in between.
Download the ZIP file
Once your license has been activated, you should see a full list of all add-ons in the plan listed down the page on the licenses tab.
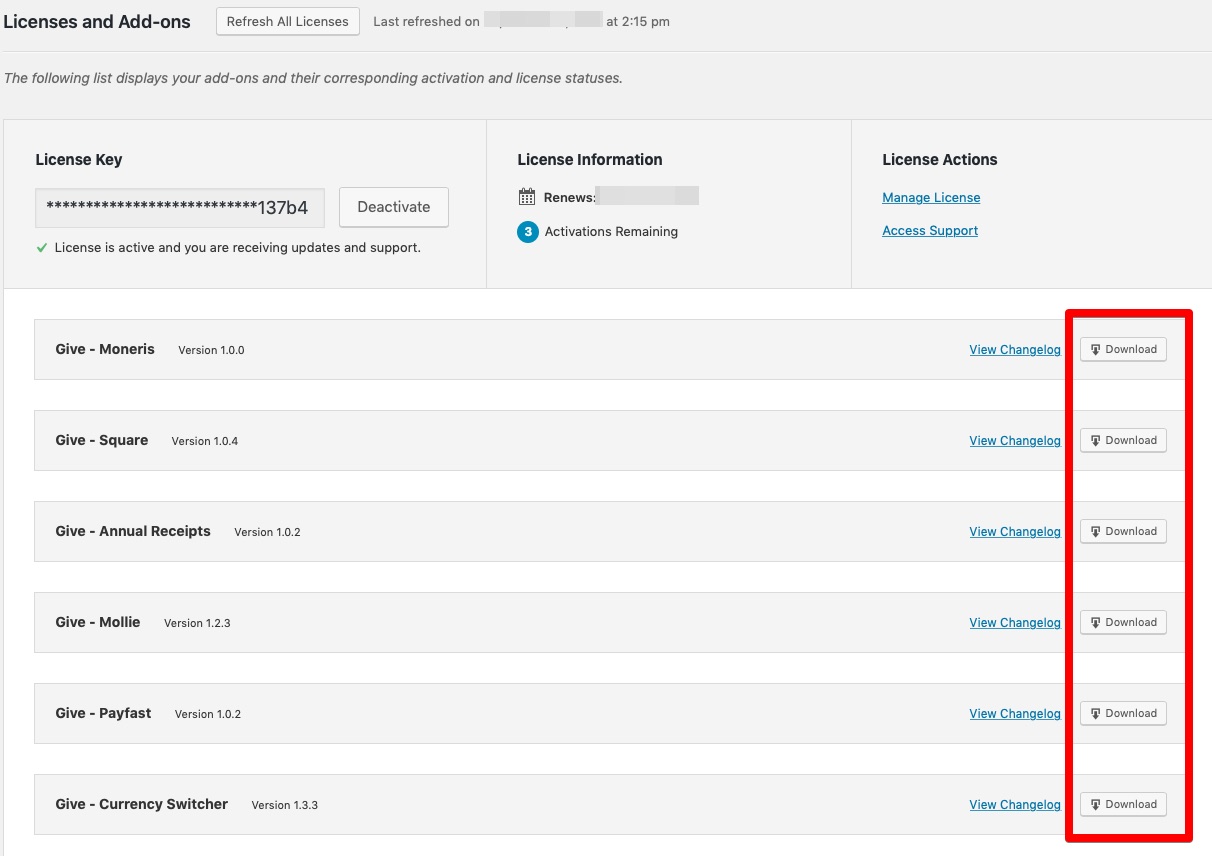
Now you can download the add-ons that you want to use on this site by clicking the download button beside each individual addon.
Note: It’s a best practice to only have downloaded and installed the add-ons you are currently using on the site. You can always add more, so start with some essentials and go from there.
Upload and Activate the add-ons
The download button downloads the ZIP to your computer, so the next and final step is to upload from your computer to your website.
To do that, drag and drop the ZIP file into the box inside the “Upload and Activate an Add-on” box at the top of the Licenses tab.
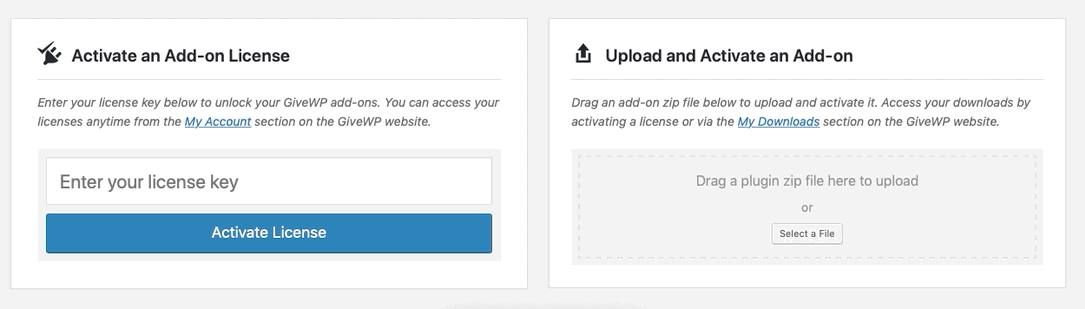
Drag each add-on ZIP to that box, and click to activate them. You’re all set!
Manually installing your GiveWP Add-ons
If the above procedure fails for any reason, you can always access your add-ons by visiting the Downloads section on your My Account page. Once there, click on the link next to the download you wish to install to download the add-on plugin ZIP file.
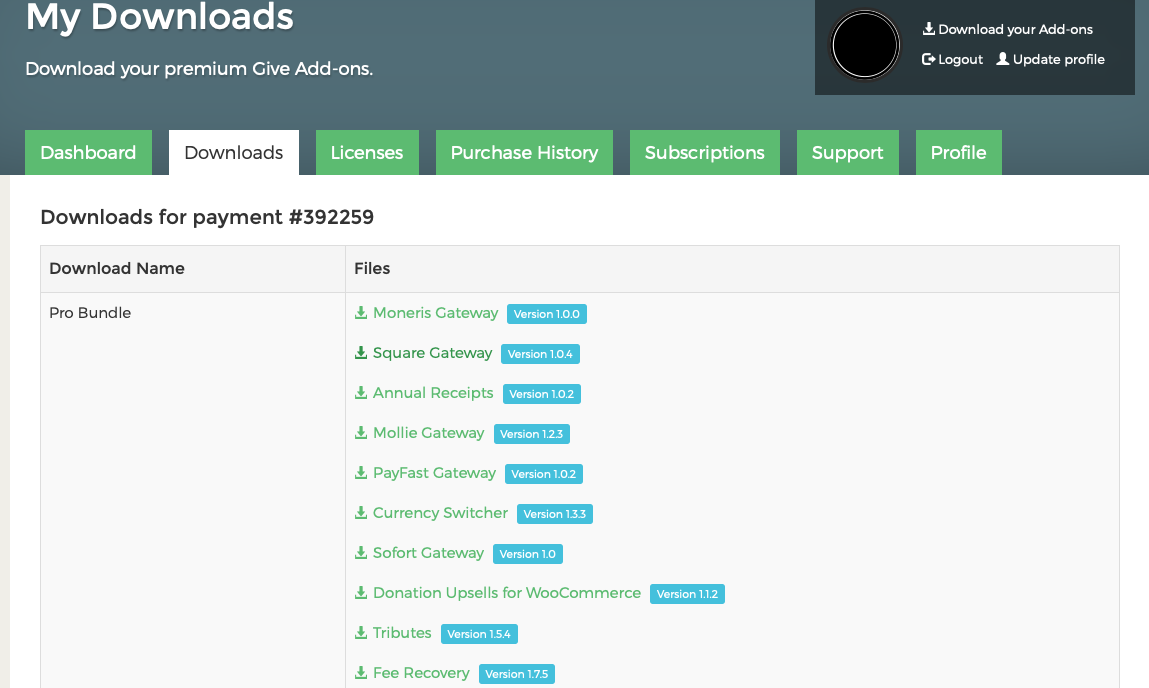
With those ZIPs, you can install and activate the add-ons like you would any other third-party plugin, via the “Add New” button on the top of the Plugins page.
Deactivating an Add-on
To deactivate a plugin or add-on, navigate from your WordPress Dashboard to Plugins > Installed Plugins. You will see a list of all your installed plugins. Navigate to the plugin or add-on you would like to deactivate, and click “deactivate”.


