ConvertKit
ConvertKit is a service that provides marketing tools that allow you to engage with your donors via email. The GiveWP extension for ConvertKit helps you connect the service to GiveWP, and allows donors to subscribe tags and forms on ConvertKit.
Add-on Install and Activation
The first step is always downloading and installing your Add-on and activating your License key.
Requirements
The ConvertKit Add-on allows you to provide your donors the option to subscribe to your forms and tags within the ConvertKit platform. In order to integrate ConvertKit with GiveWP you need the following:
- An active ConvertKit account
- The ConvertKit GiveWP Add-on
- The free GiveWP WordPress plugin
Getting Started
After the ConvertKit Add-on is activated, go to GiveWP > Settings and click on the Add-ons tab. There you will see a section called ConvertKit Settings.
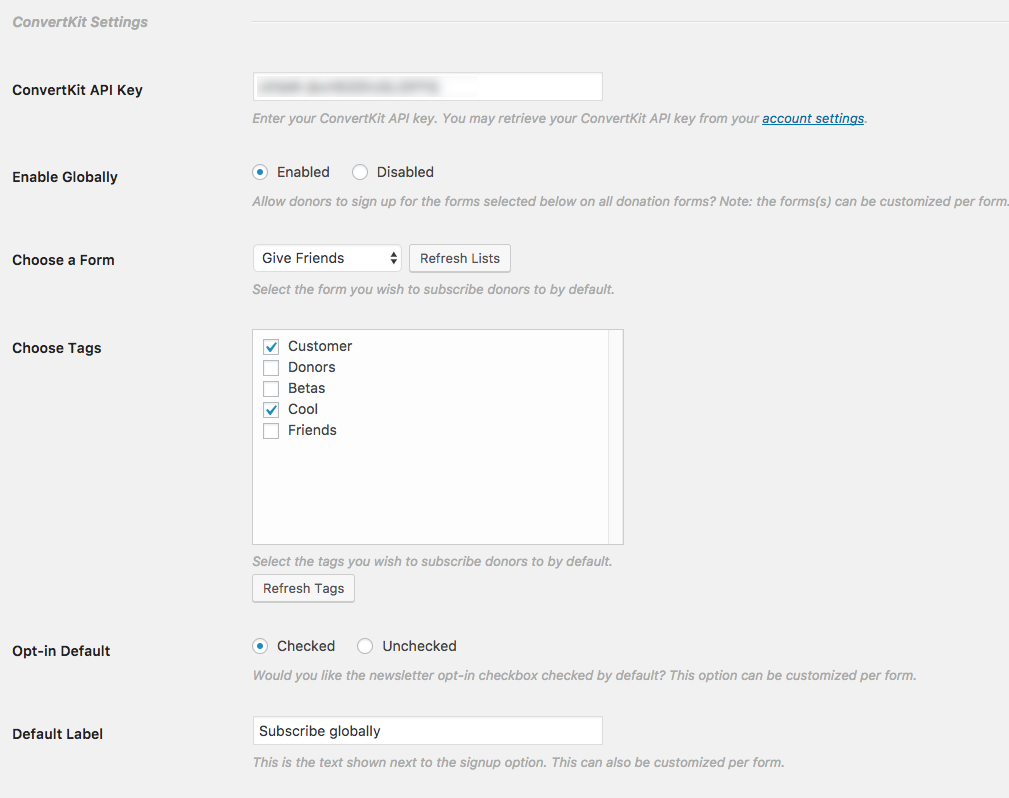
The options in this section allow you to control various global plugin settings. “Global” means the options here will affect all donation forms. These options can be customized per form.
Connecting ConvertKit to GiveWP
Within the settings tab you will see an option called “ConvertKit API Key“. This key is necessary for GiveWP to integrate with ConvertKit.
To obtain your ConvertKit API Key:
- Log into your ConvertKit account.
- Click on “Account” and copy the “API Key” field content:
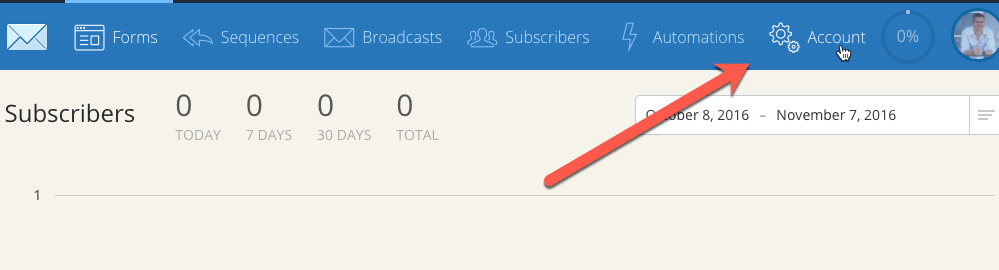

Paste the ConvertKit API Key into the GiveWP settings field and click save.
Adding ConvertKit to a Visual Donation Form Builder form
Find your form by going to GiveWP > Campaigns, clicking into the Campaign, and then using the Forms tab to find the list of forms. After clicking the form’s title to edit it, use the Build tab. Choose the spot to add the ConvertKit block and add it to the section.
If you need more information on blocks, please visit the documentation on GiveWP Blocks

Once the block has been added there are options in the right-hand menu:
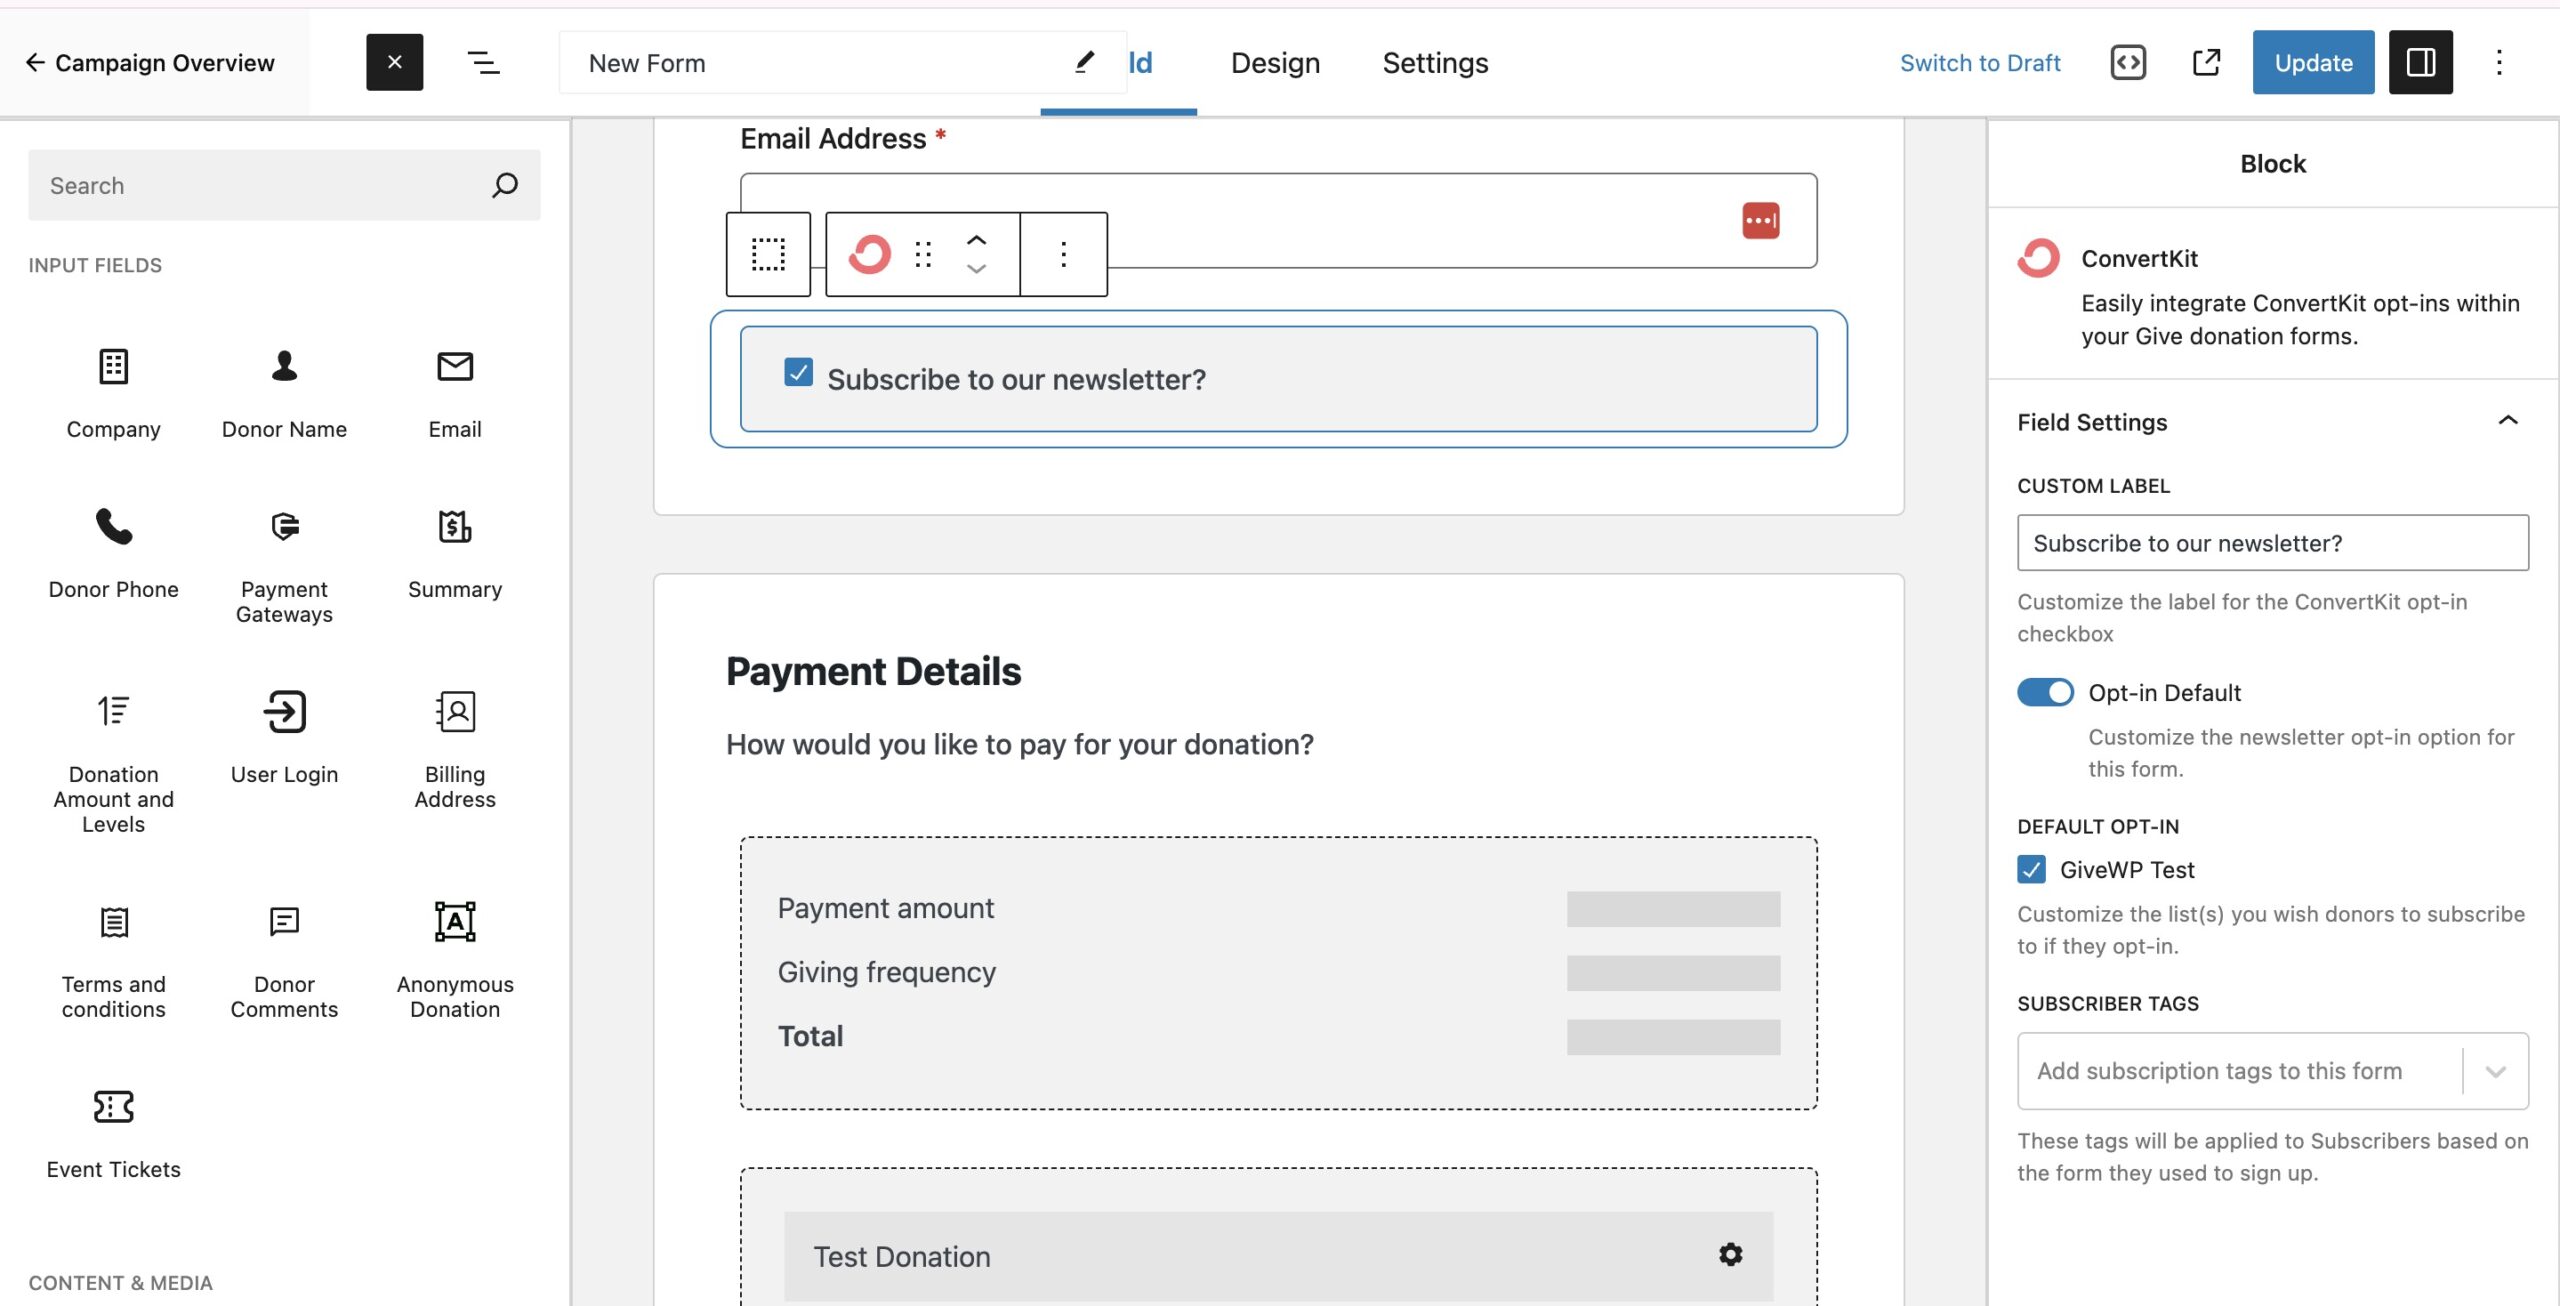
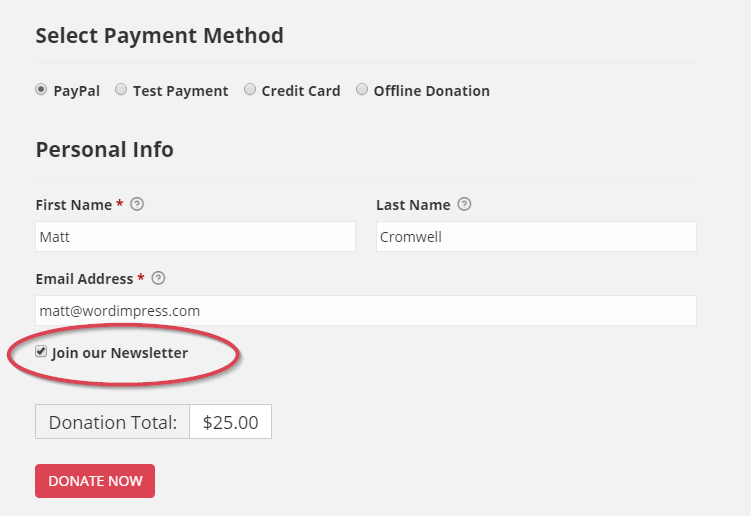
The Donor Experience
Once configured, you can choose whether all or only select donation forms have an additional subscribe checkbox added to them. This checkbox informs your donors that they can now opt-into your ConvertKit email newsletter when the checkbox is checked.
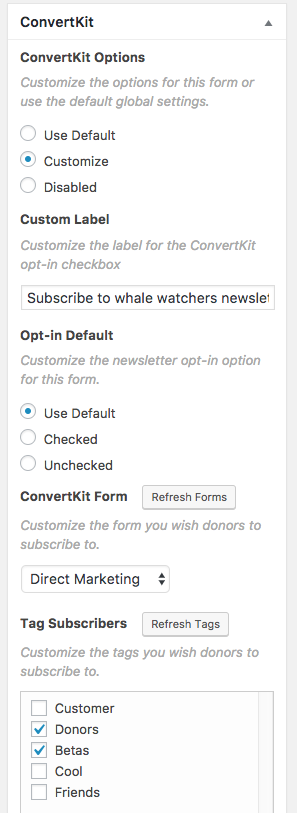
Understanding the Per Form Settings
In the GiveWP > Settings screen, you previously chose your “Global” settings. You can override these settings per form as well. For example, you may have different ConvertKit tags that you want to subscribe donors to per form. Here’s how you do that.
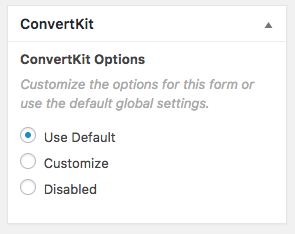
Go to a GiveWP form that you wish to tag donors who opt-in. In the left-hand sidebar, you’ll see a sidebar metabox called “ConvertKit”. There you’ll see three options:
- Use Default — this form will inherit the Global settings from GiveWP > Settings > Add-ons
- Customize — You’ll see options to customize how this one form uses ConvertKit.
- Disabled — ConvertKit will not be used on this form at all.
Customize Options
If you choose “Customize”, you’ll see additional options that allow you to integrate ConvertKit with this form differently than the Global Default.
- Custom Label — create a different opt-in label than the Global Default.
- Opt-in Default — change whether the ConvertKit checkbox on your form is checked or unchecked by default.
- ConvertKit Forms — choose a different form than the Global Default.
- ConvertKit Tags — choose a different tags than the Global Default.