Stripe Payment Element
What is Stripe Payment Element?
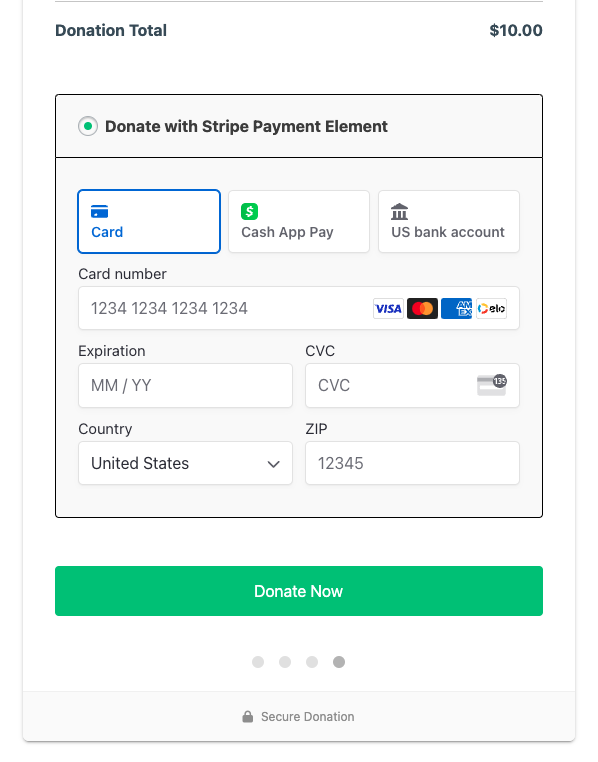
The Stripe – Payment Element payment gateway applies to campaign forms created using the visual donation form builder. This gateway accepts 40+ payment methods, validates input, and handles errors directly on your website. It is also built-in the core GiveWP plugin, no additional add-ons required!
Some of the more popular payment methods include:
- Apple Pay
- Google Pay
- ACH
- Cash App
And many more!
To use the Stripe Payment Element, ensure you are using GiveWP 3.0 (or newer), have a valid Stripe account and use a donation form that was created using the visual donation form builder.
Note: The Stripe Payment Element will only appear on forms created with the visual donation form builder. Forms created with the option-based form editor will require the site administrator to enable one of the other gateways to use on those forms. Learn more about the other free Stripe gateways.
It’s important to note that the Stripe Payment Element credit card checkout process happens directly on the form. Donors will not be redirected to Stripe to complete credit card payments. Some payment methods will redirect the donor to complete the donation.
Activating the Stripe Payment Element Gateway
Navigate to GiveWP > Settings > Payment Gateways > Stripe.
From there click on the Connect button to connect to your Stripe account.
From there, you can follow the prompts to either connect your existing Stripe account, or sign-up for a new account.
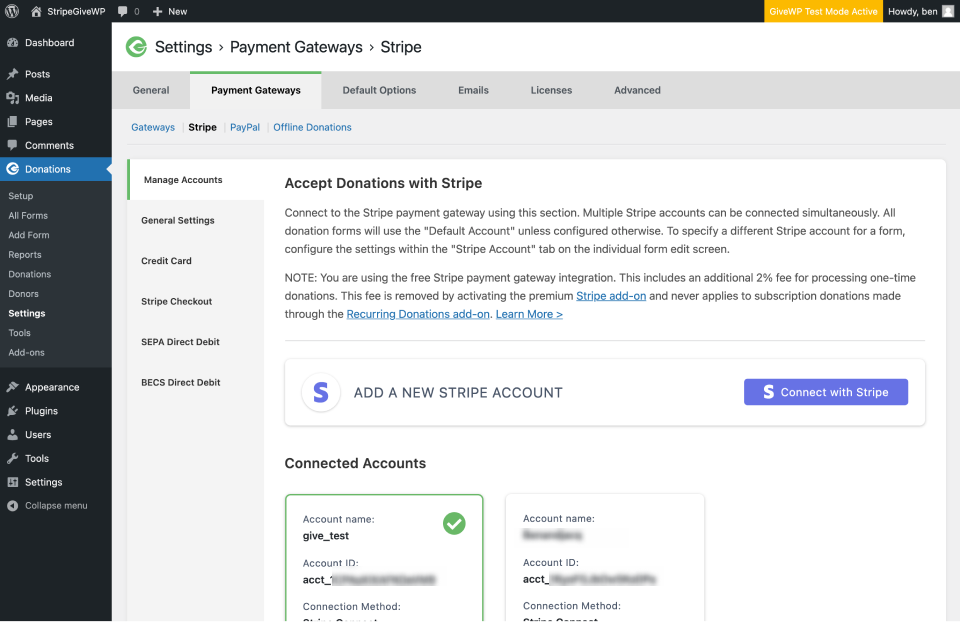
With GiveWP, you’re not limited to just one Stripe account!
The Manage Accounts tab allows for connecting to multiple Stripe accounts from a single GiveWP-powered website. Once you’ve added all the accounts you need, you can configure individual forms to use specific Stripe accounts using the Stripe Account settings in the Build step – after clicking on the Payment Gateway block at the bottom first.
Connecting Stripe and Your Webhook (required)
In order for donations to be marked as complete on your GiveWP site, you must configure the webhook at Stripe. On the settings page at GiveWP > Settings > Payment Gateways > Stripe the webhook URL is pre-populated on the page. Copy that to your clipboard for later use.
Click the link in the paragraph just above the webhook URL or navigate to:
On that page, click the “Add endpoint” button and paste in your webhook URL.
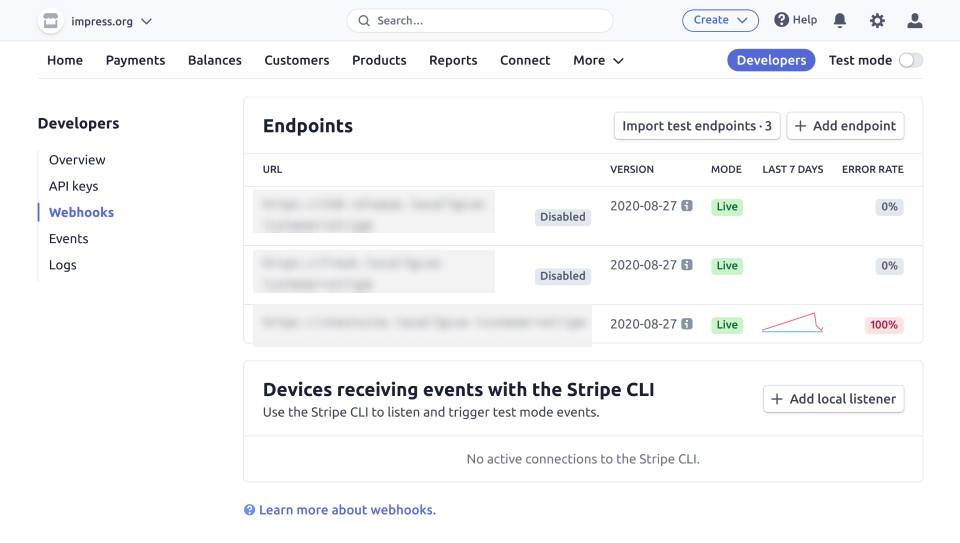

The webhook is a one-way message from Stripe to your GiveWP site to alert the site of events on the Stripe side. Select the following Events:
- charge.refunded
- checkout.session.completed
- customer.subscription.created
- customer.subscription.deleted
- invoice.payment_failed
- invoice.payment_succeeded
- payment_intent.payment_failed
- payment_intent.succeeded
After these are selected, save the changes are you are good to go!
Important: The most common problem that indicates the webhook was not created, or not configured correctly is donations remaining “stuck” in a Processing or Pending status. When a webhook is present and configured correctly, successful donation payments change to a status of Completed within a minute or two at the most. Another side effect of donations not completing is that email notifications (Donation Confirmation, Donor Receipt, etc) are not sent.
Note: In order to process test mode donations, you’ll need to repeat the same steps with Stripe’s dashboard toggled into test mode. Then enable GiveWP’s Test Mode and follow these instructions to start testing Stripe.
Stripe Settings Explained – General Settings Tab:
Stripe Webhooks
Settings Type: Text Input
Options: Your Site URL followed by /?give-listener=stripe
The webhook should be copied and pasted to your Stripe account dashboard. Learn how to set it up in the above section.
Statement Descriptor
Settings Type: Text input
Options: any 22 alphanumeric characters.
Default: Site Title
This is the text that appears on your donor’s bank statements. Statement descriptors are limited to 22 characters, cannot use the special characters <, >, ‘, or “, and must not consist solely of numbers. This is typically the name of your website or organization.
The GiveWP “Statement Descriptor” setting affects how your donors see their donations to you in their bank statements.
This allows you to customize the info that displays on bank statements.
Note: There must be a value in this field for Stripe to function properly. A default value of your site name is typically set, but in rare circumstances, this field appears blank by default. In that case, save a value here to restore functionality.
Activating Payment Methods
The Stripe Payment Element features over 40 payment methods that can be enabled and displayed in the Stripe gateway. These include Apple Pay, Google Pay, ACH, SEPA, iDEAL, Przelewy24, and many more.
In your Stripe dashboard, navigate to the Payment Methods page from the Settings page:

On the Payments page, click on Payment Methods, and then click on Default GiveWP configuration.

Now, payment methods will be presented on a new page for you to configure. Click on the Turn on buttons to enable those payment methods on your donation forms.

It’s important to note that not all payment methods are available to every Stripe account or donor. Availability depends on factors such as currency, location, and other criteria determined by Stripe. If you encounter any issues connecting a payment method, we recommend reaching out directly to Stripe support at https://support.stripe.com/ for further assistance.


