Tributes
The Tributes Add-on allows admins to provide an option for donors to designate a person they are giving in tribute of. Most commonly, this is used for “In Honor of” or “In Memory of”.
Do you need guidance on downloading, installing, or activating GiveWP Add-ons? Read our docs about that here.
Allow Donors to Give in Tribute using the Visual Donation Form Builder Tributes Block
The Visual Form Builder brings the power of Tributes to your donation forms with a new, intuitive block builder interface. By empowering your donors with the ability to give in honor or in memory of someone special, you create new opportunities for donors to stretch their style of philanthropy. The customizable block baked into the builder includes a wide array of settings and options to make Tributes the best possible experience for your donors with custom messages and options for designees. All you need is to have GiveWP and the Tributes add-on active, and you’re ready to add a Tributes block.
Enable Tributes
Once you have activated the GiveWP Tributes add-on, the block can be added to any new forms you create.
Note: Do you need guidance creating donation forms with the GiveWP Visual Form Builder? Read our docs about that here.
To add the Tributes features to your donation form, start in the Build tab in the edit screen, then select the Tributes block from the Add-Ons section and drag to a section on the form. Or, hover over a build section, then click the + symbol, type in “Tributes” in the Search field and select it from the list.
Note: You can only add one Tributes block to a form.
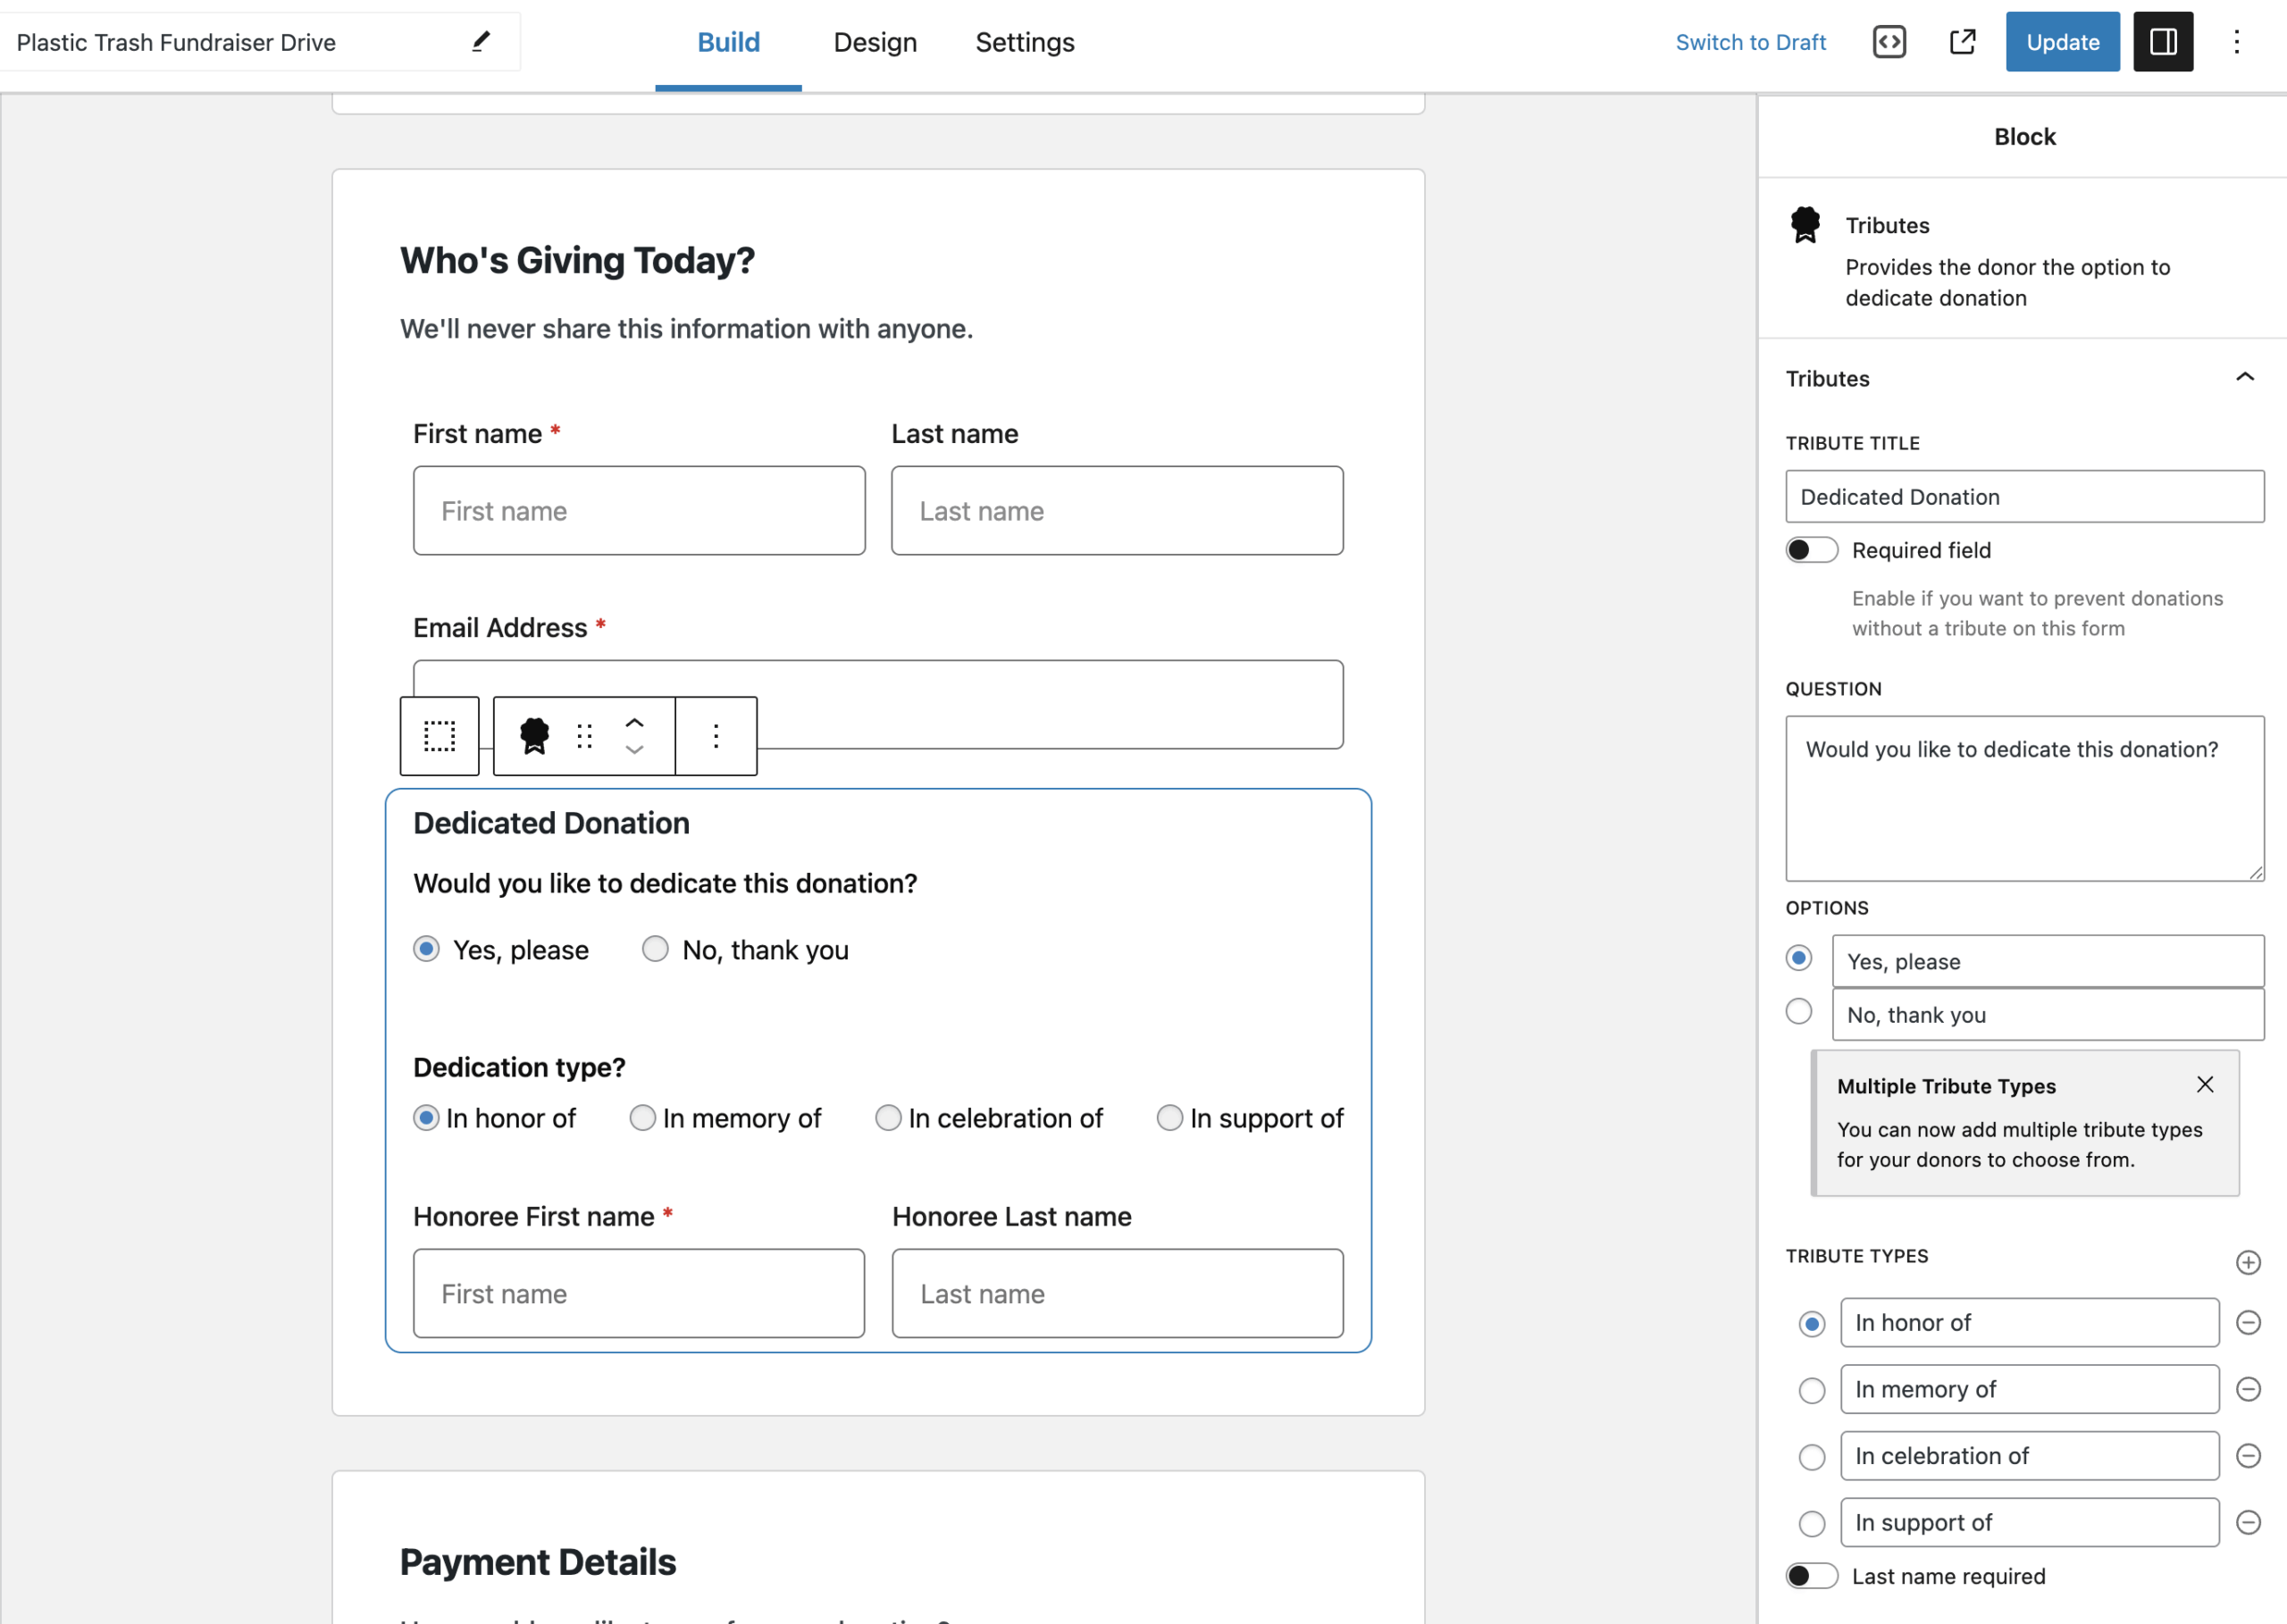
Tribute Block Settings
The Tributes Block houses a number of helpful settings for customizing the way your donor can give in honor or in memory of a designee. Below you’ll find a brief overview of the power of the Tributes Block, all available with the click of a button.
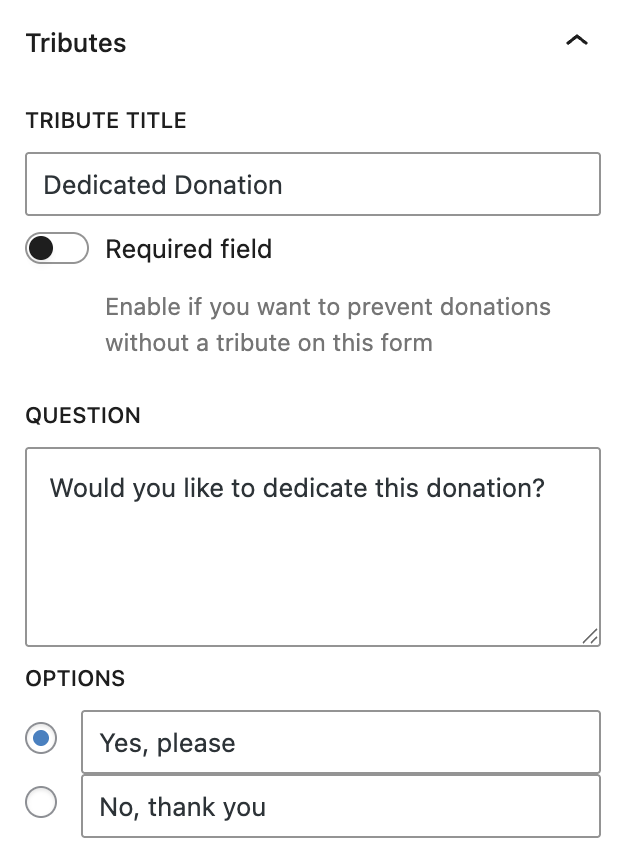
Tribute Title
Settings Type: Text field
Default: Dedicate Donation
Description: This setting contains the title that is at the top of the Tributes Block.
Required field
Settings Type: Toggle
Options: Enabled | Disabled
Default: Disabled
Description: This setting controls whether you want to prevent donations from being submitted without a tribute.
Question
Settings Type: Text field
Default: Would you like to dedicate this donation?
Description: This setting allows you to add more text to describe the tribute.
Options
Settings Type: Radio option with text labels
Default: Yes, Please | No, thank you
Description: This setting allows donors to opt-in or out of the tribute
Tribute Types
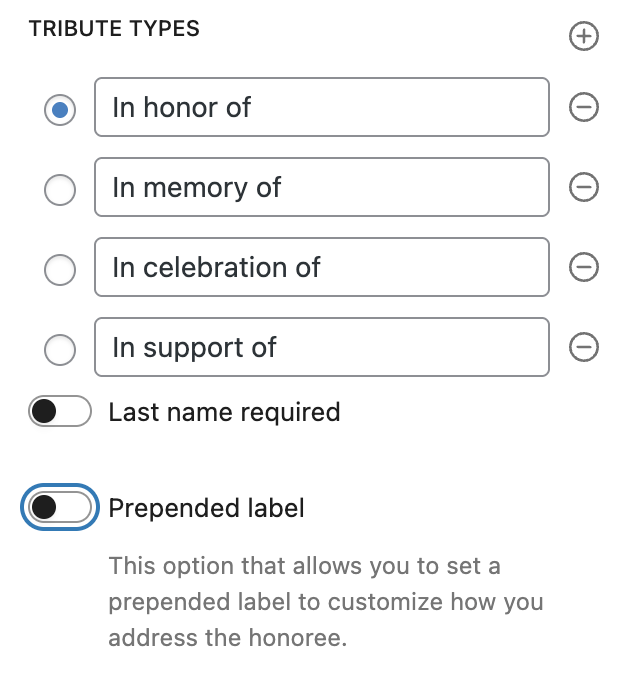
Settings Type: Radio option with text labels
Defaults: In honor of | In memory of | In celebration of | In support of
Description: This setting allows you to enter your preferred prompt for the tribute and include as many options as you like.
Last name required
Settings Type: Toggle
Options: Enabled | Disabled
Default: Disabled
Description: This setting controls whether you want the last name (of the person this tribute to be dedicated to) to be a required field.
Prepended label
Settings Type: Toggle
Options: Enabled | Disabled
Default: Disabled
Description: This is the label that appears before the tribute’s First and Last name labels on the donation form. Once this is enabled the “Tribute Prepended Label” setting will be displayed.
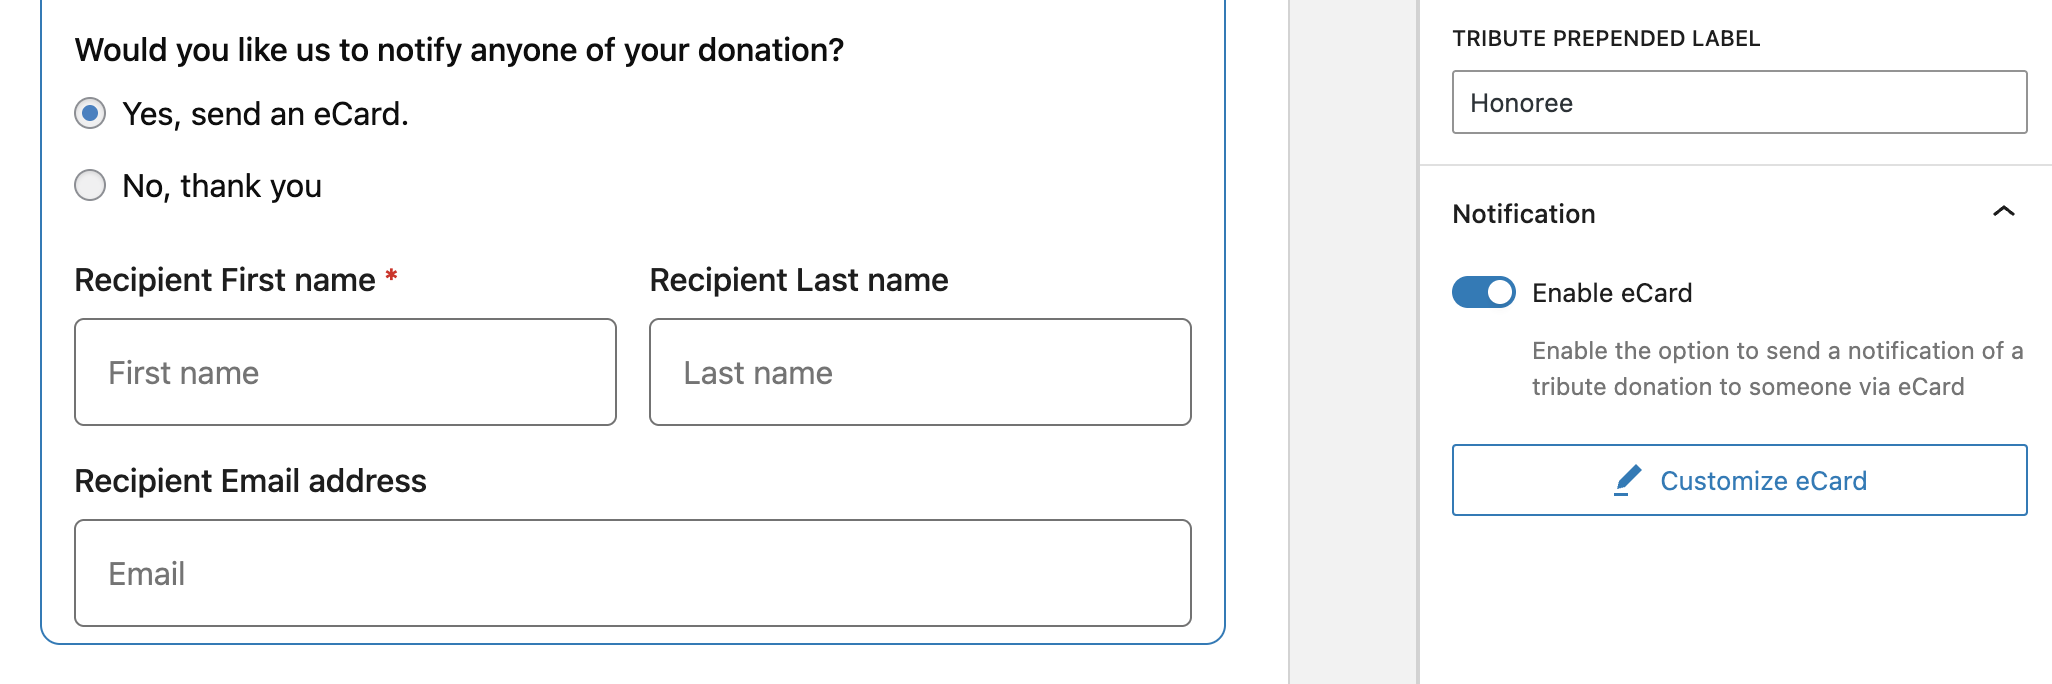
Tribute Prepended Label
Settings Type: Text field
Default: Honoree
Description: This setting allows you to enter the text that will be displayed before the “First name” and “Last name” labels.

Notifications
Enable eCard
Settings Type: Toggle
Options: Enabled | Disabled
Default: Disabled
Description: If you’d like to give your donors the ability to have a customizable eCard emailed to their designee automatically, enable this setting. Once enabled you will have the option of customizing the eCard Settings by clicking on the “Customize eCard” button settings.
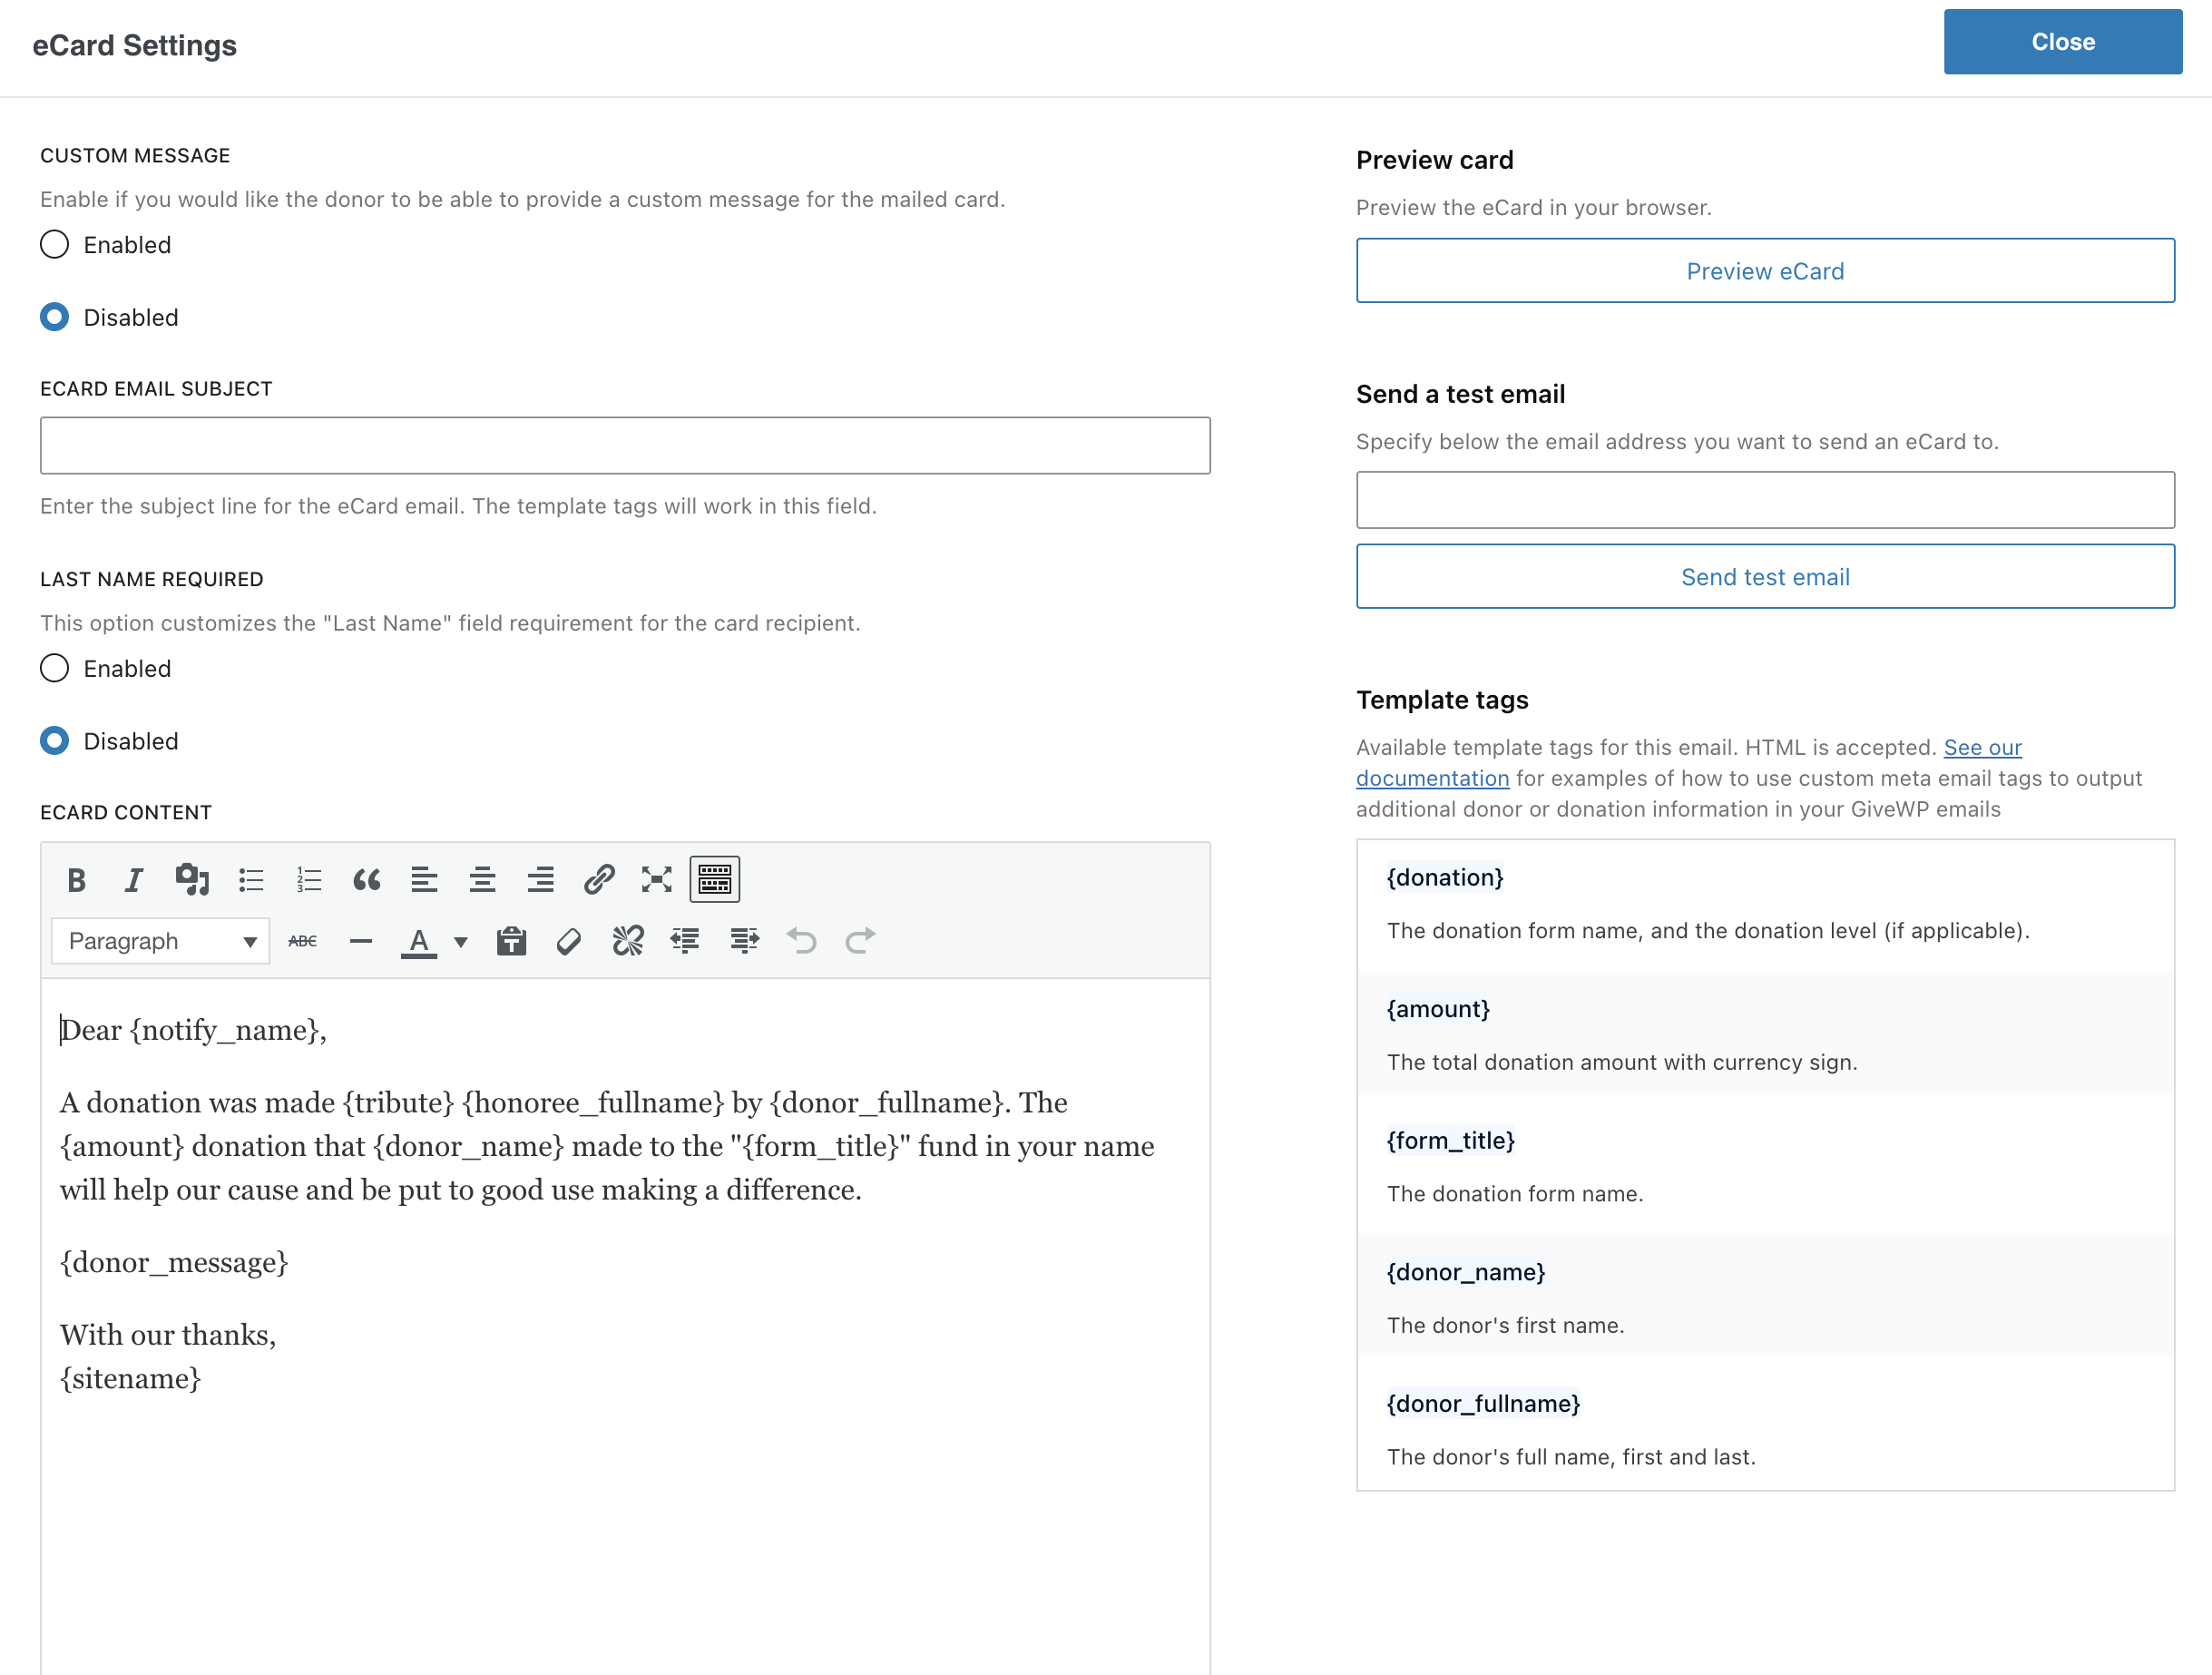
eCard Settings
Custom Message
Settings Type: Radio buttons
Options: Enabled | Disabled
Default: Disabled
Description: If you want to give your donors the option to enter a custom message in their eCard, enable this setting. Once enabled, you will have the option to set the maximum length of the message with the “Message length” setting.
Message Length
Settings Type: Number field
Default: 255
Description: This setting allows you to adjust the maximum number of characters the custom tribute message can hold.
ECard Email Subject
Settings Type: Text field
Default: Empty
Description: This setting allows you to enter the subject line for the eCard email. You can use the template tags displayed in the “Template Tags” section.
Last Name Required
Settings Type: Radio buttons
Options: Enabled | Disabled
Default: Disabled
Description: This setting controls whether or not the “Last Name” for the card recipient is required.
ECard Content
Settings Type: WYSIWYG text editor
Default: Empty
Description: This is the eCard message that will be sent to the Honoree. Because it is a rich editor, you can use all the editor tools you like to customize this message. Keep in mind that you can use any of the template tags displayed in the “Template Tags” section.
Logo Graphic
Settings Type: File upload
Default: Empty
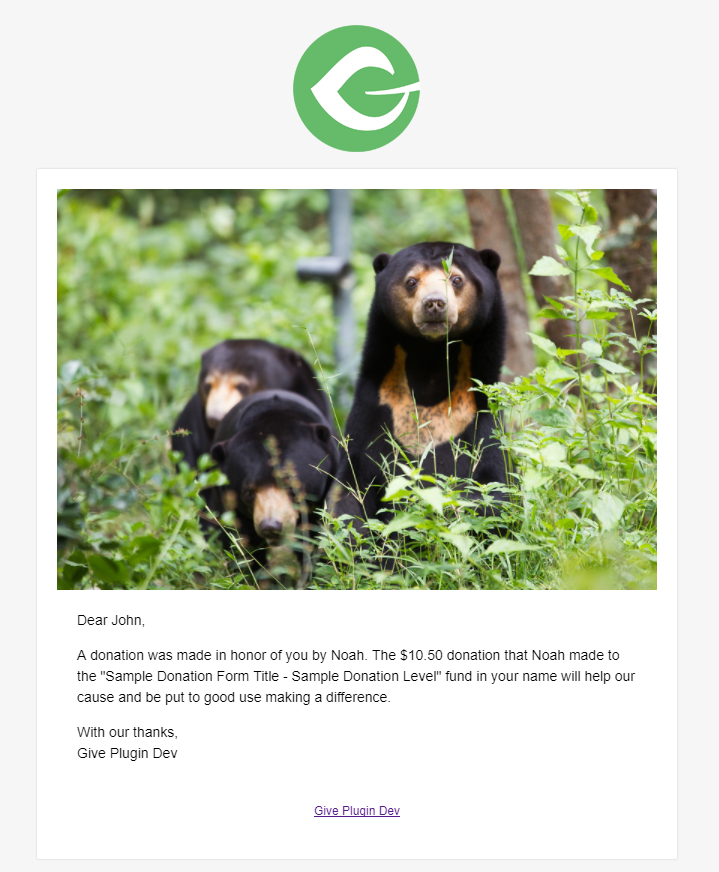
Description: This field allows you to upload your own custom logo graphic which will be included at the top of your eCard. Here’s a preview of an eCard with the GiveWP logo placed at the top.

ECard Header Graphic
Settings Type: File upload
Default: Empty
Description: This setting allows you to upload the image of your choice as the header of the eCard. In the preview image above that is the image with the bears.
Preview eCard
Settings Type: Action Button
Default: NA
Description: Clicking this button will open a new window in your browser where you can preview the eCard.
Send a test email
Email address
Settings Type: Text box
Default: Empty
Description: Use this setting to enter the email address you would like to send the test eCard.
Send test email
Settings Type: Action Button
Default: NA
Description: Clicking this button will send an eCard email to the email address entered
Template Tags
Settings Type: NA
Description: This section contains a list of all the available tags that you can use for both the “ECard Email Subject” and “ECard Content” settings. You have the option to copy and paste each tag.
Note: The eCard settings are not saved until you close the “Customize eCard” window.
Tributes for V1 and V2 Forms
Note: Are you seeing an option for Mail a Card? Uh oh, time to update your Tributes add-on! This feature is no longer supported. Please update at your earliest convenience.
Tributes Settings
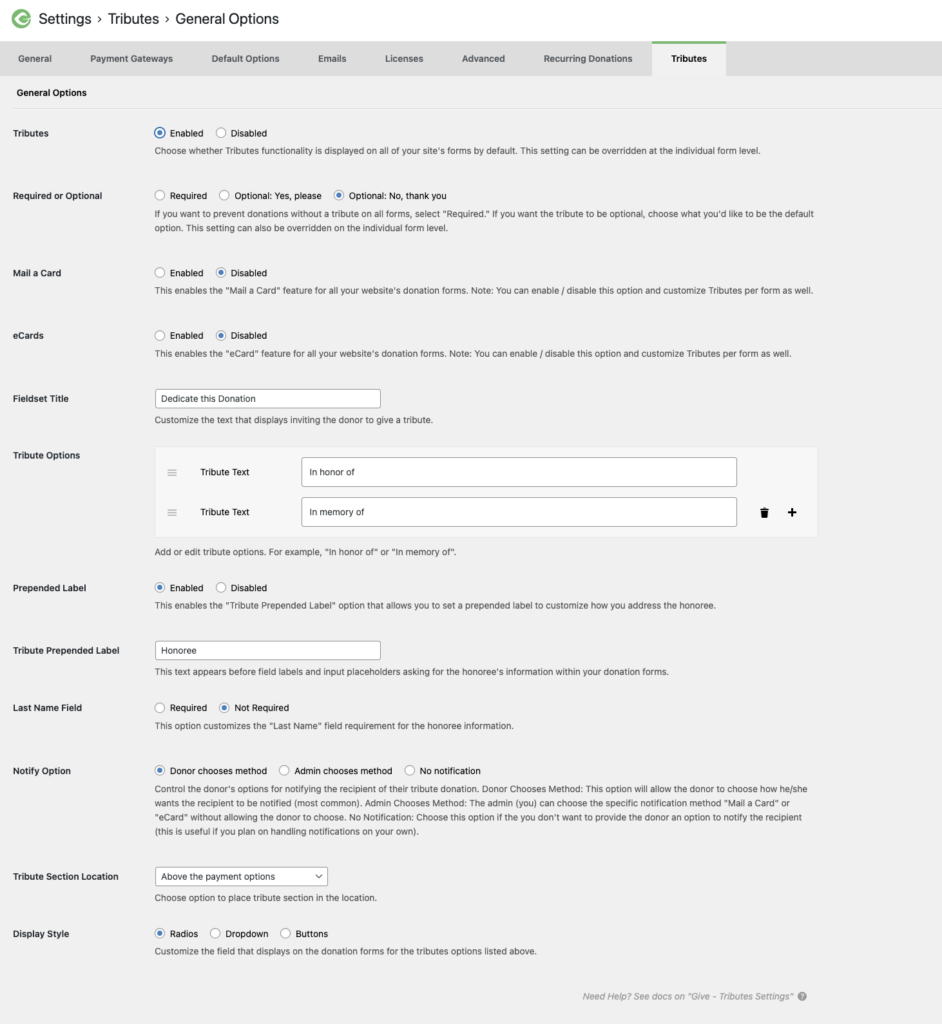
The General settings screen for the Tributes Add-on allows you to set site-wide globals for how all your forms handle Tributes. Keep in mind that all settings can be customized per-form as well.
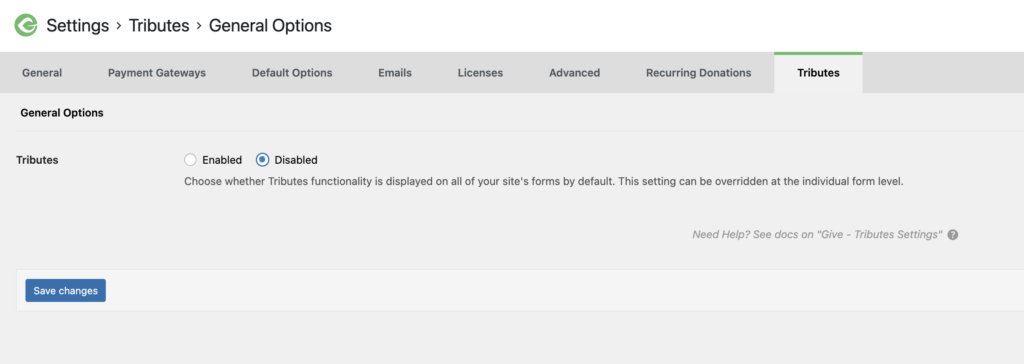
Enable Tributes
Settings Type: Radio buttons
Options: Enabled | Disabled
Default: Disabled
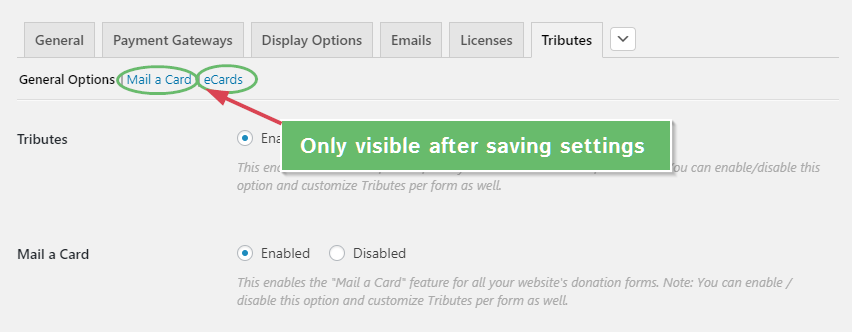
Once you activate GiveWP Tributes, you’ll be able to see the settings screen above, found in GiveWP > Settings > Tributes. But nothing will yet be enabled. To enable Tributes for your forms and/or eCards or Mail a Card, enable Tributes here.
Once you select “Enable” for Tributes, you’ll see all the general settings available to you. These General settings serve as defaults for all your forms but can be over-written per-form as well.
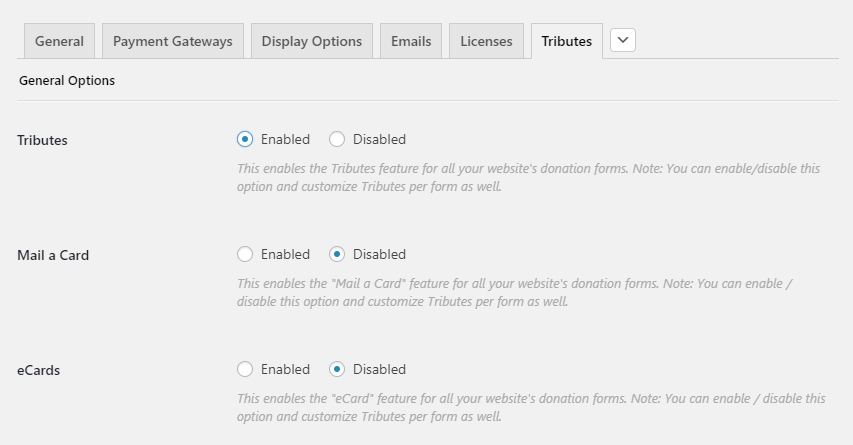
eCards
Settings Type: Radio buttons
Options: Enabled | Disabled
Default: Disabled
If you’d like to give your donors the ability to have a customizable eCard emailed to their loved one automatically, set this to “Enabled”. Similarly to the “Mail a Card” setting, the sub-menu item will only appear once this setting is enabled.
Fieldset Title
Settings Type: Text field
Default: “Dedicate this Donation”
This is the title that will appear directly in your form above the Tribute options.
Tribute Options
Settings Type: Repeater field, text field
Default: “In honor of” and “In memory of”
This setting allows you to create as many custom tribute types as you like. By default the most common tribute types are included: “In honor of” and “In memory of”. To add more simply click on “Add Tribute Option” and give your new Tribute type a name. You can also simply change the names of the default Tributes. You can also delete Tribute types by clicking on the “Trash” icon.
Tribute Prepended Label
Settings Type: Text field
Default: “Honoree”
This is the label that appears before the tribute name on the frontend GiveWP donation form.
Tribute Section Location
Settings Type: Dropdown field
Options: Below the donation level fields | Below the top donation amount field | Above the payment options | Below the payment options | Above the personal info fields | Below the personal info fields | Above the credit card fields | Below the credit card fields
Default: Below the personal info fields
This setting allows you to choose where in the donation form you would like the Tribute options to appear. This is a handy guide to understand the positions well:

Display Style
Settings Type: Radio buttons
Options: Radios | Dropdown | Buttons
This setting dictates the display style of your Tribute options. Similarly to GiveWP’s multi-level options, you can display the Tribute options as inline Radio buttons, a dropdown (select field), or as buttons.
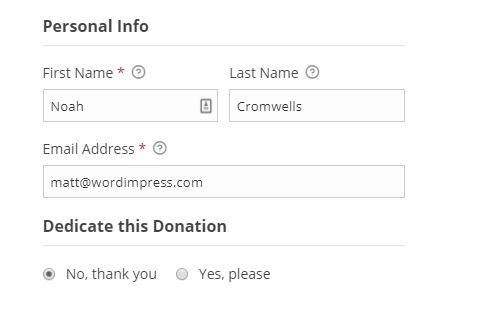
Required or Optional
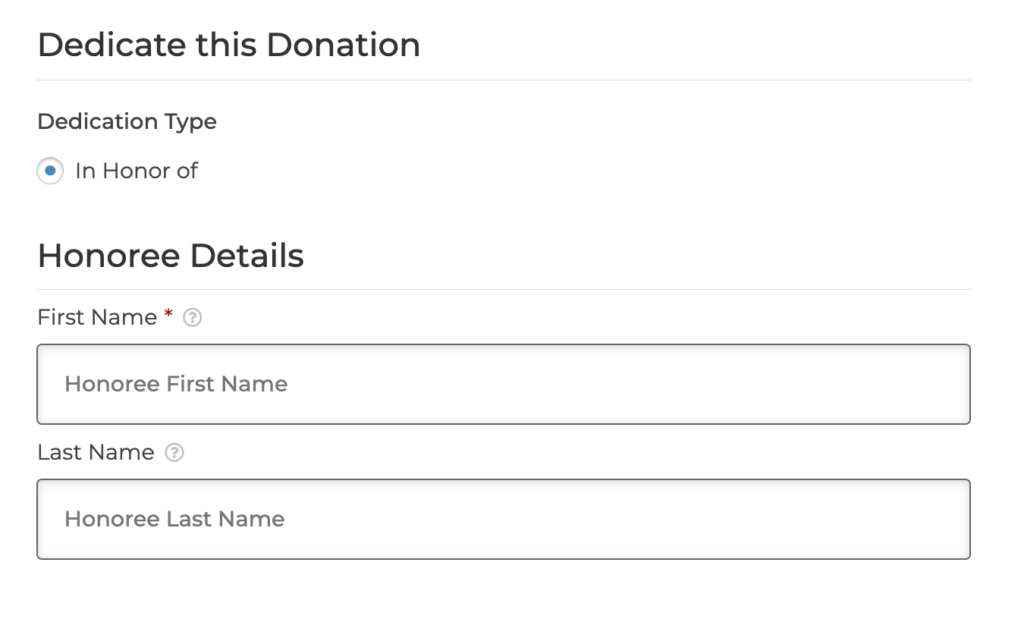
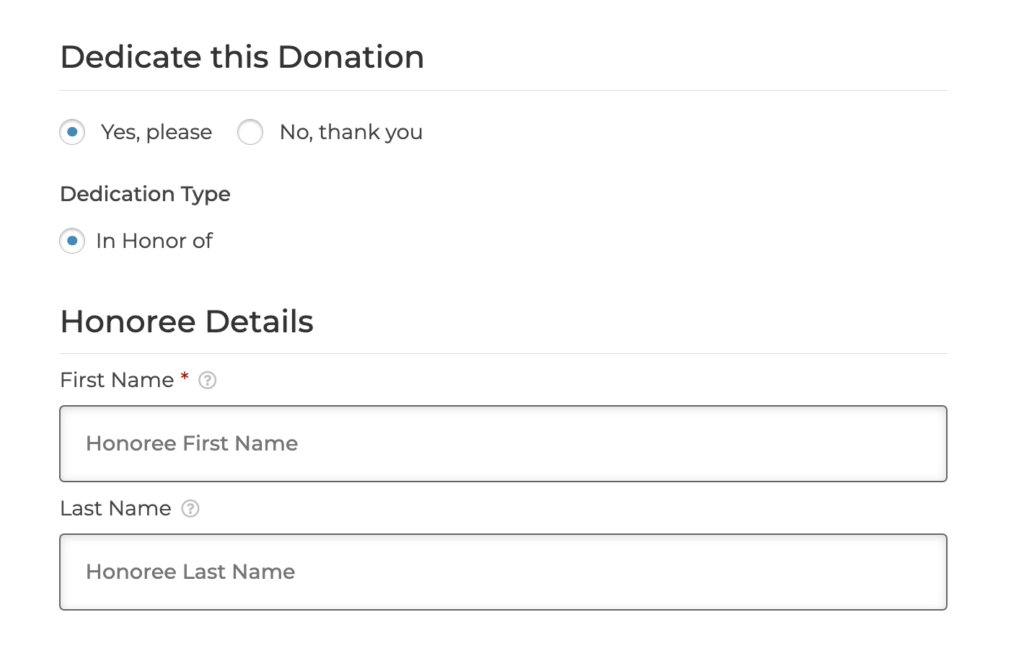
The Required or Optional section of the Tributes add-on provides you the ability to make Tributes required to complete the donation, pre-selected as yes, or pre-selected as no.
When Tributes is set to “required”, the fields will automatically display on your donation form. The button for Dedication Type will be auto-selected.
When Tributes is set to Optional: Yes, the button will be automatically set to “yes”, and fields will be displayed for donors to complete.
When Tributes is set to “Optional: No, thank you”, no fields will display, and the button will be set to “no”.

Enable eCards
Once Tributes are enabled, you’ll need to enable eCards. After saving your settings, on page refresh you’ll see a new sub-menu item to set your eCard settings.
The Tributes eCards feature allows you to give your donors the ability to have an eCard emailed to their Honoree with a custom message automatically.
Note: This screen will only be visible if you’ve enabled “eCards” in the Tributes General options screen found in GiveWP > Settings > Tributes.
Custom Message
Settings Type: Radio buttons
Options: Enabled | Disabled
Default: Disabled
This options provides your donors with the ability to set their own custom message in the eCard.
eCard Email Subject
Settings Type: Text field
Default: “{donor_name} just gave {amount} {tribute} you!”
This is the subject line of the eCard that is emailed to the Honoree. Keep in mind that you can use any of the email tags available to you here. See the “eCard Content” section below for a list of all email tags available.
Multiple eCard Recipients
Settings Type: Radio buttons
Options: Enabled | Disabled
Default: Disabled
This option allow the donors to provide multiple notification names and emails for their dedicated donation. This will send a dedication email to each notification recipient the donor provides.
Logo Graphic
Settings Type: Image upload field
Default: Empty
This field allows you to upload your own custom logo graphic which will be included at the top of your eCard. Here’s a preview of an eCard with the GiveWP logo placed at the top.
eCard Header Graphic
Settings Type: Image upload field
Default: Empty
This setting allows you to upload the image of your choice as the header of the eCard. In the preview image above that is the image with the bears.
eCard Content
Settings Type: WYSIWYG Editor
Default:
Dear {honoree_name},
A donation was made {tribute} you by {donor_name}. The {amount} donation that {donor_name} made to the “{form_title}” fund in your name will help our cause and be put to good use making a difference.
With our thanks,
{sitename}
This is the eCard message that will be sent to the Honoree. Since it is a rich editor you can use all the editor tools you like to customize this message, including adding additional images.
You can also use any of the following email tags within the message to add dynamic information into your eCard message:
{donation}– The donation form name, and the donation level (if applicable).{amount}– The total donation amount with currency sign.{form_title}– The donation form name.{donor_name}– The donor’s first name.{donor_email}– The donor’s email address.{donor_fullname}– The donor’s full name, first and last.{tribute}– The tribute choice given by the donor.{honoree_name}– The name of the honoree.{honoree_fullname}– The full name of the honoree.{card_address}– The address of the honoree.{sitename}– The name of your site.{download_card}– The PDF Download link.
These tags can also be used in the eCard Subject line.
Preview eCard
Settings Type: Action Buttons
Default: NA
There are two ways that you can preview your eCards.
- Preview eCard — this will open a new window in your browser where you can preview the eCard live. At the top of the screen is a dropdown of all your recent donations so you can see what the eCard would look like populated with that specific information. This is a nice option that doesn’t require sending an email.
- Send Test Email — this will send an actual eCard email to your user account email address.
Fieldset Title
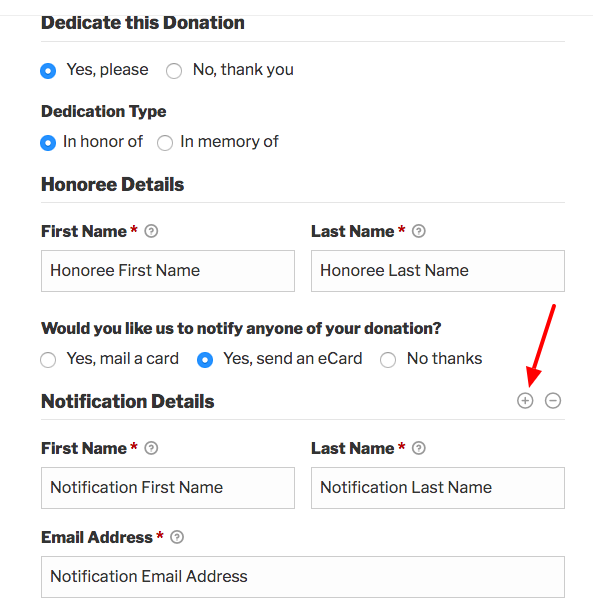
The Fieldset Title defaults to the text “Dedicate this Donation”. This field is editable, any text of your choice can be entered to customize your dedication section.

In the example below, the Fieldset Title has been changed from “Dedicate this Donation” to “Donations for the Mason Wedding”:

Tributes Notification Option
With this option, you can provide your donor with a method of notifying the recipient of their tribute donation. This can be donor’s choice, admin’s choice, or no notification at all.
These notifications can be set per-tribute type.

Tributes Section Location
The Tributes Section Location features a pop up menu with a list of options for locations where you can display Tributes fields.

Tributes Reporting Features
If your donors want you to mail cards on their behalf, you’ll want a way to manage those. GiveWP Tributes has powerful reporting features that makes printing your card and tracking whether they are mailed or not as simple as a few clicks.
Additionally, you can track what eCards were sent on your donors’ behalf as well.
Tribute Reports
The Tributes Reports are found under the Legacy Reports within GiveWP. You can find all Tribute Reports by going to GiveWP > Reports > Legacy Reports > Tributes. There you’ll find different sub-menu links depending on what features of Tributes you have enabled. When all features are enabled you’ll see these options:
- Tribute Donations
- eCards
The Tribute Donations Report
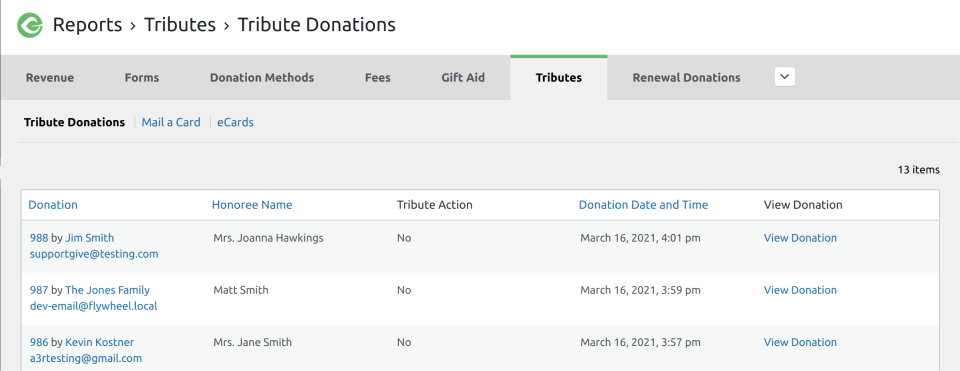
This report simply lists all donations that you’ve received that have a Tribute named in one form or another. This table can be sorted by the Donation ID, Honoree Name, or the Date/Time.
The eCard Report
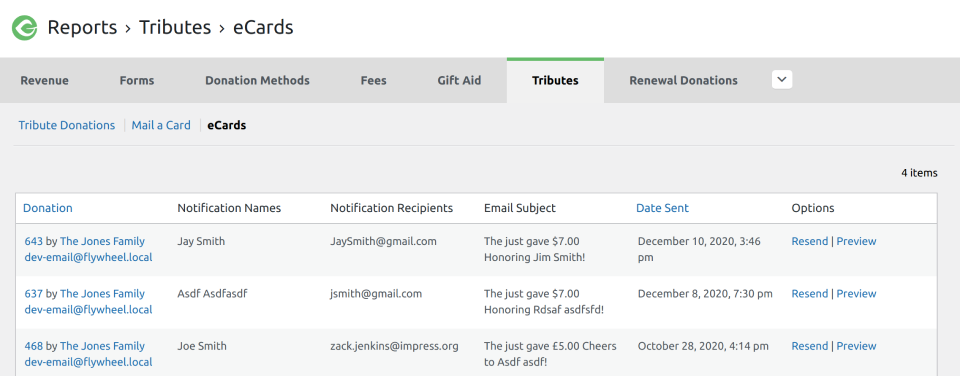
This report lists all donations that were made where an eCard was sent. The table can be sorted by the date the eCard was sent or by the Donation ID. The “Options”
FAQ
Mail a Card
Settings Type: Radio buttons
Options: Enabled | Disabled
Default: Disabled
If you’d like to have the ability to mail a physical and customizable card, set this to “Enabled”. Once enabled, you’ll see a new sub-menu item where you can configure your settings for the Mail a Card feature.
The eCards and Mail a Card sub-menu items visible after saving settings.
The Tributes “Mail a Card” feature allows you to give your donors the ability to have a physical card mailed to their Honoree. You can opt to have the card mailed by your organization or provide the donor with a PDF so they can print it and mail it themselves.
Below is an explanation of all settings on the “Mail a Card” settings page.
Who Sends the Card
Settings Type: Radio buttons
Options: The Admin | The Donor
Default: The Admin
This setting dictates who will by default physically mail the card. If you opt for the Admin to send the card, the donor will be informed on the donation confirmation page that your organization will be sending the card to the Honoree on their behalf.
Custom Message
Settings Type: Radio buttons
Options: Enabled | Disabled
Default: Enabled
Visibility: Always
This setting dictates whether you allow the donor to add a custom message directly to the card to the donor.
Message length
Settings Type: Number field
Default: 255
Visibility: Only when “Custom Message” is “Enabled”
This limits the number of allowable characters for the donor to input into the custom message field.
Card Creation
Settings Type: Radio buttons
Options: Enabled | Disabled
Default: Disabled
Visibility: Only when “Who Sends the Card?” is set to “The Donor”
Enable this if you want to create a card directly in your GiveWP settings that the donor can then download to print and mail themselves.
Card Layout
Settings Type: Select field
Options: Portrait Card | Landscape Card
Default: Portrait Card
Visibility: When the Admin sends the card, or if “Card Creation” is “Enabled”
This determines the orientation of your card, either as a vertical Portrait layout, or horizontal Landscape layout.
Card Sizes
Settings Type: Multi-select Checkboxes
Options: Letter | A4 | A5 | A6
Default: Letter
Visibility: When the Admin sends the card, or if “Card Creation” is “Enabled”
This allows you to choose what paper sizes you want to generate the PDF cards in. Note that you can enable more than one size. This is particularly useful for your donors who might want to mail a different size card.
Choose Card Font
Settings Type: Select field
Options: Courier | Helevtica | Times New Roman
Default: Helvetica
Visibility: When the Admin sends the card, or if “Card Creation” is “Enabled”
This determines the font-face for the text in your PDF card.
Card Graphic
Settings Type: Image upload fieldDefault: Empty
Visibility: When the Admin sends the card, or if “Card Creation” is “Enabled”
This is the image that will appear, full-bleed, as the cover of your physical card. Keep in mind that it’s best to upload an image that is set to the same orientation as the layout option you set above.
Card Content
Settings Type: WYSIWYG text editor
Visibility: When the Admin sends the card, or if “Card Creation” is “Enabled”Default:
{donor_name} gave {tribute} you!
The {amount} donation that {donor_name} made {tribute} is going to help fund our cause and will be put to good use making a difference.
This is the actual message that will appear on the inside of your physical card. Keep in mind that you can use any of the following template tags to output dynamic text directly in the card message:
{donation} – The donation form name, and the donation level (if applicable).{amount} – The total donation amount with currency sign.{form_title} – The donation form name.{donor_name} – The donor’s first name.{donor_email} – The donor’s email address.{donor_fullname} – The donor’s full name, first and last.{tribute} – The tribute choice given by the donor.{honoree_name} – The name of the honoree.{honoree_fullname} – The full name of the honoree.{card_address} – The address of the honoree.{sitename} – The name of your site.{download_card} – The PDF Download link.Card Back Graphic
Settings Type: Image upload fieldDefault: Empty
Visibility: When the Admin sends the card, or if “Card Creation” is “Enabled”
This will add your custom image to the back of the card. It’s a good place to add your organization’s logo, for example.
Card Back Text
Settings Type: Text fieldDefault: “Thank you for giving to {your website name}”
Visibility: When the Admin sends the card, or if “Card Creation” is “Enabled”
This allows you to output custom text to the back of your card, below the custom logo.
Receipt Content
Settings Type: WYSIWYG text editor
Visibility: When the Admin sends the card, or if “Card Creation” is “Enabled”Default:
Thank you for your donation {tribute} {honoree_name}. Per your request, we will send the honoree a card to this address: {card_address}
You will receive a confirmation email once your card has been mailed.
This is the message that is displayed on the Donation Confirmation page above the donation receipt. This informs the donor of the action that can be taken to mail the card. The default text is populated to reflect whether the Admin or the Donor is sending the card.
This message also supports the following template tags:
{donation} – The donation form name, and the donation level (if applicable).{amount} – The total donation amount with currency sign.{form_title} – The donation form name.{donor_name} – The donor’s first name.{donor_email} – The donor’s email address.{donor_fullname} – The donor’s full name, first and last.{tribute} – The tribute choice given by the donor.{honoree_name} – The name of the honoree.{honoree_fullname} – The full name of the honoree.{card_address} – The address of the honoree.{sitename} – The name of your site.{download_card} – The PDF Download link.Preview Card
Settings Type: Action button
Clicking this button will open a new tab in your browser where the PDF will be generated dynamically.
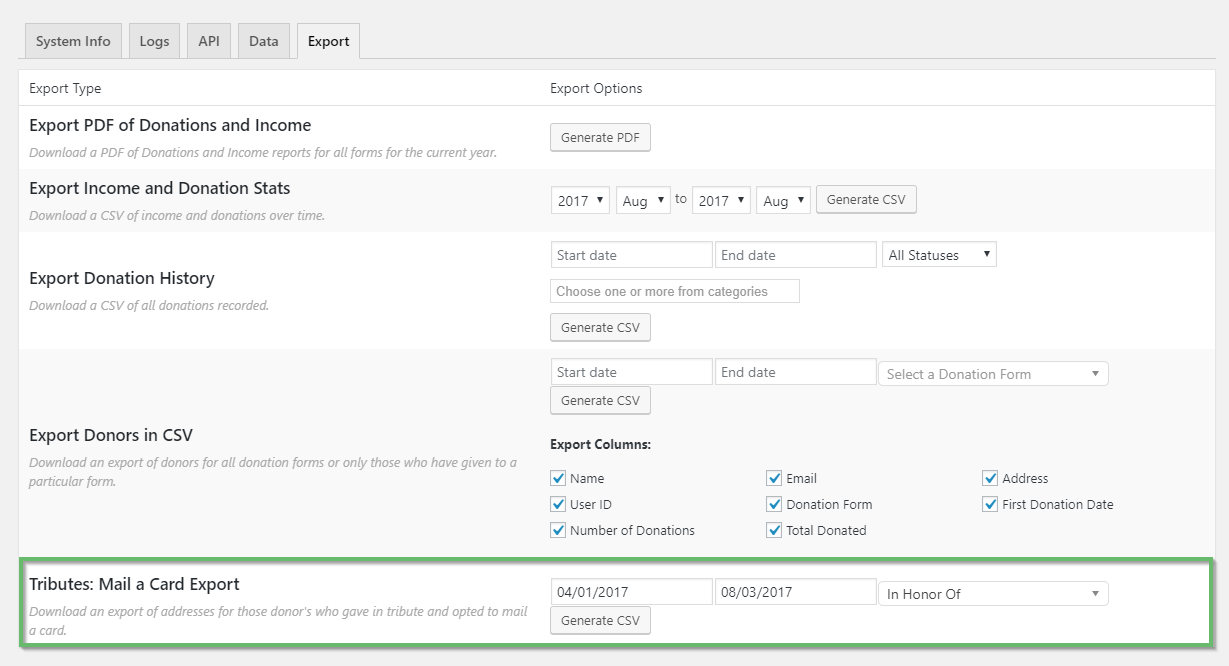
Tributes: Mail a Card Export
Perhaps your workflow is to mail your cards to honorees once a week at the same time. Perhaps you want to print labels for all your cards. The easiest way to do that is to have a CSV file of all your Tributes for a given time period. GiveWP Tributes enables you to do that with our export feature. You’ll navigate to GiveWP > Tools > Exports.
The GiveWP Tributes Mail a Card Export tool.
With this tool you can set your date range, and which form you’d like to have the honoree information from and then click “Generate CSV”. Then you can use that for your labels or any other purpose to assist with your mailings.
Global Tribute settings do affect newly created V3 forms, but only in terms of whether the feature is enabled or disabled. For example, if Tributes are enabled globally, the Tributes block will be added automatically to any new V3 form.
Important: Changing the global Tribute settings will not update the Tribute configuration for existing forms. Each form’s Tribute settings are managed individually.
Note: If the donation is recurring, the meta data will appear in the initial Stripe invoice created for the subscription, not on the transaction payment entry.
We recommend adding PHP code snippets to your website via a code snippet plugin. We use this one https://wordpress.org/plugins/code-snippets/, however, there are many available that can work.
Also, if you need assistance implementing custom PHP code on your website we have this guide: https://givewp.com/documentation/resources/adding-custom-functions-to-your-wordpress-website/.
Please note that this code snippet is provided as an example of how you can extend GiveWP with code. It’s up to you to implement and customize to your liking. We cannot provide support for custom code on your website, only the code that we create and distribute.
add_filter('give_stripe_prepare_metadata', function($args, $donationId) {
return array_merge($args, [
'Tribute Type' => give()->payment_meta->get_meta($donationId, '_give_tributes_type', true),
'Tribute First Name' => give()->payment_meta->get_meta($donationId, '_give_tributes_first_name', true),
'Tribute Last Name' => give()->payment_meta->get_meta($donationId, '_give_tributes_first_name', true),
'eCard First Name' => give()->payment_meta->get_meta($donationId, '_give_tributes_ecard_notify_first_name', true),
'eCard Last Name' => give()->payment_meta->get_meta($donationId, '_give_tributes_ecard_notify_last_name', true),
'eCard Email' => give()->payment_meta->get_meta($donationId, '_give_tributes_honoree_ecard_email', true),
]);
}, 10, 2);


