Import Donations
GiveWP has a built-in ability to import donations and donation forms from CSV. This document will walk you through how to do that.
Exporting donations from one GiveWP site and importing them into another is not the recommended way to transfer donation data. The import tool does not support Recurring Donations, and using donation IDs can create conflicts, leading to donor profile mismatches.
Moving your database and files at one time is the safest method of moving donations, and the only method for moving all subscriptions at one time. Learn more about safely transferring your data in the Site Redesigns Without Donation Data Loss documentation.
Import Donations
The “Import Donations” tool allows you to import donations and forms from your previous donations platform into GiveWP. Imported files must be in CSV format and have a validly formatted entry for each donation for the following required fields: Email Address, First Name, Donation Amount, or Form Title. It works by allowing you to map the columns of your CSV file to any GiveWP field, so you can import as much or as little information as you like. The first step to running an import is to click on the “Import CSV” button.
Step 1: Import Donations and Forms from a CSV file
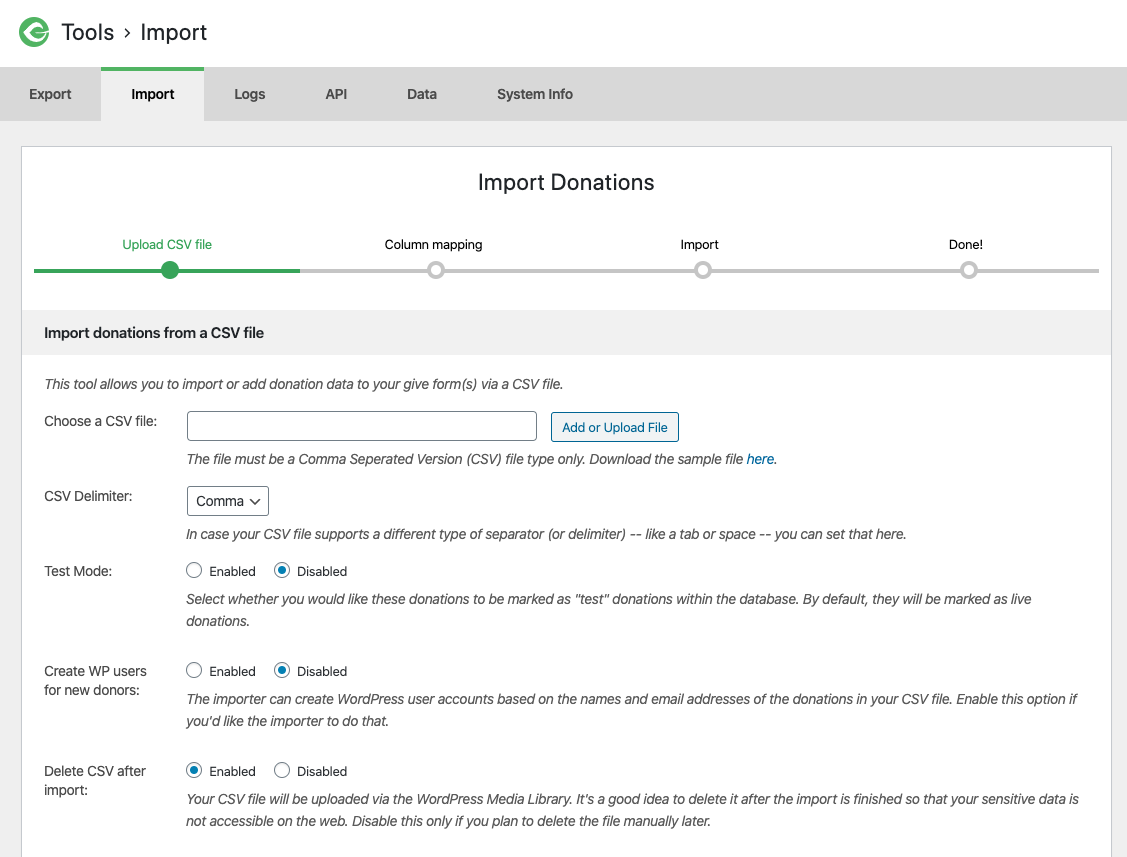
This is the first step in using the Donations importer. Here you’ll upload your CSV file and choose a few simple settings.
Choose a CSV file
Settings type: Upload field
Supported file type(s): CSV only
This allows you to upload your CSV file directly to your Media Library. Note that uploading to the Media Library creates a URL for this file which is accessible via the web for anyone who knows that URL. This is why you’ll see the “Delete CSV after import” option below.
CSV Delimiter
Settings type: Text field
Default: “,” (Comma)
By default, most Comma Separated Version (CSV) files use commas for indicating when a new column and/or row occurs in the file. But CSV files also support tabs and spaces. If the file you are working with uses tabs and spaces you can indicate that here.
Test Mode
Settings type: Checkbox
Default: Unchecked
With this setting, you can run the import tool and it will return an explanation of the types of changes that will be made to your site without actually importing anything or changing your database at all. This is helpful to know that your CSV file is properly formatted and that you get the expected number of donations before actually running the import.
Create WP users for new donors
Settings type: Checkbox
Default: Unchecked
The importer can create WordPress users for you automatically based on the name and email address of the donors associated with your donations. Keep in mind that this will necessarily mean the import process will take longer. But once all donations are imported and donors created, the new WordPress users will also be associated with their donations and donor profiles and thus be able to login to your site and see their full donation history as well.
Delete CSV after import
Settings type: Checkbox
Default: Checked
After the CSV file is uploaded, it will have a unique URL that is publicly accessible. It is best for the security of your donors to make sure that file is deleted after your import is finished. Leaving this checked is highly advisable.
Process Rows Per Batch
Settings type: Number Field
Defualt: 25
Determines how many rows you would like to import per cycle.
Dry Run
Settings type: Checkbox
Defualt: Checked
Preview what the import would look like without making any default changes to your site or your database.
Step 2: Mapping Columns to Fields
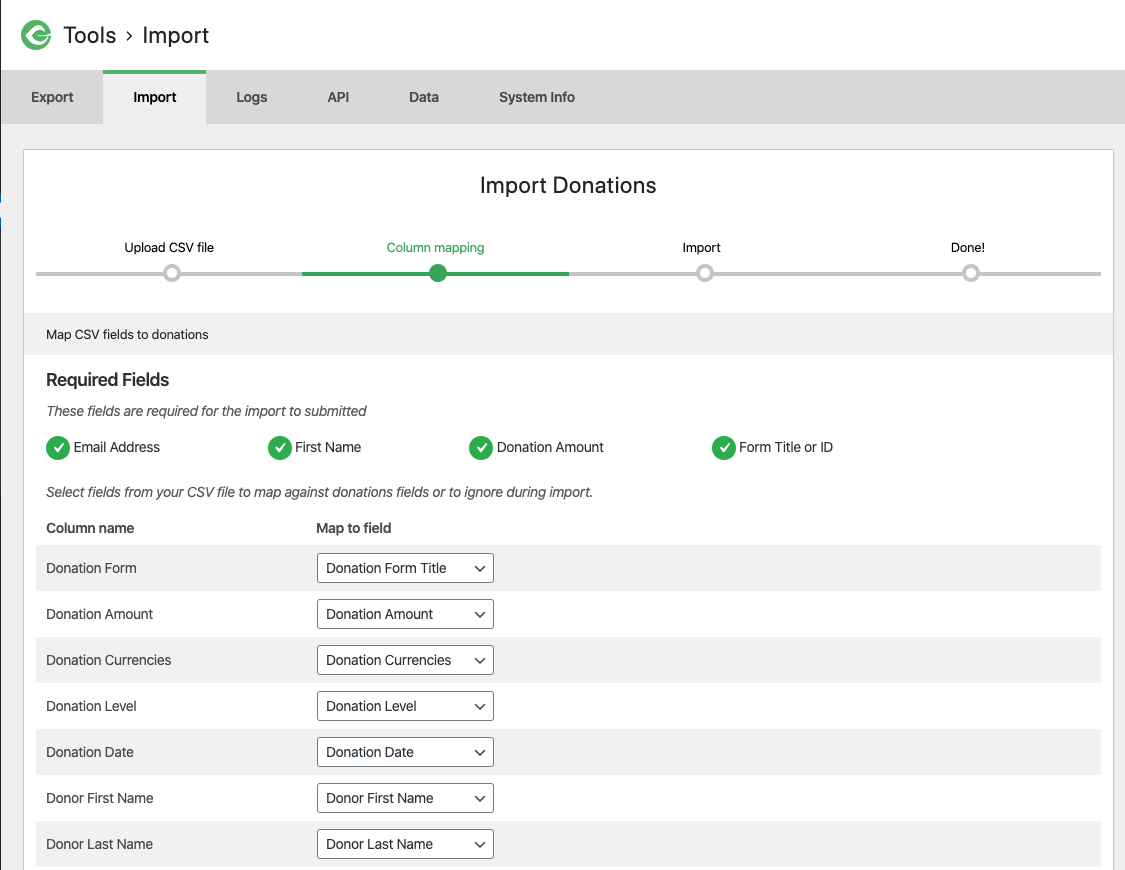
After the CSV is uploaded to the site, GiveWP attempts to match the column headings to related fields within GiveWP. It’s critical that you check to make sure of a few things here:
- The 4 required fields have a column mapped to them: Email, First Name, Amount, and Form Title or ID.
- None of those fields are being mapped from two different columns.
- None of those columns on the CSV contain empty rows.
The import will fail or only partially complete if any of the above pose a problem.
What happens behind the scenes here when you click to import: the tool pulls the data into the WordPress database, and any conflict resulting from it trying to pull two things into the same field metadata will result in the tool skipping that donation.
Note: In most cases, you should not import ID numbers (Donor IDs, Form IDs, Donation IDs, etc) from previous systems (even other GiveWP integrations!). Let the import tool assign new IDs as needed to avoid conflicts.
Step 3: Importing
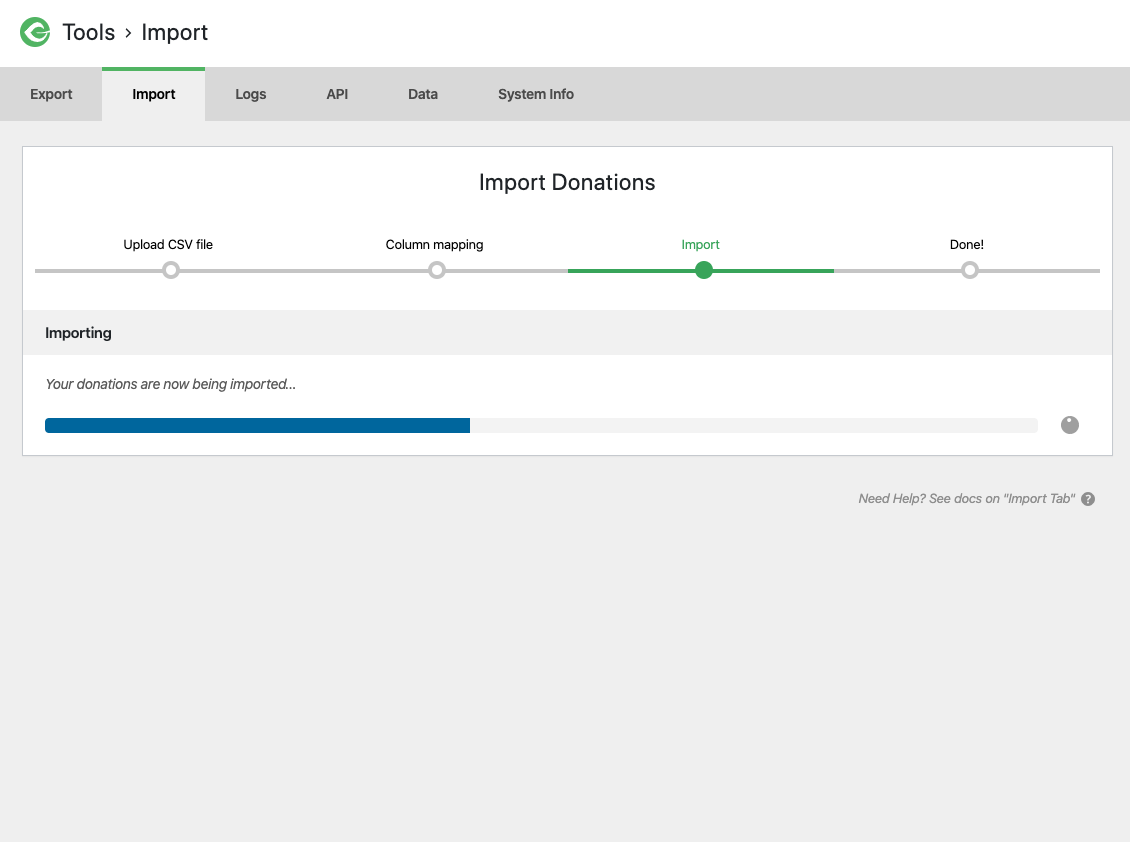
The import process time depends on how many donations you are importing. On most hosting configurations, it happens relatively quickly.
If the process fails at this point, go back to step one and select a smaller number of donations to process in each batch.
Step 4: Success!
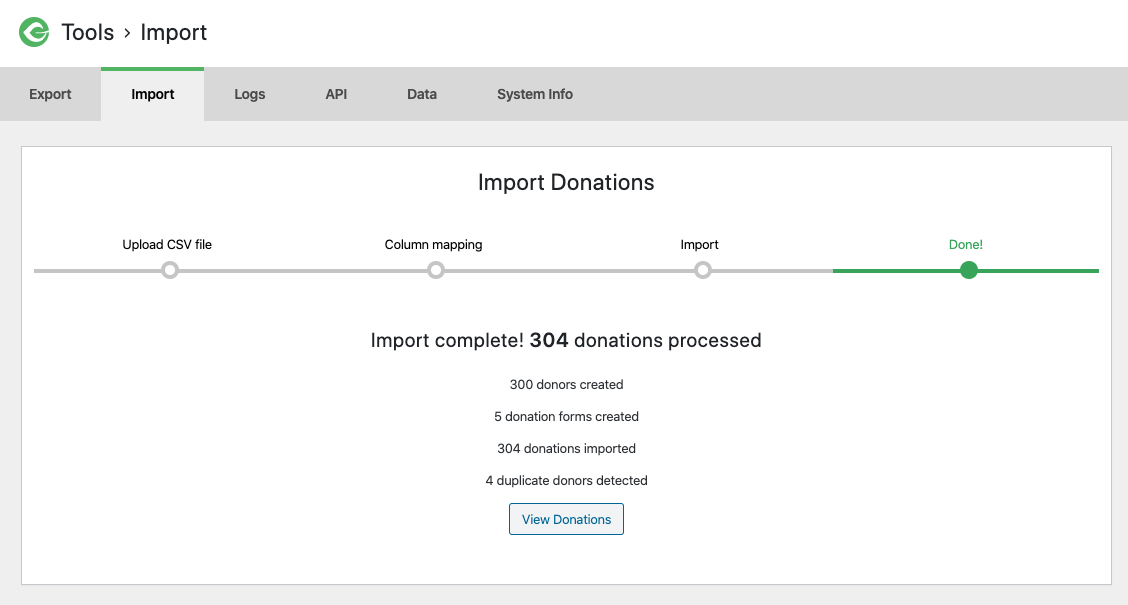
Once your donations are imported, the tool displays the results so that you can confirm the donation happened correctly. It lists Donors, Donation Forms, Donations, and Duplicate Donations.
A duplicate donation means that the tool skipped over a donation because it is for the same amount on the same day (or having the same donation ID) as an existing donation.
If you need to manually add a donation that the importer didn’t get, check out the Manual Donations add-on.


