Exporting Your Seamless Donations Into GiveWP
When planning your migration from Seamless Donations to GiveWP, you can bring over your historical donation and donor data. That’s part of the power of WordPress – you own your donation and donor data!
But how do you get that data to show up correctly in your GiveWP donor, donation, and reports screens?
This article will explain how to export your data from the Seamless Donations plugin, quality checking your resulting CSV file, and using the GiveWP importer to import into the GiveWP plugin.
Tools You Need Before You Start
First, you’ll need a WordPress website that has the Seamless Donations plugin installed, and donor and donation data.
Next, you’ll need to install the WP All Export plugin which will allow you to export your data.
To use GiveWP for online fundraising, install it as you would any other free WordPress plugin. Go to your WordPress admin dashboard and find “Plugins > Add New.”
Then, search for WP All Export in the plugin directory. When you find it, choose “install,” and “activate.”
You’ll also need a way to view and edit CSV (comma-separated value) files. This can be done with Google Sheets, Microsoft Excel, or even something as simple as Notepad.
And lastly, you need to have the free GiveWP plugin. Don’t activate it for now, you’ll want to do that only after you’ve exported your Seamless Donations data.
Once you have all of those ready, let’s jump in.
Exporting Your Donation Data from the Seamless Donations Plugin
Seamless Donations does not have its own export feature. So, in order to export your donor and donation data, you’ll need to use another plugin called “WP All Export”. This is a very powerful and useful way to export data from your WordPress website.
Note: Do not activate GiveWP quite yet.
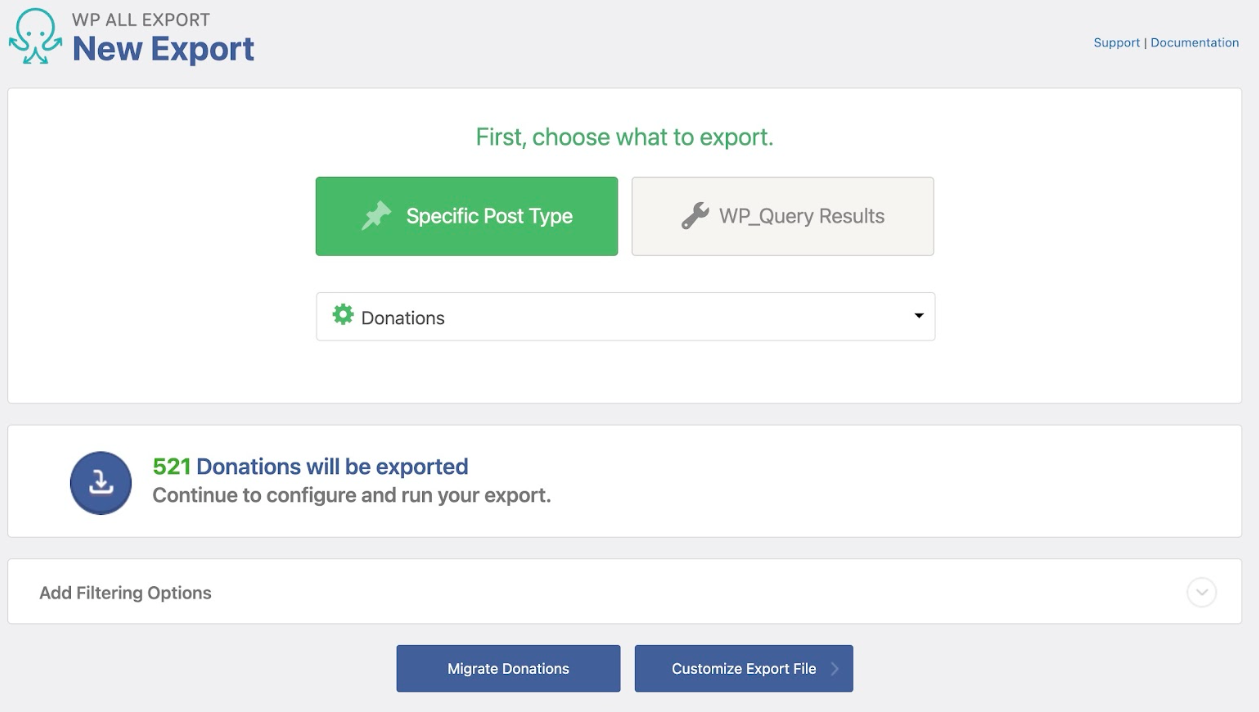
Once you install and activate WP All Export, you’ll see a new “All Export” menu in your dashboard. To begin an export, click that menu and select “New Export.”
From there, you’ll see a screen that lets you choose between Specific Post Types and WP_Query results. Choose “Specific Post Types” and then, from the drop-down menu, choose “Donations.”
Click the blue “Customize Export File” button to move to the next screen. This will give you the opportunity to choose which fields to export.
On the right, you’ll see an “Available Data” section and you want to look at “Custom Fields.” The fields that begin with _dgx_donate are the postmeta fields associated with Seamless Donations. To export donation data, drag All into the field list area.
You may want to find the field entitled _dgx_donate_payment_processor_data and click to delete it. This contains payment-related data that is not necessary for this import.
To complete the export, click the blue “Continue” button to go to the next screen. Then click the green “Confirm & Run Export” button. Once the export has run, you’ll see options for how you want to download it. We recommend clicking the blue “CSV” button to download your list.
Quality Checking Your CSV File
There are three necessary changes you’ll need to make to your resulting CSV to import into GiveWP successfully:
- Update the Date/Time column
- Add a Give Form Title column
- Removing columns you know you won’t need
Update the Date/Time Column
When you export the donations, there is a column named “Title” that the date and time a donation was initiated and received. You’ll want to include that column in your donation data, but the GiveWP importer accepts dates and times separately, not lumped together.
To solve this, you’ll need to use a “Text to Columns” tool to change the date-time column so it is separated into two columns: one that is the “date” and another that is the “time”. Here’s how you do that in Google Sheets (similar to the process in Microsoft Excel).
Create a new empty column to the right of the “Title” column. Select the whole “Title” column by clicking on the column header named “B”. Then, in the menu choose “Data > Split Text to Columns”. This should automatically detect to split by “Space” and you’ll see all the times in the right-hand column, and all the dates in the left-hand column.
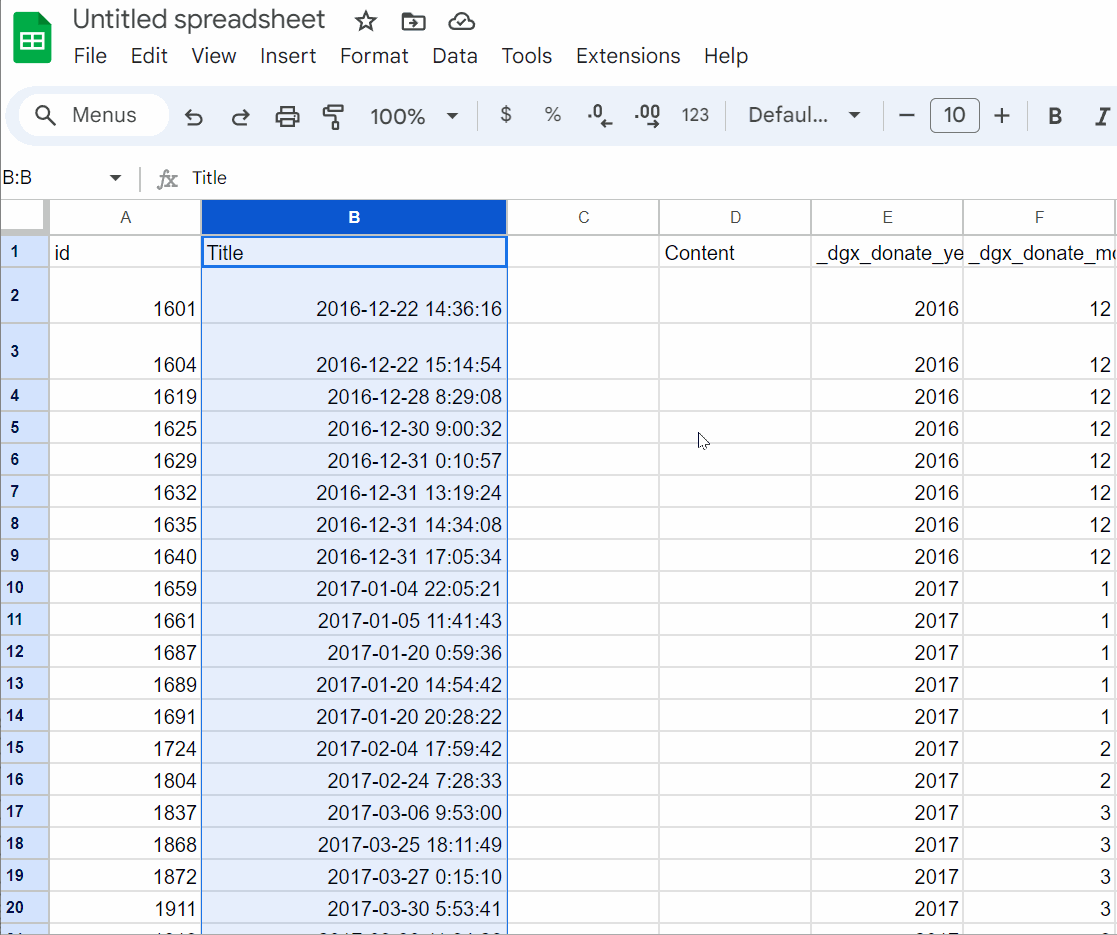
Change the header cell from “Title” to “Date”. In the new column, add “Time” as the column header.
Adding a Give Form Title Column
GiveWP requires every donation to be associated with a form that has a title. Seamless Donation doesn’t have that same concept, so there is no column in your current CSV that you can use for that purpose.
You can add a GiveWP form title column by adding a new blank column, naming it “Form Title” and adding a generic form title in all the cells. In this case, we’re going to call it “General Fund”.
Remove Columns You Know You Won’t Need
When you get to the GiveWP import screen, you’ll have the opportunity to map every column of this CSV file to a field in the GiveWP donations. If you know with certainty that you are not going to import a specific column, you can delete it here in your CSV file. This will save you time when you begin your import.
Once you’ve narrowed the file down to your essential columns, you can save that file. Now, you are ready to run the GiveWP importer.
Importing Your Donation Data Into GiveWP
Now that your CSV is cleaned up nicely, you can follow the directions on our main Import Donations documentation and you are done!
The Importer will do its best to “guess” which fields from your CSV should be mapped to the Give donation data – you’ll want to keep a sharp eye out for this. The Importer makes assumptions that may place data in unexpected columns, so auditing line-by-line will be important.
For example: Seamless Donations supports Honoraria, and it’s easy for the GiveWP Importer to make the assumption that a name indicates a “Donor Name” when it might actually be the “Honorarium Name”. The same may happen with the honorarium address, city, or state. Taking a careful look at your field mapping is crucial.
When you’ve mapped everything correctly, the Importer creates a summary of what is going to happen before you click the final “Import”. This is a good time to cross-check the donation amounts you see in your CSV against what you see in this summary.
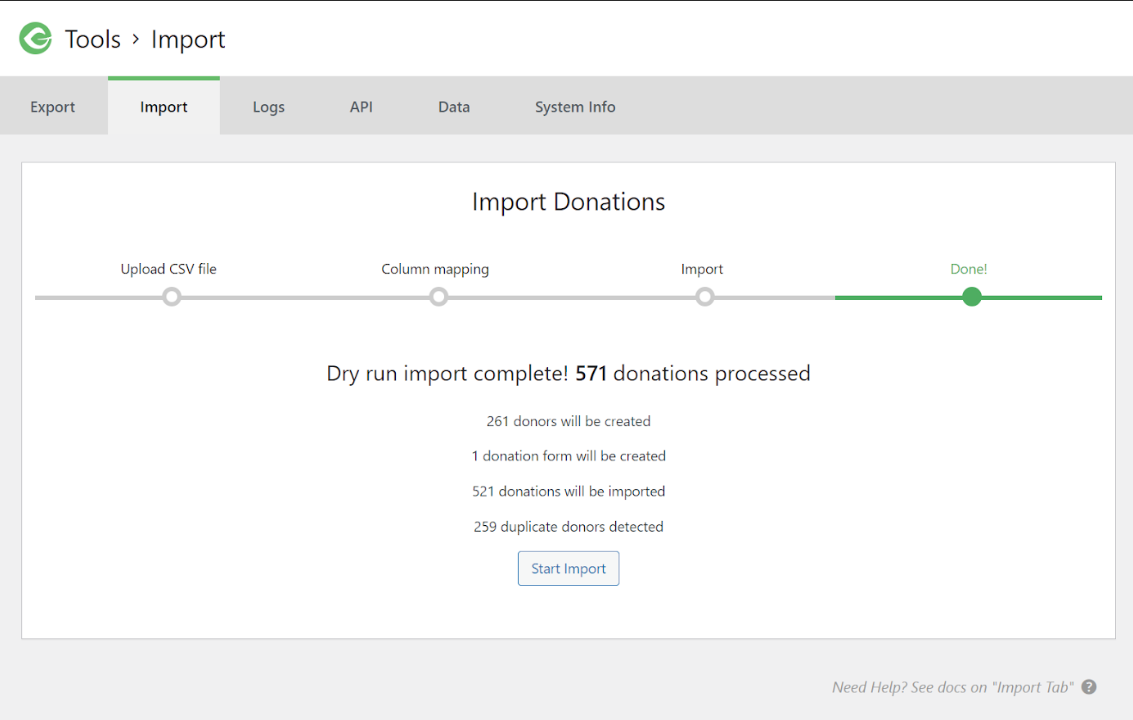
If the summary says that “duplicate donations” or “duplicate donors” have been detected, this is most likely because a required field has been mapped twice. Make sure the required fields are only mapped once in your import.
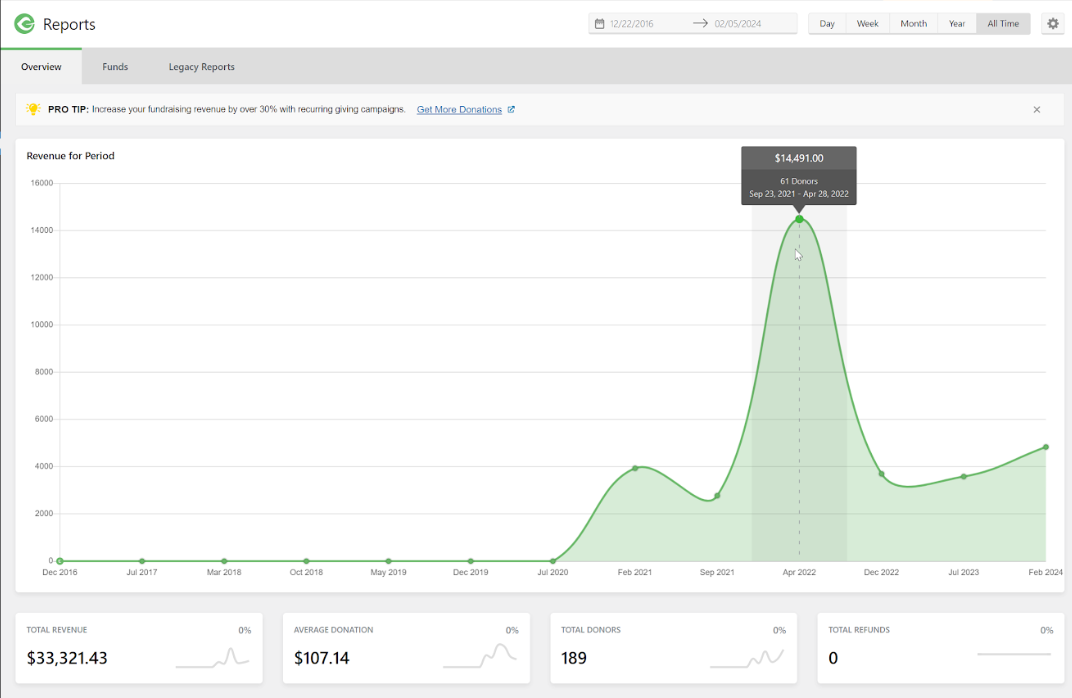
Validate your Import Results
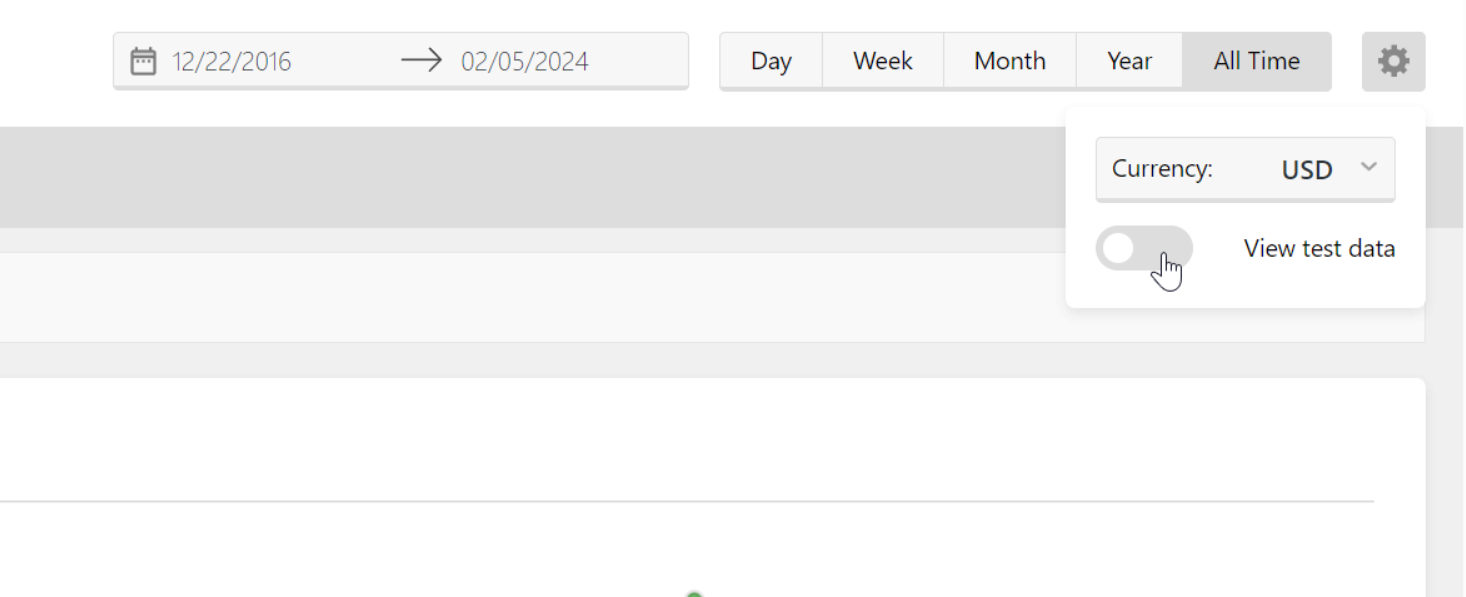
Once your import is finished, go to the “Donors” screen, or the “Donations” screen to validate that you see your donors and donations. You can also go to the “Reports” screen to see an overview of your whole history of giving. Make sure to toggle whether you want to see your “Test Donations” or not.
If all goes well, you should see a report like this: