A/B Testing Donation Landing Pages with Google Optimize
Use the free Google Optimize tool to A/B test your donation landing pages.
Sometimes, the smallest detail can influence whether a donor finally hits that “Donate” button or not. But how can you know what parts of your page should stay, and which should go for best conversions?
Enter A/B testing. We wrote about this previously with Ingot by the Caldera Labs team. This post is provided by our friend at GoDaddy, Andy McIlwain, and covers A/B testing with the new Google Optimize tool.
If you’ve already installed Give, you’re probably tempted to drop that donation form on every single post and page of your website.
You may be thinking to yourself, “The more eyes we have on this, the more likely we are to get some donations!” And while there’s some truth to that, you shouldn’t bet all of your success on visibility alone.
Convincing someone to make a donation is a lot like convincing someone to make a purchase. You have to take that potential donor from first impression through consideration to conversion.
This isn’t easy. But that’s why we have landing pages.
A landing page is a page with a purpose.

A landing page is meant to compel you to take a single, specific action.
When you see an ad, say on Google or Facebook or YouTube, that’s the first impression.
If you click the ad, you’ll probably be taken to a landing page. That landing page is making a sales pitch and hoping you take the time to consider the offer.
All of the landing page elements — layout, color, headlines, images, body copy — exist to support that consideration and convince you to convert.
Now put yourself in the mindset of creating a landing page.
If you’re using Give, your goal is to compel someone to make a donation, and your challenge is to figure out that perfect combination of page elements.
How do you do that? Through research and testing. Lots of it.
How do you test landing page performance?
There are many types of tests that you can run on a landing page. But for now, I’d like to focus on just one: A/B testing.
In basic terms, A/B testing pits two or more versions of a landing page against each other to see which one performs better.
To avoid testing too many things at once, the different landing page versions — or variants — should all be the same, except for whatever element you want to test, like a headline or image.
Then, as visitors come to your landing page, you randomly serve up one version or another to see which one converts the best.
What can you use to run tests?
There are a bunch of testing tools out there, but for this article, we’re going to focus on using Google Optimize. It’s free and integrates with the rest of Google’s marketing suite, which is pretty fantastic if you’re already using Google Analytics or Google Tag Manager.
Let’s break it down.
1. Create your Give landing page.
First things first: You’ll need to create a landing page.
The easiest option is to add a new page in WordPress and just drop in your Give donation form.
A step up from that is to use a landing page or page builder plugin. This’ll give you more control over the page layout, which in turn gives you more to experiment with in your A/B tests.
Personally, I’m a fan of using the GeneratePress theme and its Premium upgrade because of the Disable Elements feature. It lets me disable the site header and site navigation so folks aren’t tempted to click away from my landing page.
2. Set up Google Optimize
Google Optimize requires a Google Analytics account. If you haven’t set up Google Analytics yet, go and create an account and add your website as a Google Analytics property.
After that’s done, head over to optimize.google.com. Log in using your Google account, then follow the prompts to create and activate your Google Optimize account.

You’ll be taken to your Container screen. The Container will contain all of your tests, aka “experiments”. Your Container Information is listed in the panel on the right, alongside steps to complete the setup.
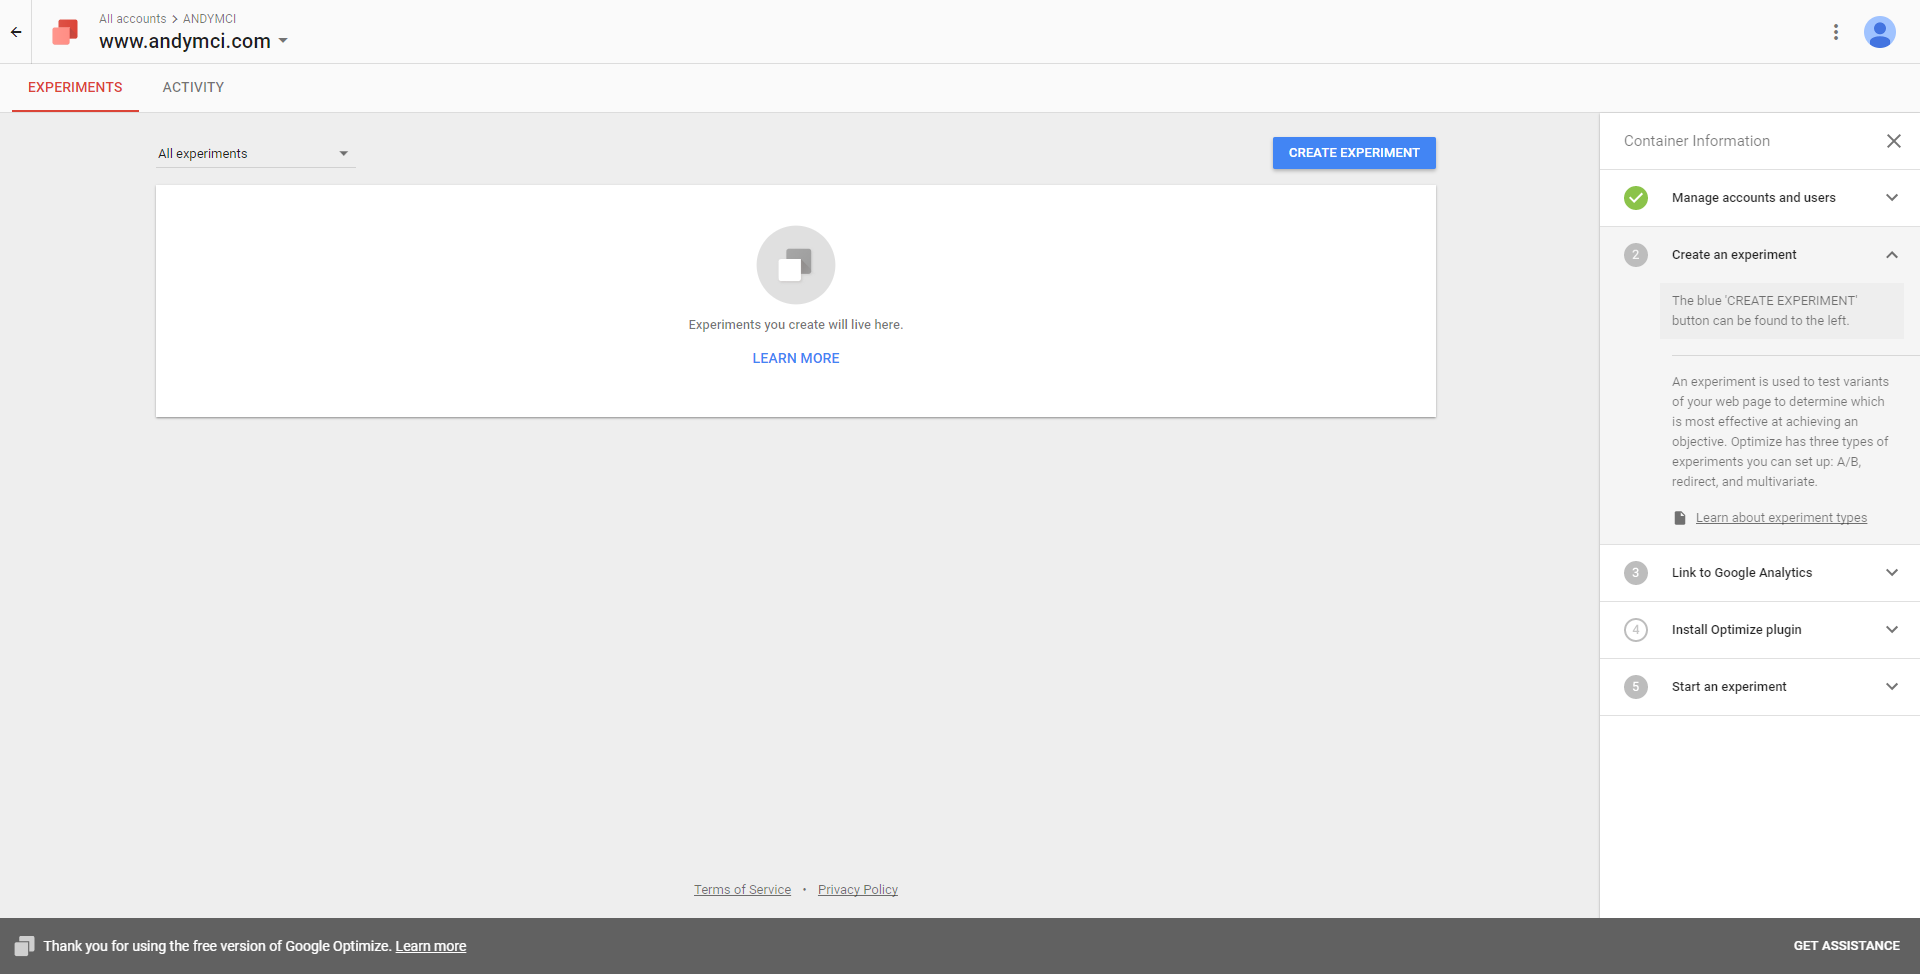
Let’s get this container configured before we go any further.
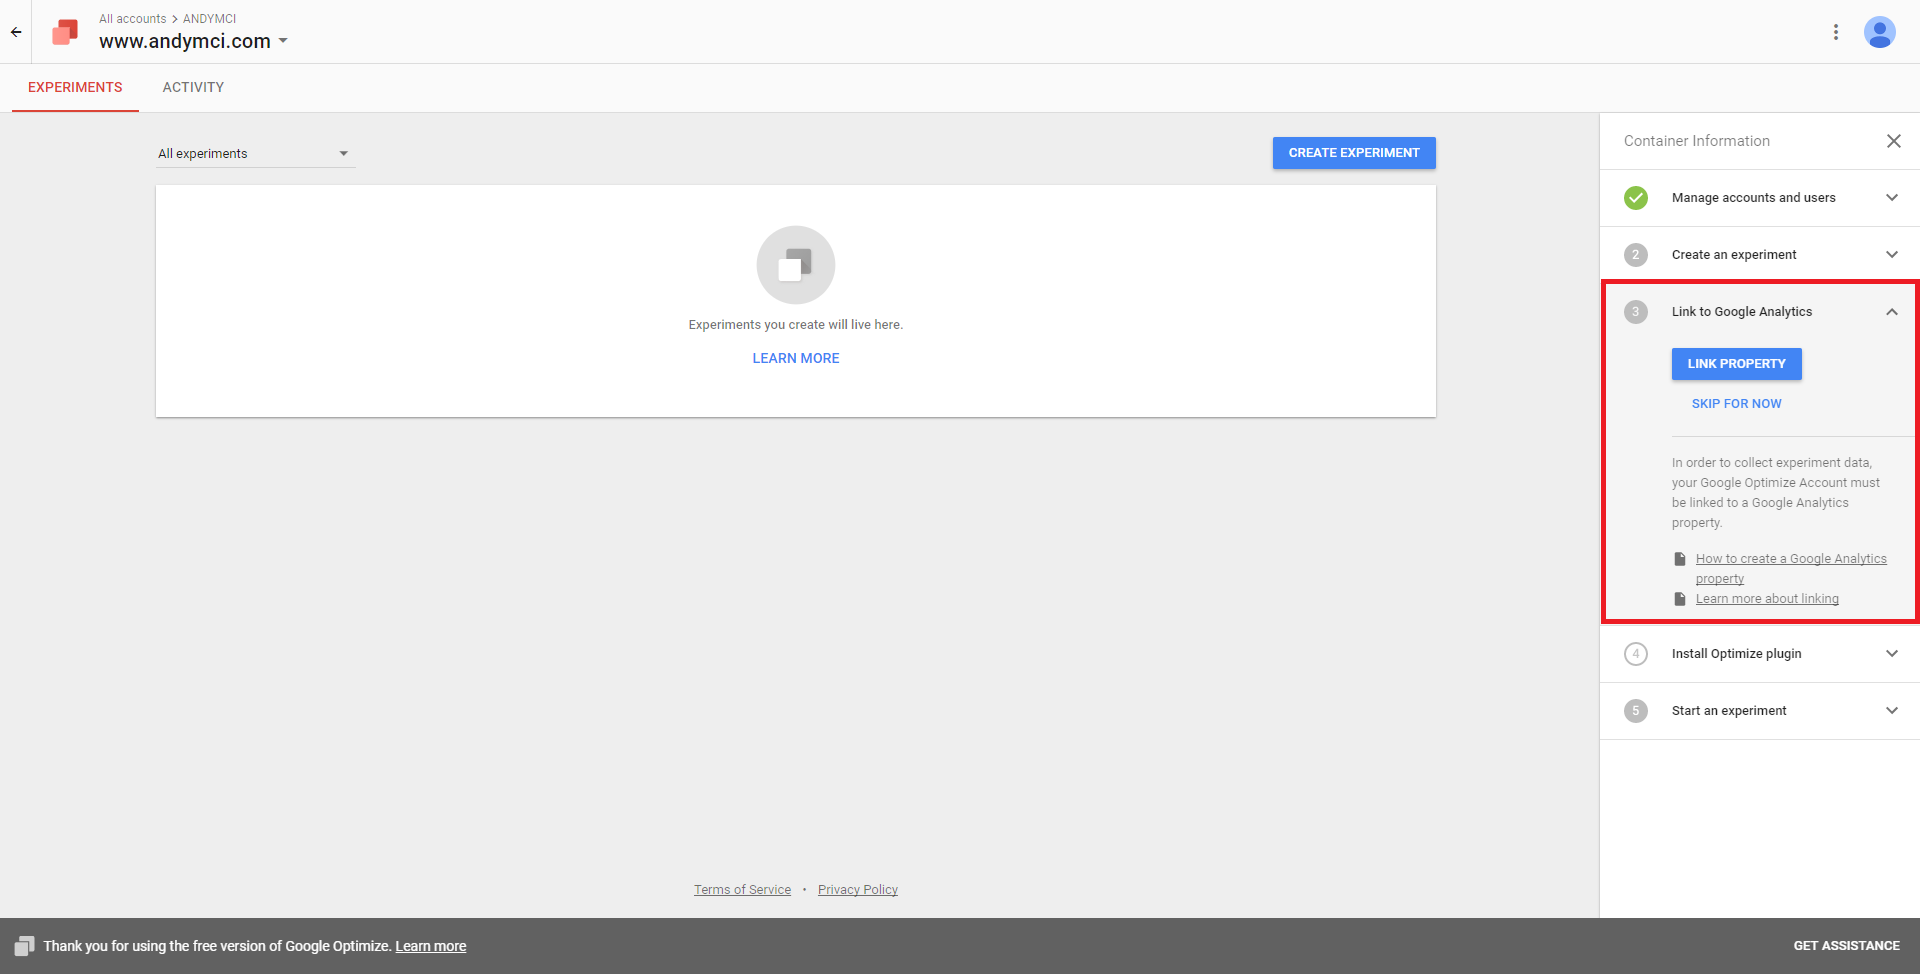
Expand the Link to Google Analytics panel. You’ll need to connect your Google Optimize container to your Google Analytics property, and choose the appropriate Analytics view for Optimize to use. (In most cases it’ll probably be the All Web Site Data view.)
After you’ve connected Google Analytics to Google Optimize, you’ll need to add the Google Optimize tag to your website.
This gets a little technical, and I honestly spent more time on this than on anything else in this post. Thankfully the fine folks at LunaMetrics wrote a fantastic guide on deploying Google Optimize to your site alongside Google Tag Manager.
The high-level gist of it: You’ll need Google’s Chrome browser; the Google Optimize extension for Chrome; and the ability to add JavaScript snippets to your site.
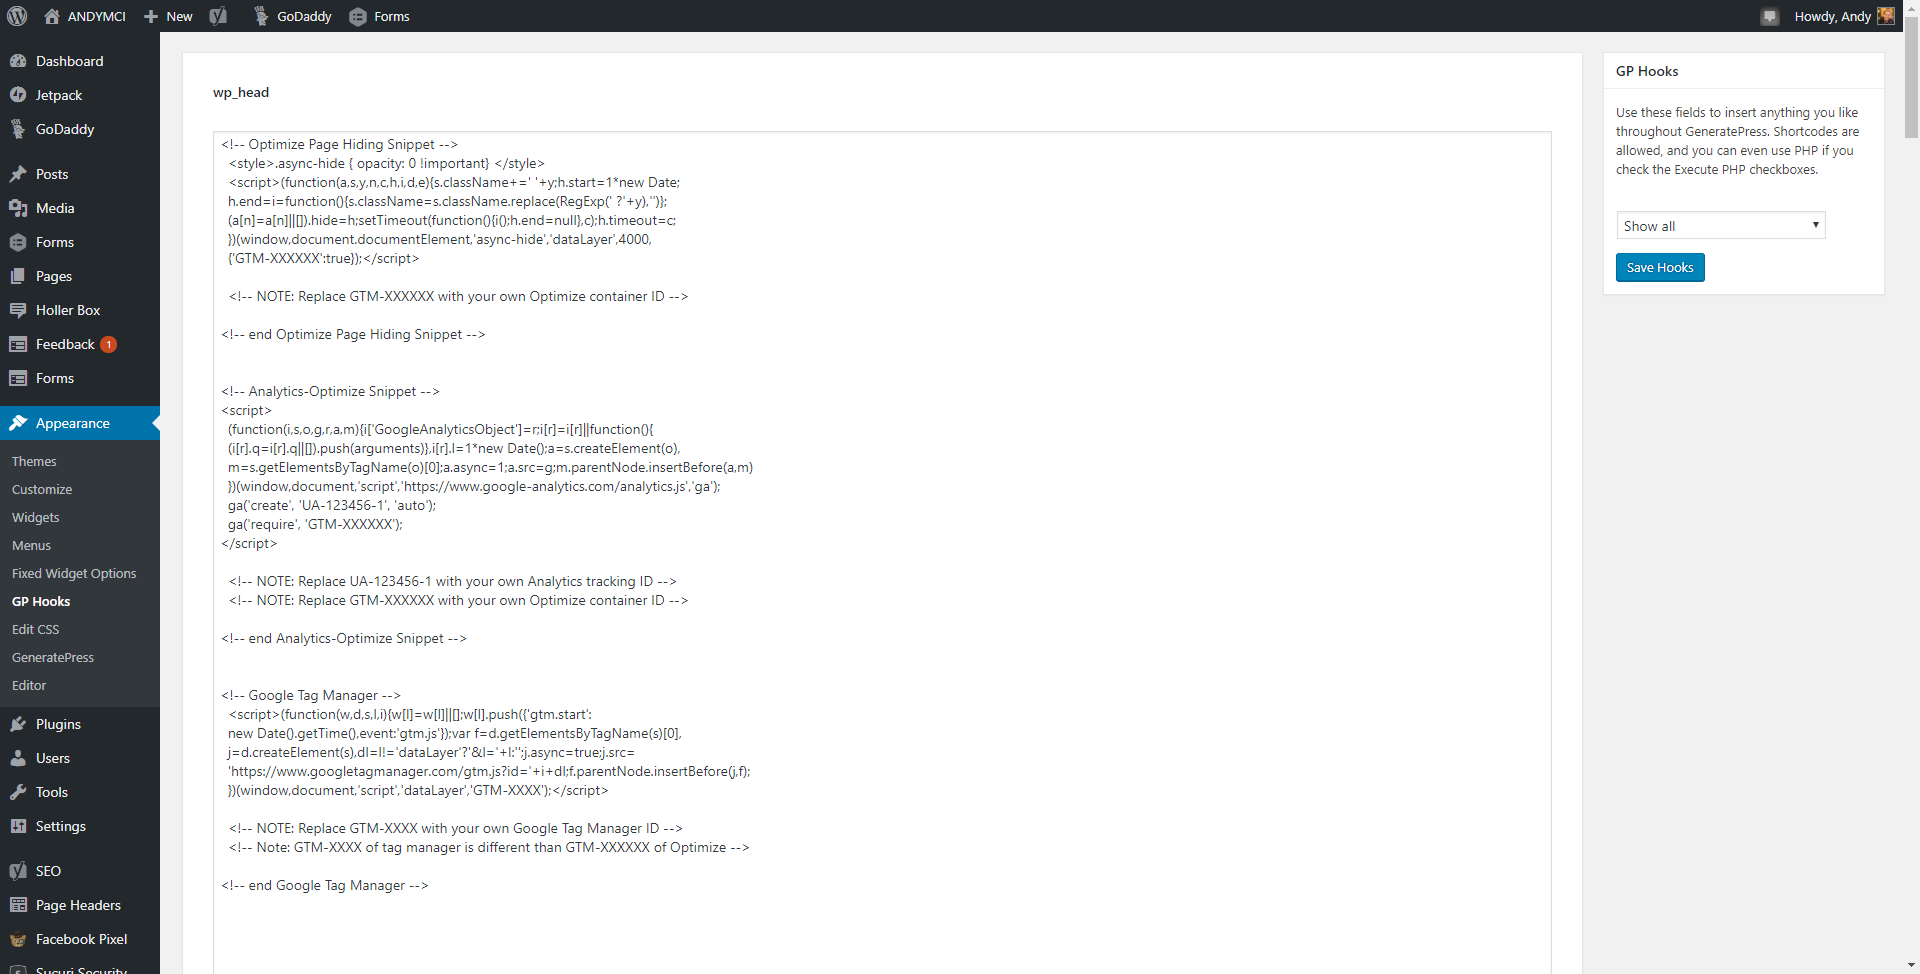
In my case, since I’m using the GeneratePress theme, I used the GP Hooks addon (part of GeneratePress Premium) to handle the snippet insertion. Alternative methods include creating a child theme or using a plugin like Header, Footer and Post Injections.
3. Create your first experiment
With Google Optimize set up, it’s time to create your tests!
Click CREATE EXPERIMENT to create a new experiment. Give it a clear name, and enter the URL of the landing page you’re going to optimize. Select “A/B test” from the list of available test types.
After creating your experiment you need to set a measurable objective. This is where the connection between Google Optimize and Google Analytics comes in.
Next, choose from a list of existing Google Analytics metrics as the objective, or specify a custom metric. For example: If you redirect people to a Thank You page after they’ve made a donation, you can set visits to that page as an objective for your experiment.
And finally, provide a hypothesis for the experiment. Your hypothesis describes what you’re testing and what you suspect or expect the outcome of the experiment to be. Maybe changing the wording of a headline or paragraph will lead to a bump in donations?
4. Choose your targets
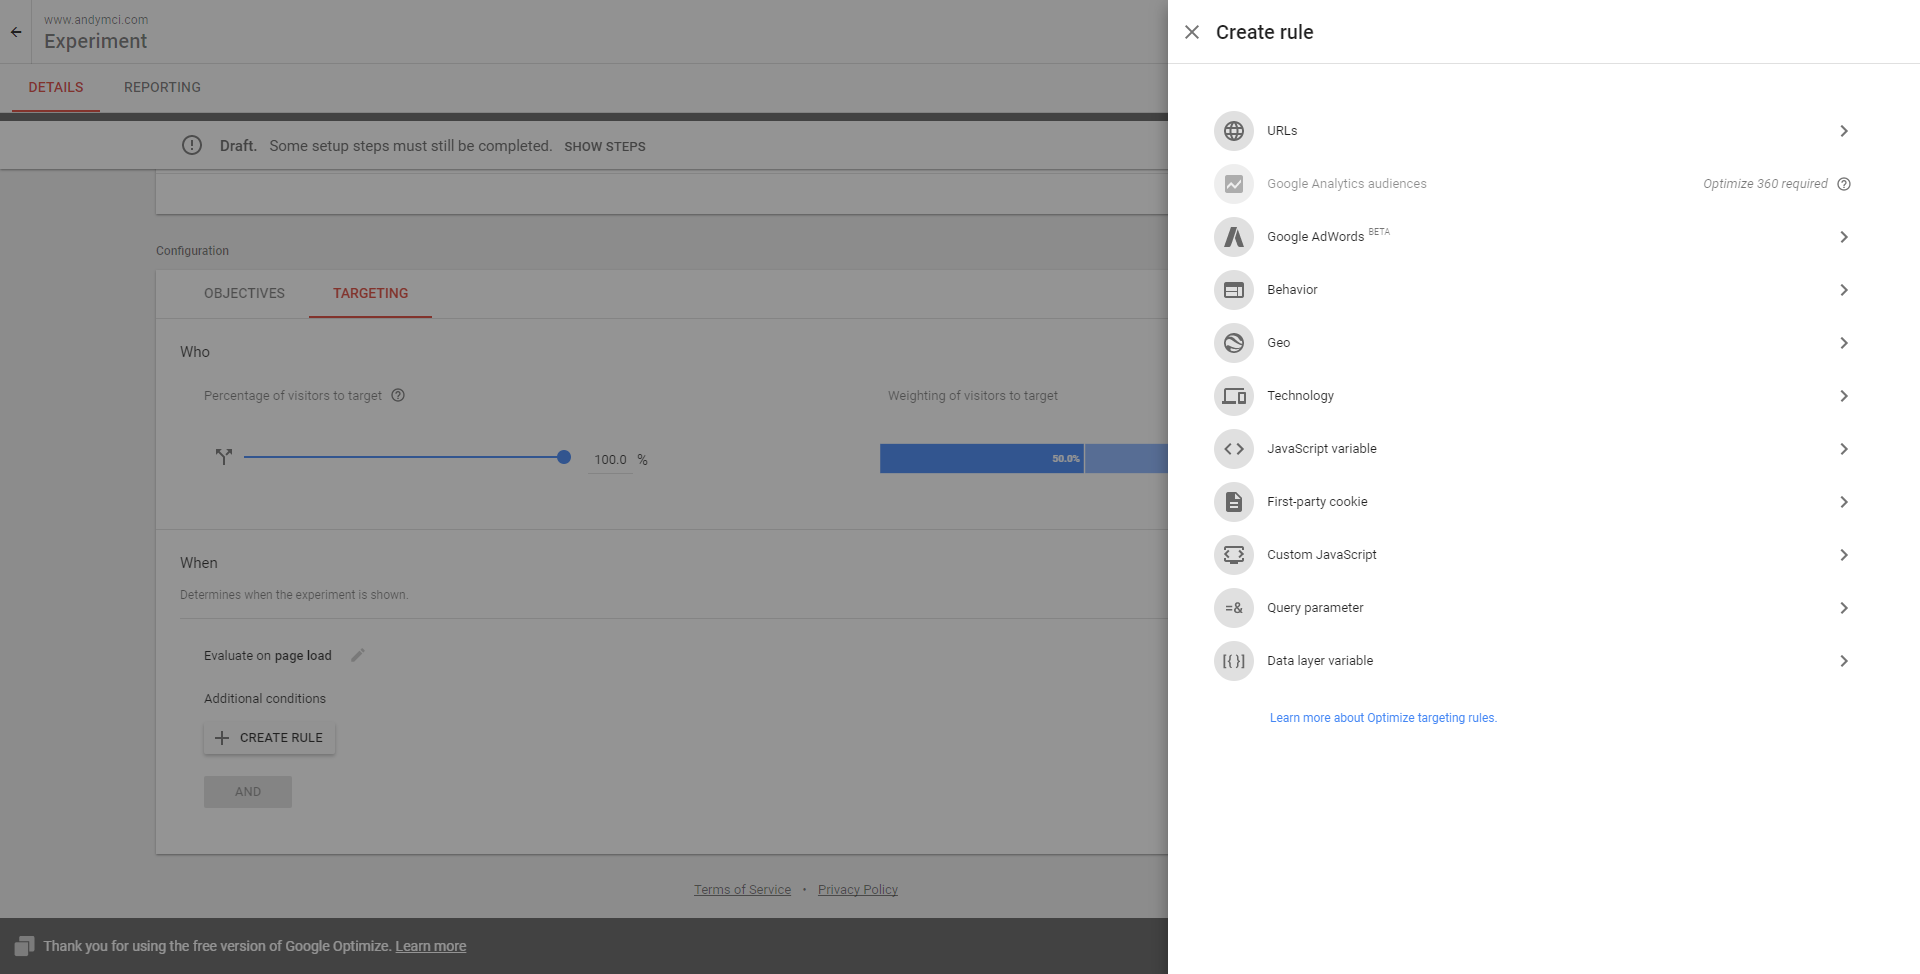
Once your objective is defined, you need to set your targeting.
With your experiment selected, click over to the Targeting tab.
First you need to set the percentage of site visitors you want to target. Slide the scale up and down to choose the appropriate setting.
Click Create Rule. There are a bunch of targeting options. Your experiment is triggered when these targeting conditions are met. For example, you could limit the targeting to certain geographic regions or device types.
For now we’ll just stick with URL targeting. Enter your landing page URL as the target and click Save.
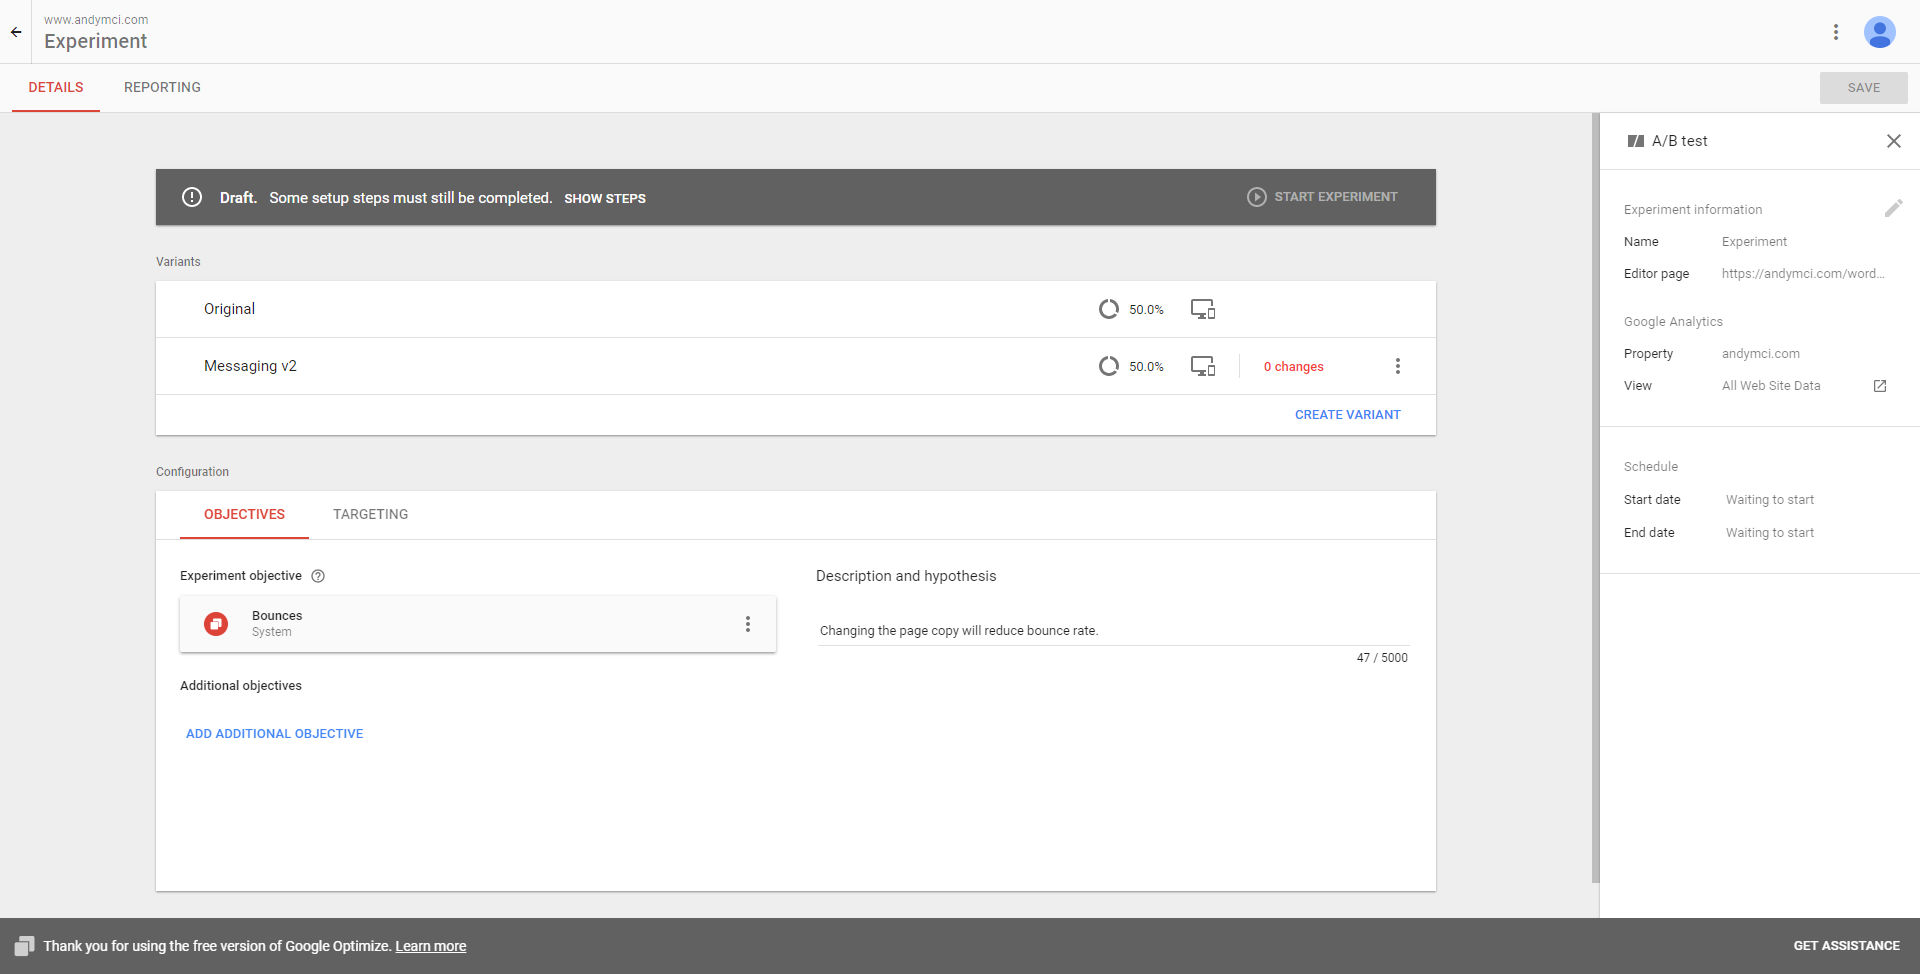
5. Add your variants
With the objective defined and targeting set, we can move on to adding the variants. These will be the different versions of the landing page that you want to test.
Remember: When you run A/B tests you’re testing the performance of single page elements against each other, like a headline, or the color of a button.
Click on CREATE VARIANT to add a new variant. Give the variant a name, then click ADD.

To edit a variant, click on its name in the list. Your landing page will open, overlaid by the Google Optimize visual editor.
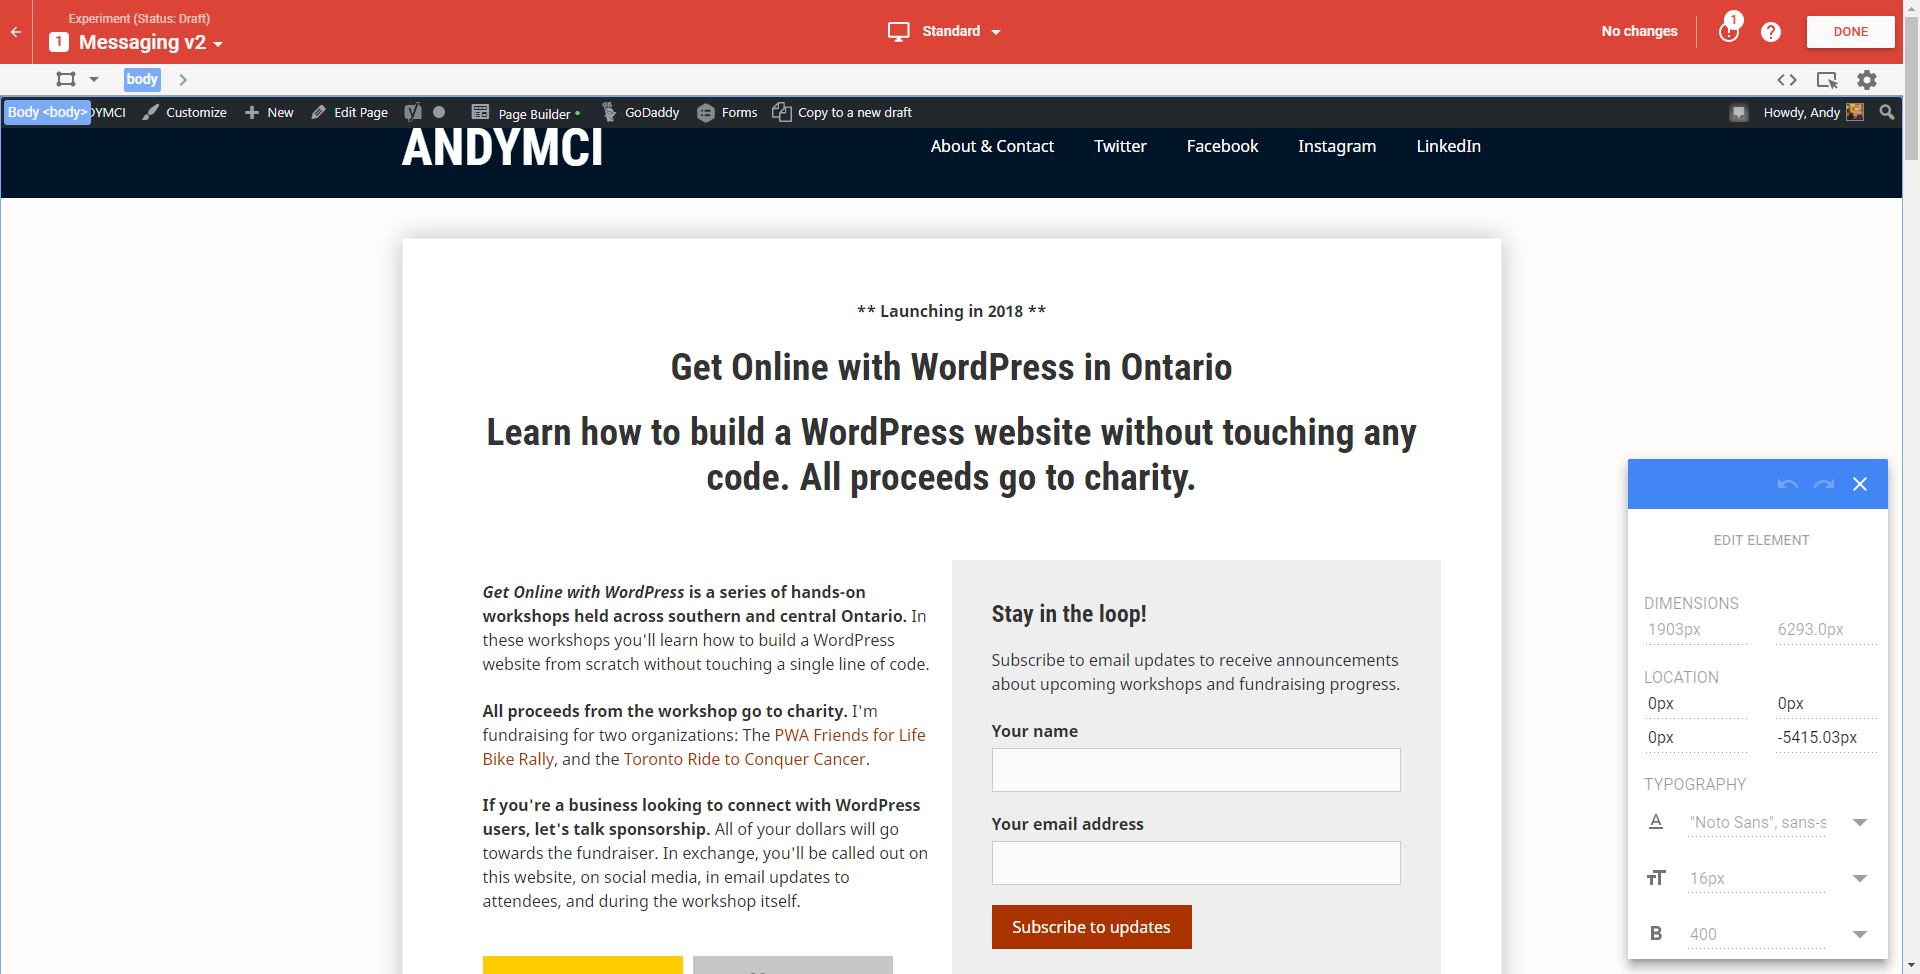
Make your edits, then click DONE to save them.
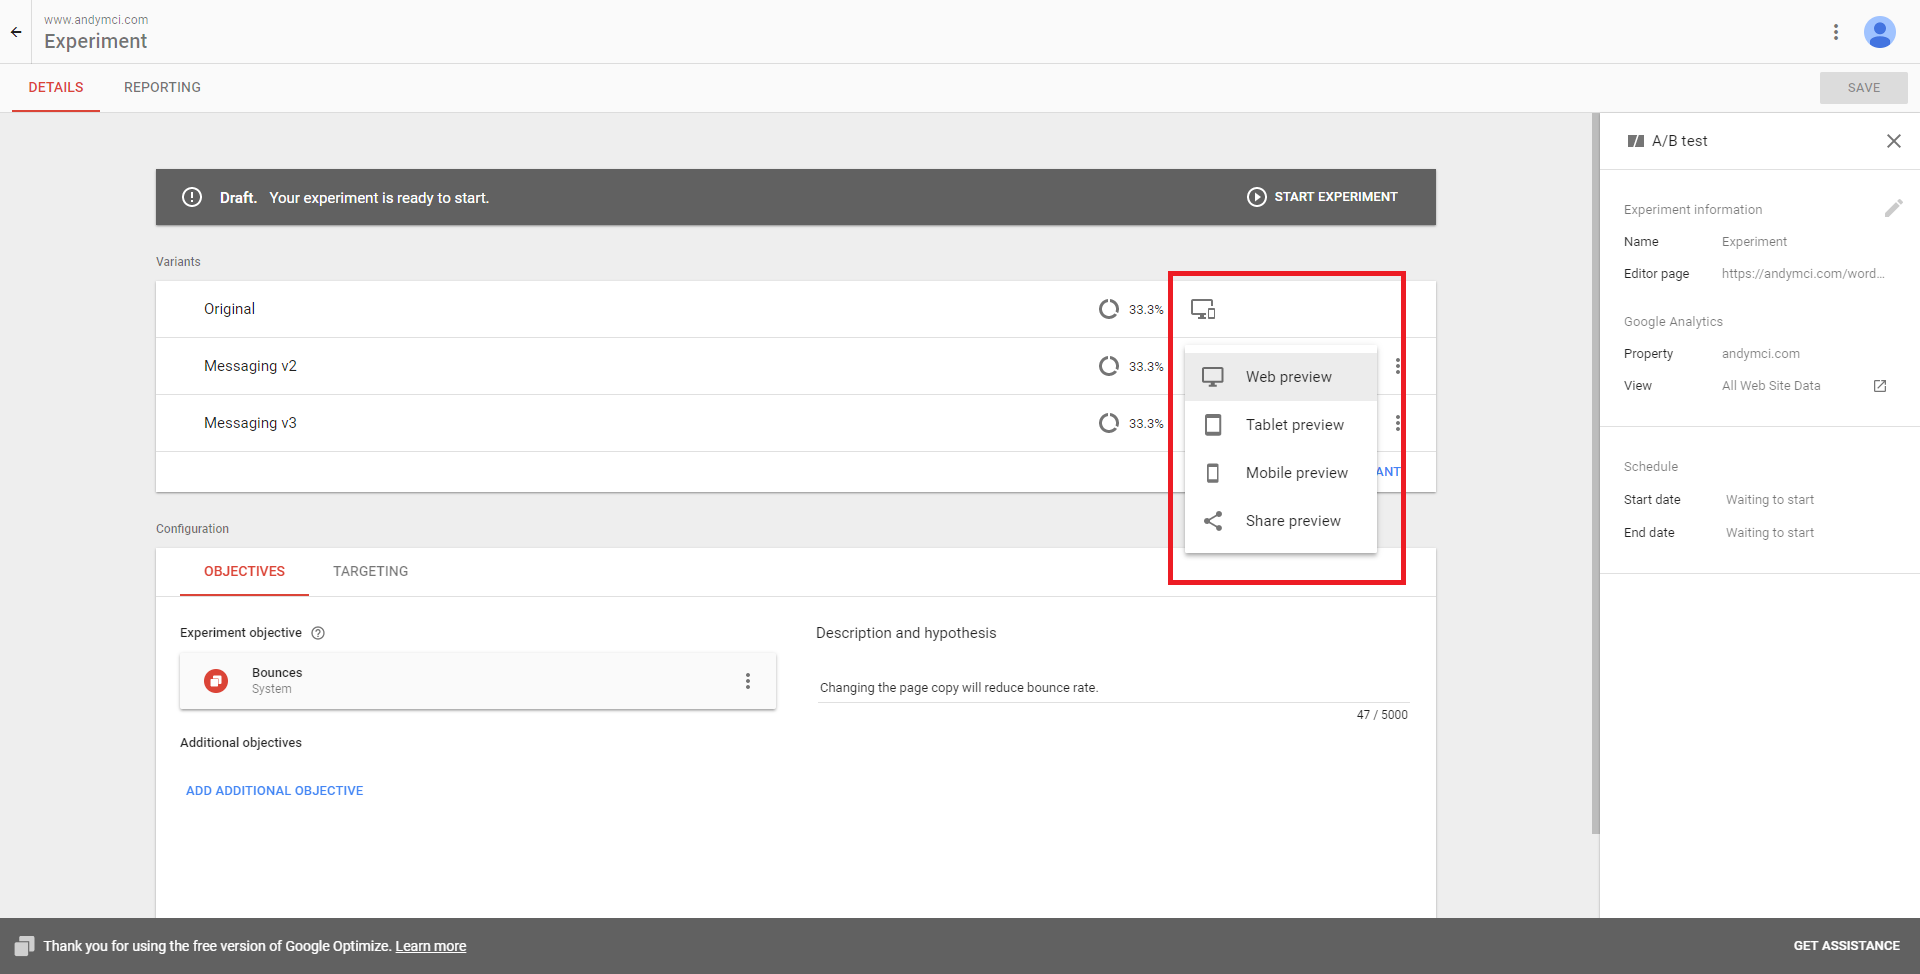
If you want to preview the variant, click on the small desktop/mobile icon. You can choose to share the preview as well – handy if you want input from someone else before the experiment goes live.
Keep in mind that you can’t modify variants after an experiment has started. You’ll need to stop the experiment and start a new one.
After all your variants have been created, you can adjust their weighting. Variant weighting controls how many visitors will be exposed to one variant over another. By default, Google Optimize gives all variants the same weighting.
6. Run the experiment
When you’re happy with your variants and their weighting, you can move on to running the experiment. Google recommends keeping the experiment running for at least two weeks to gather enough data.
P.S. Don’t forget about driving traffic to the landing page!
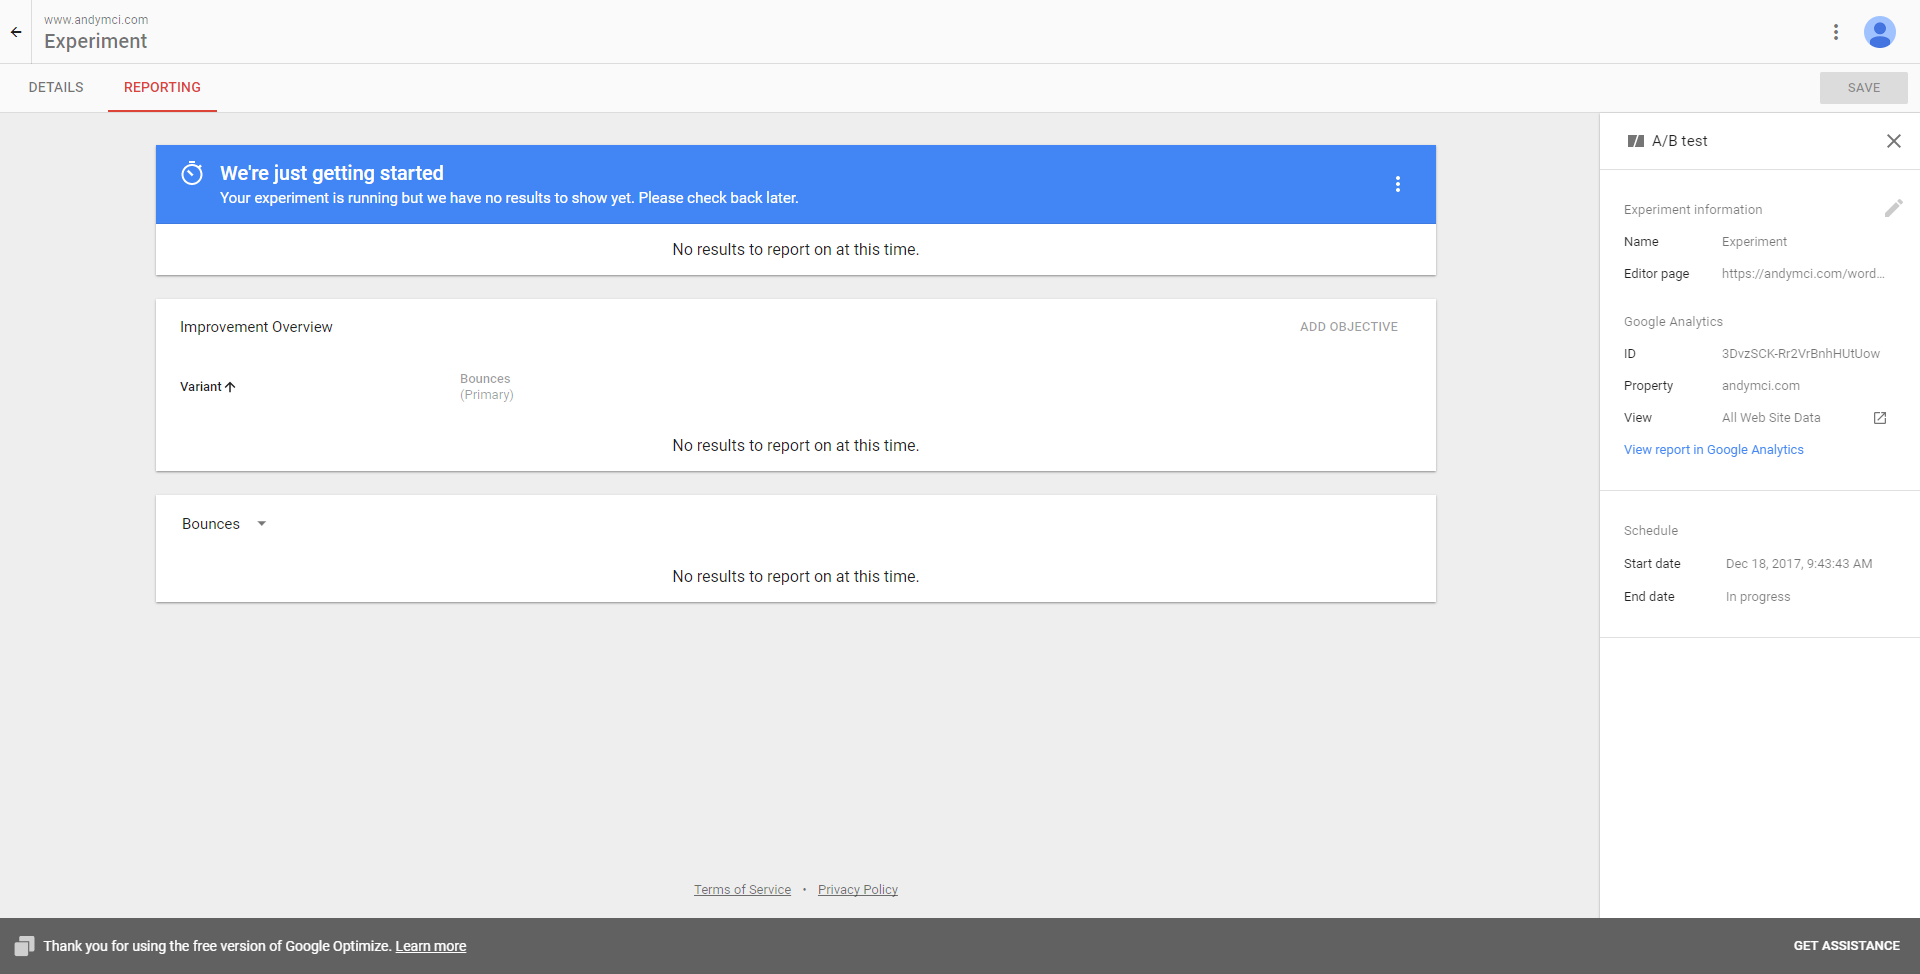
7. Review the reports
While your experiments are running, check into the Reporting tab to take a look at how things are progressing. Reports are presented as a series of cards that unveil deeper levels of detail as you go.
The Summary card shows you the leading variant; an estimate of how well the variant will perform in the future; the probability of that variant being the best; and the expected improvement over your existing (baseline) conversion rate for the landing page.
Putting it all together…
Getting Google Optimize set up for your Give landing pages takes seven steps:
- Build your landing page in WordPress.
- Set up Google Optimize and install it on your site.
- Create your first experiment.
- Choose your test targets.
- Add your test variants.
- Run the experiment for at least two weeks.
- Review the reports.
If you’re building landing pages to gather donations via Give, you should absolutely include Google Optimize as part of your suite of tools. It’s a powerful addition to Google Analytics that’ll help you improve the performance of your landing pages and fundraising campaigns.
About the Author
Andy McIlwain
Andy wrangles technical content for the GoDaddy blog. On the side, he writes about content strategy for small businesses.