How to Build a Peer-to-Peer Campaign with GiveWP
A step-by-step guide on how to build your peer-to-peer fundraising campaigns with GiveWP.
You’ve heard by now that the Peer-to-Peer plugin for GiveWP is here, right?
With our new peer-to-peer add-on, you can turn your WordPress website into a peer-to-peer powerhouse of fundraising!
Before incorporating peer-to-peer for yourself, you may be wondering where to start. How do you create a campaign? What’s the best way to engage users?
We’ve got you covered! Below, we’ll outline how to build your own Peer-to-Peer campaign. We’ll also provide some actionable advice on when to best implement this strategy, specifically for time-sensitive fundraising goals.
Why Use Peer-to-Peer?
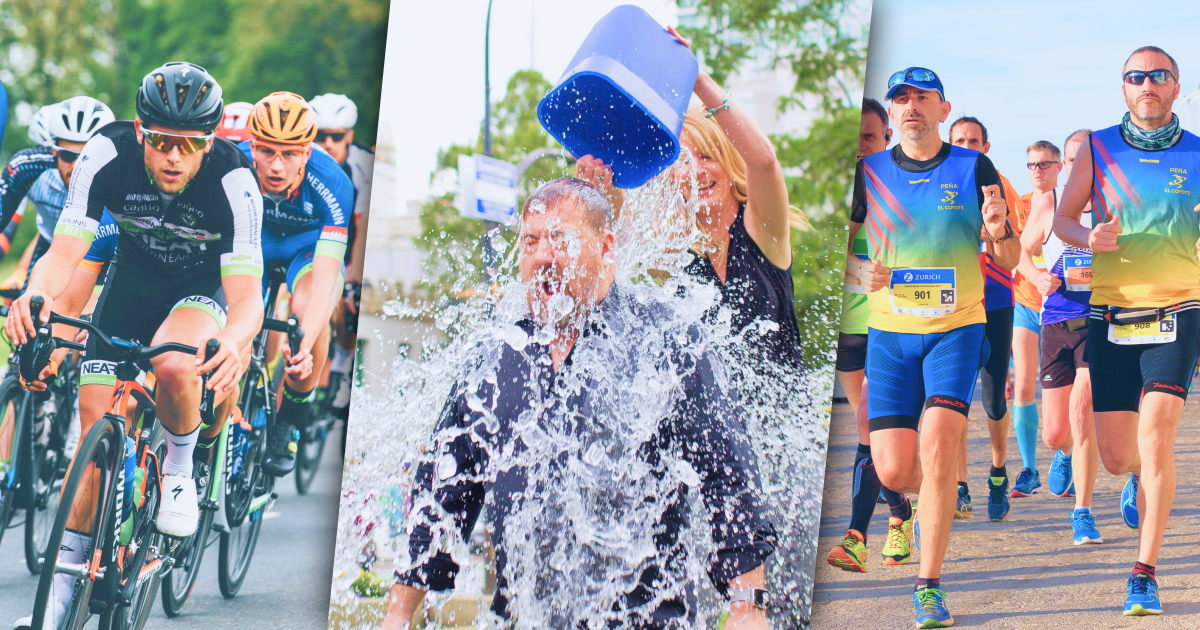
Peer-to-peer fundraising can multiply the effectiveness of a campaign by allowing donors to raise money together as a team. Those who are passionate about your cause can become involved in a new way by creating an ask on your behalf.
Word of mouth is one of the most effective tools for spreading awareness. The chain effect of peer-to-peer can provide exposure to those you may have never reached before. The vocal, public support of a peer campaign creates a sense of immediacy and awareness for your nonprofit.
We’ve created the peer-to-peer add-on because we believe that every nonprofit needs peer-to-peer fundraising. It’s a powerful form of fundraising that expands your reach and engages your volunteers in new, authentic ways.
Peer-to-Peer Features Overview
When you add peer-to-peer, you’ll have access to features like:
- Individual and team fundraising pages
- Leaderboards for individual fundraisers and teams
- Integration with popular GiveWP add-ons, like recurring donations, fee recovery, tributes, and more
- Tools for fundraisers to customize their campaigns within your branding
- The ability to add campaign sponsors
The backbone of a peer-to-peer campaign will be the formation of fundraisers and teams to support your goals. To help prepare you for the process, let’s review the difference between a campaign, a team, a fundraiser, and a sponsor.
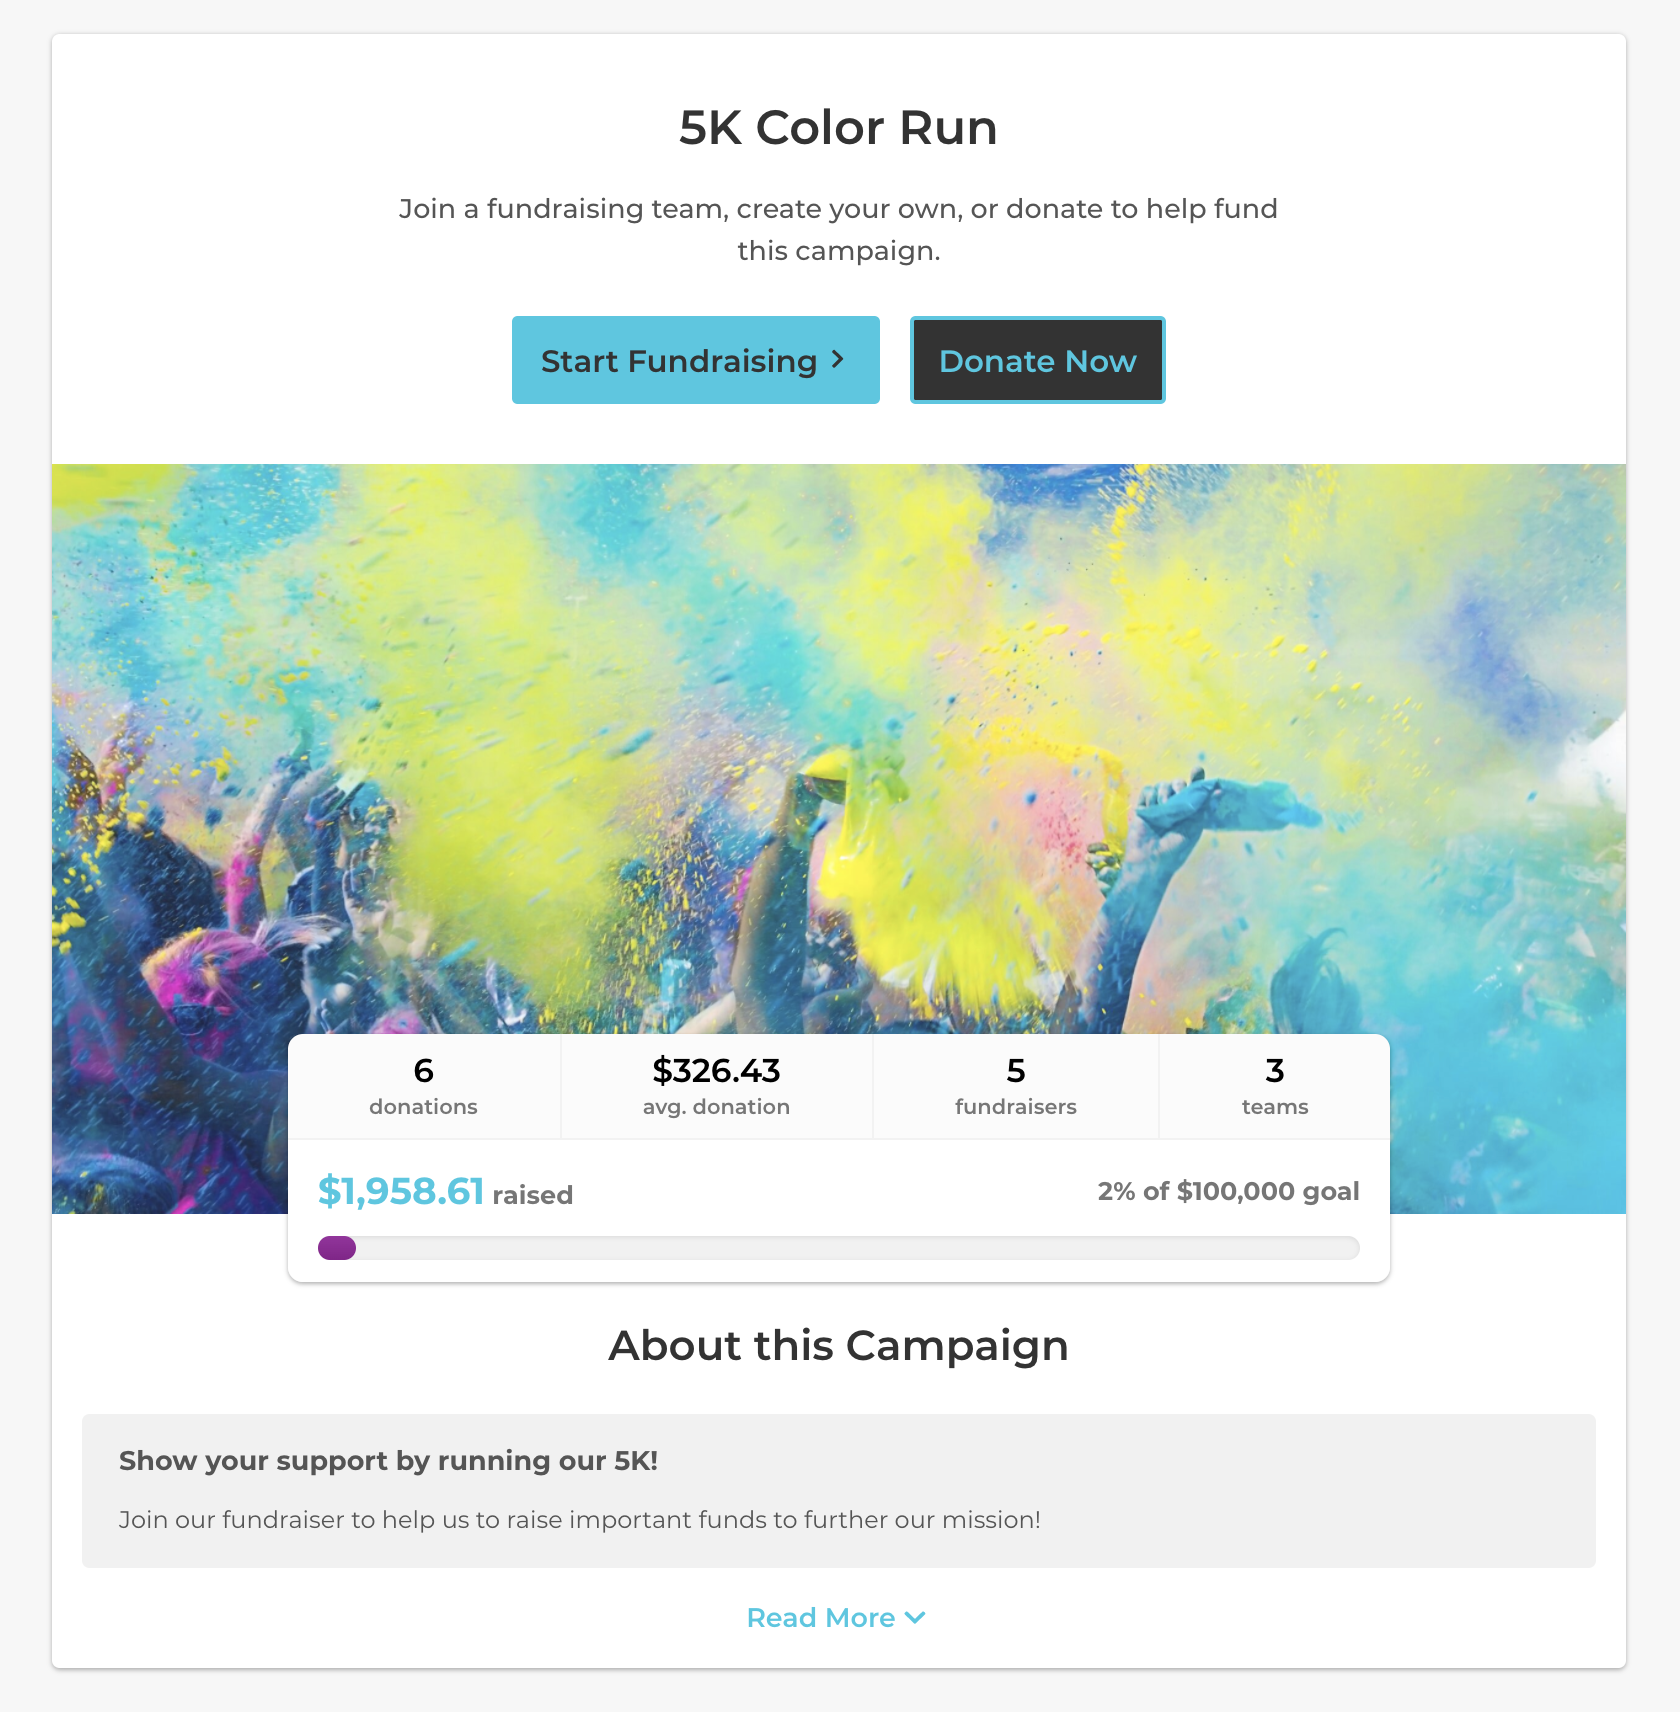
- Campaigns: Campaigns are the collection of all teams and individual fundraisers who are raising money for a given cause. Every campaign is connected to an individual donation form on your site.
- Teams: Teams are an organized group of folks raising money for the campaign. Teams have a captain who creates the team and can approve new team members who join to fundraise for the team.
- Fundraisers: These are the individuals who want to raise funds for your campaign. Individual fundraisers can either donate on their own or join a team. All the funds raised by individual fundraisers will go towards the campaign goal.
- Sponsors: Campaigns have an optional spot to display sponsor logos, allowing your organization to generate more revenue while allowing sponsors to associate their brand with your campaign.
How to Start Your Own Peer-to-peer campaign
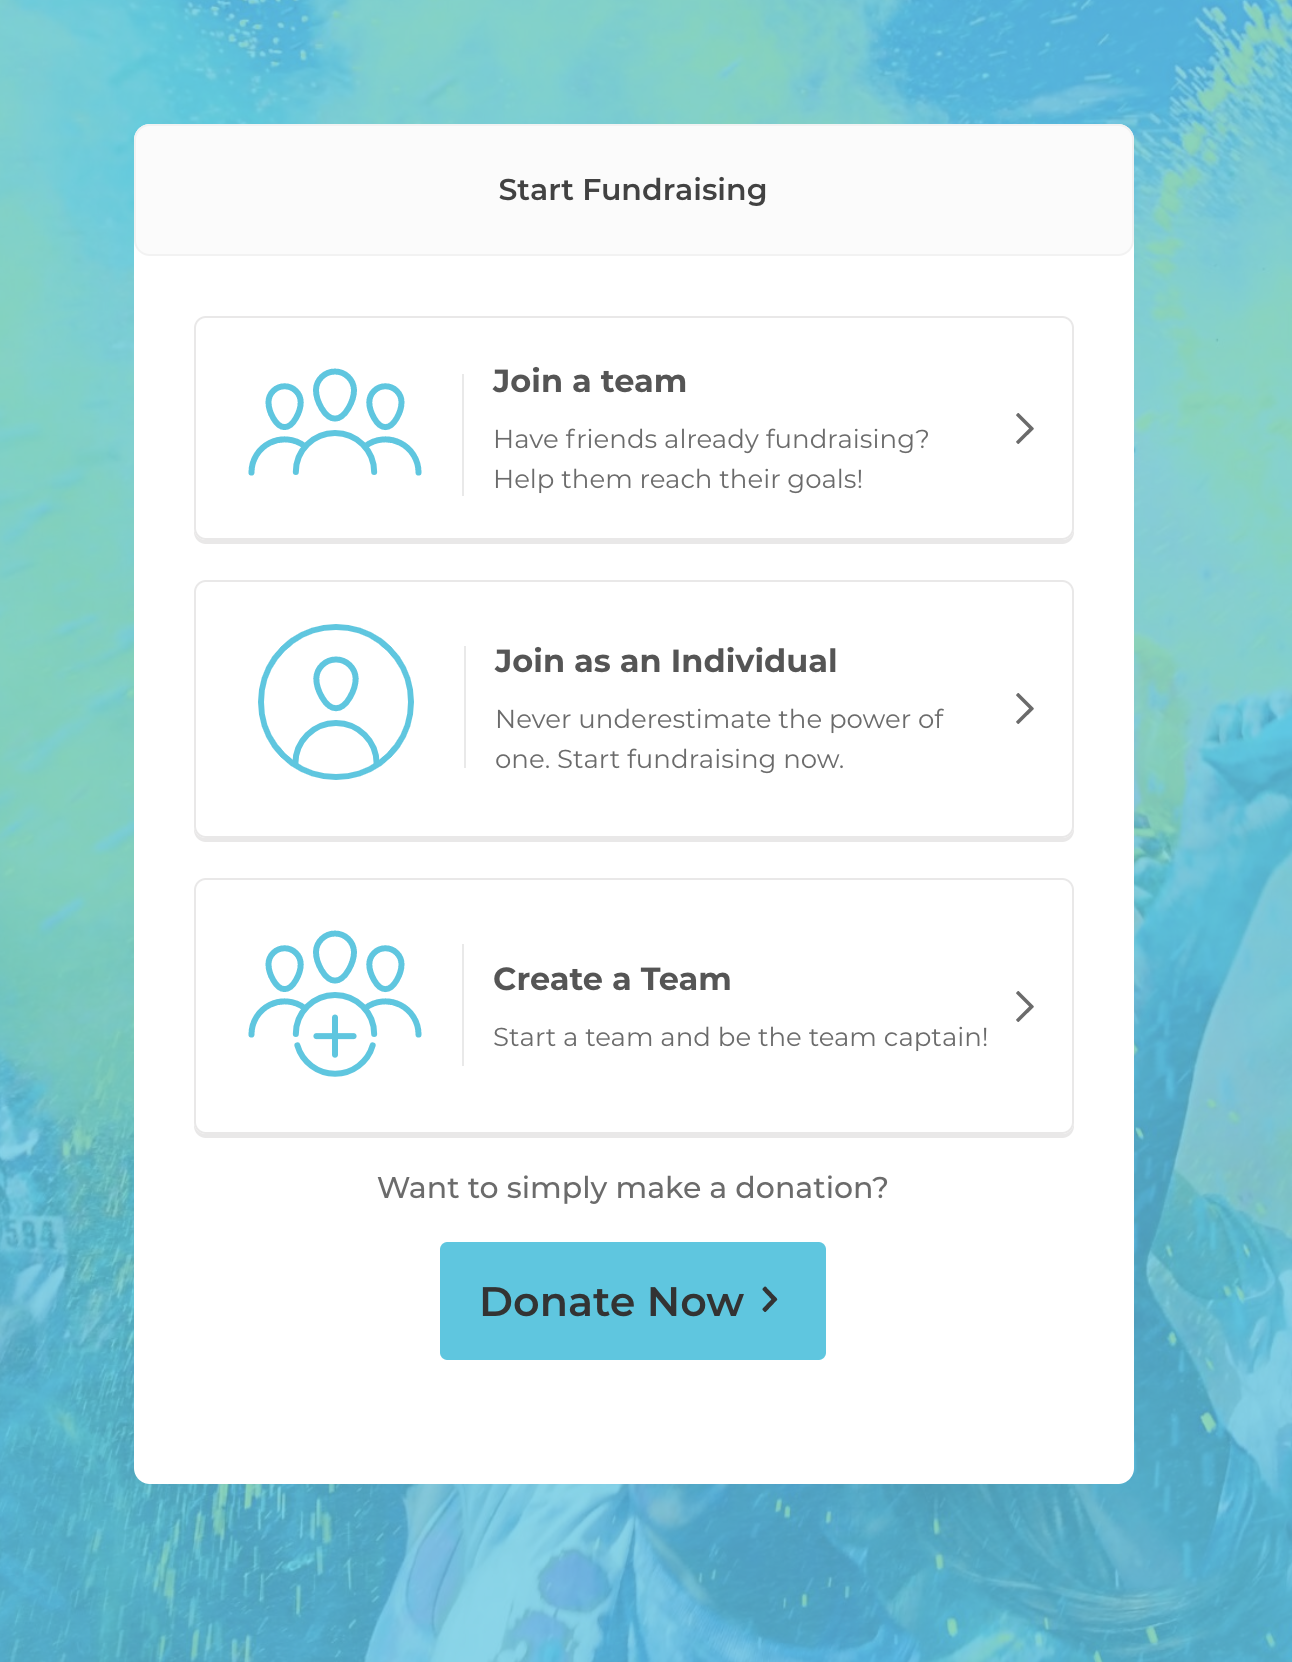
With GiveWP’s new peer-to-peer solution, volunteers can sign up to become team captains, join existing teams, or donate directly to a team.
Below, we’ll walk you through how to get started. We’ve broken it down into three steps: Getting Started, Adding fundraisers and teams, and Supporting your Campaign.
Getting Started
First, to build your own peer-to-peer campaign, you’ll have to decide if you want to build a new campaign from scratch using peer-to-peer, or if you want to tie peer-to-peer to an existing form on your site.
For purposes of this demonstration, we’ll be building this one from the ground up. To get started, you’ll want to click donations, then “add a new peer-to-peer campaign.”
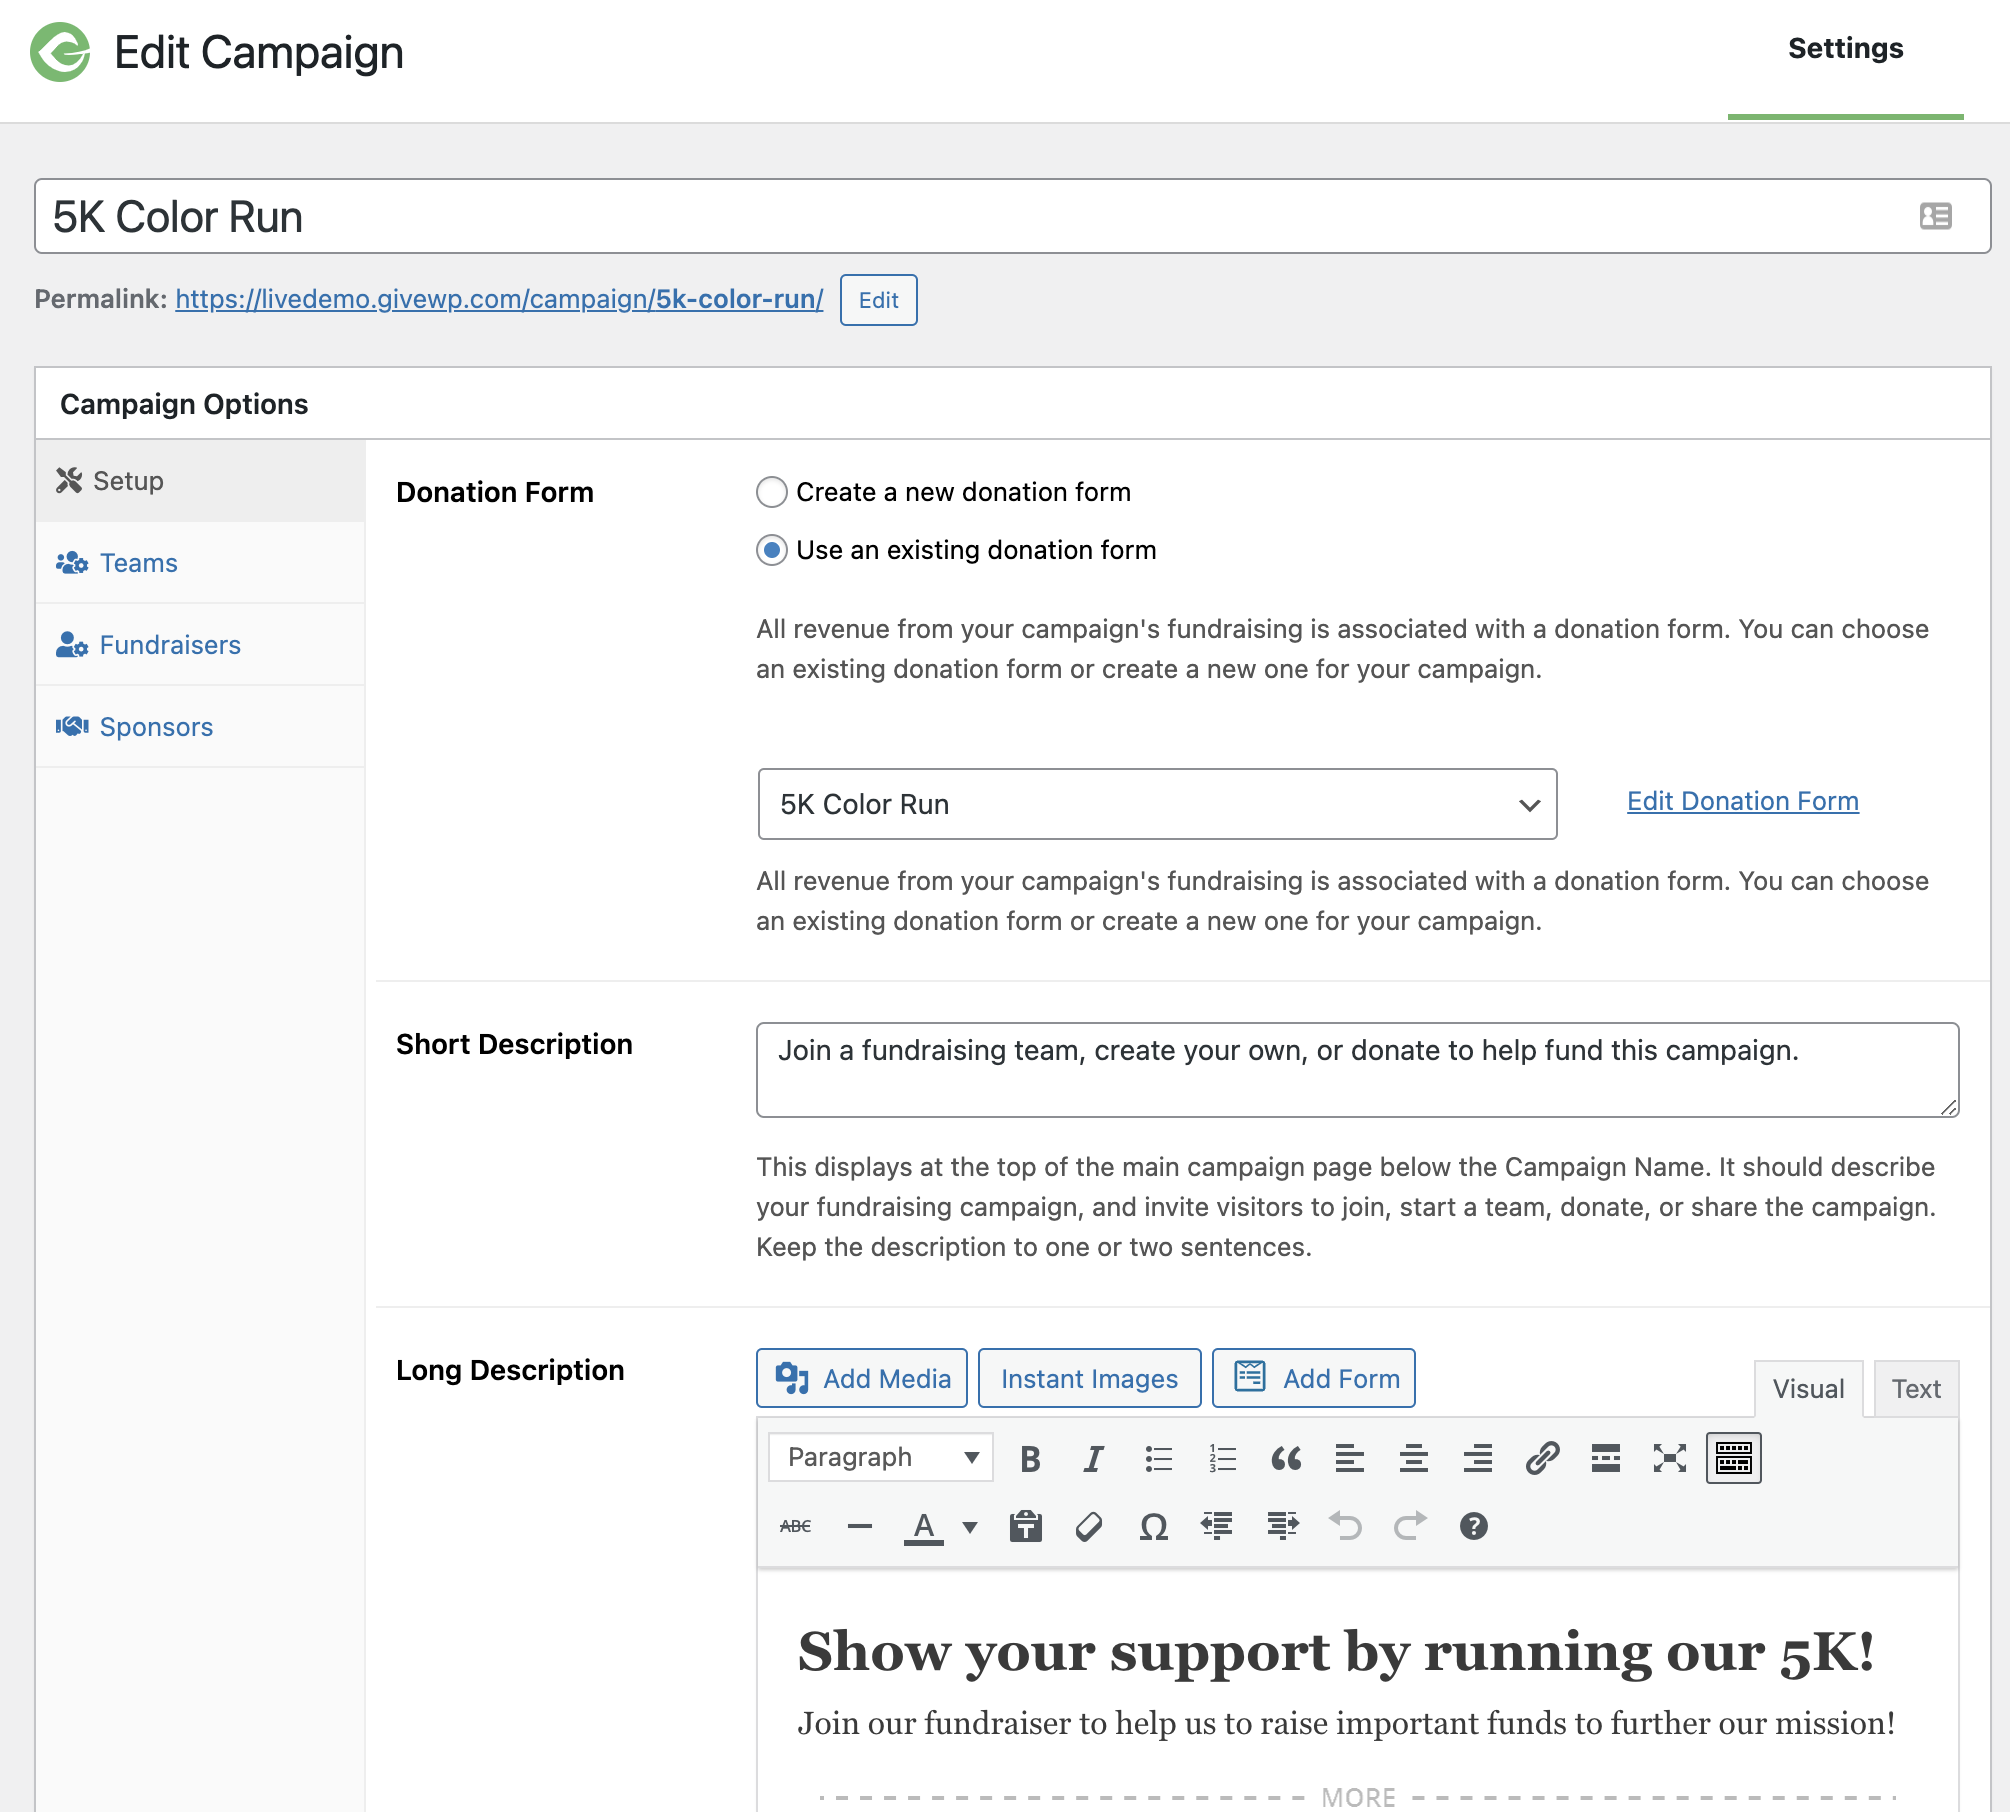
From here, you can start filling out the details of your campaign. Use these sections to express how donors can help. Your short description will be a few sentences to explain how to get involved, while the long description will be your bigger call to action. Your call to action will incentivize others to donate, but also to create a team.
The next element you’ll want to add is images. In the Setup tab, you can add a logo and a larger image for the campaign. When thinking of images, consider showing off the outcome of a campaign (for example, smiling faces of recipients) or something that represents teamwork.
Finally, you’ll likely want to make sure that you have some filter in place for donations coming into a peer-to-peer campaign. Since the donation may be spread widely without your knowing, the link could find its way to well, just about anybody.
When donations come through a peer-to-peer campaign, they will be categorized under the form that you’ve specified for that campaign. To keep everything organized, it’s important for folks to use a new form, or a form specific to the peer-to-peer campaign, to keep those reports organized!
Creating Fundraisers and Teams
Campaigns are supported by individual fundraisers and teams. When donors land on your peer-to-peer page, they’ll see the options to join a team, join as an individual, or to create a team. Users can create an account on your page – or tie an existing account to the peer-to-peer fundraiser – to get started.
You can play around with the settings for teams on your end to make it easier for teams to get
started, like setting team goals and suggesting placeholder text. Think about setting an ambitious campaign or team goal – many team captains will go along with your recommended amount.
You can also adjust the settings on the Teams tab of the create/edit campaign screen to suggest things for new team captains to do next (like invite more members) and ideas for writing their own compelling story. This placeholder text will show up during the flow of creating a new team.
You have the option to welcome new team members automatically or to approve team members manually as they sign up. For publicly available sites, it’s recommended to manually approve team members first.
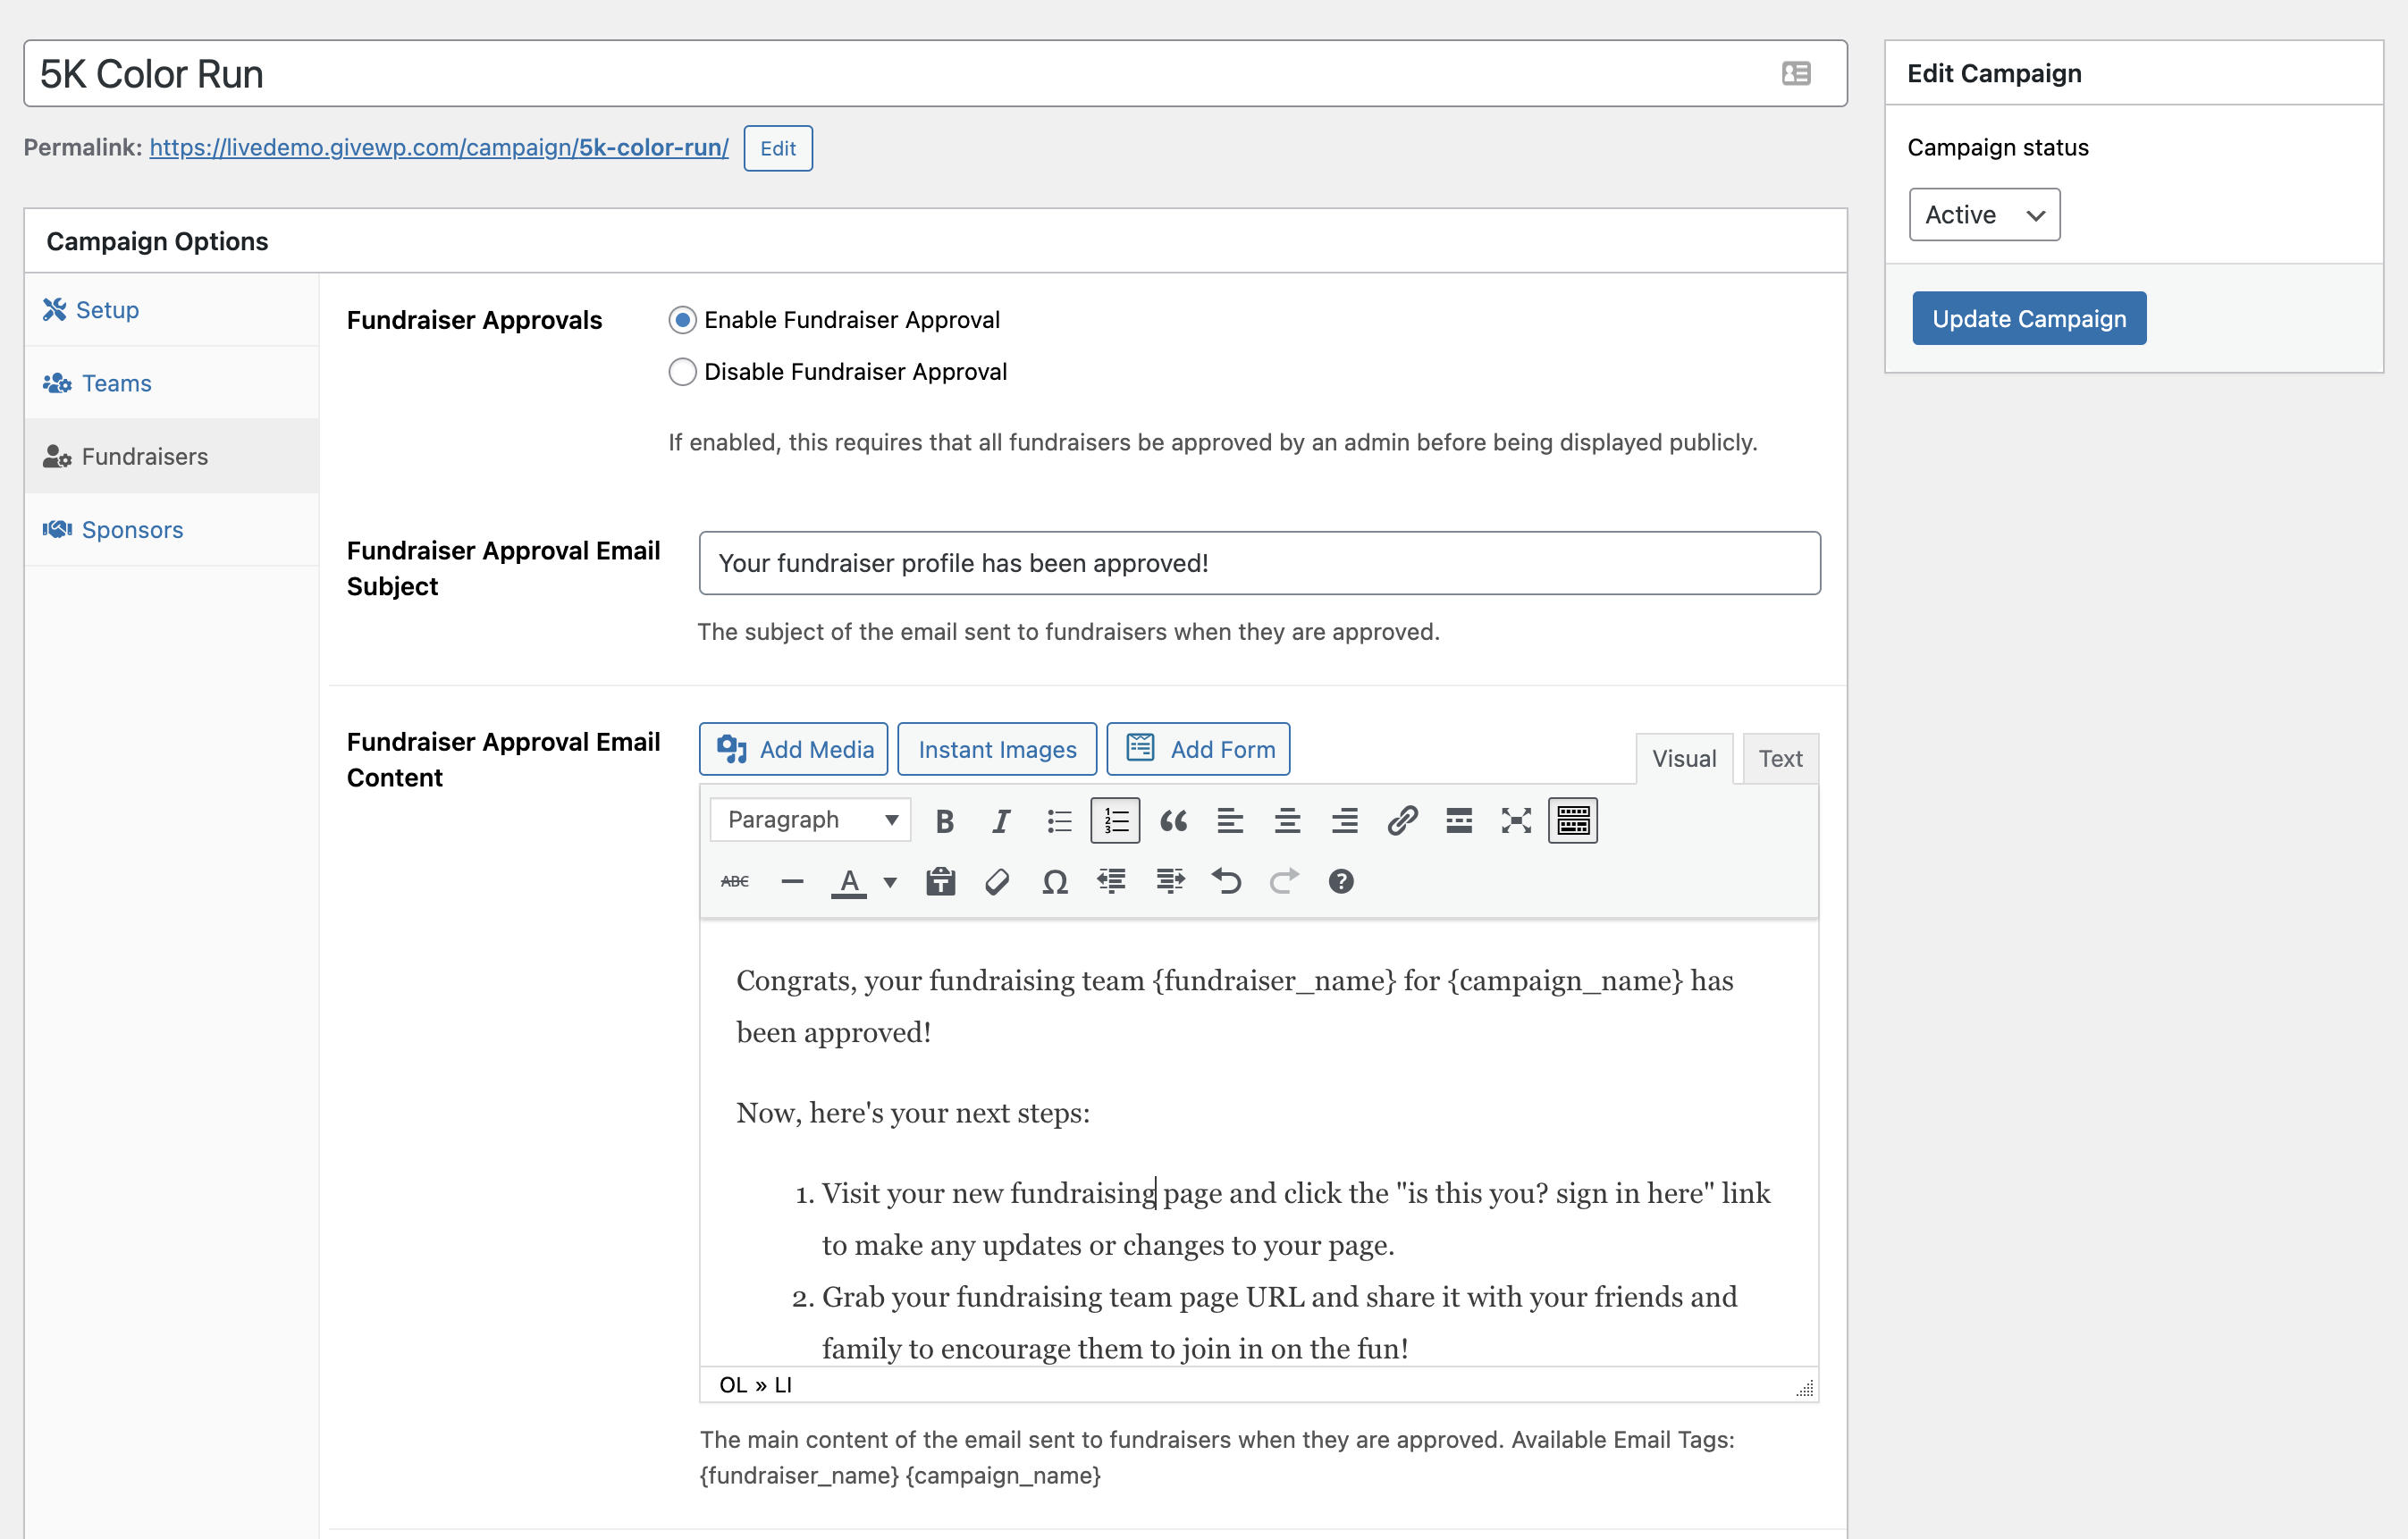
The same goes for individual fundraisers – the fundraiser can request to join, but it still requires approval. You can toggle the approval, and customize the fundraiser email approval, on the “fundraiser” page in the campaign options.
The fundraiser approval email should be viewed as a “next step” for the fundraiser/team. Customize this email to tell folks what to do next, such as visiting their new fundraiser page and sharing it with their friends.
Supporting Your Campaign
Now that your campaign is all created, let’s have some fun promoting it!
Ask for sponsors.
One way to support your peer-to-peer campaign is through sponsors. Sponsors lend credibility as a form of social proof. Plus, sponsors like being able to see their logo on the page. On the Sponsor page in your campaign options, you can enable sponsors and decide on display options. Some options include whether or not you want to link to the sponsors websites and where sponsors can apply.
To create an application for sponsors, you can actually use a GiveWP form as a sponsorship form! First, create a sponsorship form using a new GiveWP form, then link that form as a sponsorship application on your peer-to-peer campaign site. Check out this primer on how to use GiveWP forms to get sponsorships.
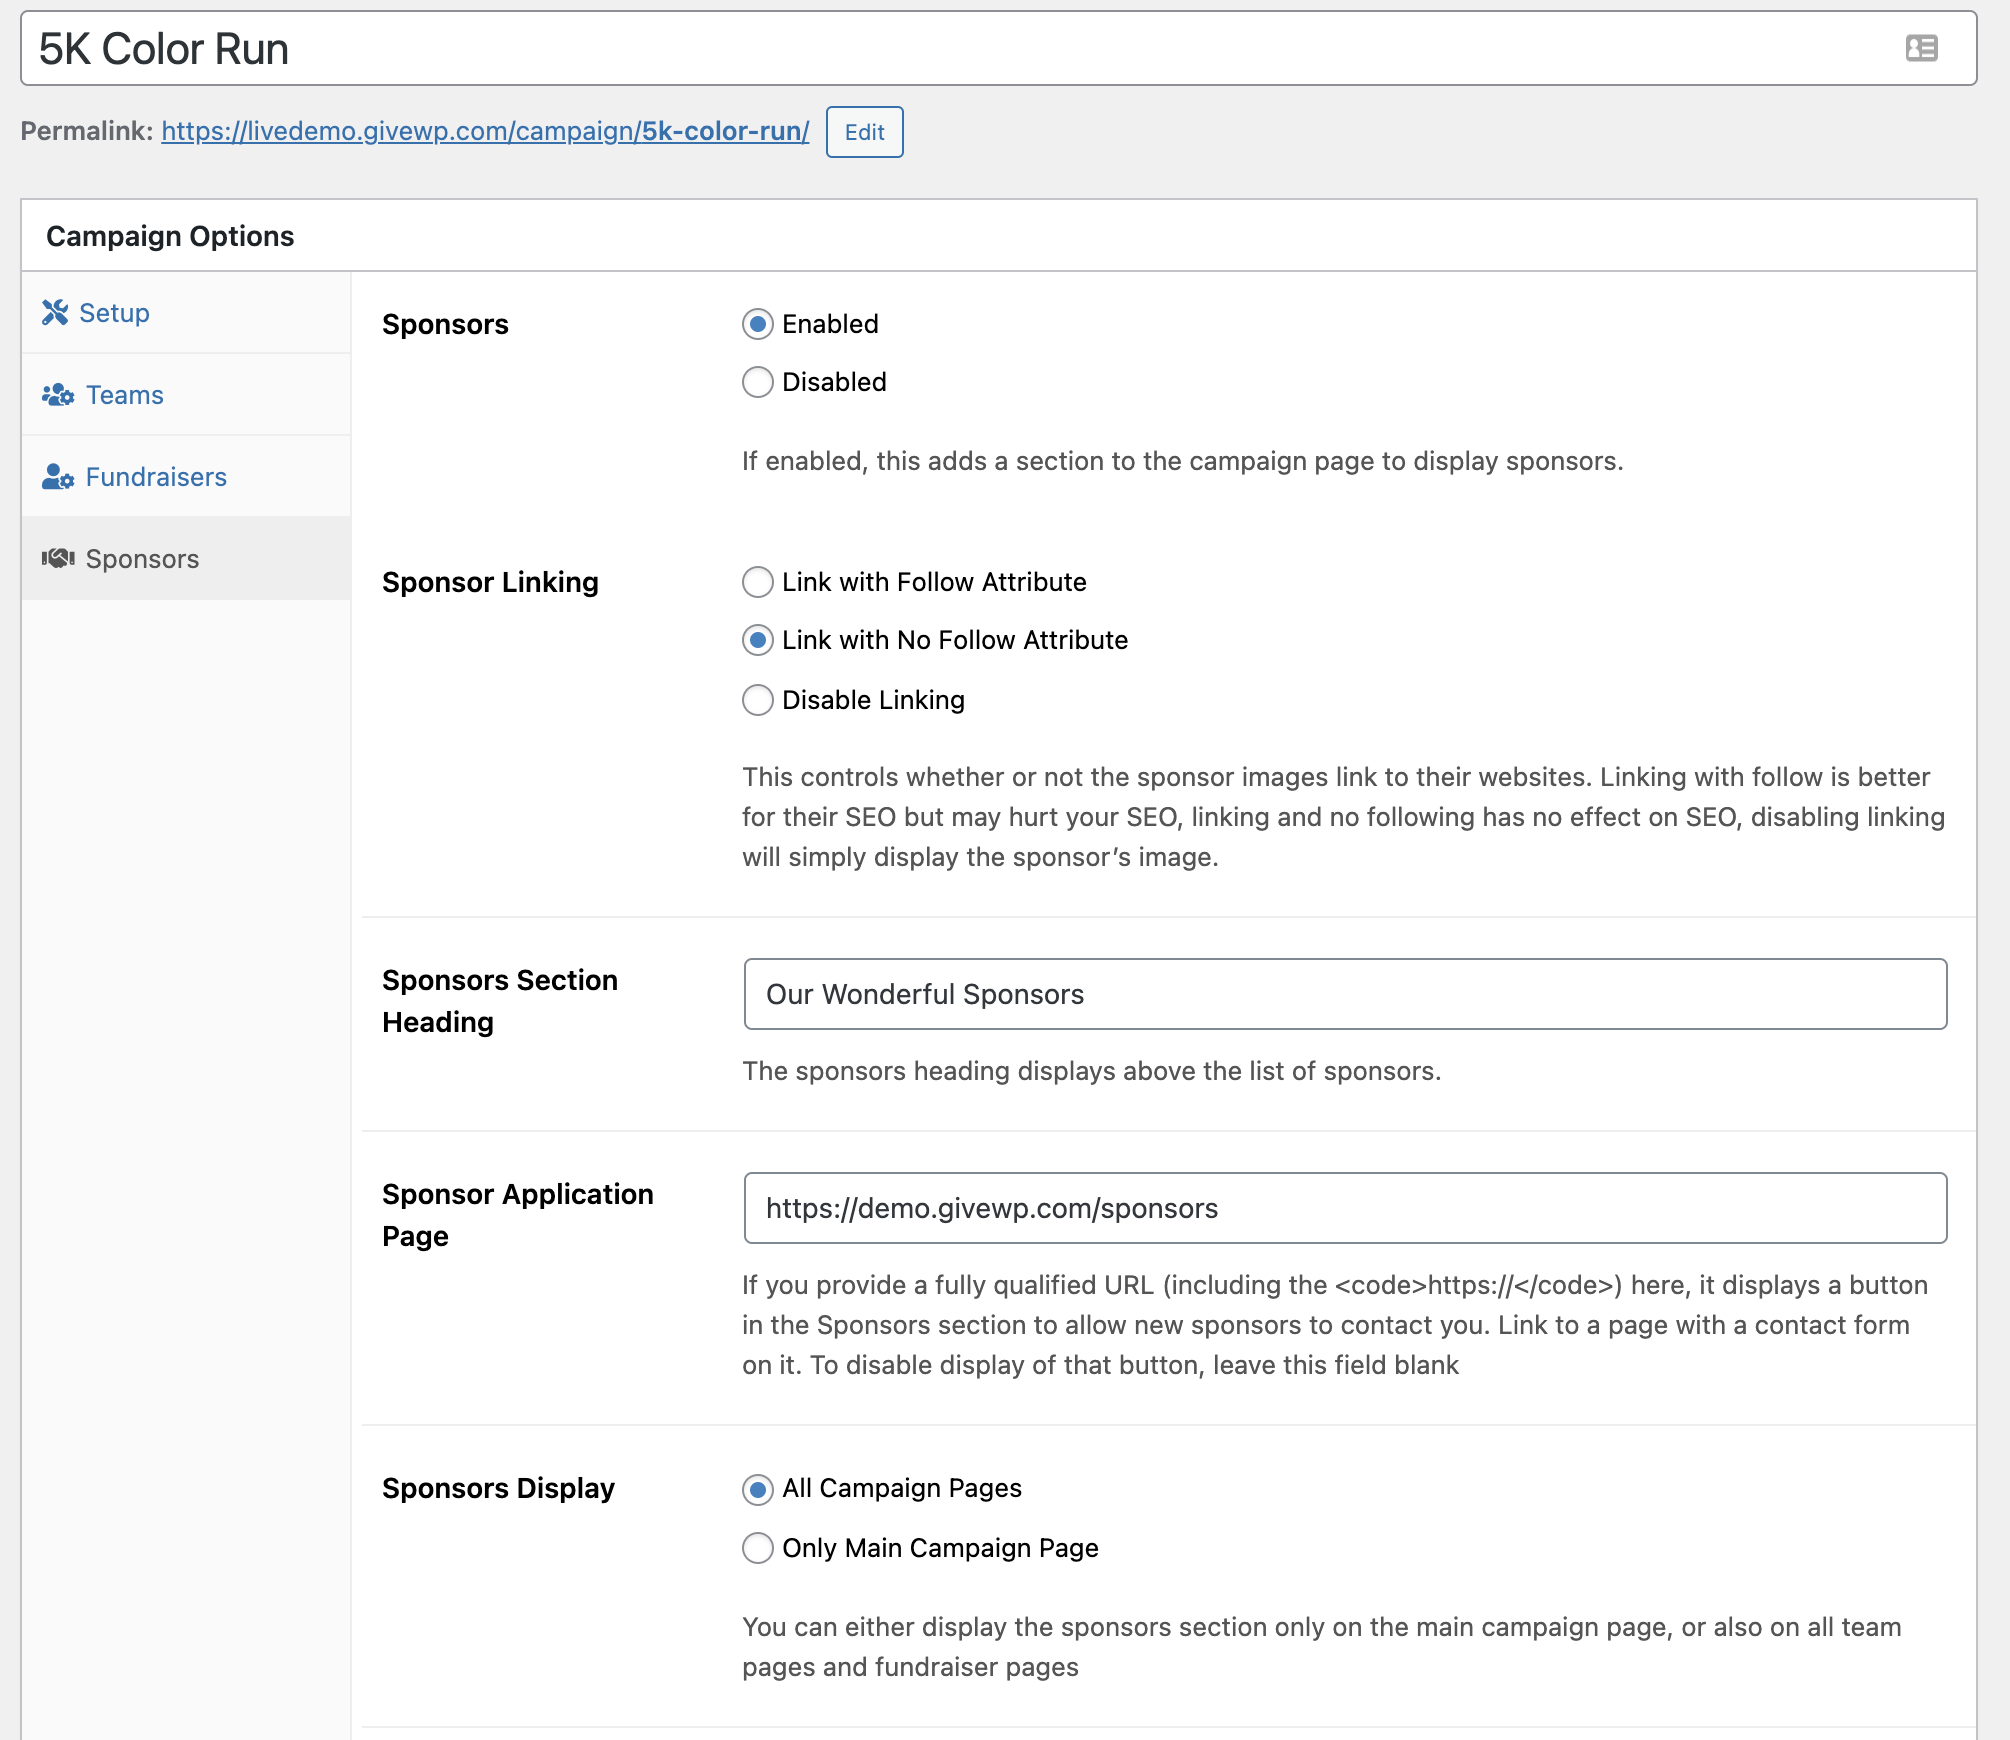
When setting up your campaign, the Sponsors tab has an option to either display the sponsor images on the main campaign page only, or on all pages associated with a campaign. Here’s an example of what your sponsorship slot may look like on your campaign page:
![]()
Share your campaign on social.
The best way your fundraisers and teams can spread the word is to share the link to the campaign, or to your team’s page, on social media. Seeing the team effort and personalized support may encourage many others to join in!
Invite others to join your team.
Inviting others is simple. Anyone on the peer team can invite an individual to create an account and join the team. However, the team captain will have to approve all requests when “enable fundraiser approval” is on.
Engage donors with gamification elements.
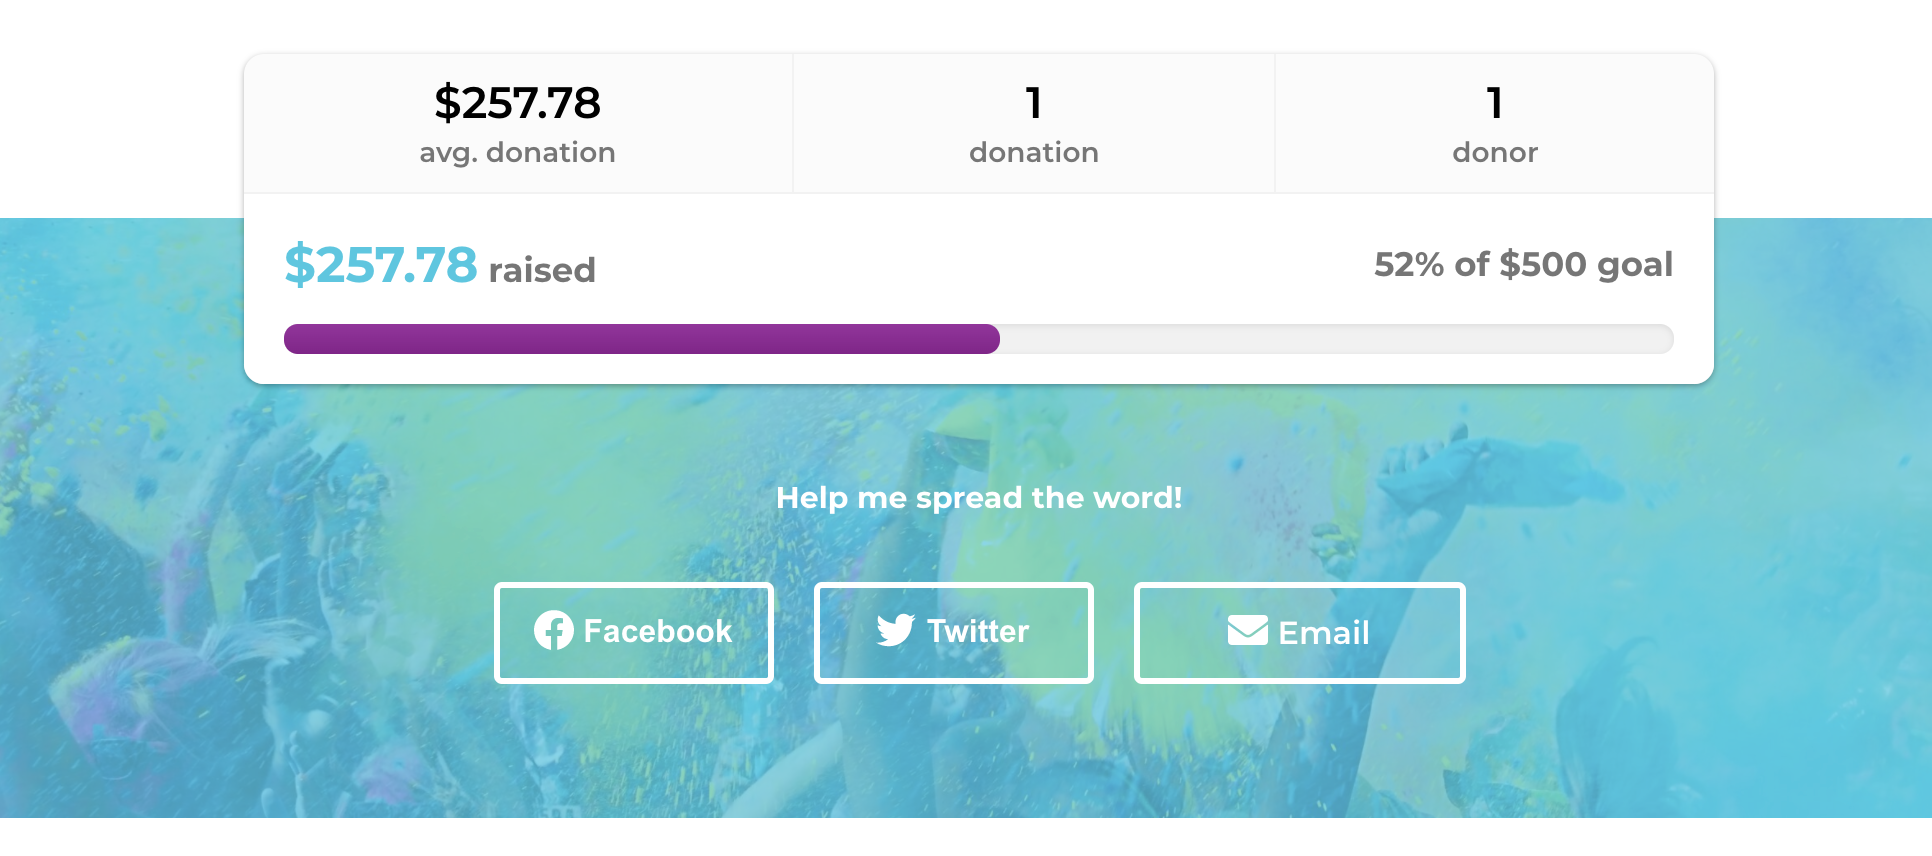
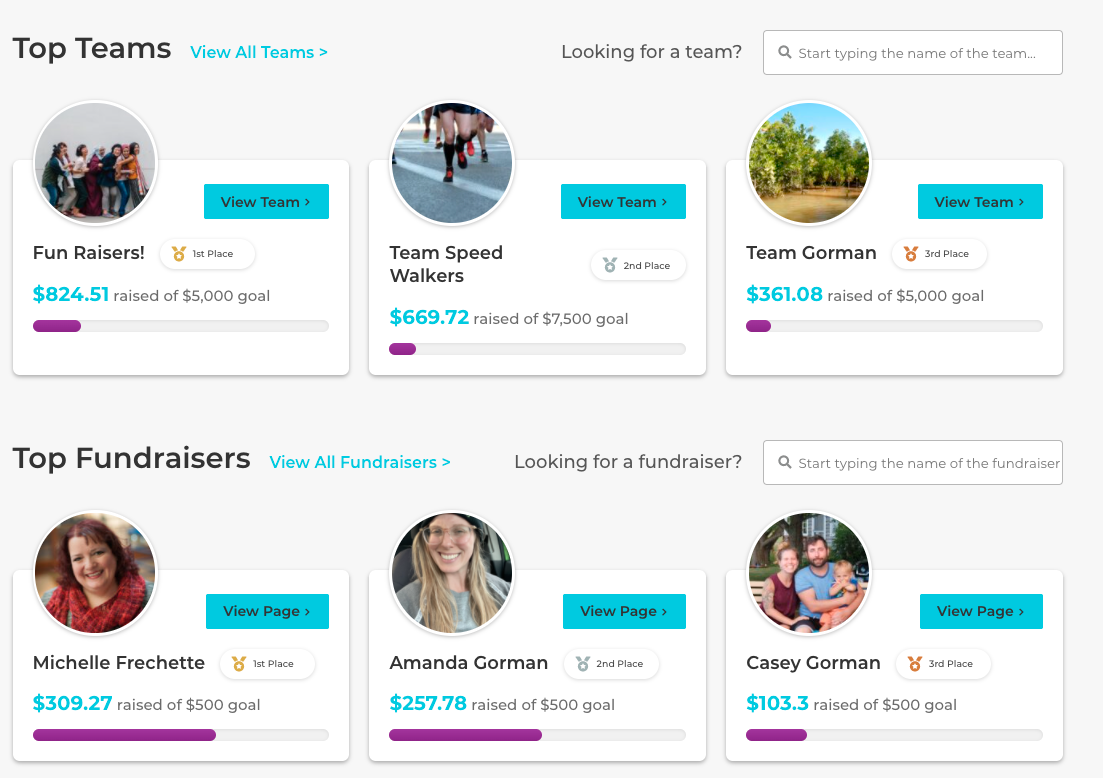
Peer-to-peer has some excellent gamification like progress bars, leaderboards, and more! These tools will help drive a small sense of competition to see who on the team can rise in the rankings. You can display top teams and top individual fundraisers on your peer-to-peer campaign page for all to see:
When to use Peer-to-Peer
Peer-to-peer is a great fundraising tool, but that doesn’t mean every fundraising goal now needs to be a peer-to-peer campaign. First, start by thinking of the events you’re already planning and see if you can incorporate a peer-to-peer fundraising aspect into them.
Another thing to consider before implementing a peer-to-peer strategy is how time sensitive your goals are. Peer-to-peer can spread word quickly on a donation goal with a short window. If you’re trying to hit a certain goal and need that final push, think about mobilizing your community through peer-to-peer. When you bring to your donor’s attention that they only have a certain amount of time, it can help spring them into action and raise more money for your campaign.
One strategy is to think of capitalizing on certain months that spread awareness – like American Stroke Awareness month in May, and no-shave November for cancer prevention.
Peer-to-peer fundraising also works well when donations are solicited in memory of someone. Your fundraisers can set up a peer-to-peer campaign in honor of a tribute by using the “tributes” GiveWP add-on in addition with peer-to-peer.
In addition to tribute campaigns, peer-to-peer could be used for folks needing immediate medical or emergency support. Word could spread quickly of your cause due to the time-sensitive nature and would benefit from wide sharing that peer-to-peer offers.
Finally, try it out for a birthday celebration! Most folks like using their birth month for donating to a cause, so try out a campaign for a special birthday and let the message spread through your social feeds as the birth date draws near.
Try it For Yourself
Ready to give peer-to-peer a try for yourself? Our live demo lets you explore features peer-to-peer, as well as additional features like multi-step forms, recurring donations, and fee recovery. The demo lets you see what your donors see and can provide inspiration for your own campaign!
1.3 Update
Since launching in September 2021, GiveWP has been happy to keep improving our peer-to-peer add-on. We released the 1.3 update for peer-to-peer in January 2022 with the following improvements:
- Admins can now clone Campaigns
- Donations can be edited to be attributed to different teams or fundraisers via the donation detail screen
- Admins can export campaign fundraiser data, including Campaign ID, Campaign Name, Fundraiser ID, Fundraiser Name, Fundraiser Email Address, Fundraiser Goal Amount, Fundraiser Raised Amount
- Admins can now delete teams and individual fundraisers
- You can now use custom CSS to style your Peer-to-Peer campaigns
- Read additional changes in the release announcement
Using a peer-to-peer campaign to support one of your 2022 goals? We’d love to hear about it! Let us know how your campaign is going and share success stories by filling out our story submission form.
About the Author
Rachel Kolman
Rachel Kolman is a Content Strategist for StellarWP. She has over 10 years of experience writing and editing for a variety of clients and brands. With two MFAs in Creative Writing, Rachel loves playing with language in new and surprising ways and exploring how to tell a story. She is passionate about education, social change, pop culture, and video games. She lives in Seattle, WA with her husband and two cats.