Stripe Gateway Settings
Stripe is a well-respected international payment gateway with support for a large number of countries and currencies. With a Stripe Premium Add-on license and GiveWP you can accept credit card donations with no fee, as well as Apple Pay, Google Pay, and iDEAL donations directly on your website easily and seamlessly.
Articles in this section:
 Common Error Messages
Getting Started with Stripe and GiveWP
In order to accept payments with Stripe using GiveWP you need to have 4 things:
- An active Stripe account (or more than one)
- GiveWP installed and activated
- The Stripe GiveWP Add-on
- A valid SSL certificate
Here are instructions on installing and activating GiveWP Add-ons.
Note: You can always access your add-on purchase receipts, downloads, and licenses from your GiveWP Account dashboard.
After your Stripe Add-on is activated, navigate to GiveWP > Settings > Payment Gateways. There you will see the default Payment Gateways (PayPal Standard, Test Payment, and Offline Donations). With the premium Stripe addon active, four additional options become available:
- Stripe – Apple Pay
- Stripe – Google Pay
- Stripe – iDEAL
Connecting to Stripe
With the premium Stripe add-on, you can connect to Stripe in two ways: using Stripe Connect (also known as the “Blue button” method) as well as the API Key method.
If you are connecting Stripe and GiveWP for the first time, you’ll need to read through the steps in the next section. If you are reconnecting Stripe, you can skip ahead to the Stripe Connect section.
Connecting Stripe and GiveWP for the First Time with Stripe Connect
Before connecting to Stripe, every backend page in the WordPress Admin area displays a banner prompting your connect to Stripe:

Click the “Connect with Stripe” button. This will redirect you to Stripe and prompt you to either login to your Stripe account, or if you’re already logged in you’ll be able to connect immediately or choose from multiple accounts that you have access to.
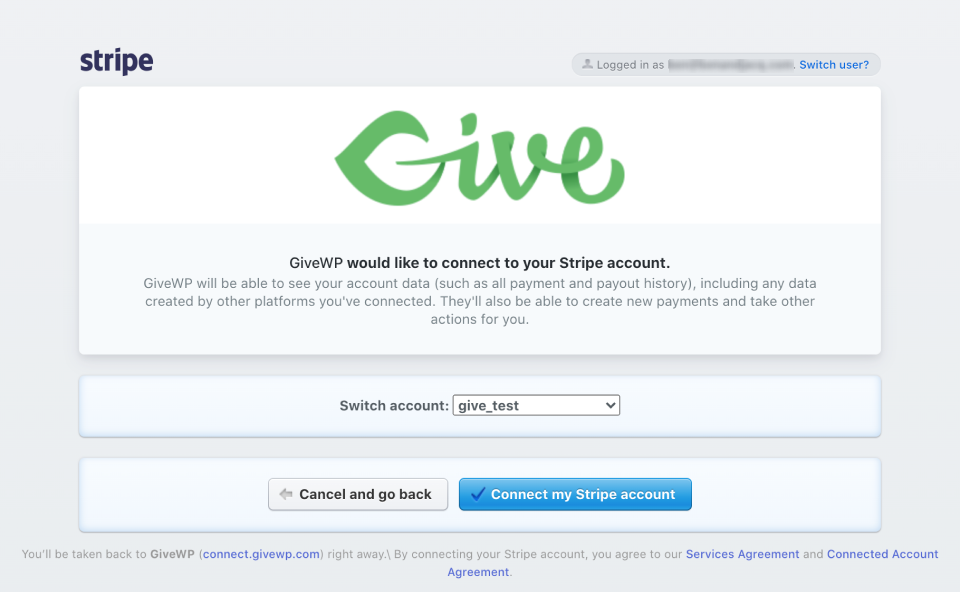
You can also find this method of connection at GiveWP > Settings > Payment Gateways (tab) > Stripe Settings (section) > Manage Accounts”.
Click the “Connect my Stripe account” button to connect with Stripe. Once clicked, you will be redirected back to your admin dashboard and you should see you now have been connected:
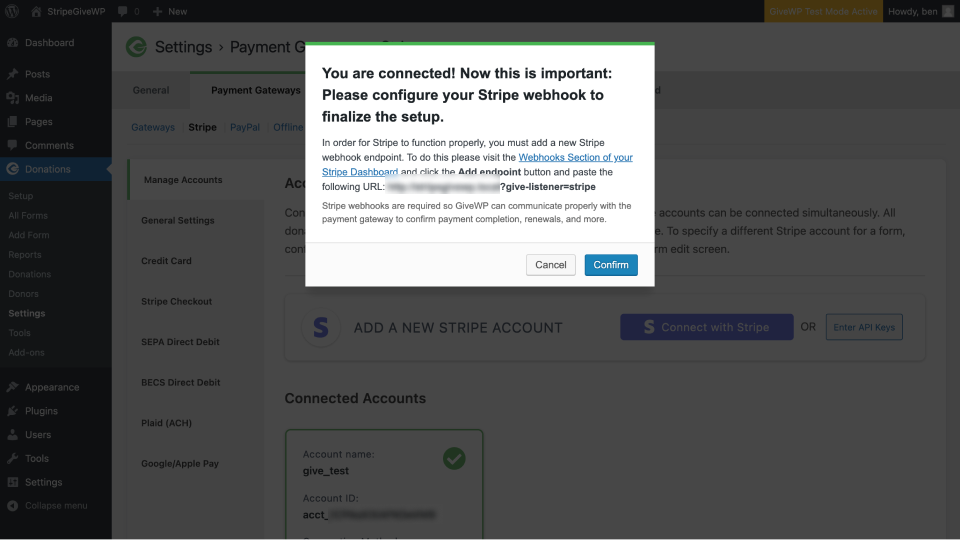
GiveWP is now connected to your Stripe account and ready to accept both live and test donations, but without the webhook configured correctly, donations won’t be marked as complete. See that section below.
Connecting to Stripe with API Keys
If you are connecting your Stripe account using API keys, Stripe requires restricted API keys for new connections. You’ll need to follow the steps below to create that first connection.
Navigate to Settings > Payment Gateways > Stripe > Manage Accounts, and select “Enter API Keys”.
You can either use the existing keys, or use the GiveWP Stripe App to generate new keys.
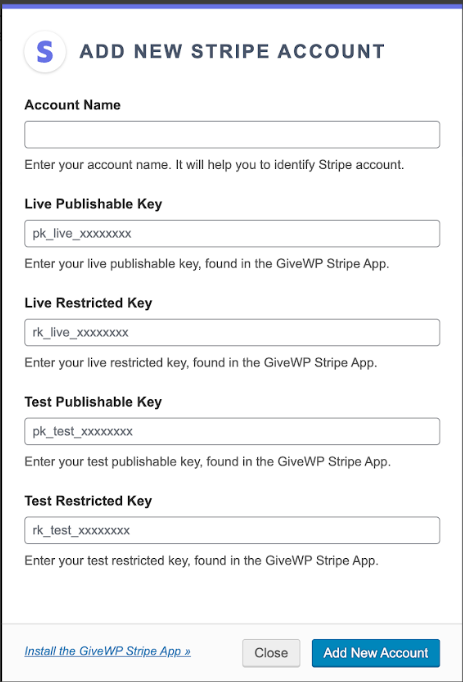
To use the GiveWP Stripe App, choose “Install the GiveWP Stripe App” in the bottom-left corner. A new tab will open in the Stripe Marketplace. You’ll want to select the GiveWP page, and then select “Install App”. From here, you can choose Live Mode or Test Mode, and click “Install App”.

In the App Settings, copy the publishable key and restricted key. Then, navigate back to the tab where you initiated the connection to Stripe in GiveWP. Paste the keys into the appropriate fields in the modal.
Test Donations with the Stripe App and GiveWP’s Test Mode
If you’d like to run test donations with GiveWP in Test Mode, you’ll need to install the GiveWP Stripe App in your Stripe account in Test Mode as well. You’ll want to match Test Mode to Test Mode, and Live to Live. Once you have both GiveWP and Stripe in test mode, head back to the Stripe Marketplace tab.
Click the “Install App in Test Mode” button and follow the steps listed.

Just like Stripe and GiveWP, you’ll want this app installed in Test Mode to keep Test Mode matching across all three. Once the app has been installed in Test Mode, copy the test publishable key and restricted keys into the modal on the Give settings page.
Select “Add New Account” (and remember to provide an account name!).
Note: Only one set of keys (Live or Test) is required to add the account. This is because it can be difficult to successfully procure both sets at the same time using the app. Users may want to add separate connections for Live and Test modes.
Keys can also be created manually in your Stripe Dashboard. Manually created keys will need to have the following required permissions:
- Apple Pay Domains: Write
- Customers: Write
- Events: Read
- PaymentIntents: Write
- Products: Write
- Checkout Sessions: Write
- Credit Notes: Write
- Prices: Write
- Subscriptions: Write
- Webhook Endpoints: Write
API-key based Stripe Integration
A benefit of GiveWP’s premium Stripe add-on is the option to connect using API keys, instead of the Stripe Connect method outlined above. This is an option for advanced users and developers who want to connect without the oAuth method outlined above.
Note: You do not need to use your own API keys if you are already connected to Stripe using the above “blue button” option.
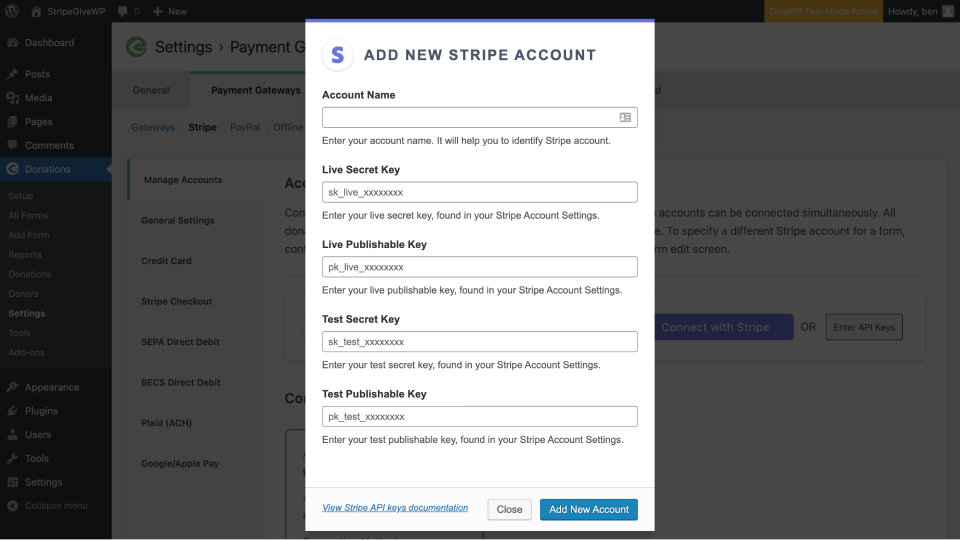
When the premium add-on is activated, there’s an API Keys option which you can select to use to connect. First, you need to get your API keys from your Stripe account.
Integrating Your API Keys in GiveWP
Leave the Stripe Dashboard open in one browser tab, and in a new tab go to your GiveWP-powered WordPress site and navigate to GiveWP > Settings > Payment Gateways > Stripe. Select the “API Keys” Connection Type to see the fields for adding in the API keys.
That’s all there is to it. Now when your donors come to your site, they’ll be able to use credit cards to donate to you directly in the currency of your country and not have to be redirected to another site.
Connecting Stripe and Your Webhook (required)
In order for donations to be marked as complete on your GiveWP site, you must configure the webhook at Stripe. On the settings page at GiveWP > Settings > Payment Gateways > Stripe > General Settings the webhook URL is pre-populated on the page. Copy that to your clipboard for later use.
Click the link in the paragraph just above the webhook URL or navigate to:
On that page, click the “Add endpoint” button and paste in your webhook URL.
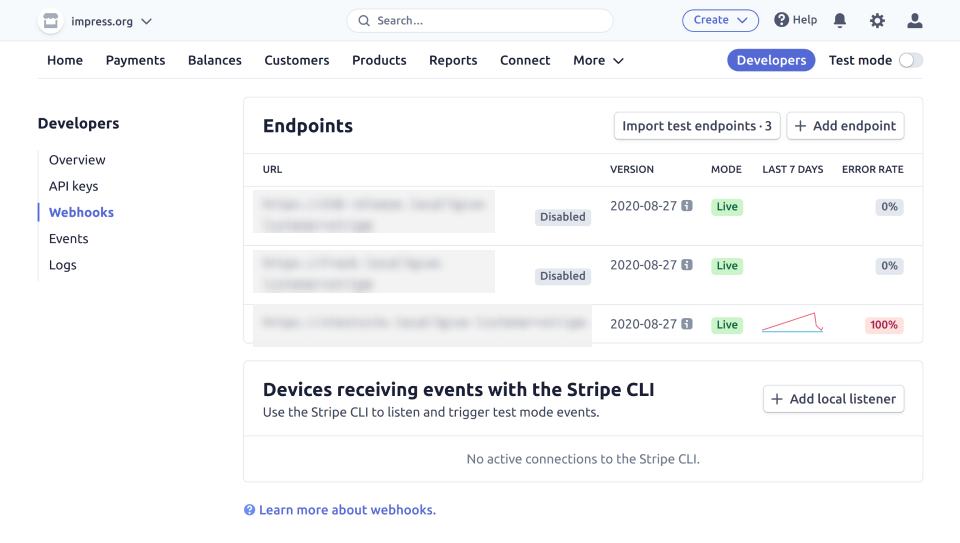
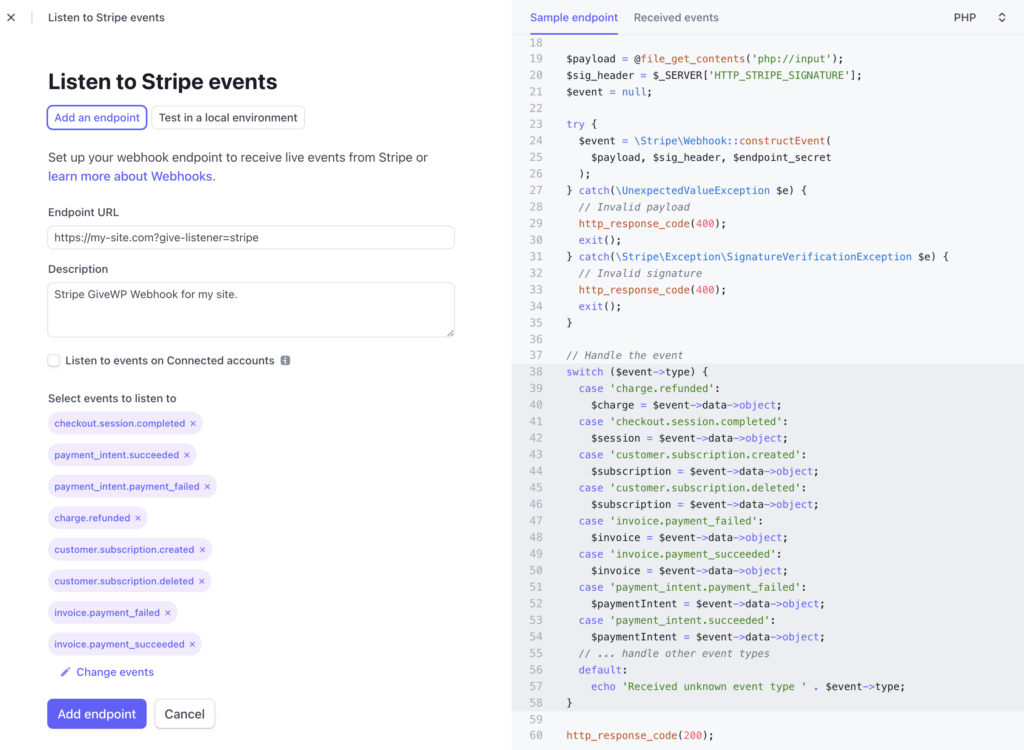
The webhook is a one-way message from Stripe to your GiveWP site to alert the site of events on the Stripe side. Select the following Events:
- checkout.session.completed
- payment_intent.succeeded
- payment_intent.payment_failed
- charge.refunded
- customer.subscription.created
- customer.subscription.deleted
- invoice.payment_failed
- invoice.payment_succeeded
Stripe has a method for sending ALL events, which you can also use, as long as you understand the tradeoff you are making there. Every event that is sent over the webhook, regardless of whether GiveWP does anything with it, creates a log in the GiveWP logs at GiveWP > Tools > Logs. For the events above, in addition to logging the event, GiveWP also does something else (marks the donation as complete, adds a renewal for recurring subscriptions, marks a transaction as refunded, etc).
If you select all events, you’ll end up with lots of events GiveWP doesn’t really do anything with, which can clutter up your logs, or in the case of Stripe accounts with a ton of volume, potentially slow down your server.
But by selecting all events you’ll be ready if GiveWP ever changes/adds a feature that uses a new event.
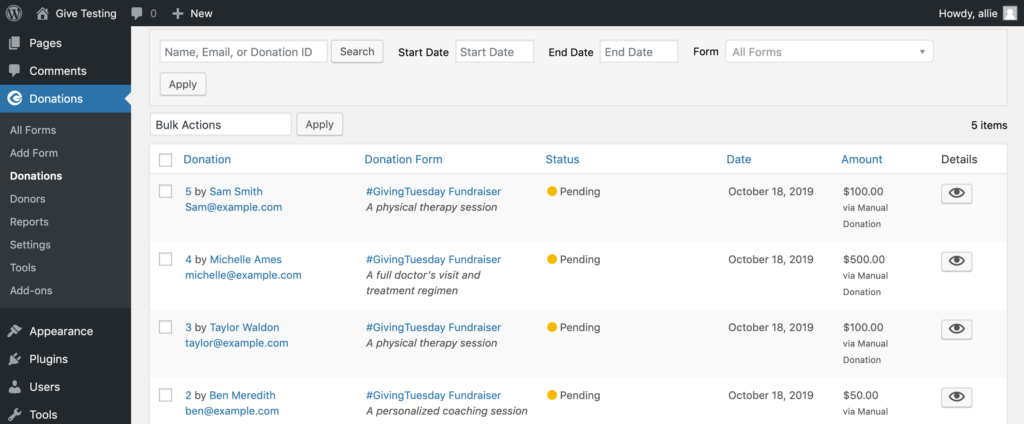
The most common problem that points toward webhooks not being configured correctly is donations not being marked as complete on the GiveWP side, even though they are complete at Stripe.
A side effect of donations in “pending” status is that email notifications (Donation Confirmation, Donor Receipt, etc) are not sent.
Note: In order to process test mode donations, you’ll need to repeat the same steps with Stripe’s dashboard toggled into test mode.
Frequently Asked Questions
Stripe itself always has it’s own credit card processing fees. If you are a 501(c)3 (or similar outside the U.S.) then Stripe can reduce your fees. Reach out to their support about that.In addition to the Stripe credit card processing fees, our Stripe integration includes a 2% platform fee.
Yes. The webhook is now required for both one-time and recurring donations so that GiveWP knows that the donation is complete.
Yes. They are two different gateways and both can be enabled and used side-by-side.
If you are seeing that you have many donations that are pending, but you have received funds through Stripe, your webhook has not been configured correctly. Seeing the webhook reflected in the Stripe Settings on WordPress is only the first step.
As of version 2.2.9 of the Stripe add-on, preapproval is no longer supported.
Stripe Chargeback Protection is compatible with GiveWP. It would need to be activated and configured from within the Stripe dashboard.


