How to Build Your Giving Tuesday Landing Page with Elementor
Learn to use Elementor and build a Giving Tuesday landing page with the key pieces to need to inspire fundraising

A landing page is one of the most powerful tools in your Giving Tuesday arsenal. They’re handy because they provide a focused environment, optimized for one goal: donations.
However, building a landing page is hard for some people. If you’re not sure what to include or how to build it, creating one for an important fundraising campaign like Giving Tuesday can seem intimidating.
Luckily, the combined user-friendly power of WordPress, Elementor, and GiveWP make putting together a targeted landing page a breeze.
Why Use GiveWP and Elementor for Giving Tuesday?
Elementor is a robust visual page builder that works with any WordPress theme. You need zero coding skills to get it up and running and it works perfectly with the GiveWP donation plugin. The drag and drop tools make it ideal for putting together important marketing pages. If you’re pressed for time and need a tool start building your Giving Tuesday landing page, Elementor is perfect for you.
To get started building a Giving Tuesday campaign with Elementor, you need:
- A WordPress website.
- The free GiveWP donation plugin.
- The free Elementor page builder plugin.
If you already know and love Elementor, you can get started using our template now. If not, keep reading!
Identify Key Giving Tuesday Landing Page Components
It’s best to plan the work, then work the plan when creating any website or landing page. Prepare all the components you need in advance to make it easier to build the page. This includes written text as well as images and videos.
Brainstorm and document answers to the following questions in a singular place. You may have some of these on your site already that you can re-use.
- What is the fundraising campaign for? In this case, it’s Giving Tuesday.
- What do you need from donors (money? sign-ups?) and how will you use what they give?
- How much do you want to raise or collect?
- When will the campaign begin and end?
- What are some compelling reasons/statistics/facts that prove why people donate?
- What suggested amounts can you ask for? Include the impact each suggested amount will generate.
- What high-quality images or videos do you have that support or describe your campaign?
Now comes the fun part: actually building the page! Let’s go through an example design with one of the Elementor templates. Tweak the following steps to create a page that fits your Giving Tuesday campaign and organization.
Set up Elementor on Your WordPress Website
First, open up your WordPress website and go your WordPress Dashboard and find Plugins > Add New > Search: "Elementor". Download and activate the first choice on the page, “Elementor Page Builder.”
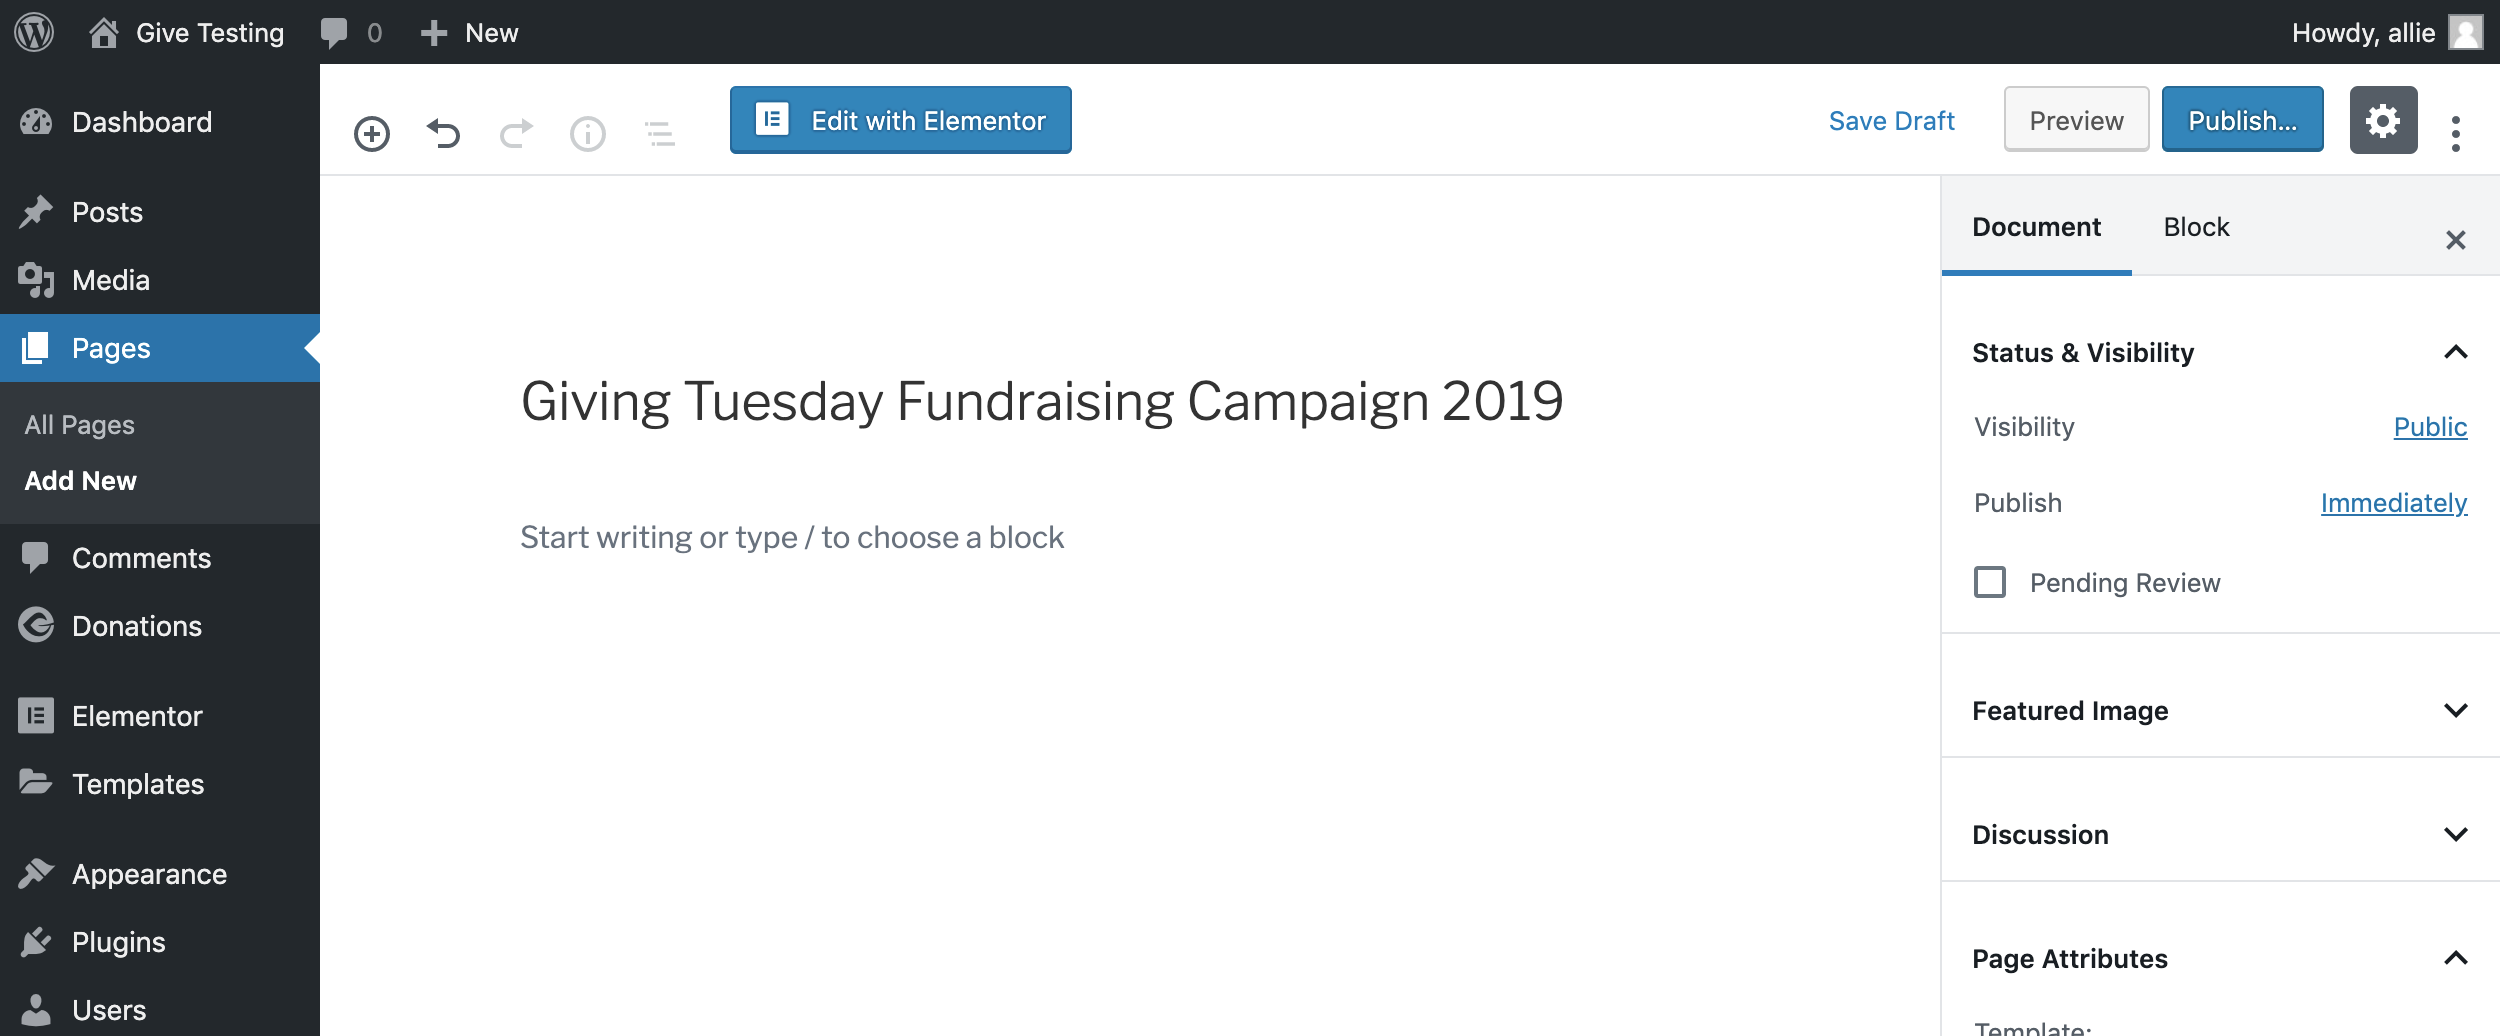
Go to Pages > Add New and give your page a name. Then, click “Edit with Elementor” and you’ll get redirected to the editor.
Browse the template library for a layout instead of starting from scratch. Find a template that fits the look and feel of your organization’s mission best. Consider the shapes and spacing included in the design. Keep in mind you can always change the colors and fonts to match your branding later.
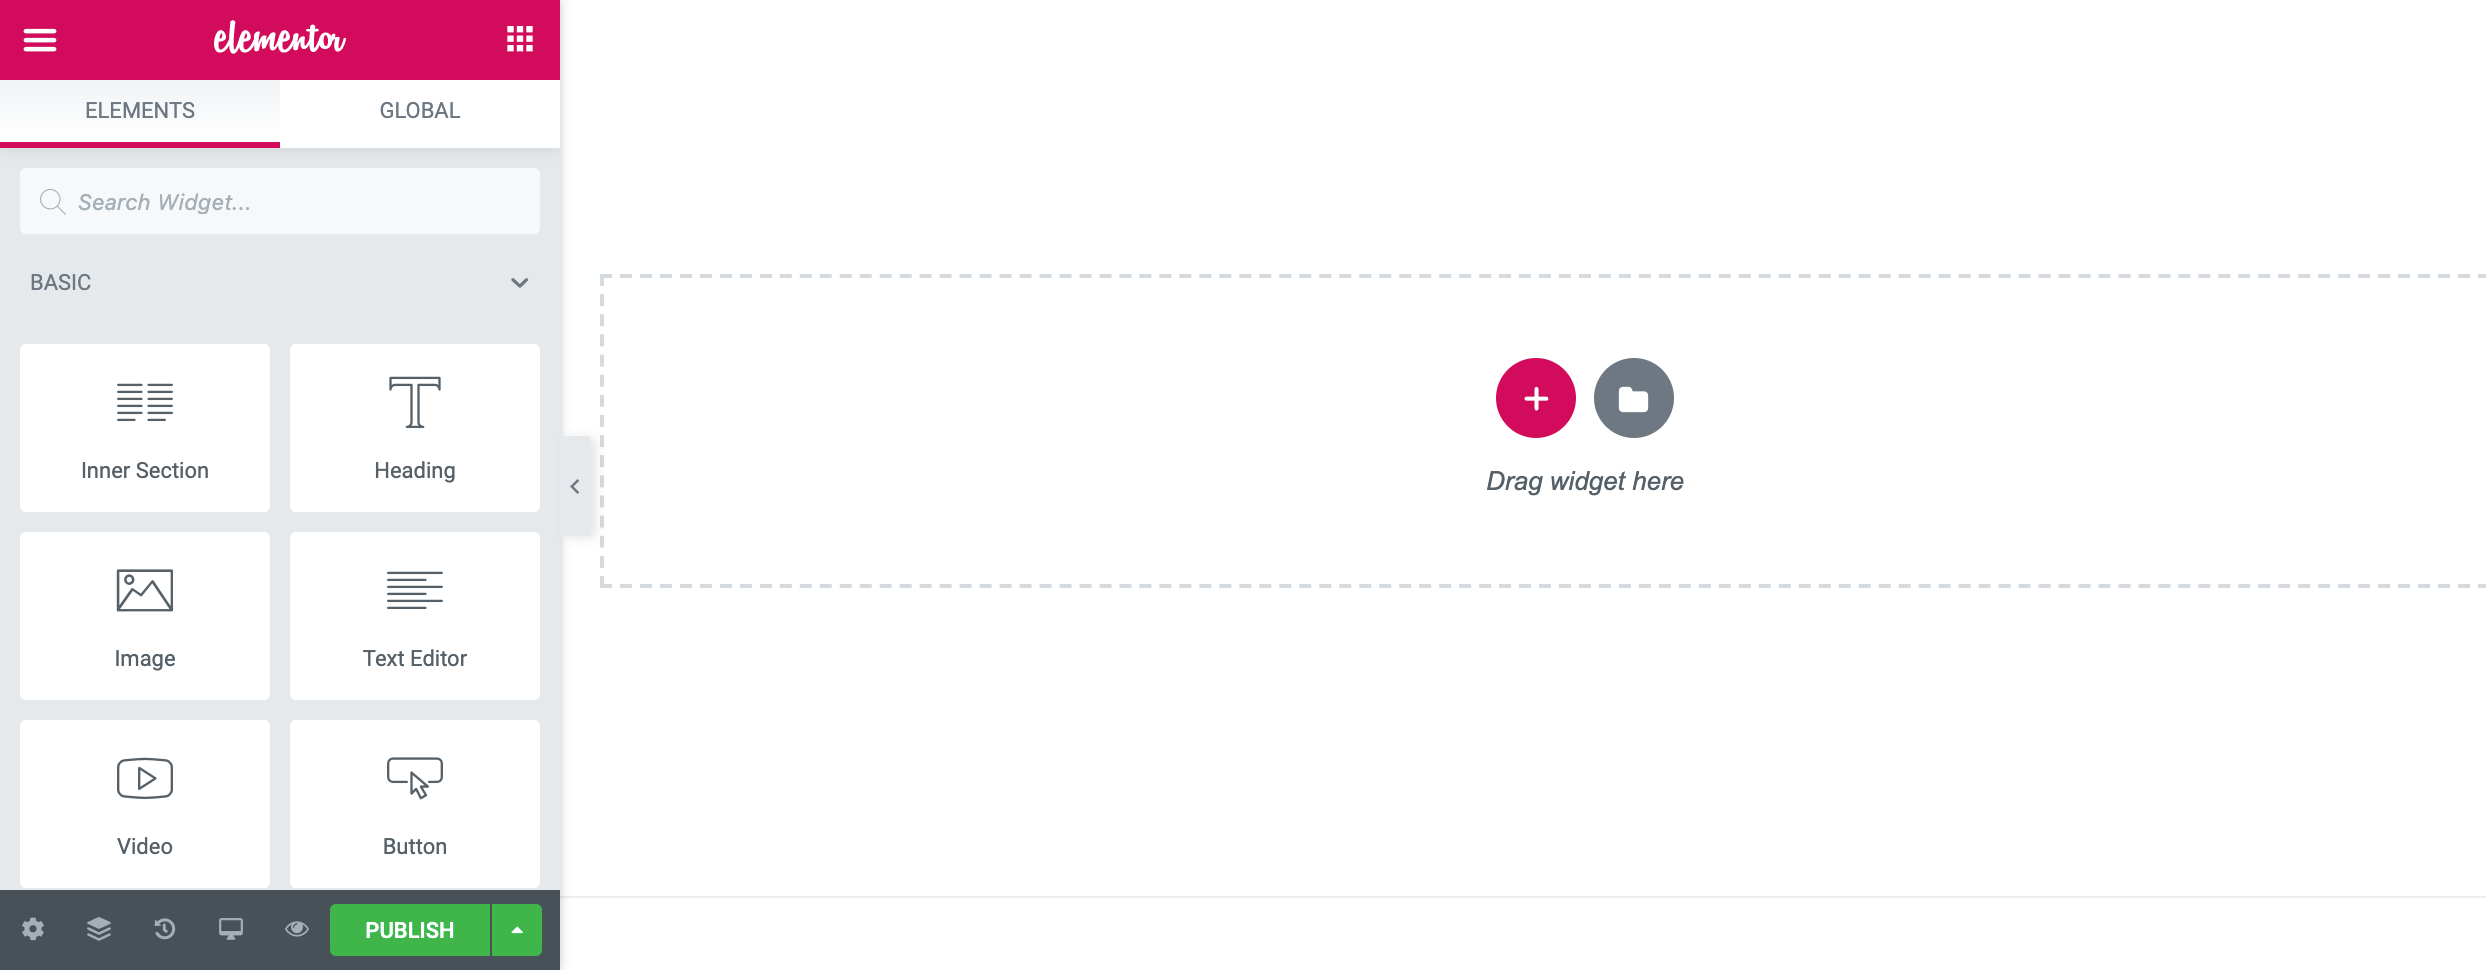
On the Elementor editing screen, choose the gray folder icon to open the template library.
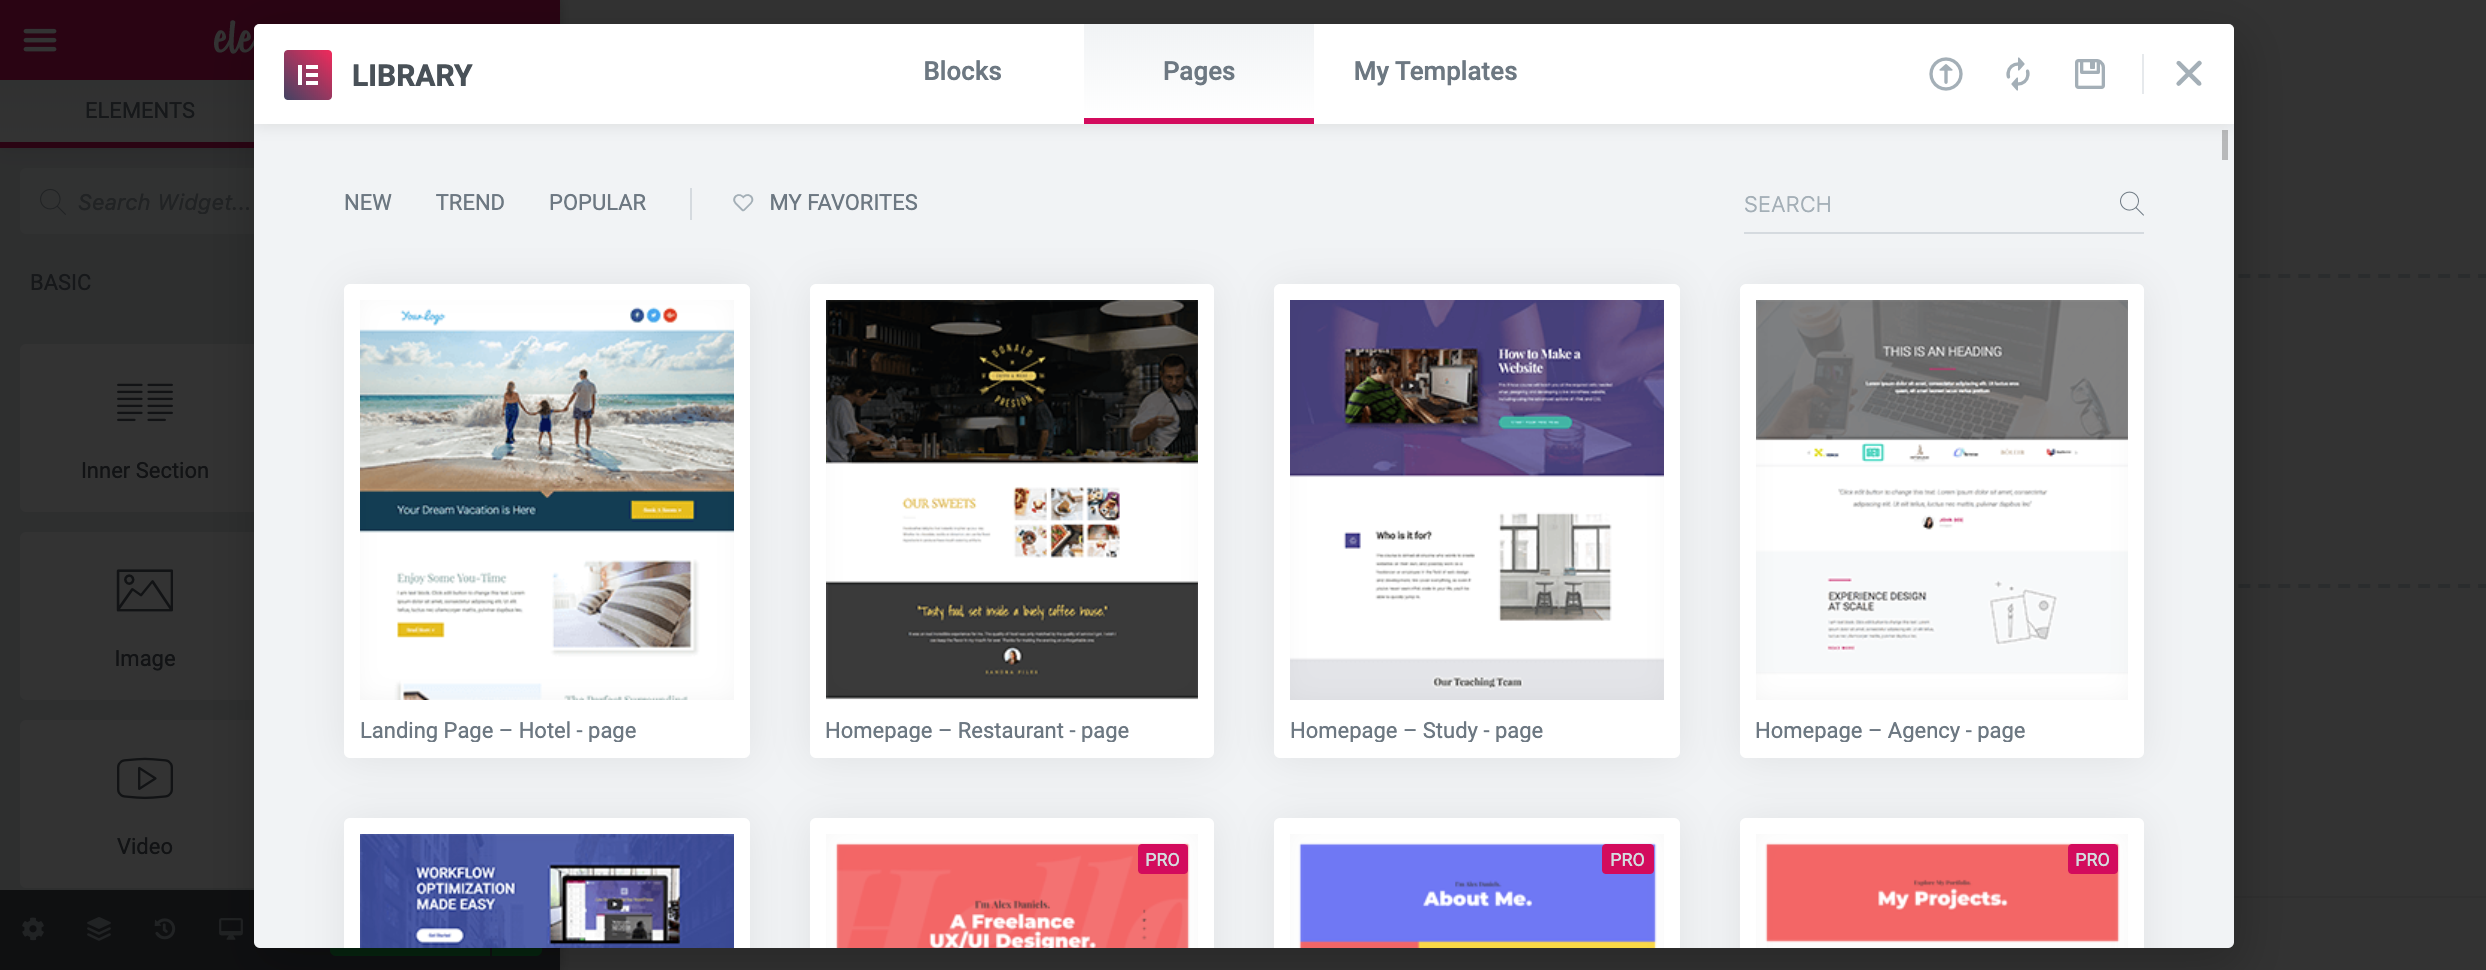
The template you choose should communicate the feelings and emotions you want to convey. For example, determine whether the tone of the campaign is hopeful, somber, playful, or compassionate. The landing page templates that Elementor offers are all fantastic. But some may stand out to you or fit the content you have better than others.
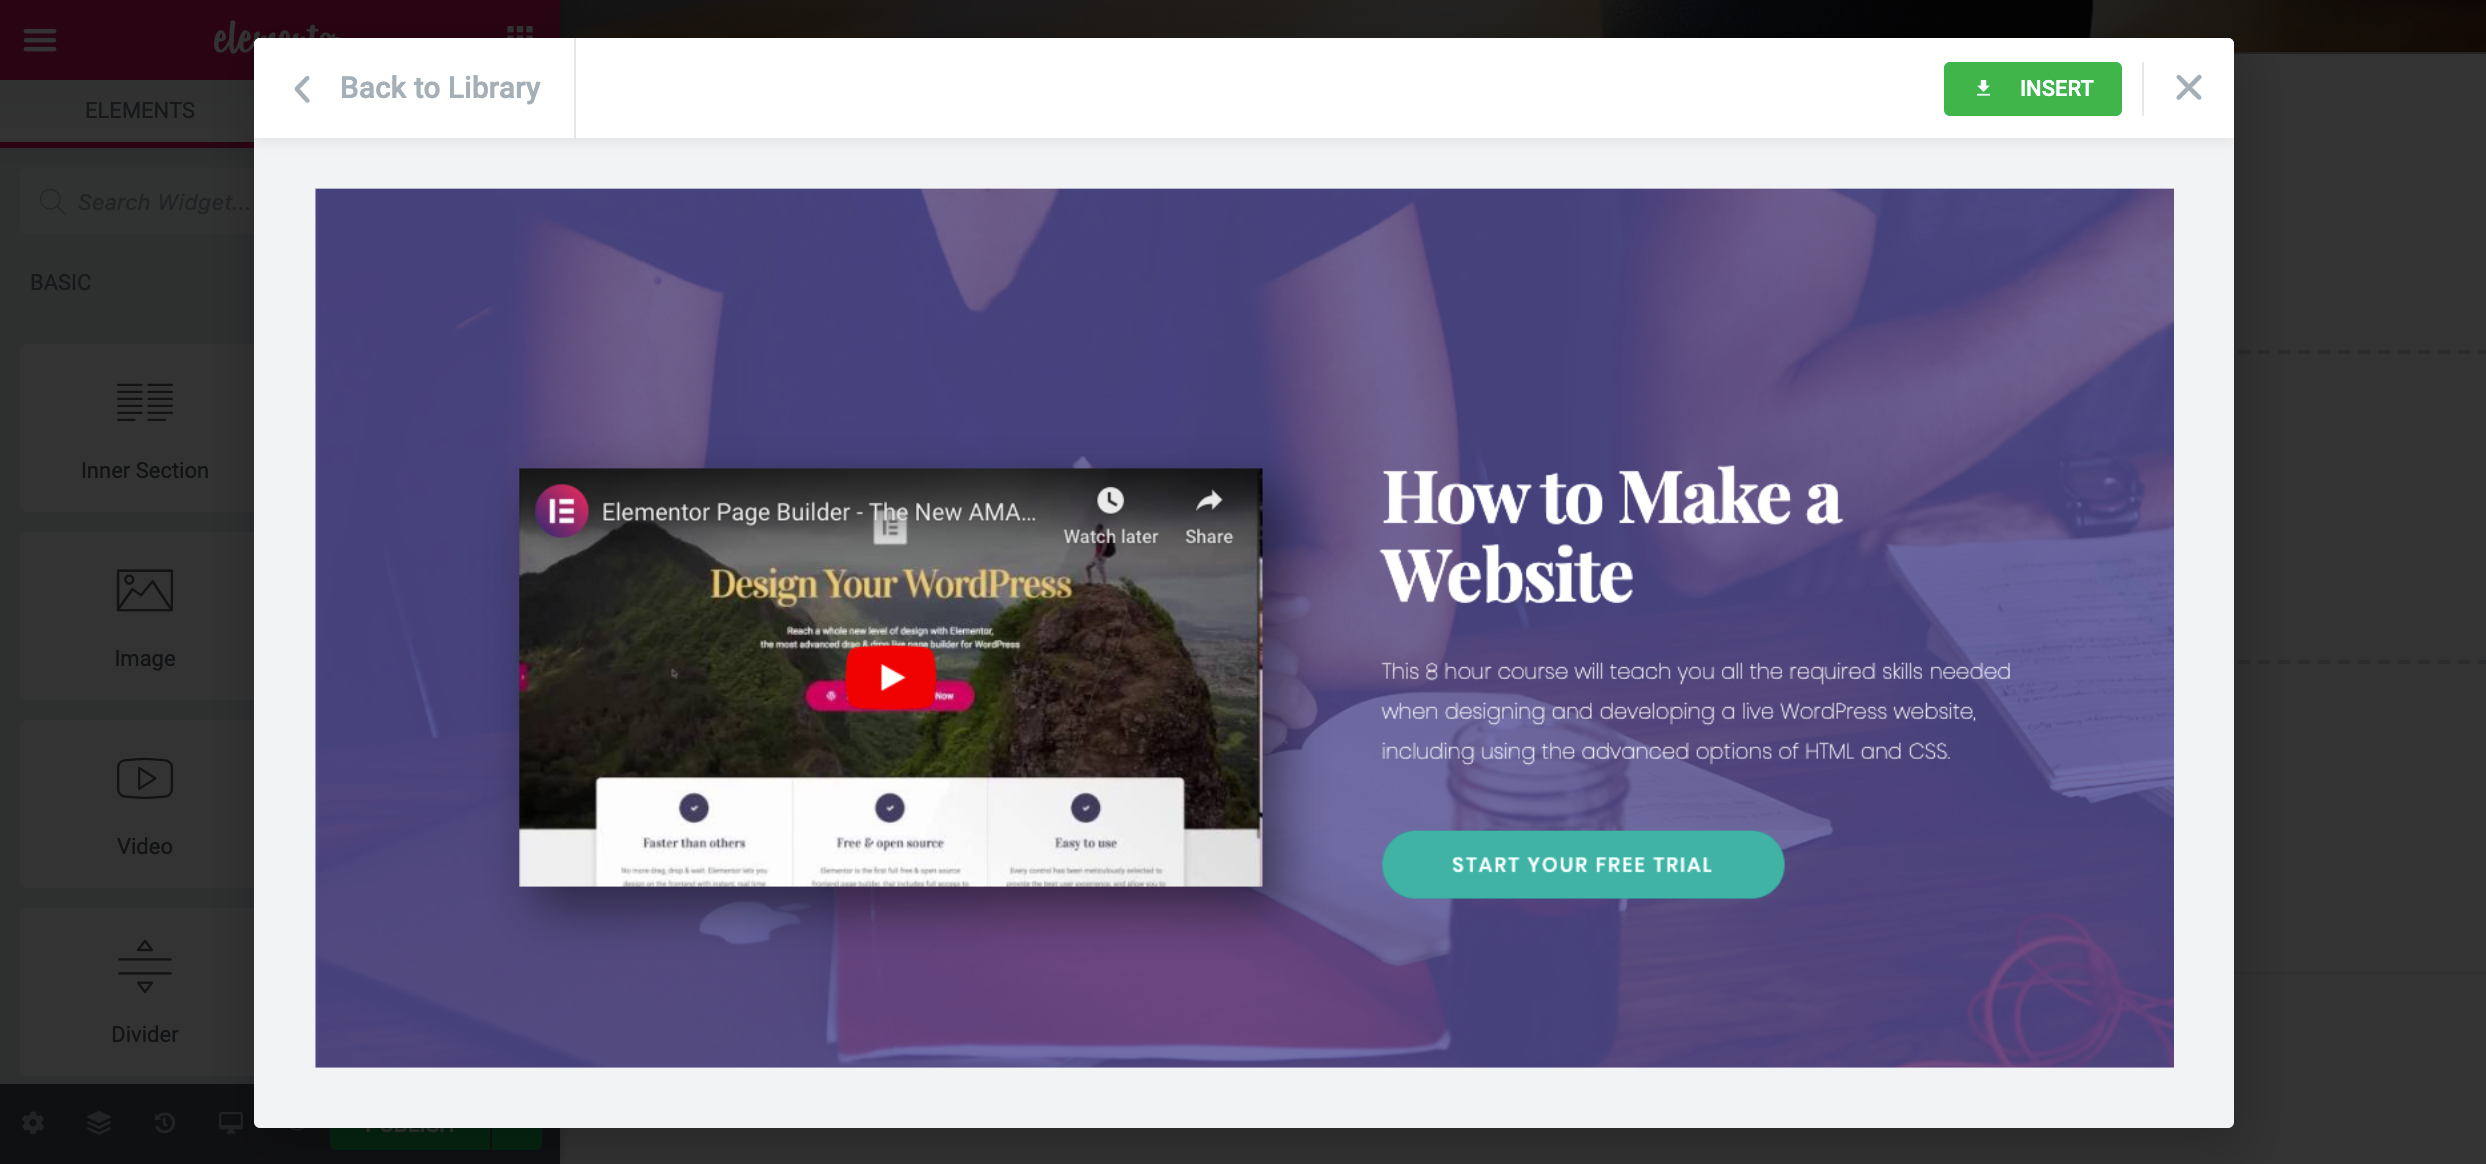
Once you’ve picked a template, you can start to build!
Edit Your Landing Page with Elementor
Once you’ve selected your template, edit it to fit your Giving Tuesday campaign. You have the ability to edit the color, the design, the layout, etc.
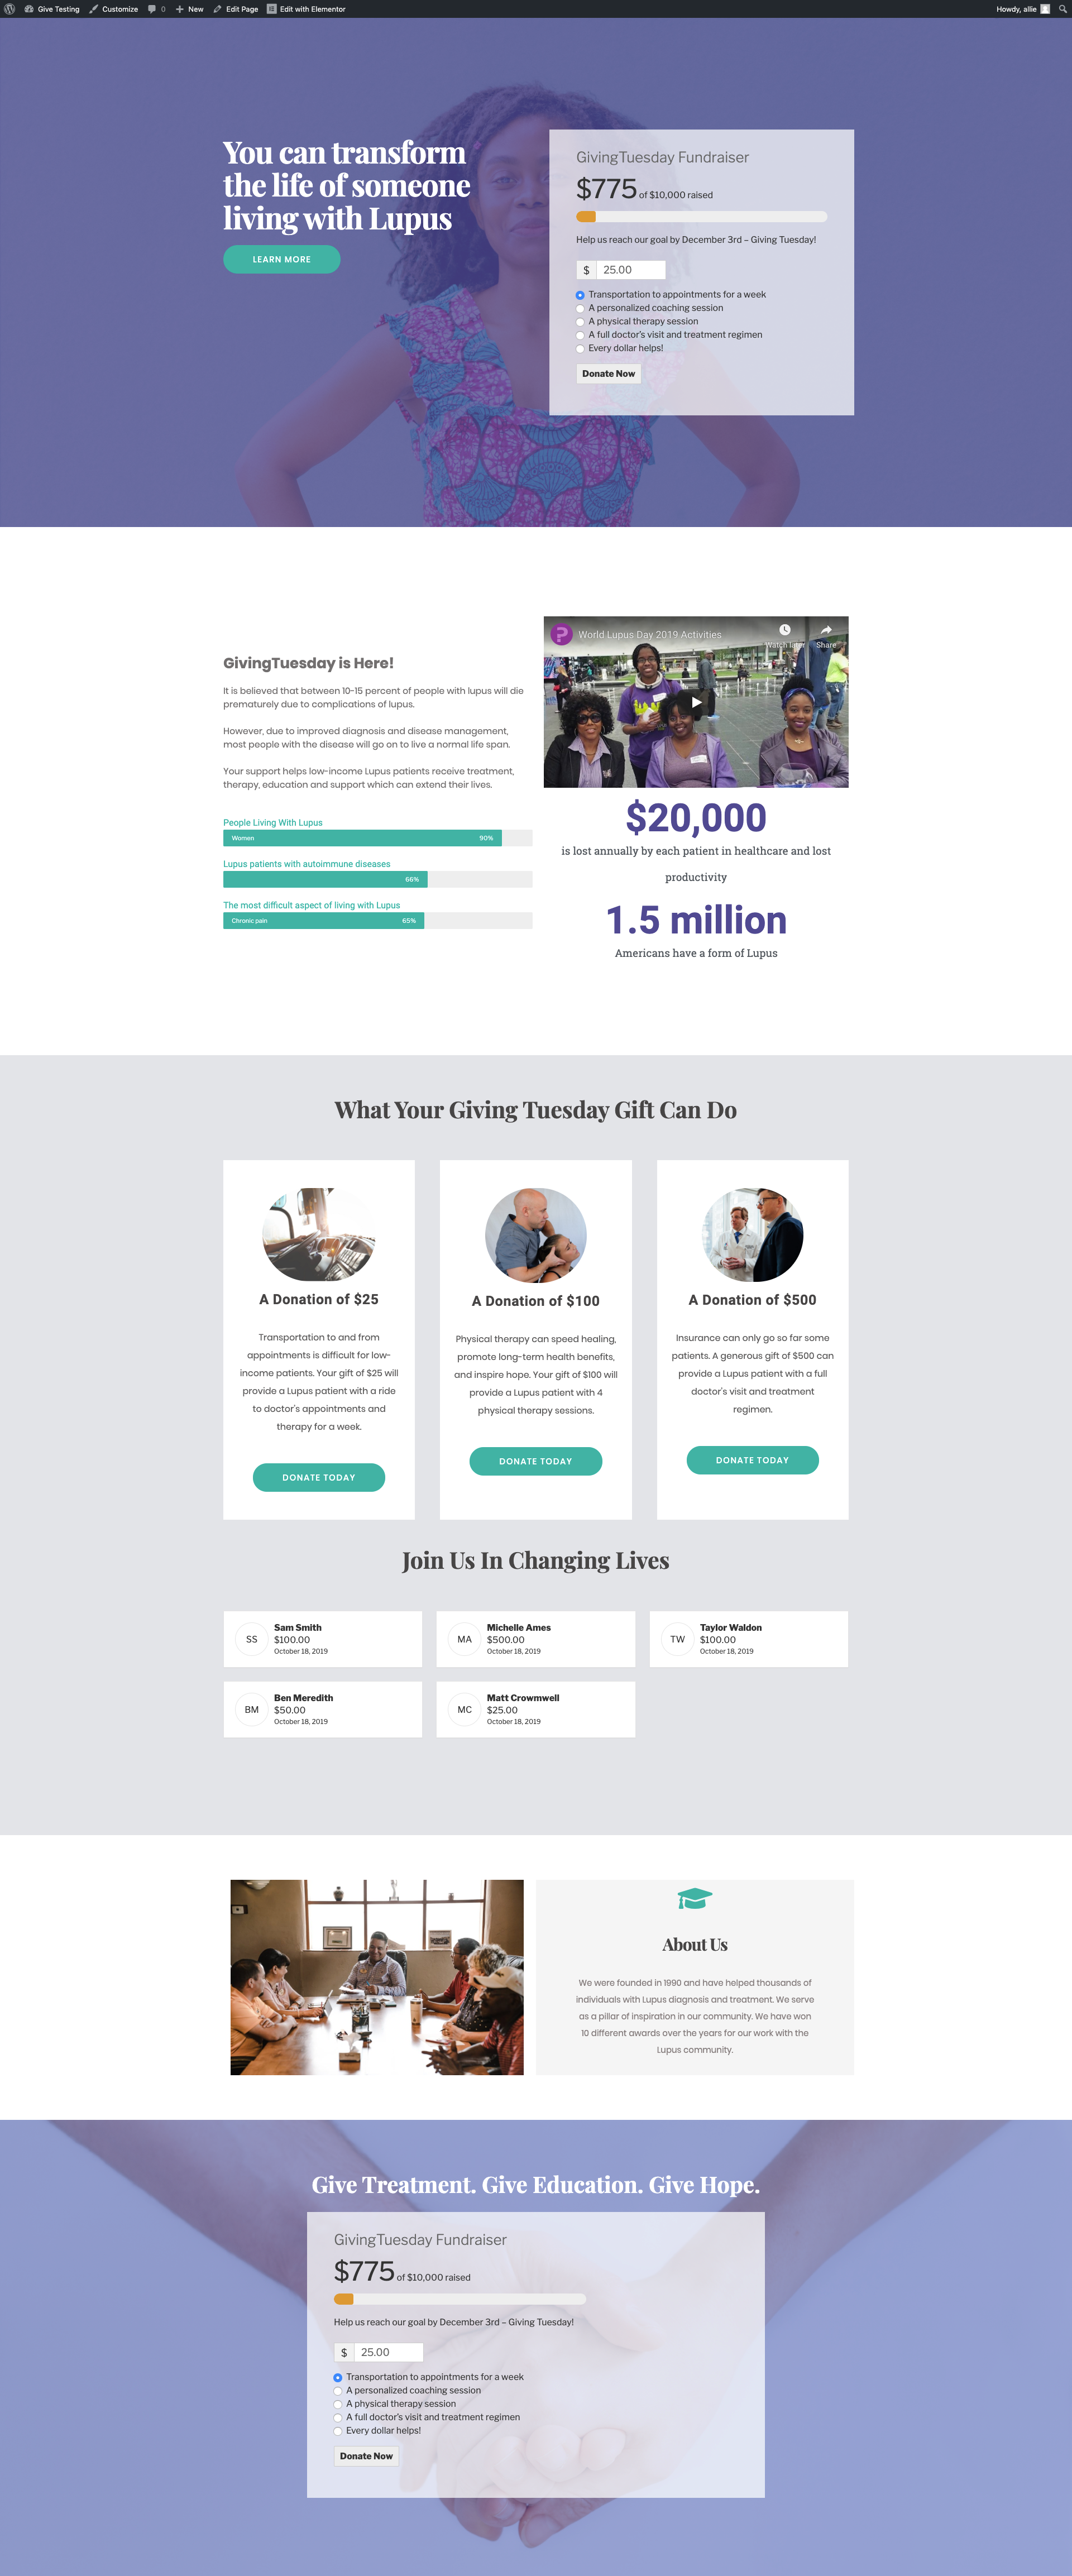
The Hero Section
Our chosen template already has a great hero section. It includes a full-width background, text area, button, and video. To personalize it, start by changing the background image.

In the editing panel, go to Style > Image. Then click on the existing image to access the Media Library. Upload or search for your photo. It will immediately display in the background.
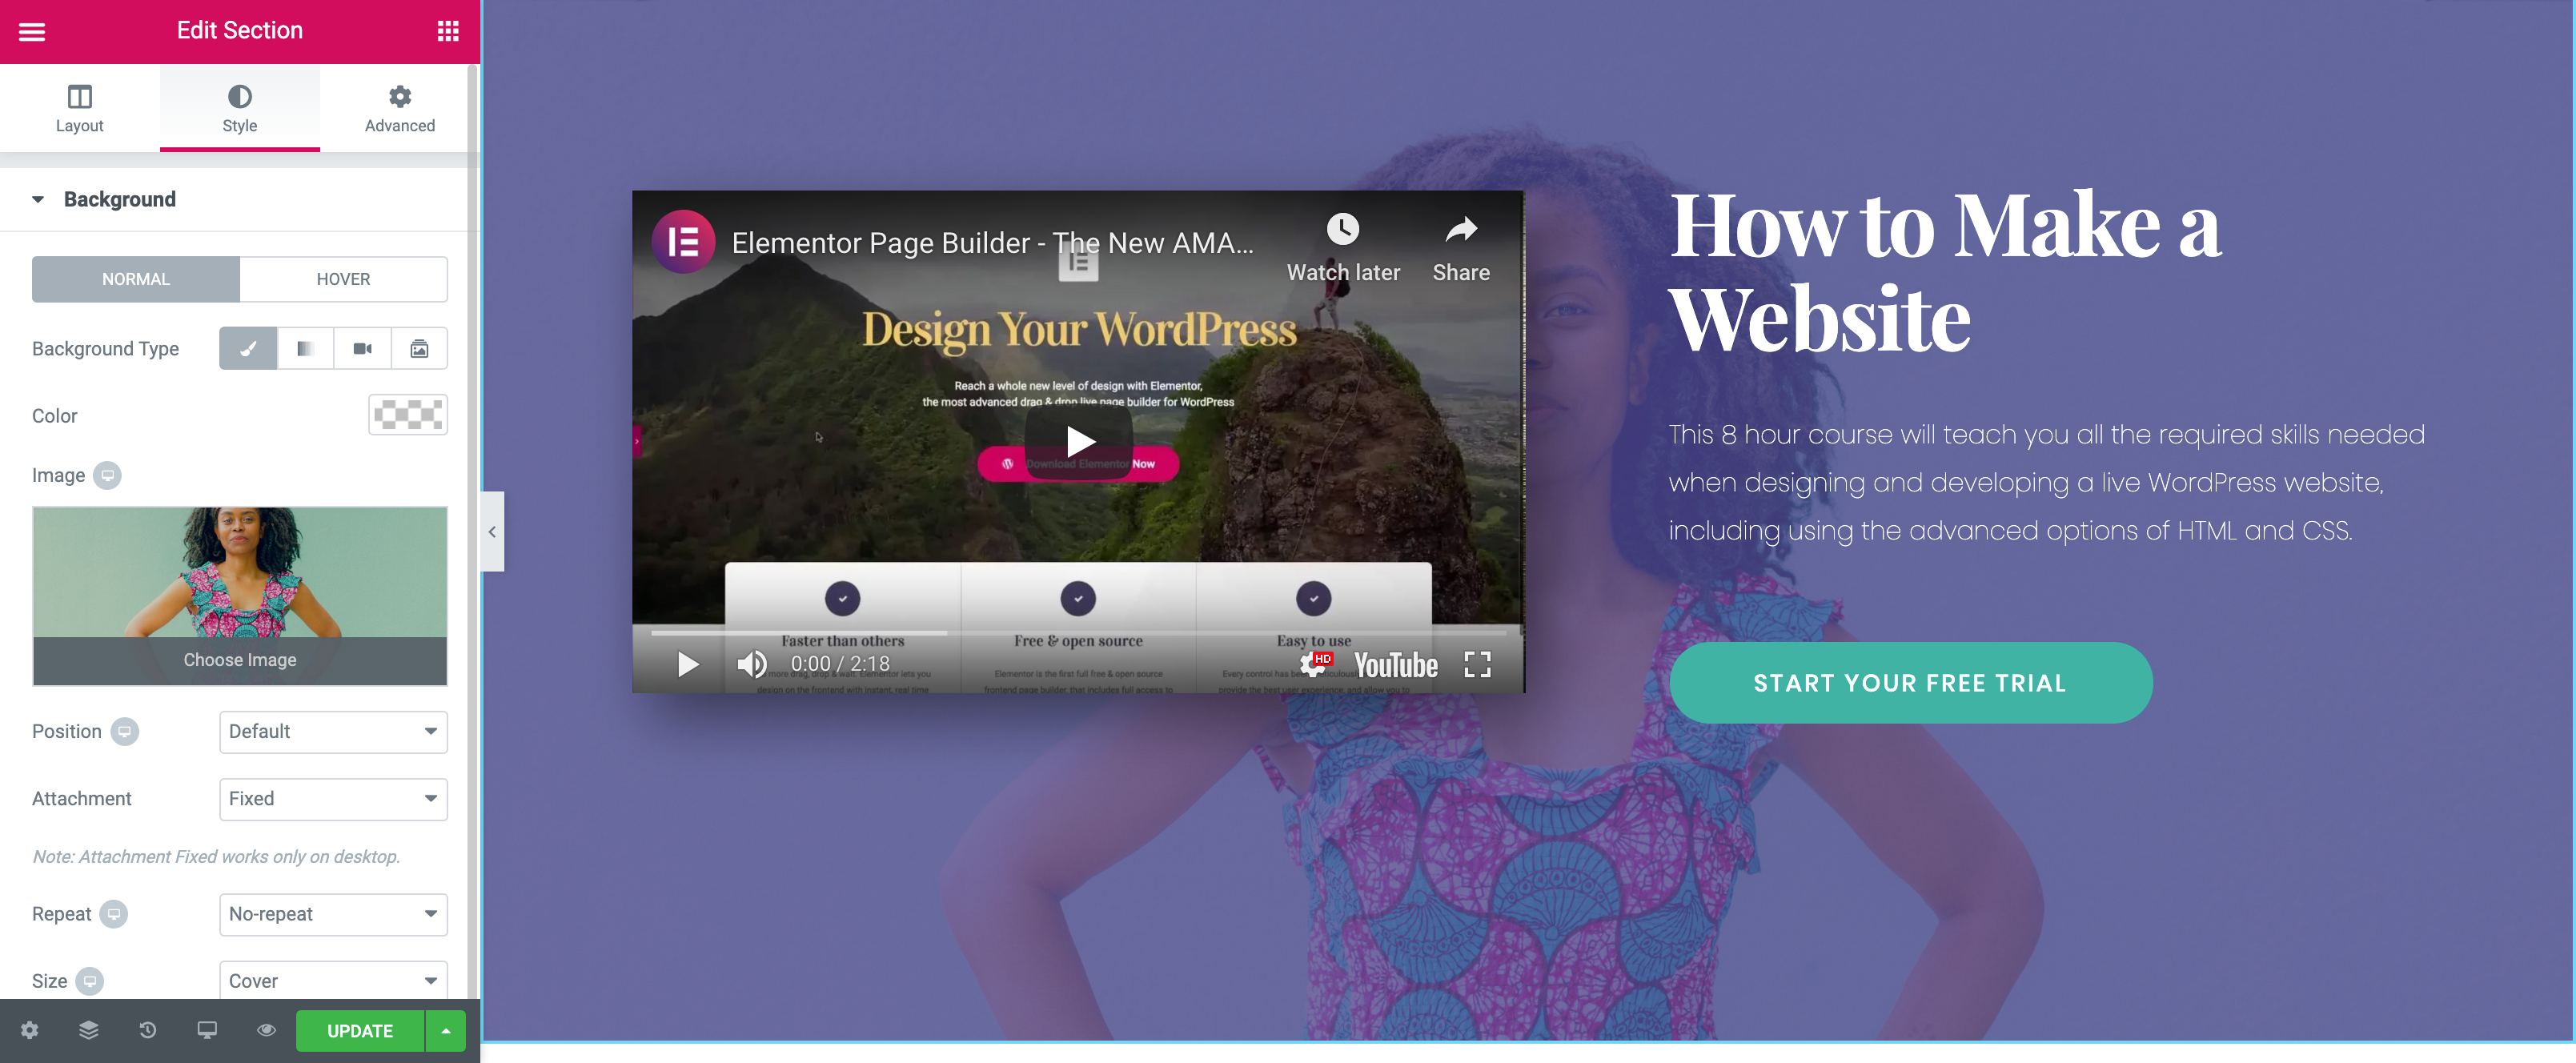
Now, swap the position of the text and video by clicking on the blue pencil icon, then dragging and dropping the modules.
To edit the text, click the small blue pencil icon attached to the text field. It opens up the Elementor section editor panel for that piece.
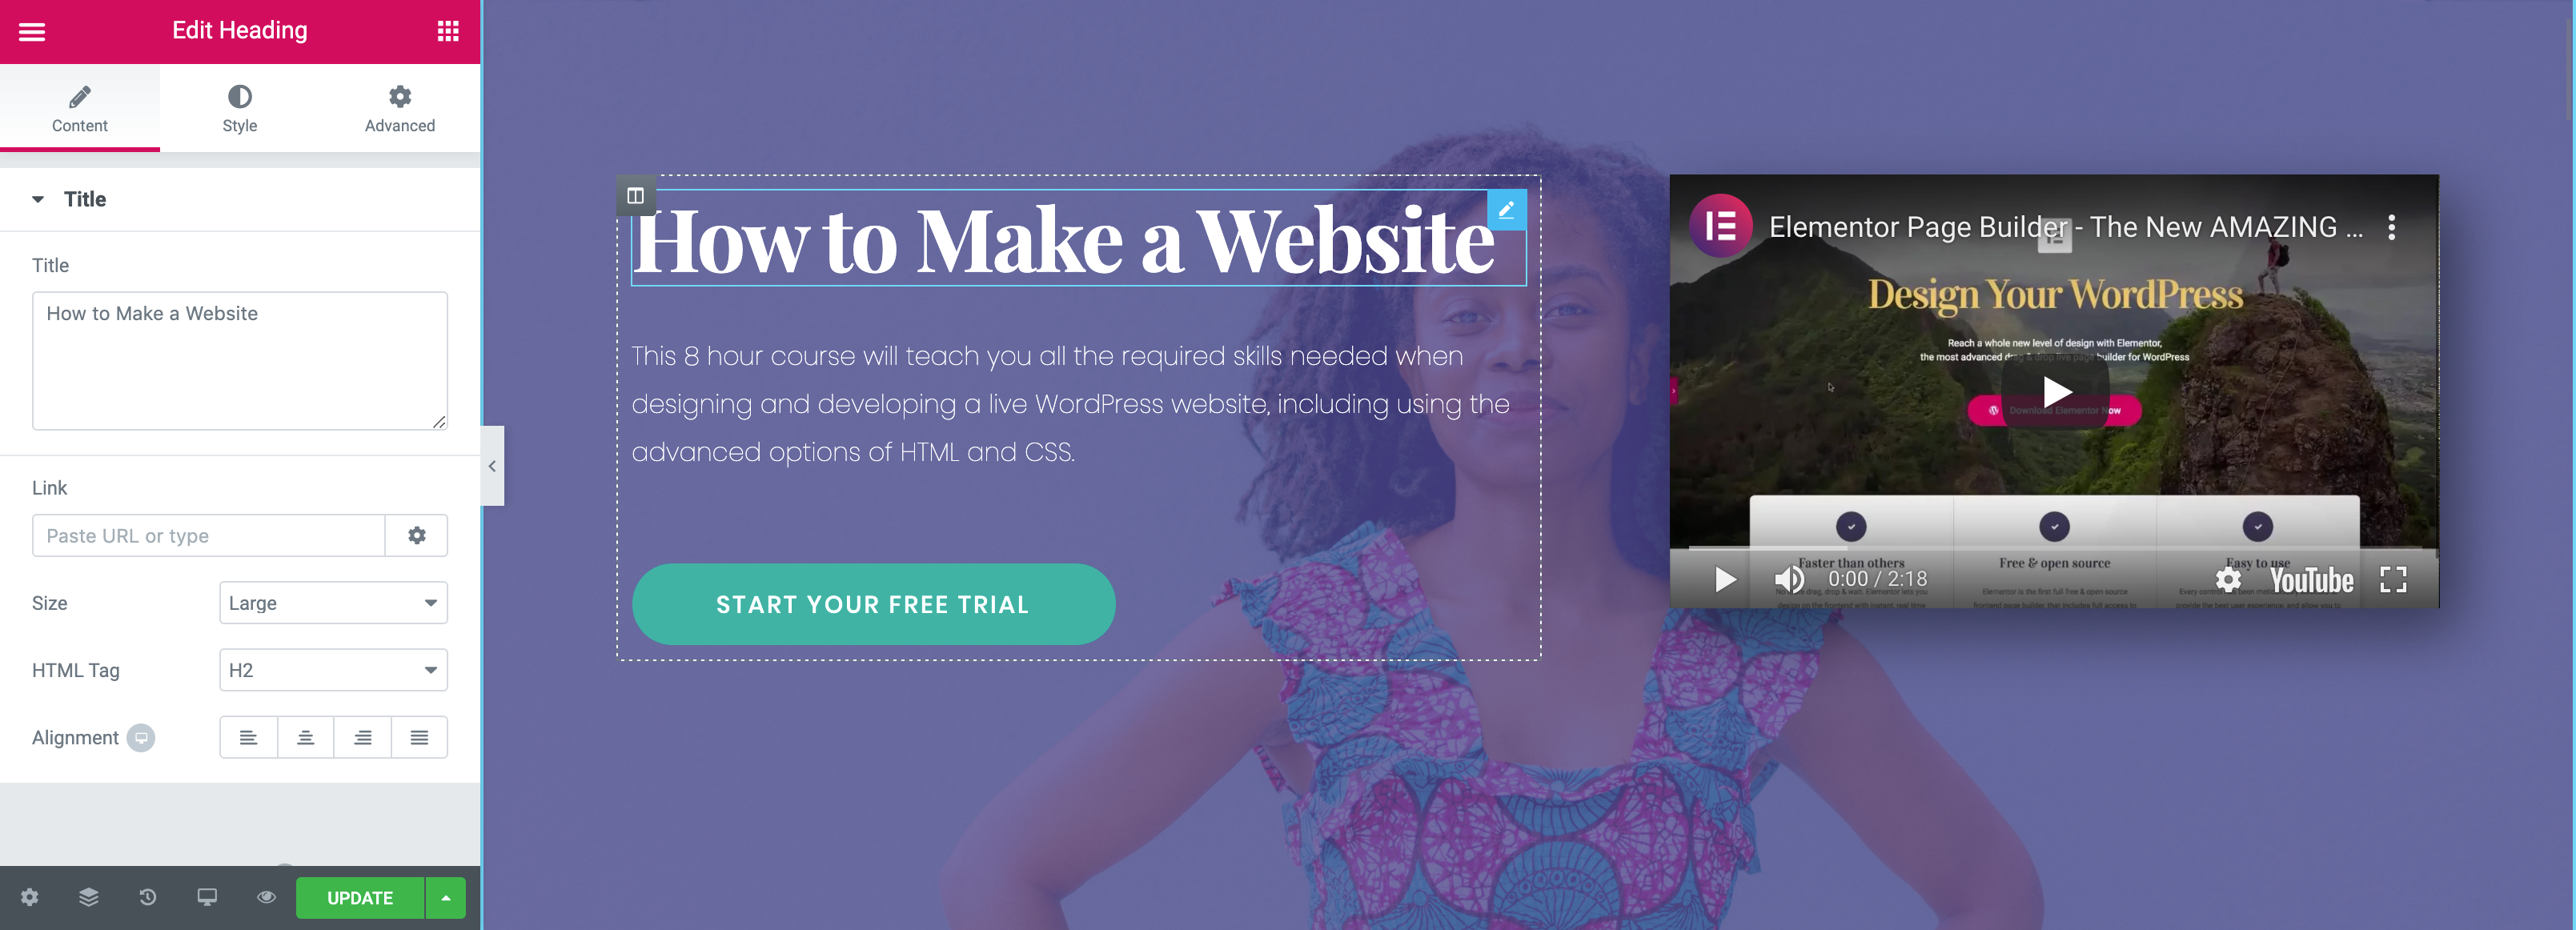
Instead of a video here, add a donation form so that it’s immediately available. We don’t want to make donors scroll too far, especially on mobile devices. Add another form further down the page for those who scroll further.
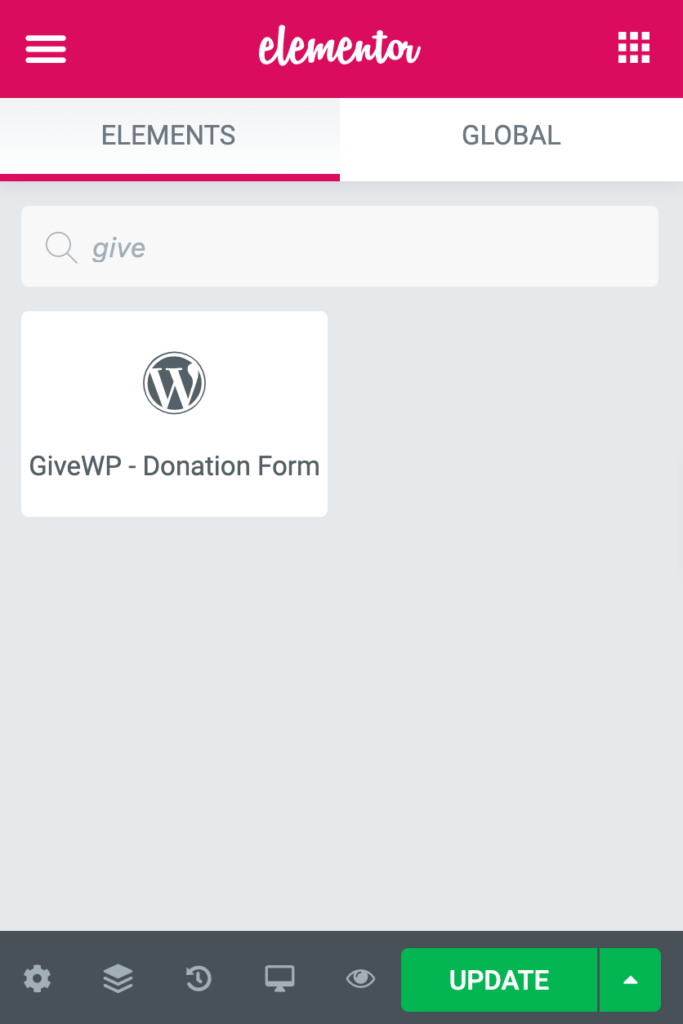
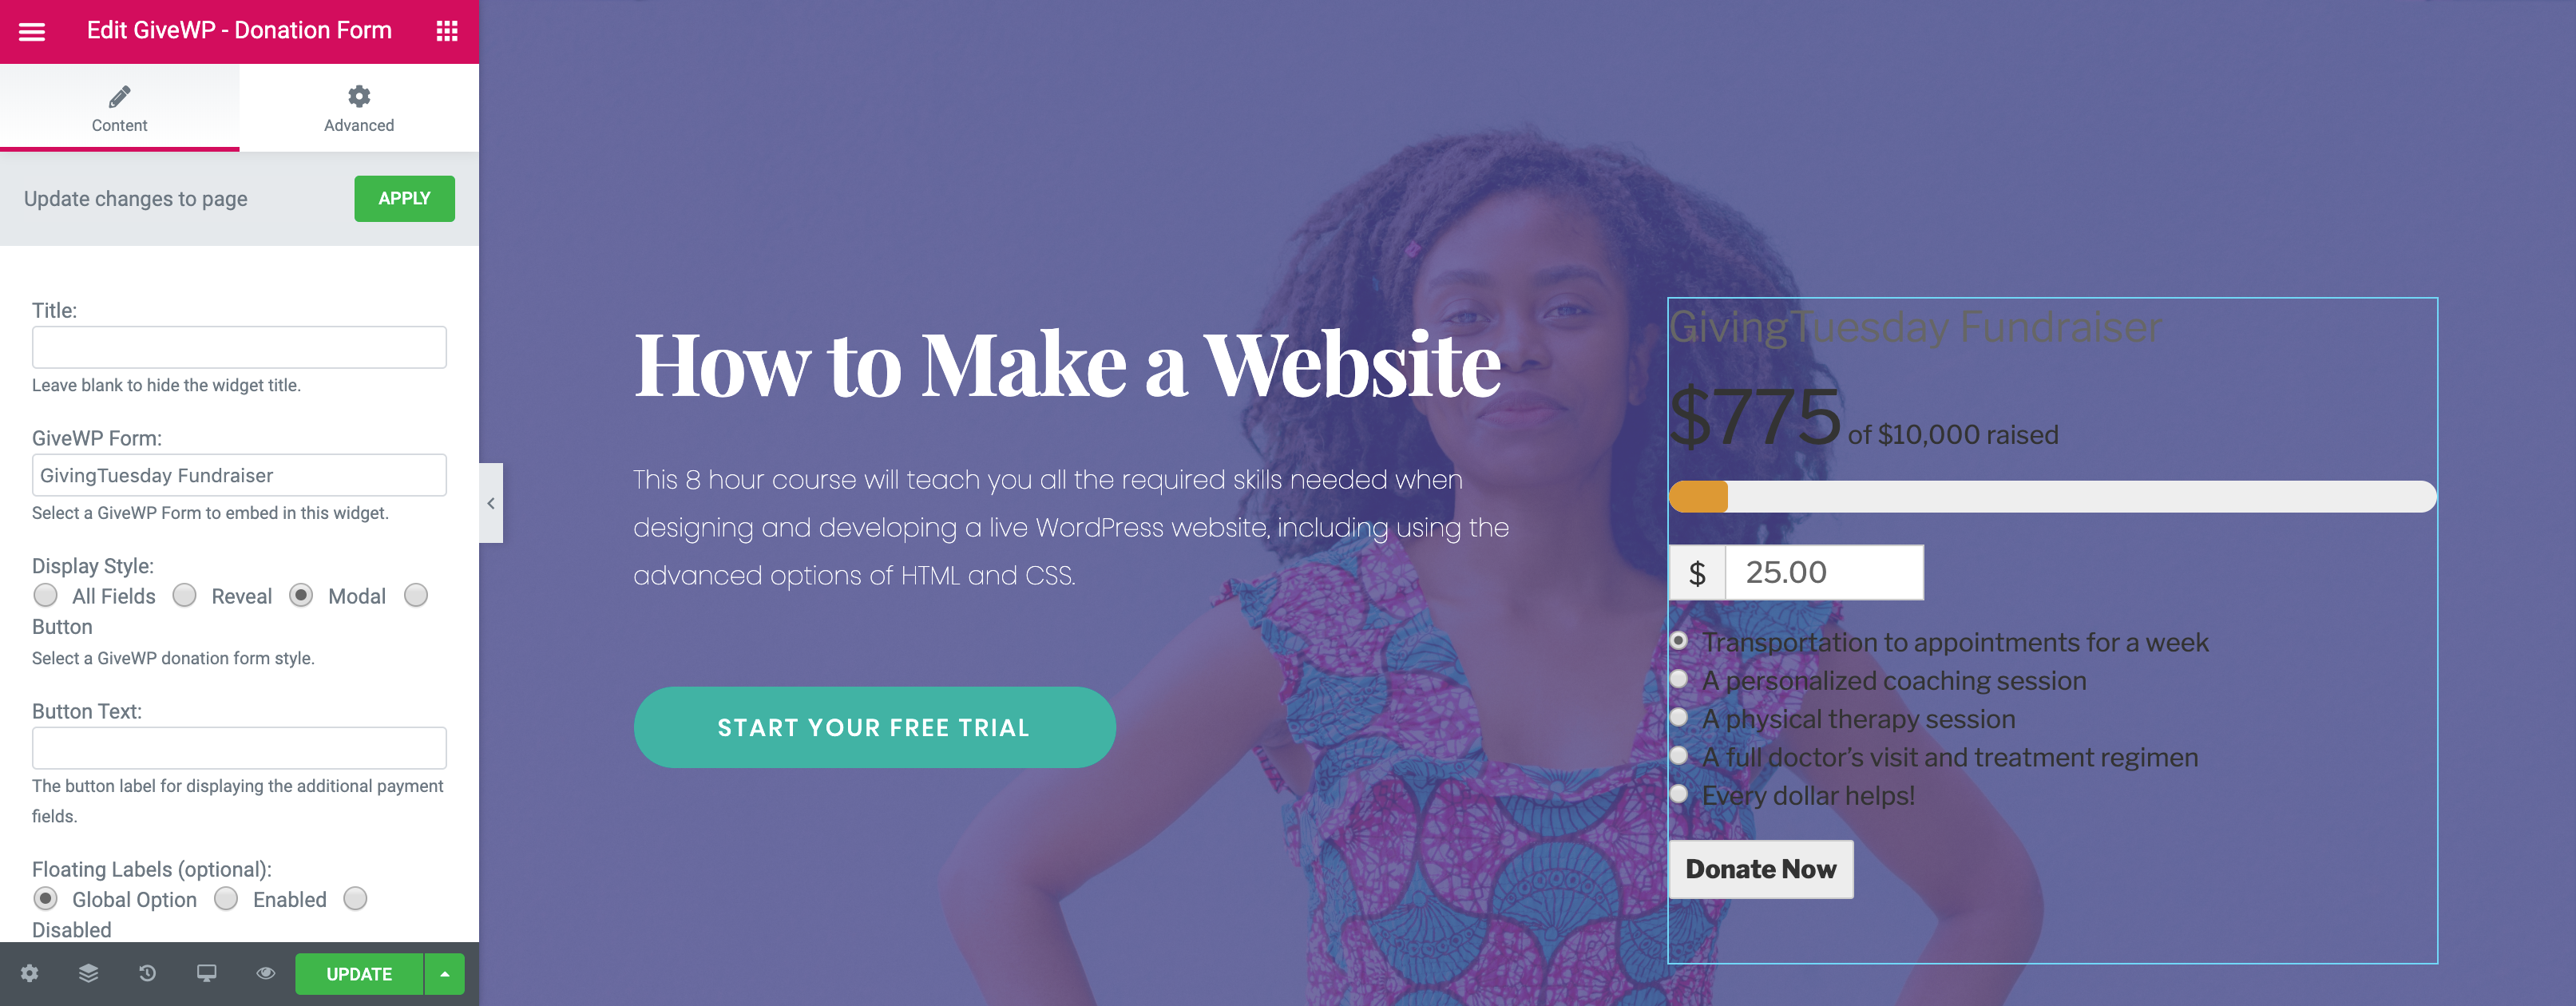
To add a GiveWP donation form to this area, first, delete the video module. Then, add a donation form from the Elementor sidebar. To add a new module, find the menu toggle in the Elementor panel. Once you’re back on the main module screen, search for the GiveWP – Donation Form module. Then, drag and drop it to the place on the page you’d like it to go. Don’t forget to select the title of the form you need!
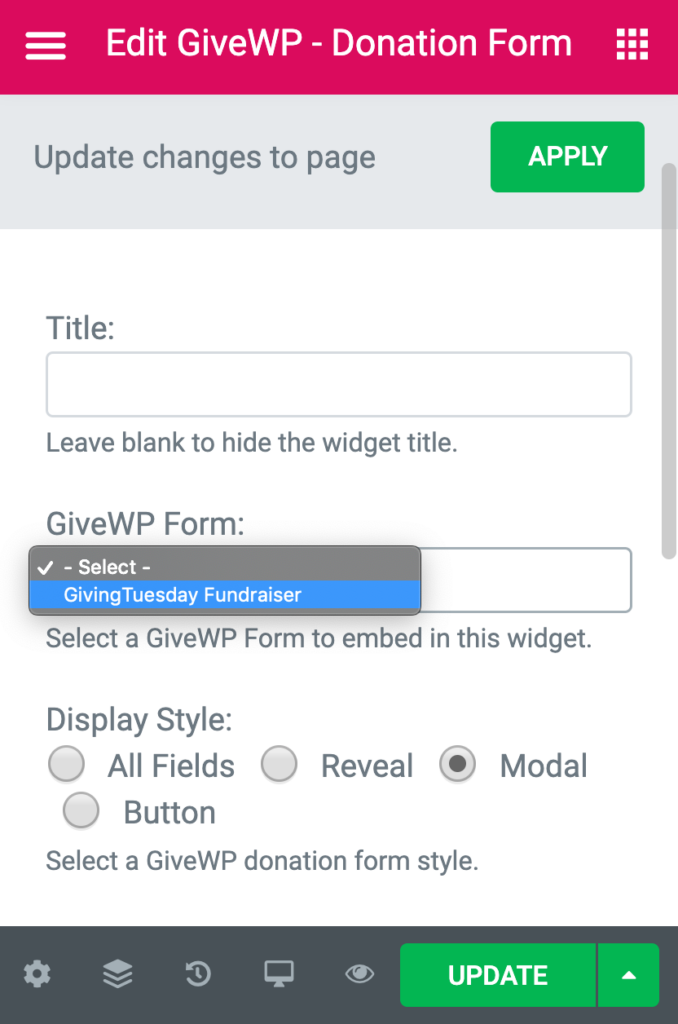
Donations > Add Form to create a new form!In this form, I’ve included a goal counter and used the mutli-level donation feature to show donors what their money is going toward. I’ve also included a form content area that explains when the campaign will be over.
But something looks off. The form needs some styling.
To add a background color, go to Advanced > Background. Select “Background Type: Classic.” Set the color to white.

Make sure to increase the padding around the content. Go to Advanced > Advanced. Set your padding to Top: 30, Right: 40, Bottom: 10, Left: 40. Now the form looks great and stands out on the page.
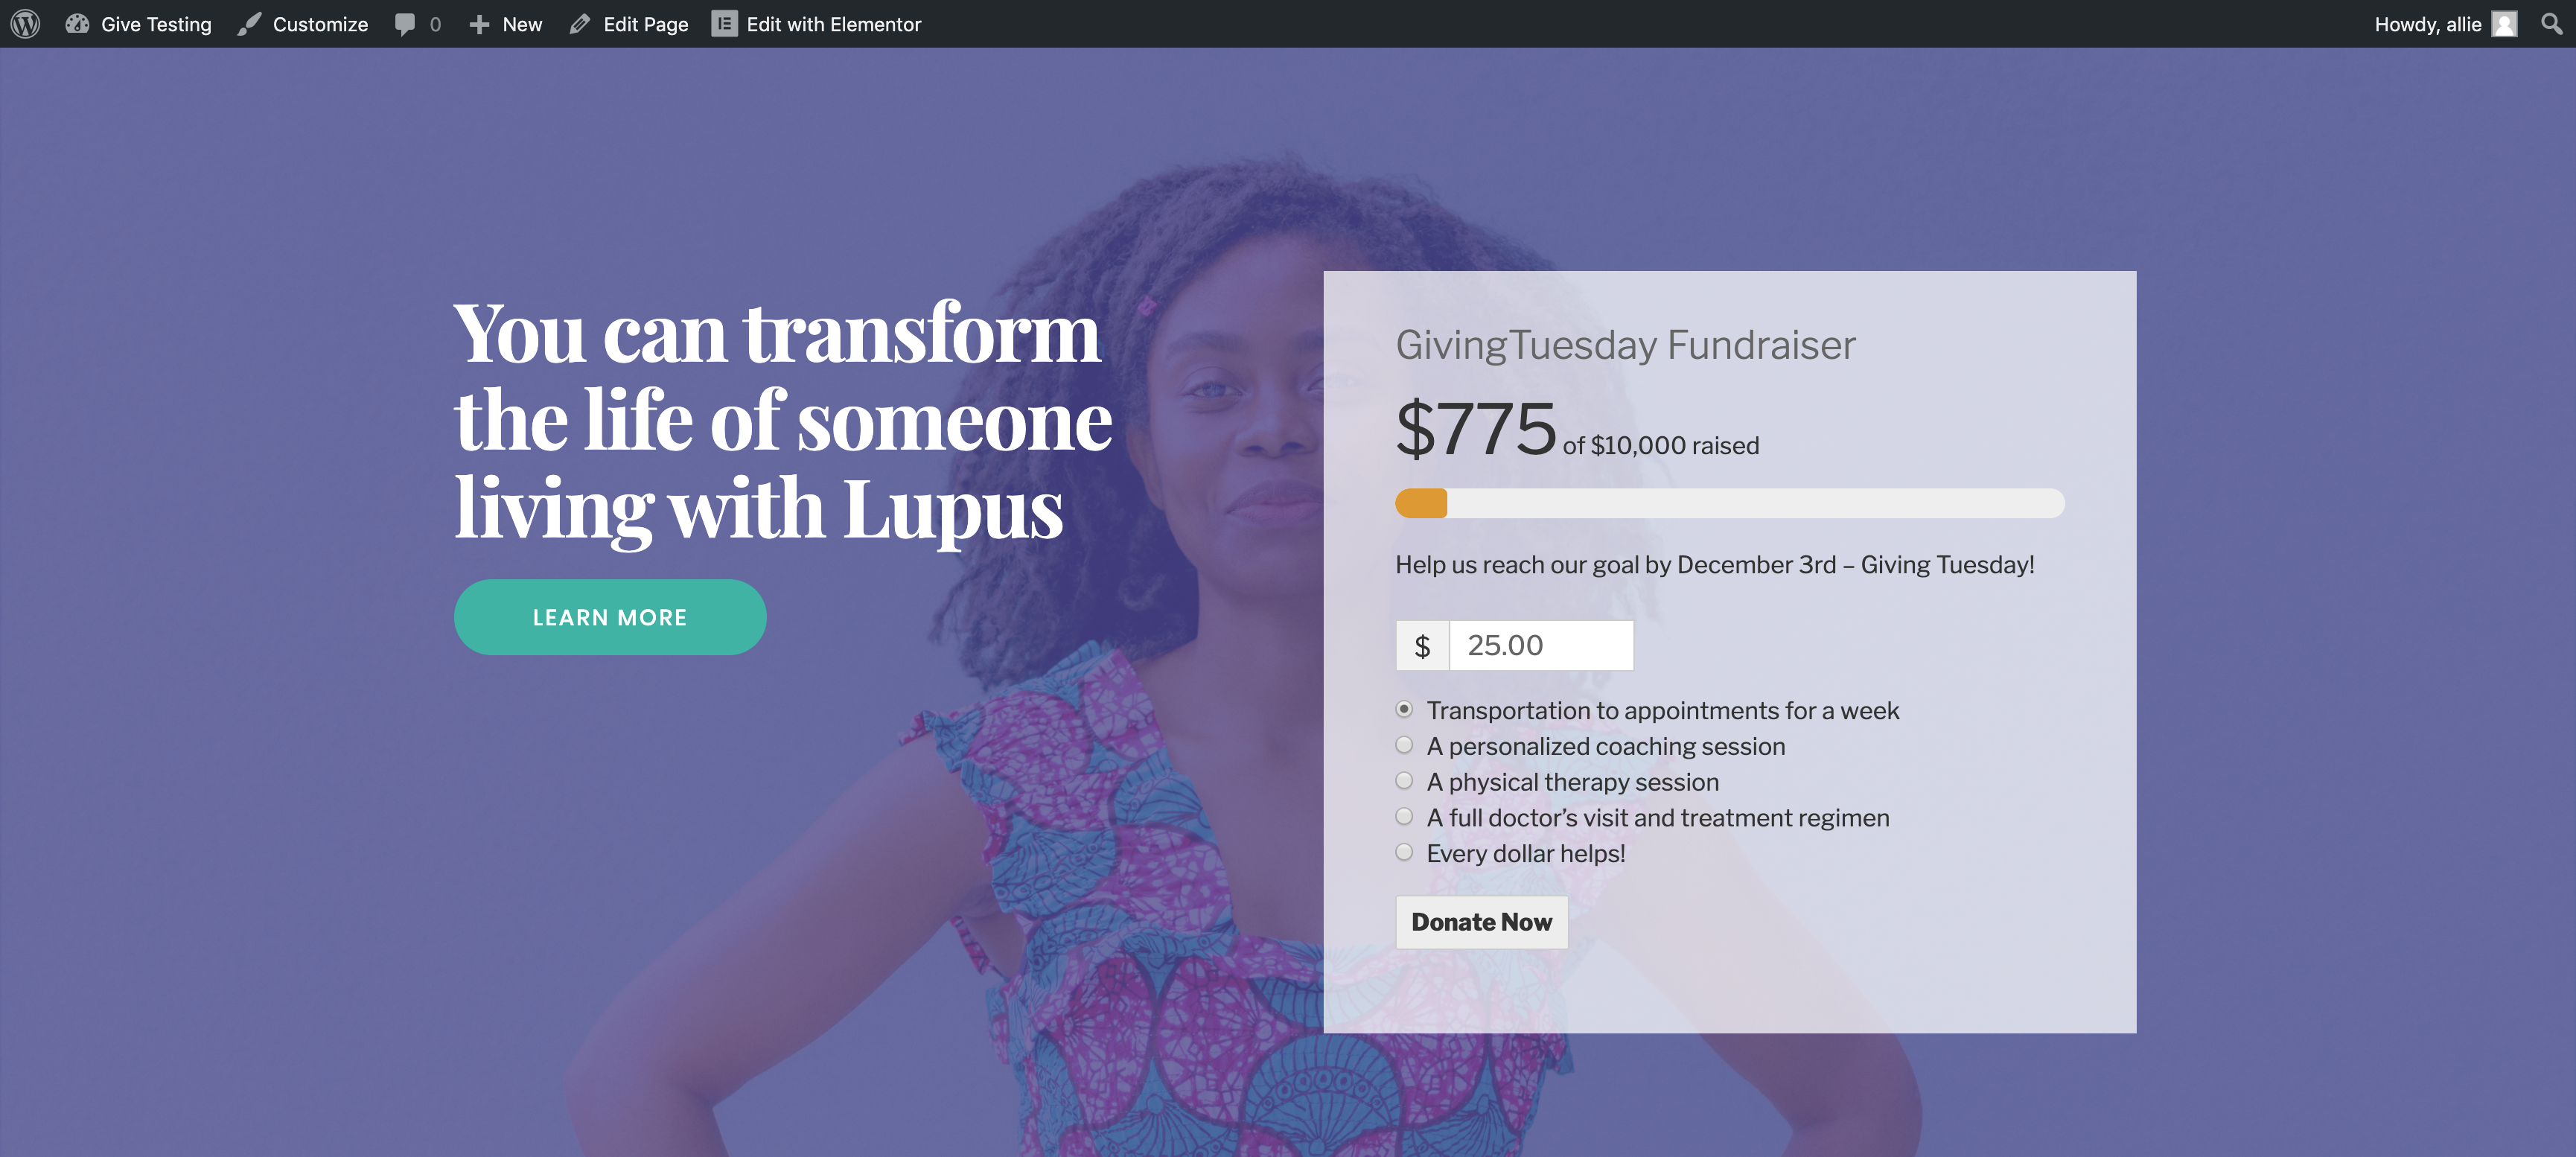
Our Hero section looks pretty good! It will grab our donor’s attention and gives them pertinent info about the campaign. Let’s move on to the next section, where we provide more details about why we’re running this campaign.
Campaign Details Section
The next section on the page will serve to showcase our campaign details. We’ll edit this section in the same way we edited the hero section.
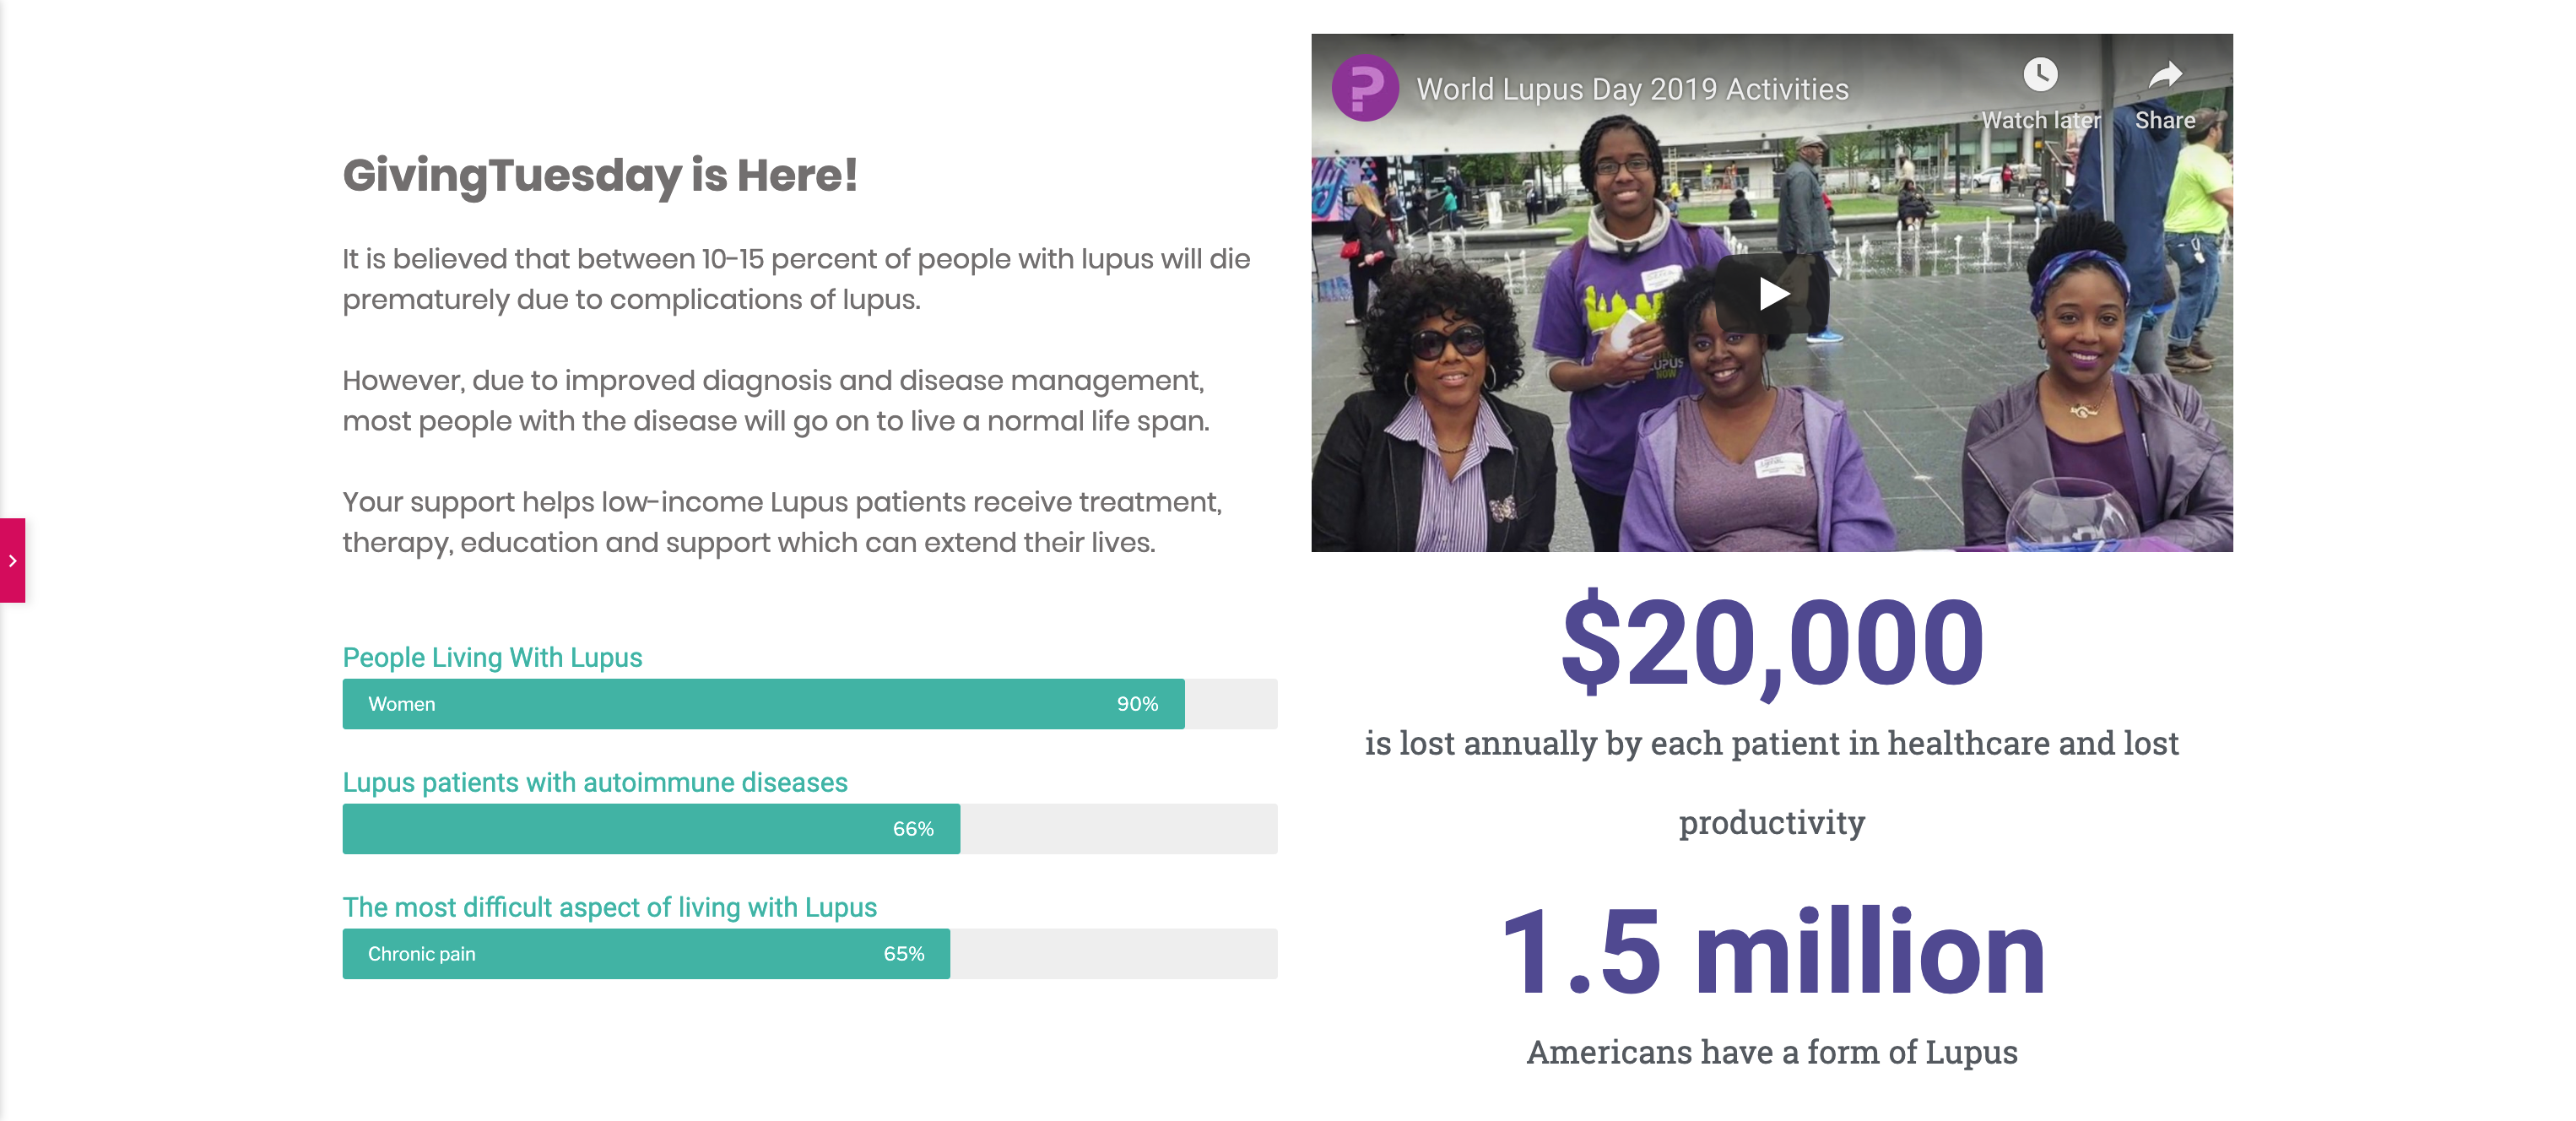
On one side of the page, we’ll use the text area to describe the problem we’re trying to solve alongside some compelling statistics. On the other, we’ll include a video with additional numerical information.
Video is also highly compelling. People like to watch rather than read. It’s best to use a video you made or produced that shows off your organization. We’ll use an example video from World Lupus Day 2019.
To create a section with these details search for these Elementor modules:
- Progress Bar
- Counter
- Video
- Text
This section looks great! The donor can now see the problem we’re trying to solve and the challenges we’re up against.
Supporting Details Section
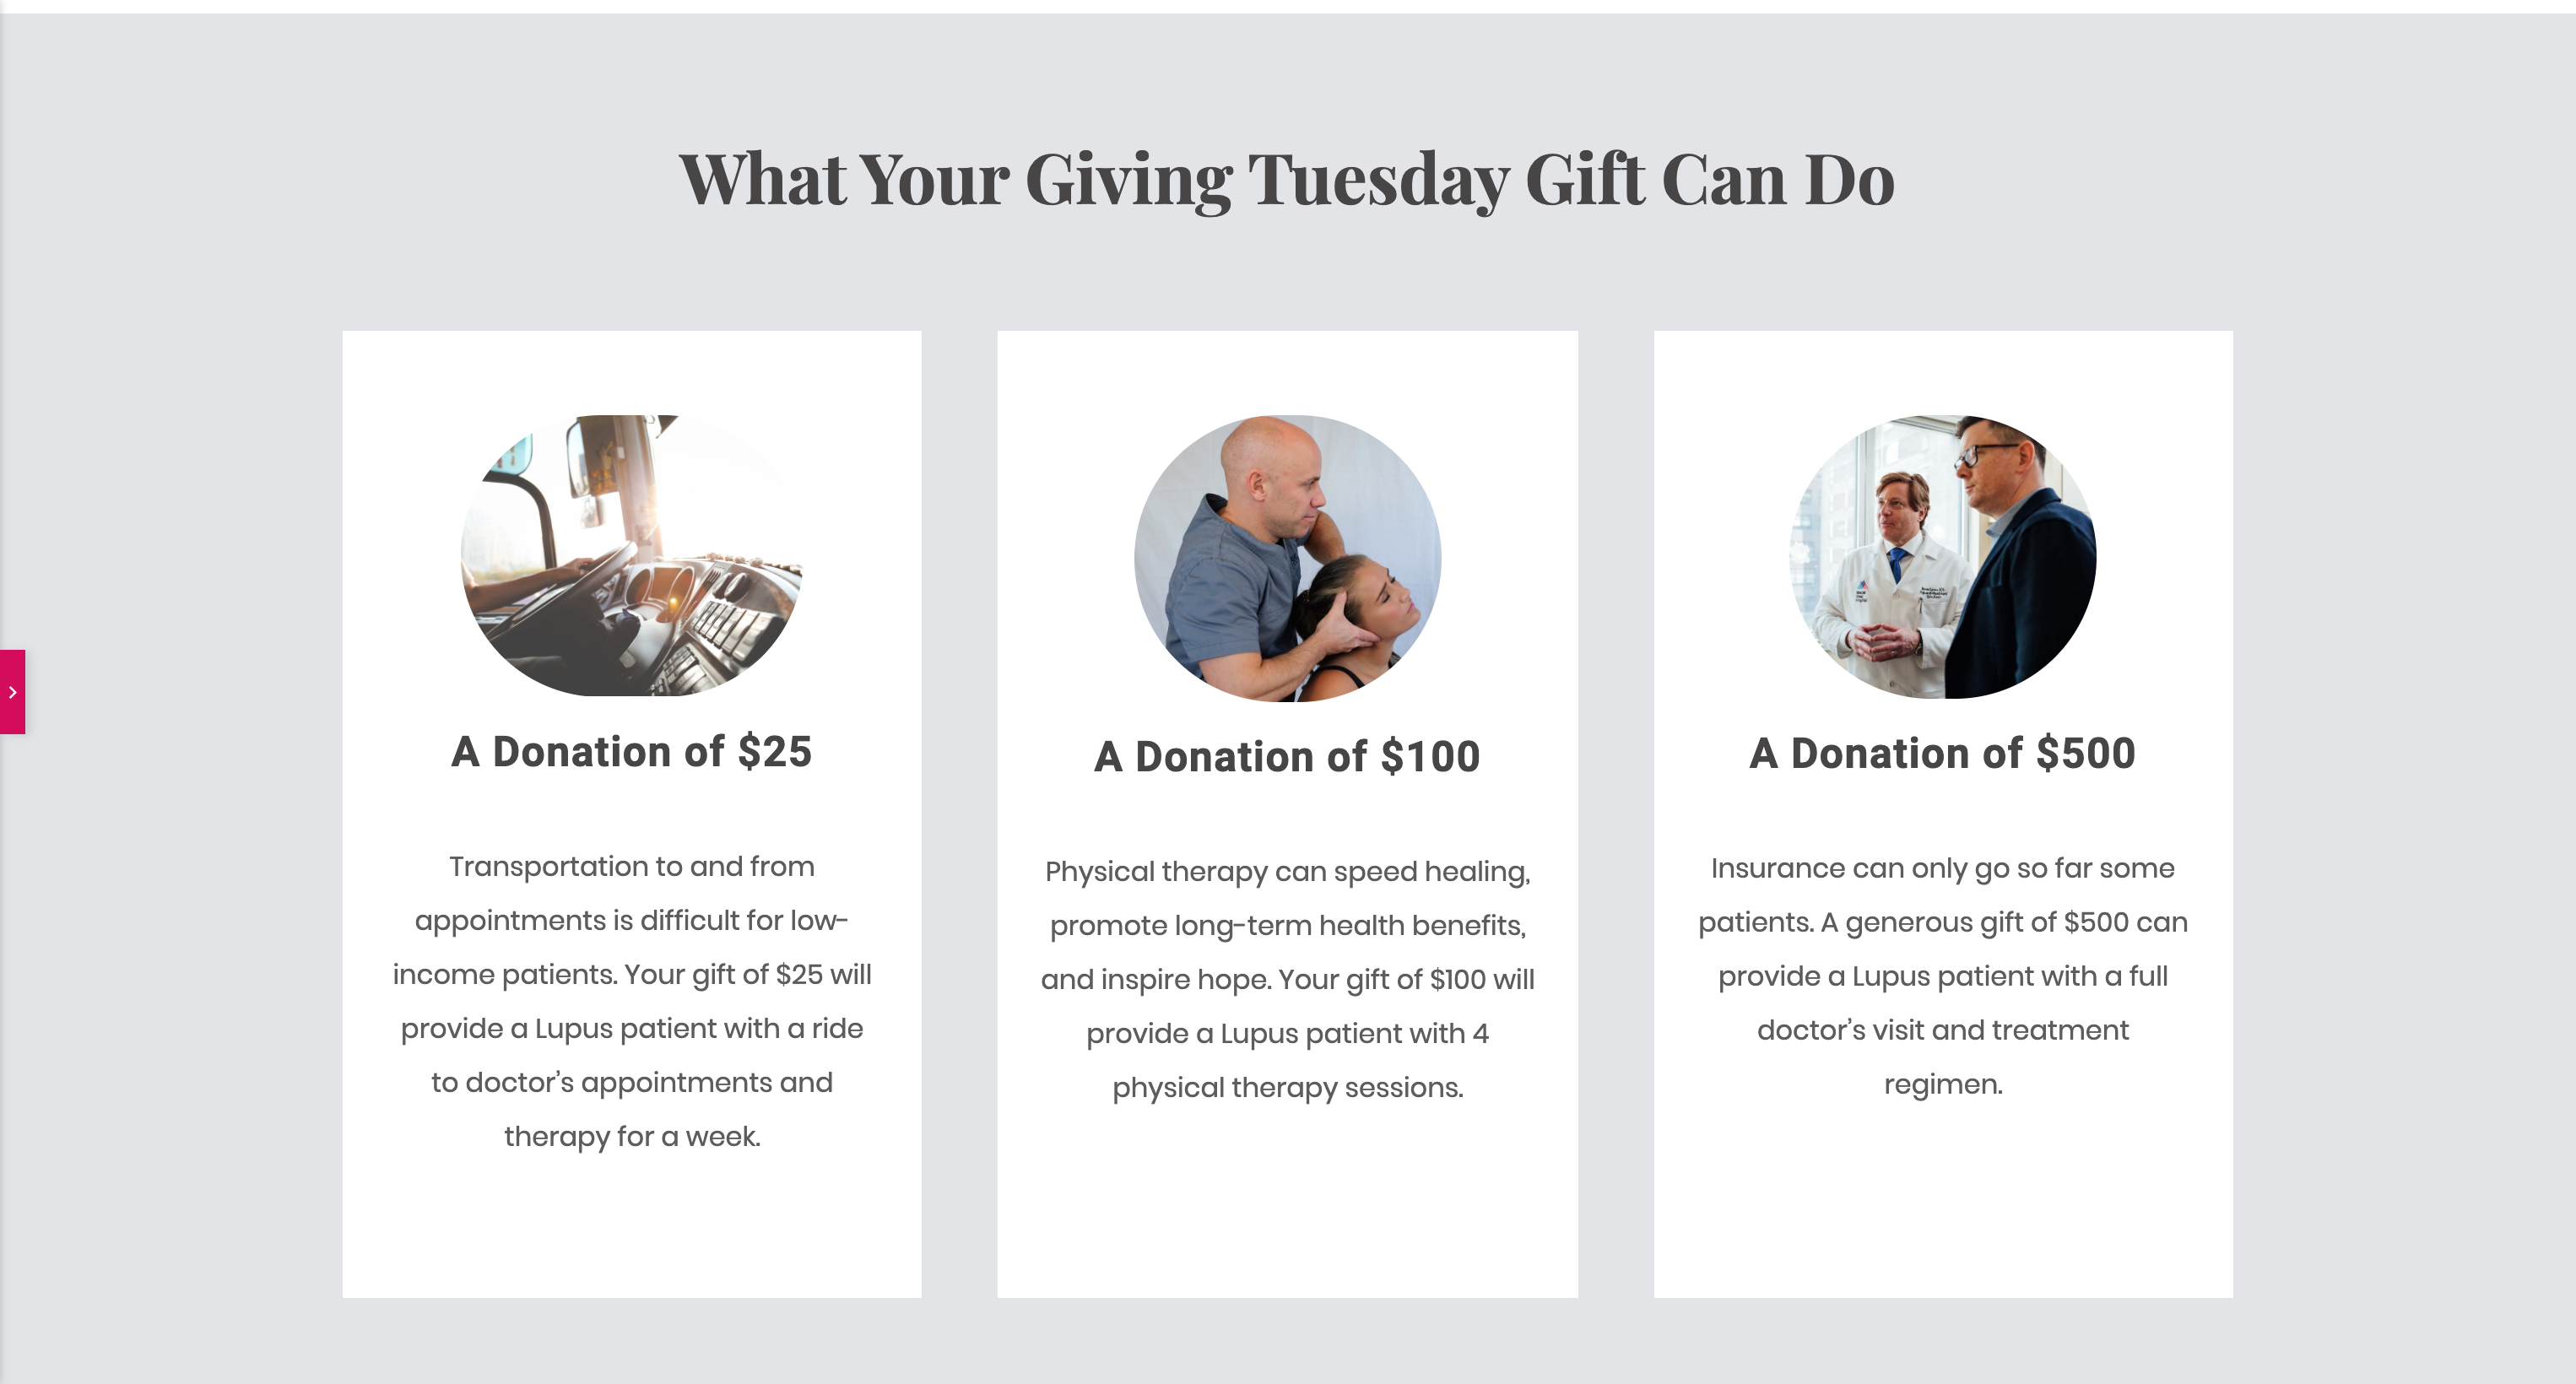
Now that we’ve established why someone should donate, we need to show our donors what their money will actually go toward. It’s powerful to show how you will account for each dollar and intend to create real change.
Our template has three handy sections that are great for this purpose. Here’s what they look like without any edits:

First remove the sections that won’t be useful to us with the delete function we’ve seen before. We’re also going to get rid of the subtitles and the icons at the bottom.
Next, use the edit function to change the title of each column. Swap out these headshots for photos that depict your different donation levels. Edit the descriptions to describe the goals for each of these donation levels as well. Once done, our new section should clearly outline the various donation levels and what that donation covers.
Don’t Forget Social Proof
Finally, add a new section. Social proof is important. We want to show our donors that others have given as well.
Duplicate the title area, then drag it down below the 3 columns. Open the editor and change the title to something that introduces your donor wall.
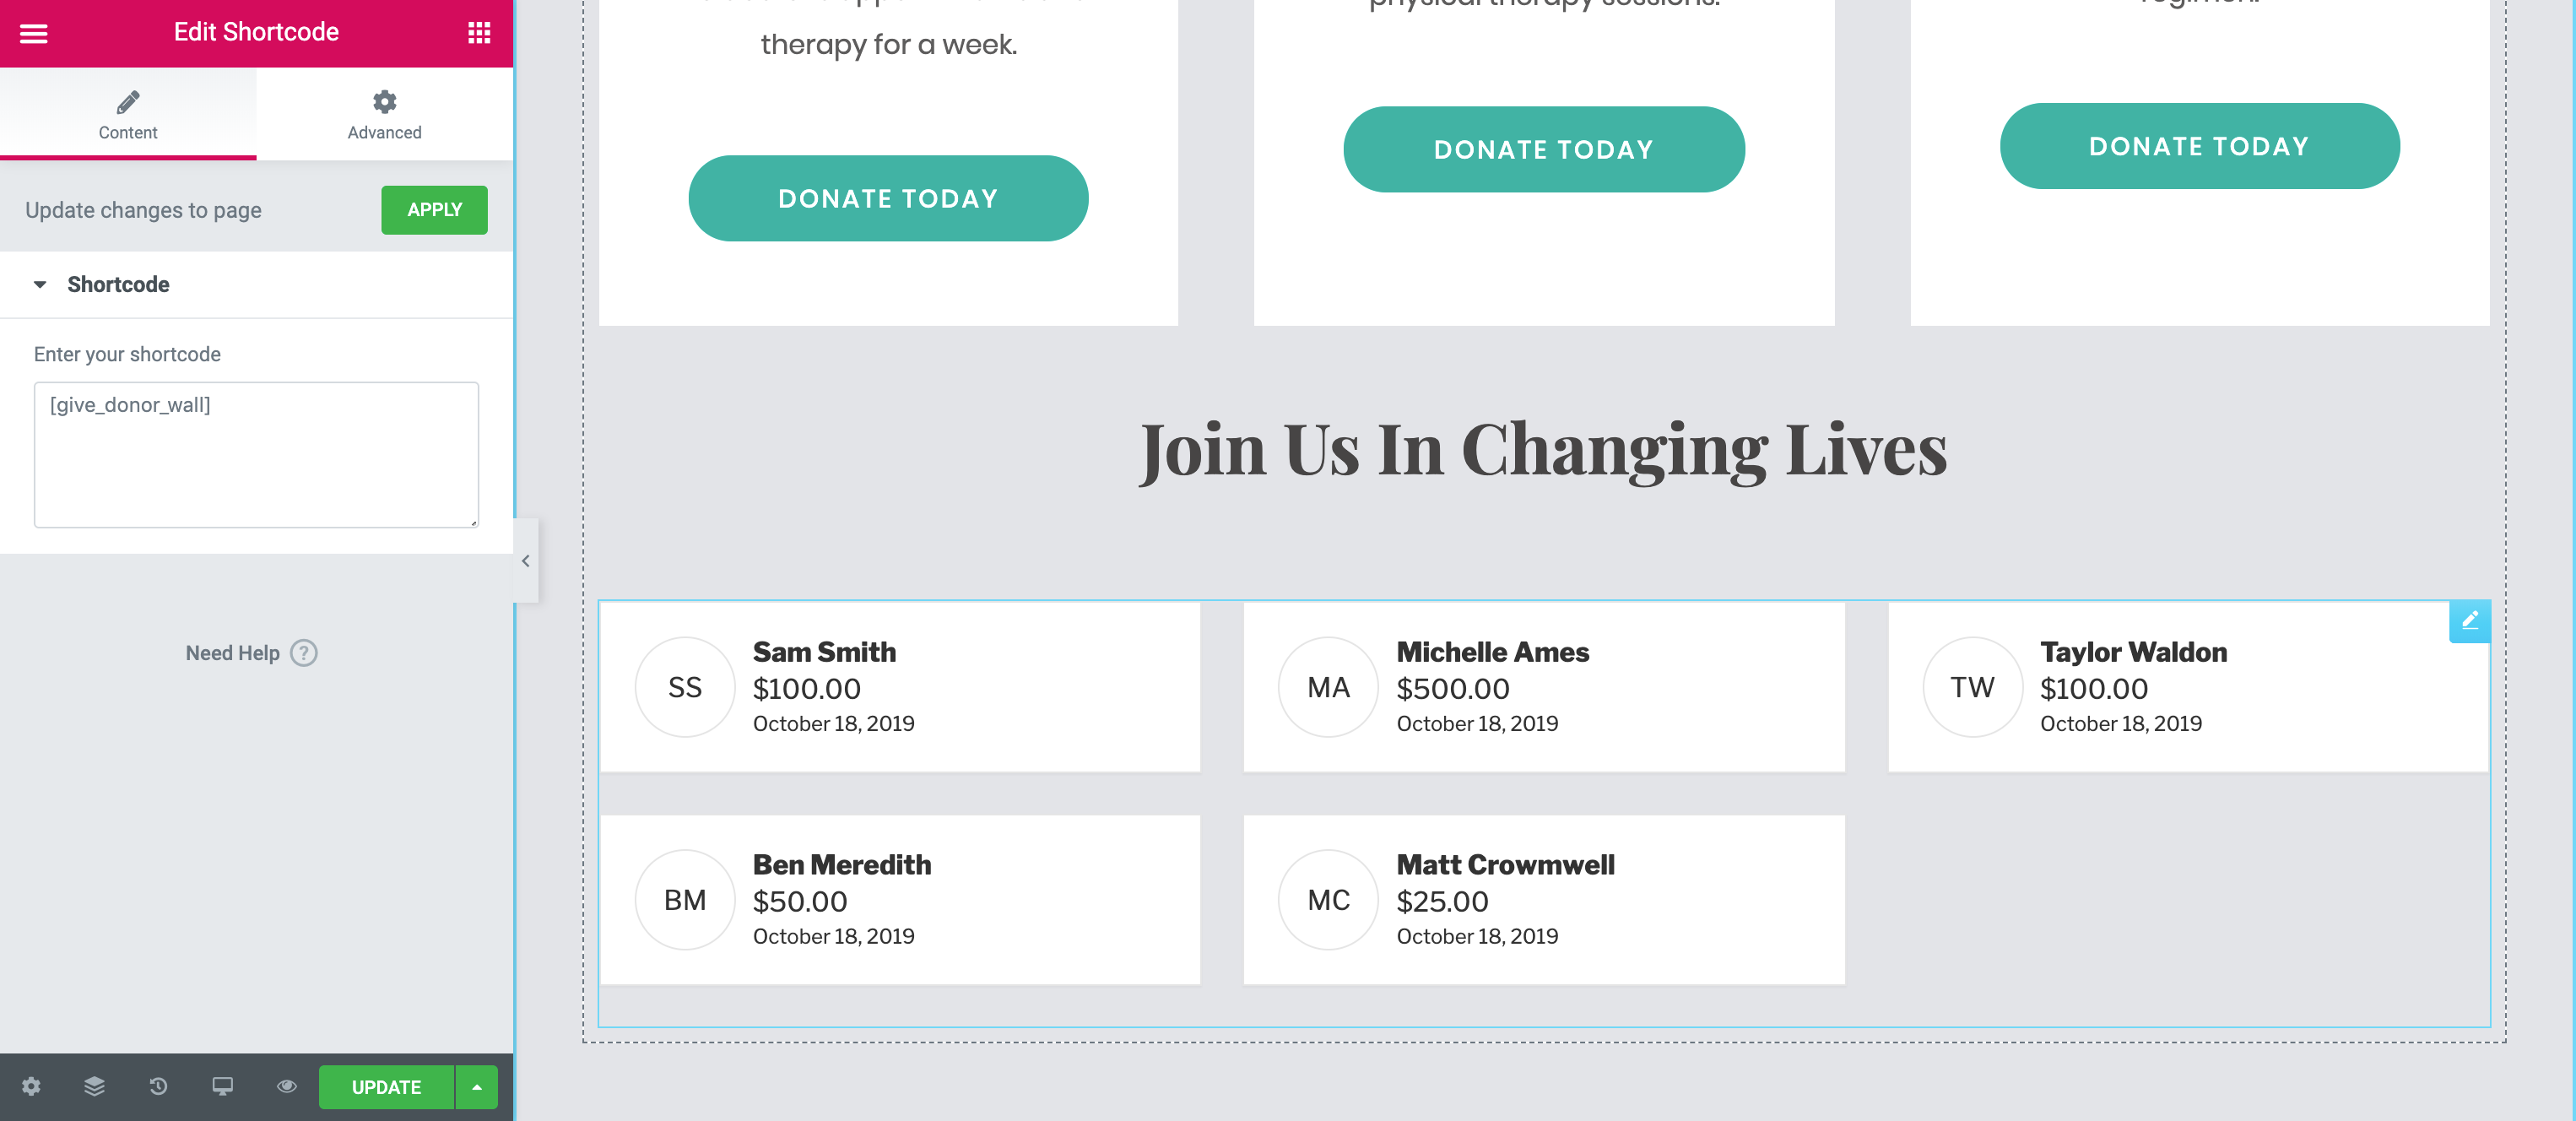
Then, search in the Elementor’s list for the shortcode module. Drag and drop it just below our new title
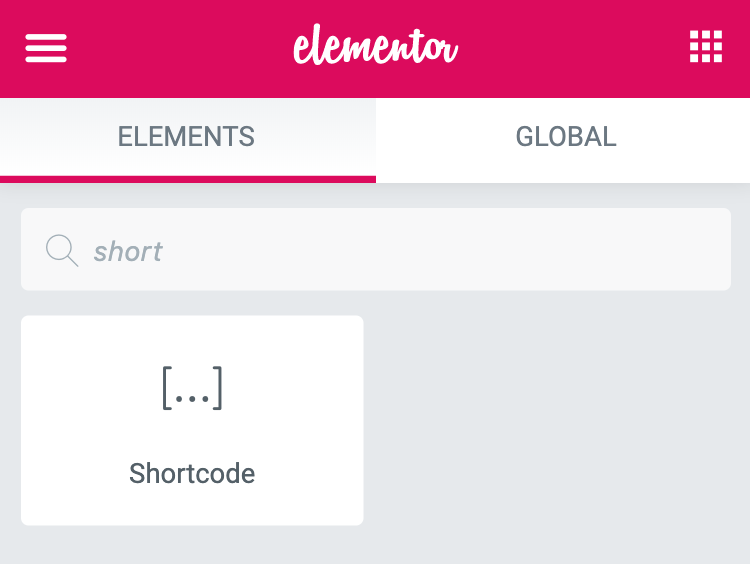
Add the GiveWP Donor Wall shortcode to generate a block that displays people who have already donated. You may want to wait to add this once you’ve had a few good donations roll in.
Call to Action Section
We’re almost done! A call to action section is the last piece to add at the bottom. Think of the landing page as a road and this is the destination. All the other content has lead your donor here.
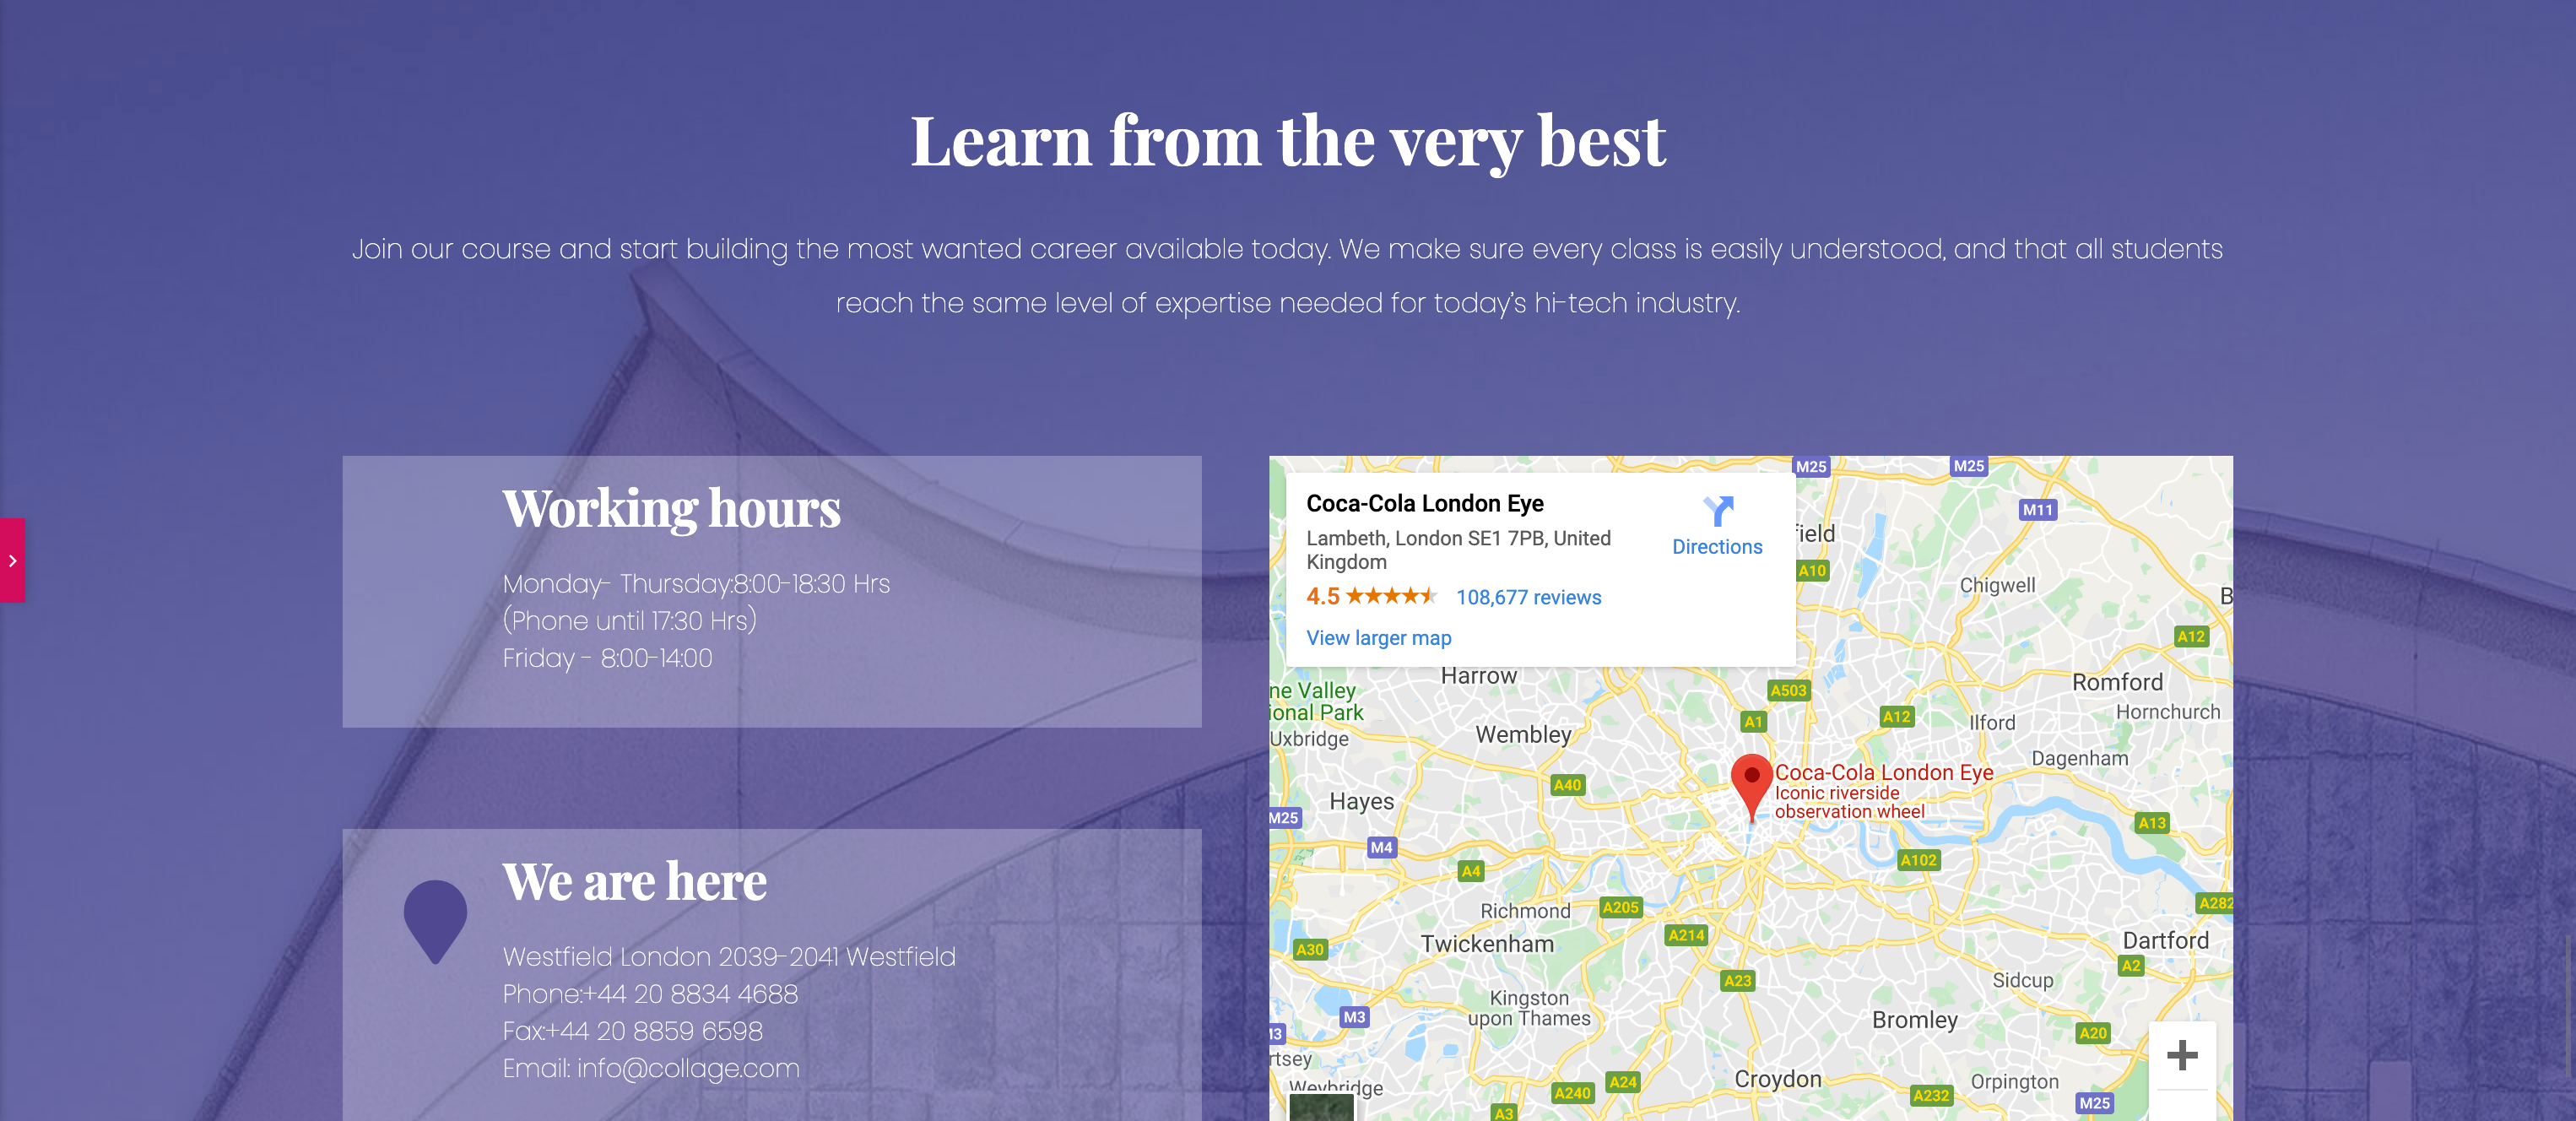
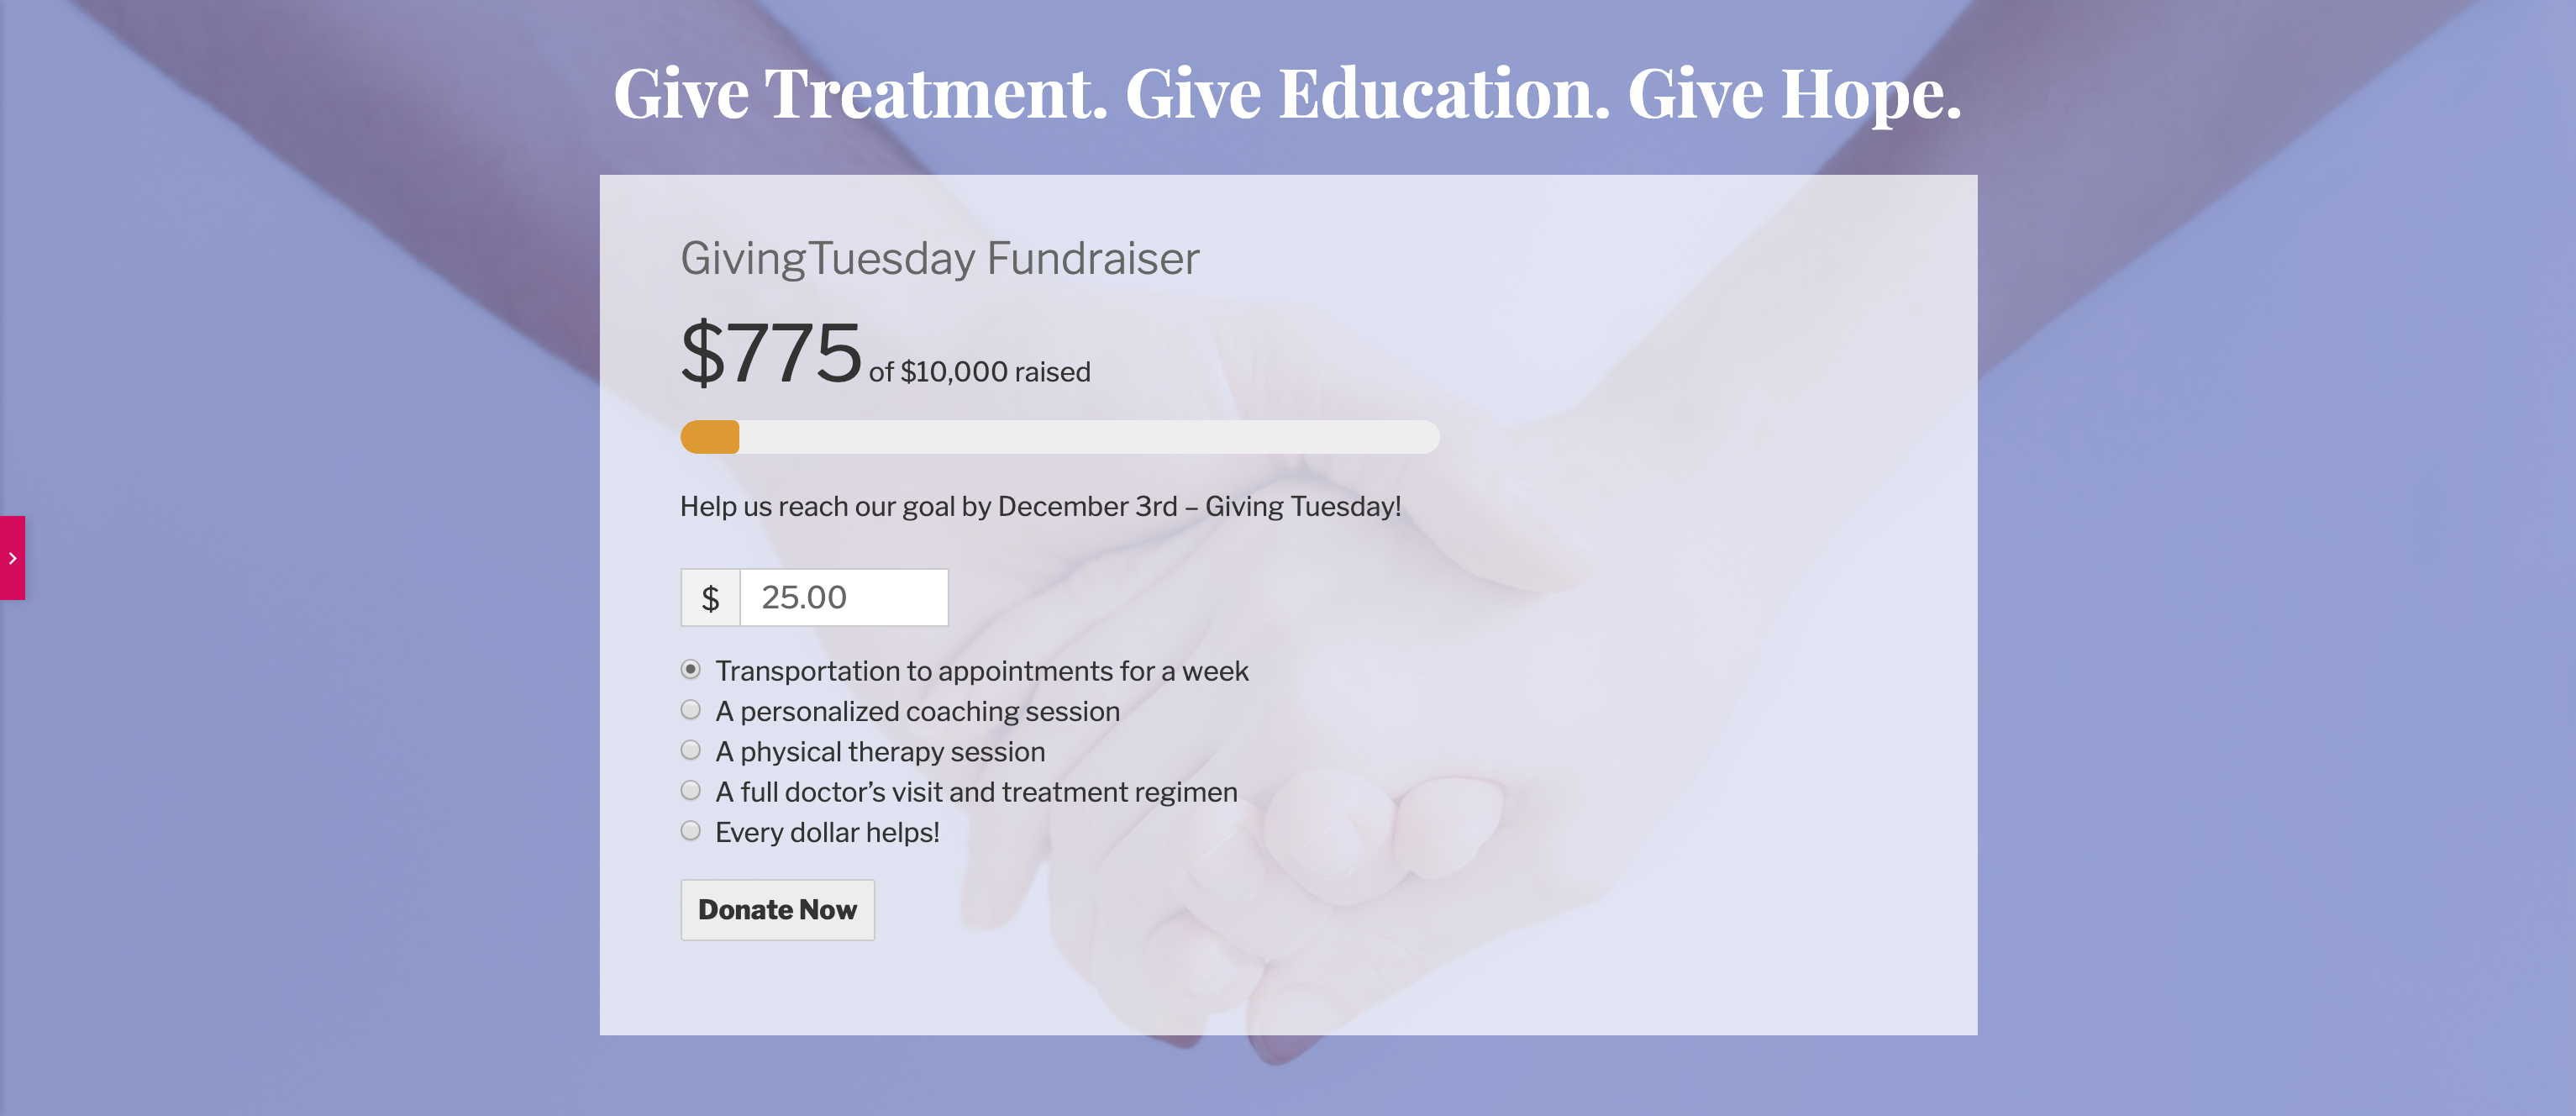
Edit the background like you did the hero section up top. Swap the image out for something that fits more with your campaign. The, edit the title to include a nice punchy headline.
Delete the entire row with the text blocks and map. Then, duplicate the form from the top of the page by right clicking, clicking “Duplicate,” then dragging it down to sit below the title.
There is no need to make a second form using GiveWP. Both of these forms are technically the same and the funds are combined.
Links and Buttons
Go back and make sure that any links or buttons go to the right places. It’s best to not force the donor to leave the page, but rather make the buttons go to various places on the same page. To do that, we need to use anchor tags.
Direct the ”Learn More” button at the top to the secondary details section. To add the anchor tag you need, right-click the small gray column icon and select “Edit Column” in the secondary details section.
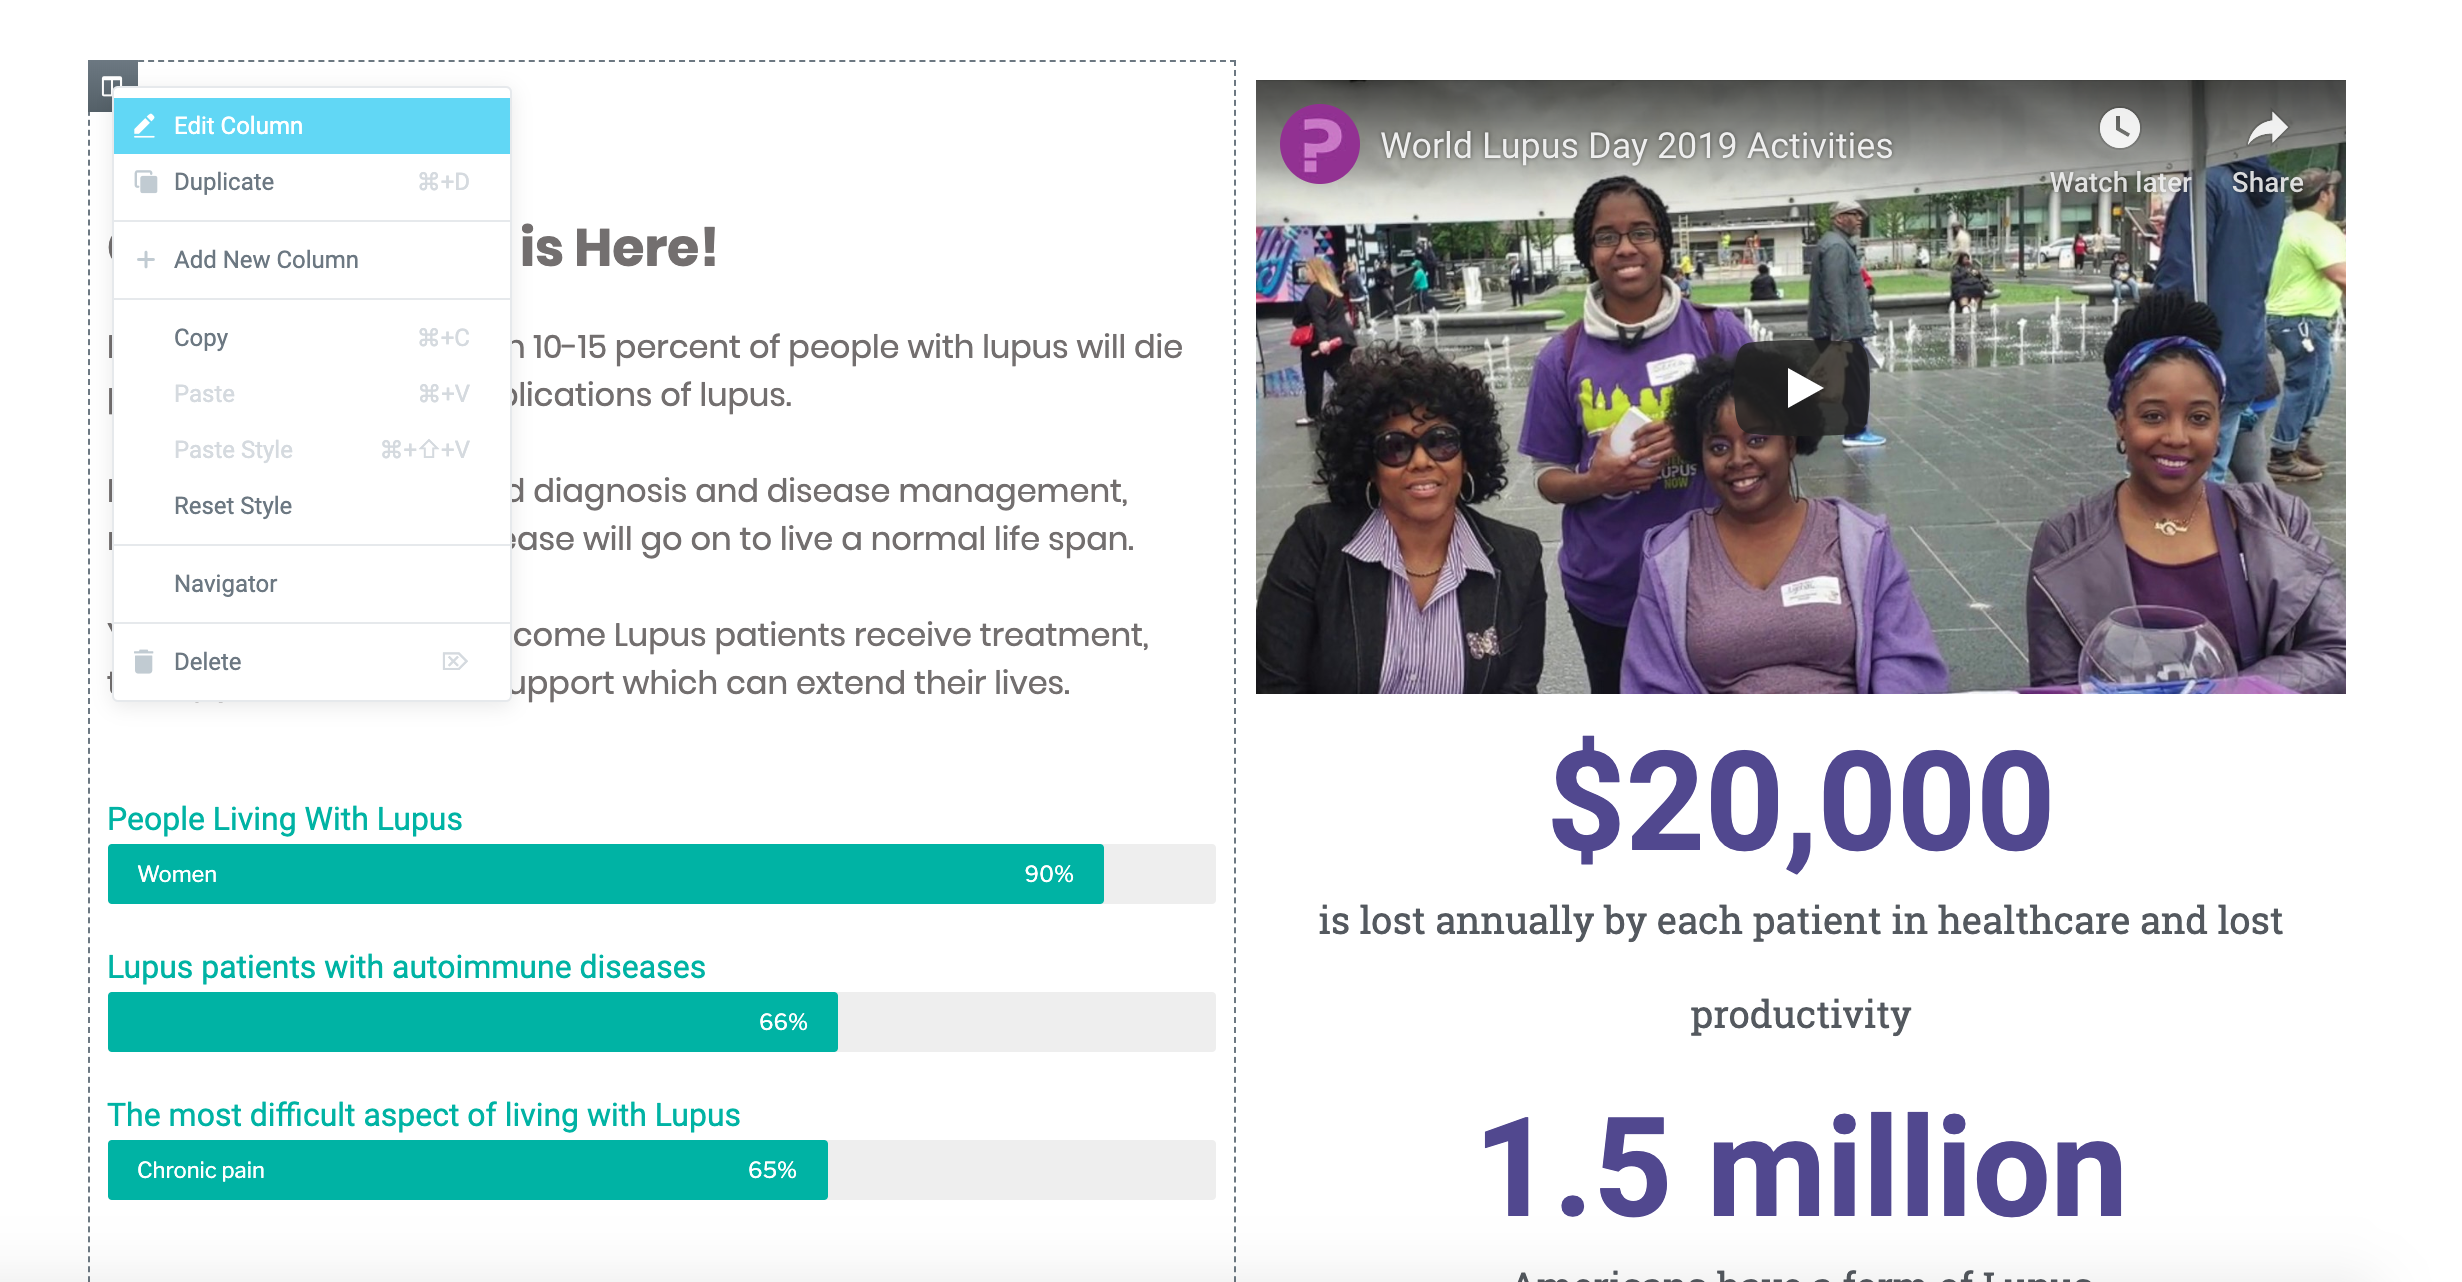
Then, go to the “Advanced” tab and type “LearnMore” into the CSS ID field. Save your changes. Then edit the “Learn More” button in your hero section. Instead of a link, type “#LearnMore” into the link field.
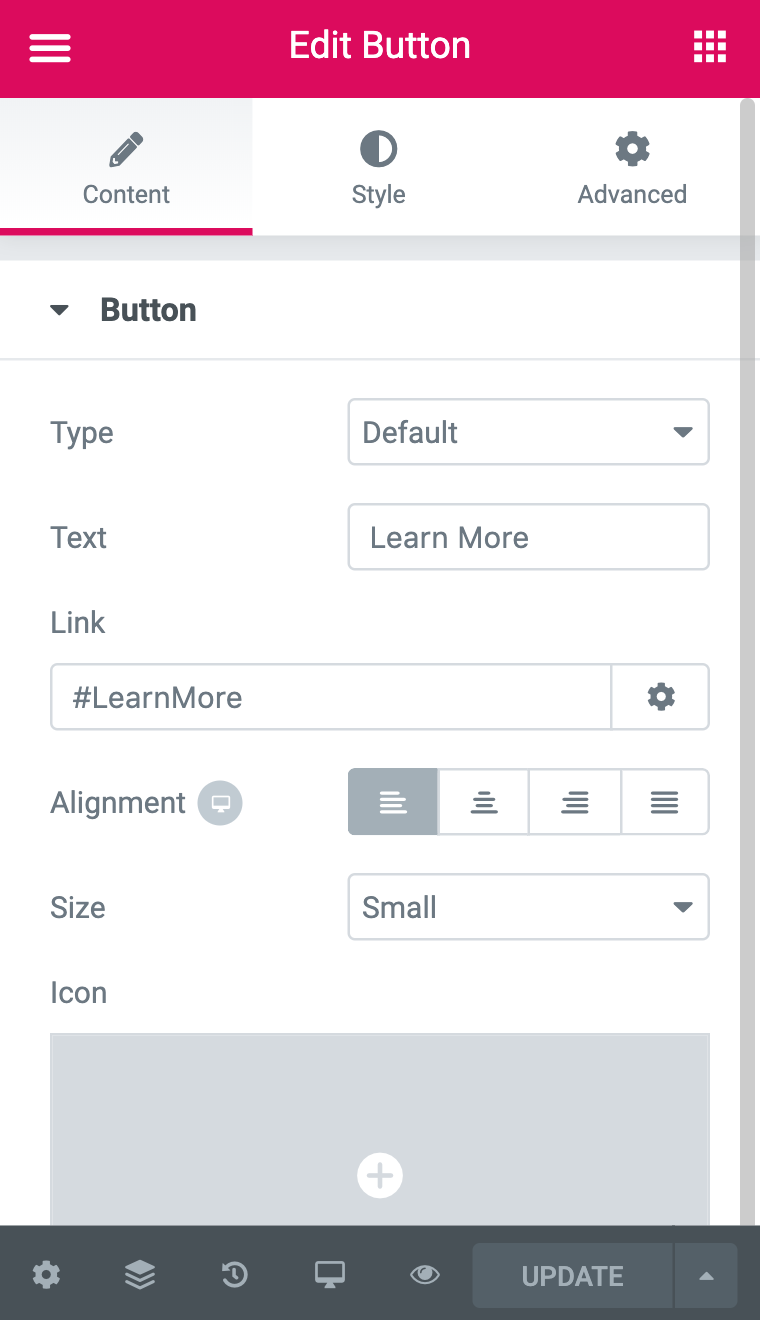
Now the button in our hero section takes the user to the section below it where they can learn more about our campaign! Let’s do the same thing for the buttons in our three-column section. This time, direct them to the call to action section at the bottom of the page where they can make a donation. Edit the call to action ID field to say “ctaform” and then add “#ctaform” as the link for each button.
Final Touches
It’s always a good idea to test your Giving Tuesday Landing Page on different devices as well as run a few test donations with your forms. Once you’re confident that the page is perfect, hit Update at the bottom of the Elementor editor area to publish your page!
You can use our Giving Tuesday landing page template by downloading the file and uploading it to your own website.
Free
Giving Tuesday
Workbook
Get everything you need to launch your Giving Tuesday campaign for FREE.
About the Author
Allie Nimmons
Allie Nimmons is a self-taught WordPress power-user since 2014. She spent 5 years maintaining, troubleshooting, designing, building, and breaking WordPress sites for small business owners. Now, she is proud to be the first Community Manager at WP Buffs. She is mildly obsessed with lists and wants to make the internet approachable and accessible to all through WordPress.