Form Field Manager
Welcome to Form Field Manager 101 – the place to learn how to get started and use one of the most powerful Give Add-ons.
Articles in this section:
 Understanding the Various Form Fields
What is Form Field Manager?
Form Field Manager, or FFM for short, is a premium Give Add-on that lets you add custom form fields to your Give donation forms. Form fields include simple fields such as checkboxes, drop downs, radios, and more. The more complex form fields that you can add are file upload fields, and the powerful repeater field.
If you’re not using FFM, the only way to add custom form fields to Give is by using custom PHP code. With FFM, you have an easy yet powerful (and code-free!) way to add one or many custom fields to your donation forms.
Installation and Activation
The first step to implementing Form Field Manager with Give is to download and install the Form Field Manager Add-on. You’ll also need to activate your Form Field Manager license in order to get one-click updates and access to our Priority Support.
Form Field Manager for the Visual Donation Form Builder
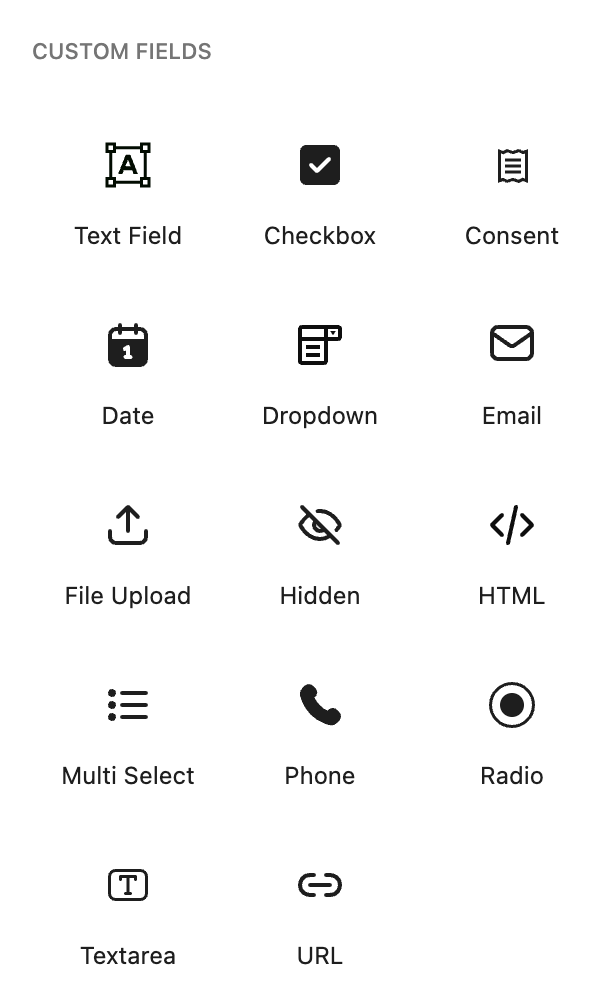
The Form Field Manager add-on unlocks several custom fields that you can utilize in building your forms (except for the Text Field block, which is available even without the Form Field Manager).
All the blocks also have individual settings unique to each of them. In the Build tab, you can view this by clicking on the custom block and viewing the right-hand side of the Visual Form Builder.
For their individual settings, almost all the custom field blocks can be made required (except for the Consent block, which is required by default). All of them can also be conditionally displayed based on the value of other fields by utilizing the Conditional Logic option in the block settings.
Saving Field Values in Visual Donation Form Builder forms
Most Form Field Manager blocks in Visual Donation Form Builder forms can be save in one of two spots: the Donation metadata or the Donor metadata. If the option is available it is found in the Advanced settings of a block:

- Saving to Donor Record – If enabled, the data collected by this field is saved to the Donor record instead of the Donation record. This is useful for data that doesn’t normally change between donations, like a phone number or t-shirt size.
- Saving to the Donation (default) – this saves the data to the donation itself. This data can be exported using the Export Donation History tool.
Fields and what they do:
- Checkbox – This custom field displays a checkbox that will enable you to include some simple yes/no choices.
- Consent – This custom field block displays the terms and conditions that the donor must accept before the donation can be submitted.
- Date – The Date custom field block enables you to allow donors to enter dates in the form. You can also modify the formatting of the date using the block settings.
- Email – Not to be confused with the default email block that comes with every form, the email custom field block is another option that you can utilize to allow the donors to enter another email address.
- File Upload – The File Upload custom field block allows your donors to upload a file to accompany their donation. The block settings for this custom field will also enable you to set a maximum file size and set the allowed types of file that can be uploaded.
- Hidden – The hidden custom field block will enable you to include an invisible field on the form. It will not show up on the front-end, but it will appear on the donation details.
- HTML – The HTML custom field block allows you to insert HTML code snippets into your form. Whether this is a custom input field that you made or something you just want to display, the HTML custom field block gives you more customization options than any other custom field block.
- Multi Select – This custom field block enables you to allow donors to select multiple options from a list of items that you can define. You can display them as checkboxes or as a dropdown.
- Phone – The phone custom field block, not to be confused with the Donor Phone block, is a custom field that you can utilize in your form for the donors to be able to enter another phone number. The phone number can either be formatted or not.
- Radio – When you want your donors to select one option among a list, the Radio custom field block is the way to go.
- Textarea – You can use this custom field block if you need a field that will enable your donors to include information that would otherwise be too many for normal text fields.
- URL – This field allows the donors to enter the URL of a website.
Form Field Manager for Options-Based Forms
Once installed and activated, Form Field Manager adds a section (technically called a metabox) to all individual Donation Form Edit Screens:
When you create or edit an existing donation form you will see the metabox as shown in the image above. This metabox allows you to add and position the various form fields. Learn more about each individual form field in the article here.
How to Use Form Field Manager
Using the Form Field Manager is a process of adding, positioning, and customizing your required form fields. The process is developed to be intuitive and flexible.
How to Add a Form Field:
Adding a form field is the first step to customizing your donation forms. To add a form field, click the button for the type of field you would like to add. That adds the field to the interface.

Editing a Form Field:
After you add a form field it’s important that you edit it to suit the needs of your requirements. To edit a form field:
- Click to expand the field’s options if it is not expanded already
- Add a “Field Label” to give the field a heading/label on the front end of the form.
- Fill out the remaining options depending on field type.
Important: Every form field must have a label and meta key, and changing the meta key for fields that have already collected data will make that data very hard to retrieve.
Placement of the fields on the form
Form Field Manager allows for you to place custom fields into one section of each form. Using the dropdown menu below the field options, you can place fields in certain sections of the form.
Saving Form Fields
After you have customized your form fields and placed them on the site, don’t forget to save the donation form. Clicking “Update” in the Publish metabox will ensure all your changes are saved.
Conditional Logic and Field Visibility
Form Field Manager allows you to add conditional logic for displaying fields based on the value of other fields on the form. The “Field Visibility” option allows you to only display a field or section based on the value of another field on the form.
Field Visibility Example
To get an idea of how powerful this feature can be, consider this example.
An organization wants to invite all donors above $1000 to attend a catered reception. With the field visibility settings in Form Field Manager they can add in three fields which only display for the right donors under the right conditions.
Here’s how to configure the form:
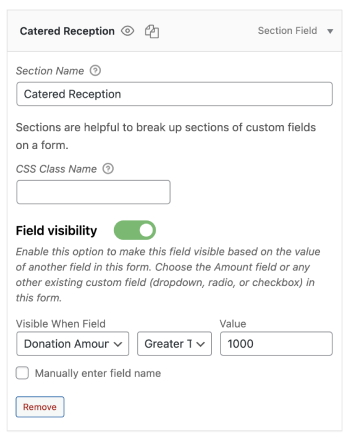
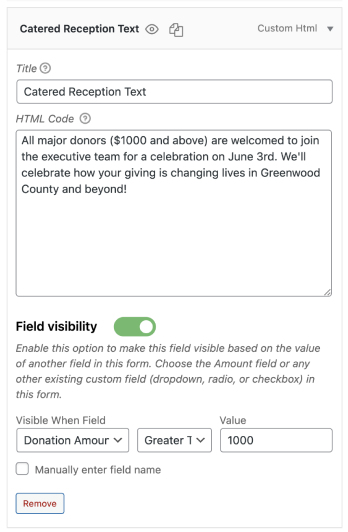
Display a Section for Donors who Give $1,000 or more
The first field is a “Section” field. This helps indicate new information within your form. Set the conditional settings to to following:
- Visible when field
Donation Amount
- Condition
Greater than or equals
- Value
1000
Add some Content to the Section at the same time
Next, add an HTML with the same conditions to display below the Section. Now they will both appear for any donor that chooses to give $1,000 or more.
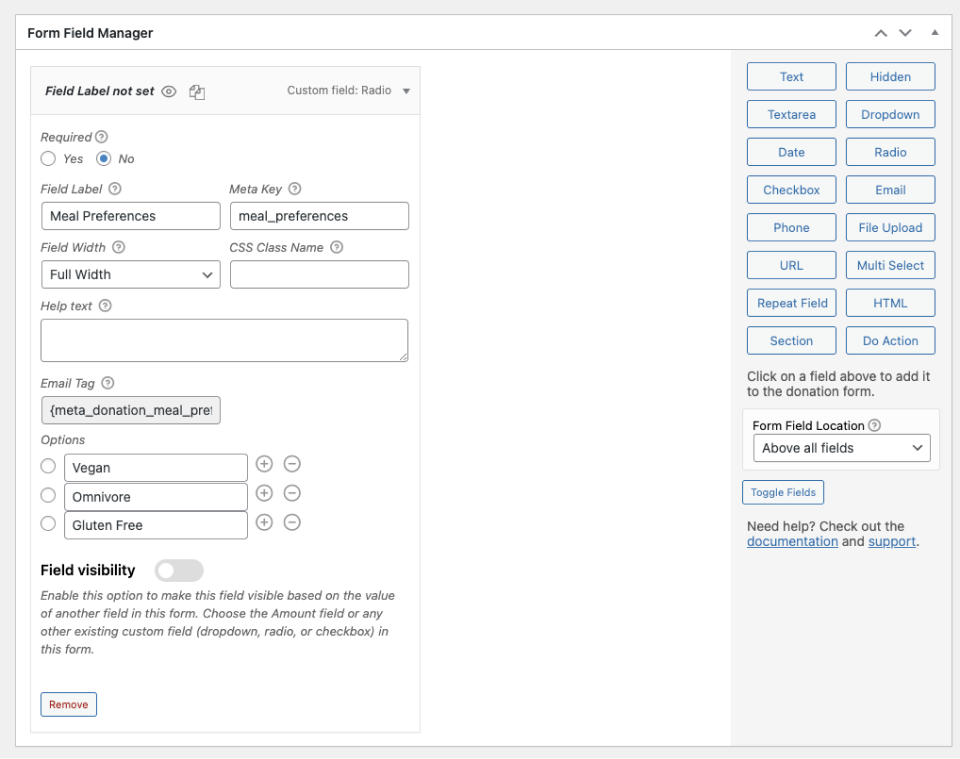
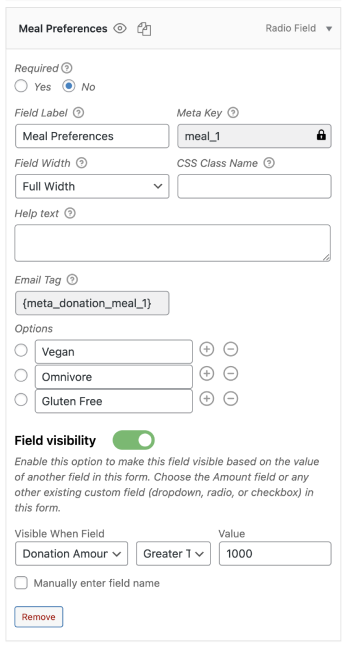
Ask for Meal Options with a Radio Field
Lastly, add a radio input for donors to select their meal preference. Choose the same field visibility options as above as well.
The final result would look like this for your donors:
Conditional Field Visibility Tips
The field visibility options are flexible and powerful. A few things to keep in mind:
Required fields are only required when displayed.
If a required field is hidden based on the value of another field, the form will submit without a value for the field. Don’t hide required fields unless you’re OK potentially getting donations without that data.
All Donation Form fields can be used to determine conditional visibility.
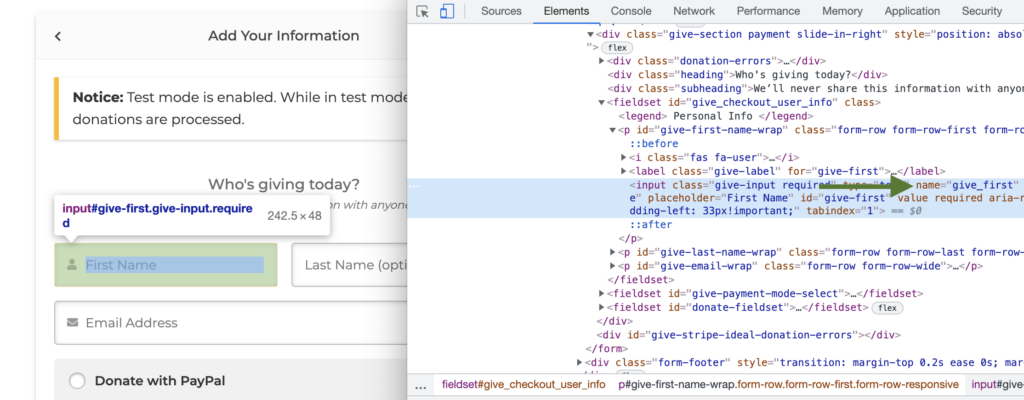
Any field can be used for conditional display, not just the three mentioned above. This means you can use the Donation amount, first name, comment, or any other field as the trigger to display your custom field. You can probably already hear your mind spinning at the possibilities. To use a field that’s not a checkbox, radio, or dropdown as the trigger, use your browser’s inspect tool while viewing the front of the form, and copy the “name” value into the Field Name input.
Viewing Custom Donation Form Field Data
Once you have set up your fields and collected data on a few donations, it’s time to view the custom field information.
You can view custom field data in your admin panel under Give > Donations > (any individual donation with custom data). The data is contained within a metabox within each individual donation.
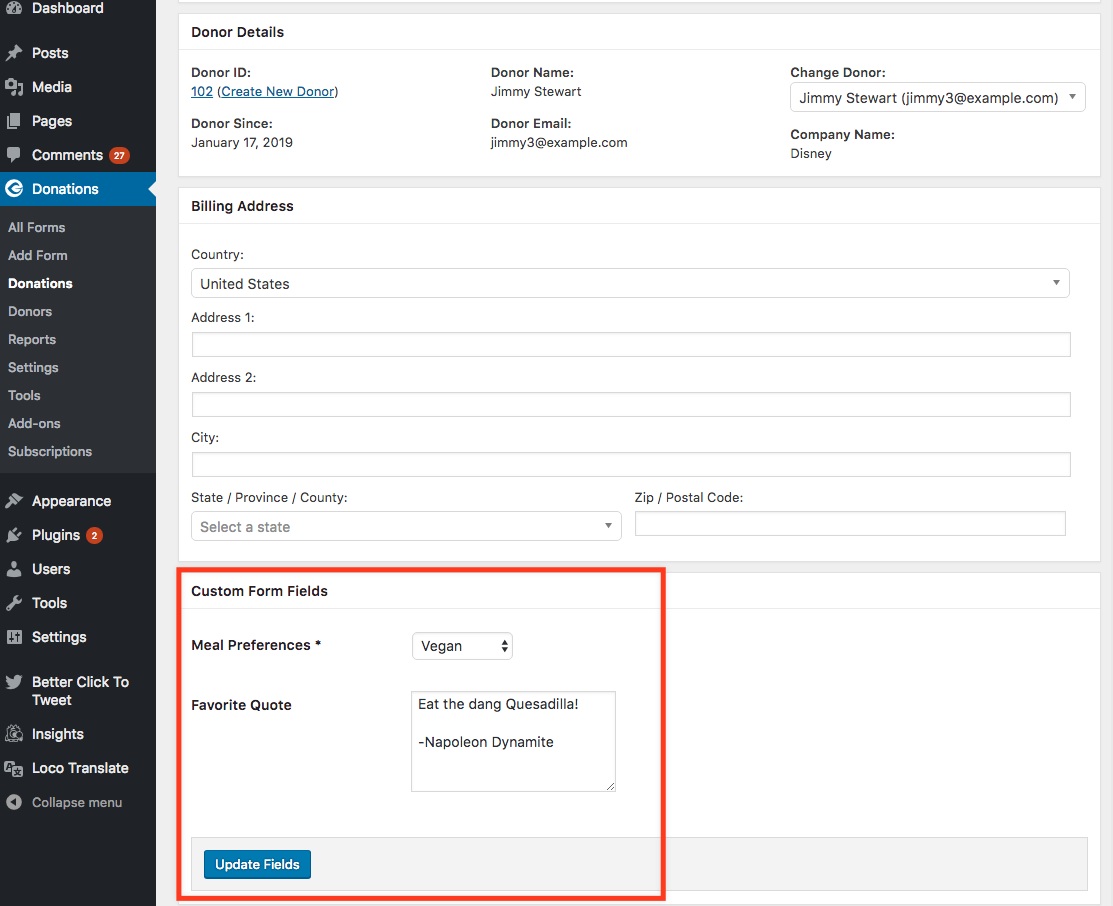
Note: Donations for donation forms that do not have custom fields will not display the Custom Fields metabox.
If you would like to make changes to the information your donor provided you can modify the fields directly in the metabox. Once you have made the changes be sure to click the Update Fields button to save your changes.
Frequently Asked Questions
- Go to Give > Tools > Generate CSV (Export Donation History).
- On that page, filter by Donation Form and choose the form that has Form Field Manager fields.
- Scroll down and select the questions you want to include in your export.
Note: If the donation is recurring, the meta data will appear in the initial Stripe invoice created for the subscription, not on the transaction payment entry.
We recommend adding PHP code snippets to your website via a code snippet plugin. We use this one https://wordpress.org/plugins/code-snippets/, however, there are many available that can work.
Also, if you need assistance implementing custom PHP code on your website we have this guide: https://givewp.com/documentation/resources/adding-custom-functions-to-your-wordpress-website/.
Please note that this code snippet is provided as an example of how you can extend Give with code. It’s up to you to implement and customize to your liking. We cannot provide support for custom code on your website, only the code that we create and distribute.
add_filter('give_stripe_prepare_metadata', function($args, $donationId) {
return array_merge($args, [
'My Dropdown List' => give()->payment_meta->get_meta($donationId, 'dropdown_list', true),
'My Paragraph textarea' => give()->payment_meta->get_meta($donationId, 'donor_details_paragraph', true),
]);
}, 10, 2);


