Donation Details
The Donation Details screen shows all the information connected to a specific donation. From here, admins can view donor information, payment details, form data, and activity logs. Depending on user role permissions, certain fields can also be edited.
To open the Donation Details screen, go to GiveWP > Donations. In the list, hover over the donation ID and click to edit.
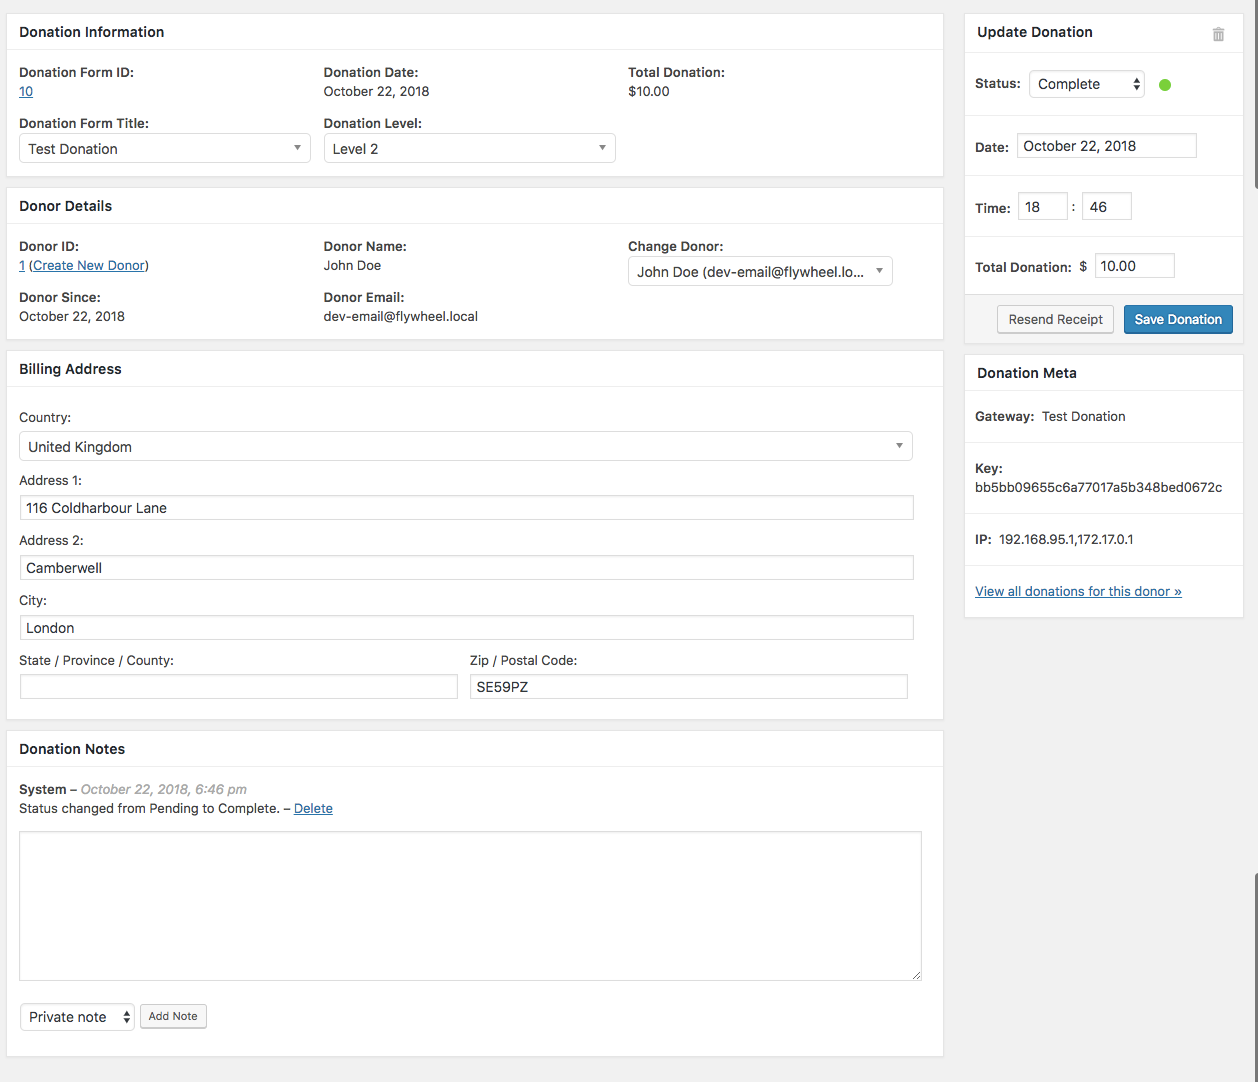
This page provides you with comprehensive information about that single donation.
Donation Information: This metabox provides you with the data related to the donation form, level (if applicable), date, and amount. The form and level are editable here.
Update Donation: This metabox allows you to update the data and status of the donation payment. Note that this does not change things at the payment gateway, and that these fields are editable only for record-keeping purposes.
Also note that for some types of donations (and depending on notification settings), changing the status from “Pending” to “Complete” will trigger donation receipt emails as well as new donation admin notification emails.
Donor Details: This metabox allows you to change the donor associated with a donation, or to click through to the donor information.
Billing Address: If the donation required collecting billing address, it will be recorded here. It can also be added manually from this metabox.
Donation Notes: This metabox has some automatically-generated system notes such as when the donation went from pending to complete. These are added as private notes.
Additionally, an admin can add a “donor note”. When choosing “Note to donor” an email is sent to the donor. Refer to this article to see how this email can be customized like all other GiveWP emails. See our list of “Email Tags” for info on the donor note email tag as well.
Donor comment: If the donation includes a comment, it will appear in its own section right after the Donation Notes.
Renaming a Donor in the Donation Details
Note: These instructions require the legacy view for donation detail admin screen to make these changes. If you are on the new view, navigate to GiveWP > Donations, and click the Switch to Legacy View button in the top-right corner of the screen.

Although rare, there are times when your donors might also donate using the same email but with a different name. In this case, the Donation Receipt will reflect the Donor Name attached to that donation. Sometimes, this can cause problems, as the Donor might need their actual name to be reflected in the Donation Receipt for any reason.
In this case, you can follow the steps below:
- Go to the Donation that you need to modify.
- In the Change Donor dropdown, select “No donor attached”.
- Save the donation.
- Again, in the Change Donor dropdown, select the correct donor.
- Save the donation again.
Thereafter, the Donor Name will now reflect the name of the Donor attached.
Reassigning a Donation to a New Donor
The Donation Details section of the screen allows admins to reassign donations to a new donor that does not already exist. This can happensif an admin is already logged in, but they are entering donations on a donation form for offline donations received at an event, or non-monetary gifts. Because they are logged in, the donation will be assigned to the admin’s email address and donor record.
Tip: It’s best to use the Manual Donations add-on to enter new donations where they can select the assigned donor from a list, or create a new one on the same screen. For more details see our documentation here.
In the Donation Details – Donor ID section, click the link Create New Donor.

On the next screen, enter the new donor’s first/last name and email address, and click Save Donation in the Update Donation section.
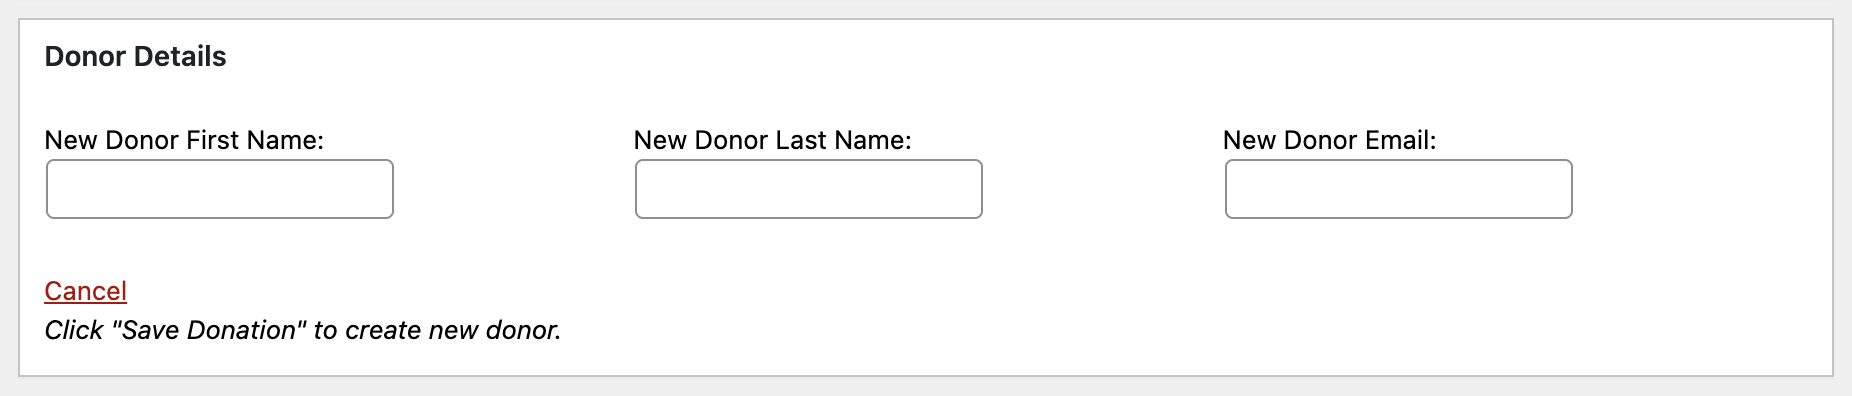
That’s it! Now the donation will belong to the new donor you just created.


