How to Set up a Charity Merchandise Website on WordPress
Get your charity merchandise website up and running on WordPress with no overhead for warehousing or shipping costs.
Selling merchandise on your charity website is a great way to not only raise money for your cause, but also awareness.
Adding an online store to your fundraising efforts is no longer out of reach, even for the smallest nonprofits. Tools like WooCommerce and Printful make it easy (and cheap) to get started. Plus, with GiveWP you can be sure you’re making the most of your charity merch store with donation upsells in the cart or checkout.
Let’s get started.
Why Build a Charity Merchandise Website?
One of the best reasons to sell merchandise is that it can be a fantastic way of fundraising. Apparel markups can be generous enough to raise serious cash for your mission. Some nonprofits even have their merchandise as their primary income stream. But that isn’t the only benefit.
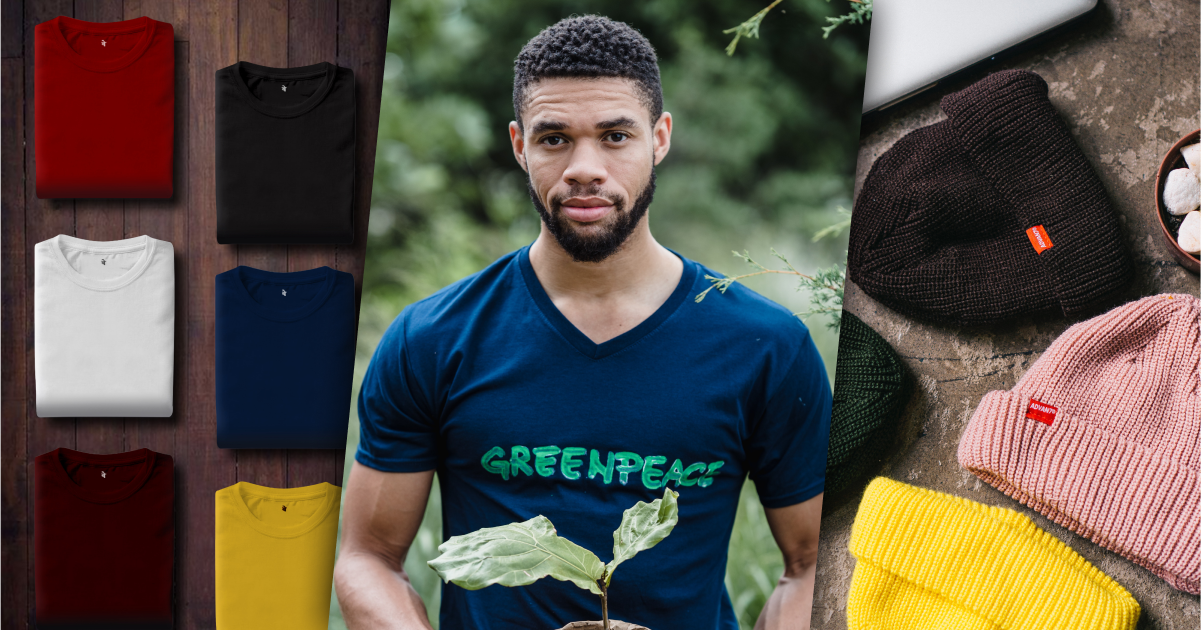
Branded merchandise = longevity. People hold on to clothing they like for years, and the brand awareness of a good t-shirt far outweighs the shelf life of mailers or advertisements.
You’re not just creating apparel – you’re creating walking billboards for your mission. Make it interesting enough and you’re also building an army of supporters ready to go out and tell people about what a great cause you have and why they support you.
Required Tools to Get Started
While it may seem like a monumental task to set up a charity merchandise shop online, in reality it’s never been easier. We’re going to give you a list of tools that can have you up and running in an afternoon with less overhead investment than you thought possible.
WooCommerce
WooCommerce is one of the most popular ecommerce platforms in the world, estimated to be on over 3.8 million websites worldwide. With WooCommerce, the possibilities are endless. Since we’re a WordPress plugin, and WooCommerce is the ecommerce platform for WordPress, all of the tools we’re highlighting will use WooCommerce.
Storebuilder
If you’re looking for one of the easiest and quickest ways to get a WordPress shop off the ground, our friends over at Nexcess just launched the latest version of StoreBuilder. With just a few clicks, StoreBuilder’s guided setup will help you design a beautiful and fully-customizable storefront built on WooCommerce.
Plus, you can get the first 30 days of StoreBuilder for free for a limited time! After that it’s only $19/month – cheaper than Shopify, Squarespace AND Wix.
Kadence Theme and Blocks
Want to build yourself? Then the first place you should start is with a stellar theme from KadenceWP. Their themes and blocks make it simple to build your shop exactly how you want it. We’re constantly impressed at how beautiful Kadence themes can be, and how easy they are to work with.
IconicWP
Once you have your store up and running, you might want to consider using some of the amazing plugins from IconicWP to really step your game up. From building Wish Lists to enabling zoomable thumbnails for your products, Iconic turns your simple WooCommerce store into a fully featured ecommerce machine.
Printful
One of the biggest barriers to starting your own nonprofit merchandise shop is the cost of printing and storing the goods (not to mention the logistics involved with coordinating shipping!). Printful takes all of that out of the equation.
They are a Print-On-Demand (POD) service that connects to your WooCommerce website, prints apparel orders as they come in, and ships them to your customers, without you needing to do a thing (except a little set-up). You can get started with Printful totally free, and there are no minimums or monthly fees to worry about.
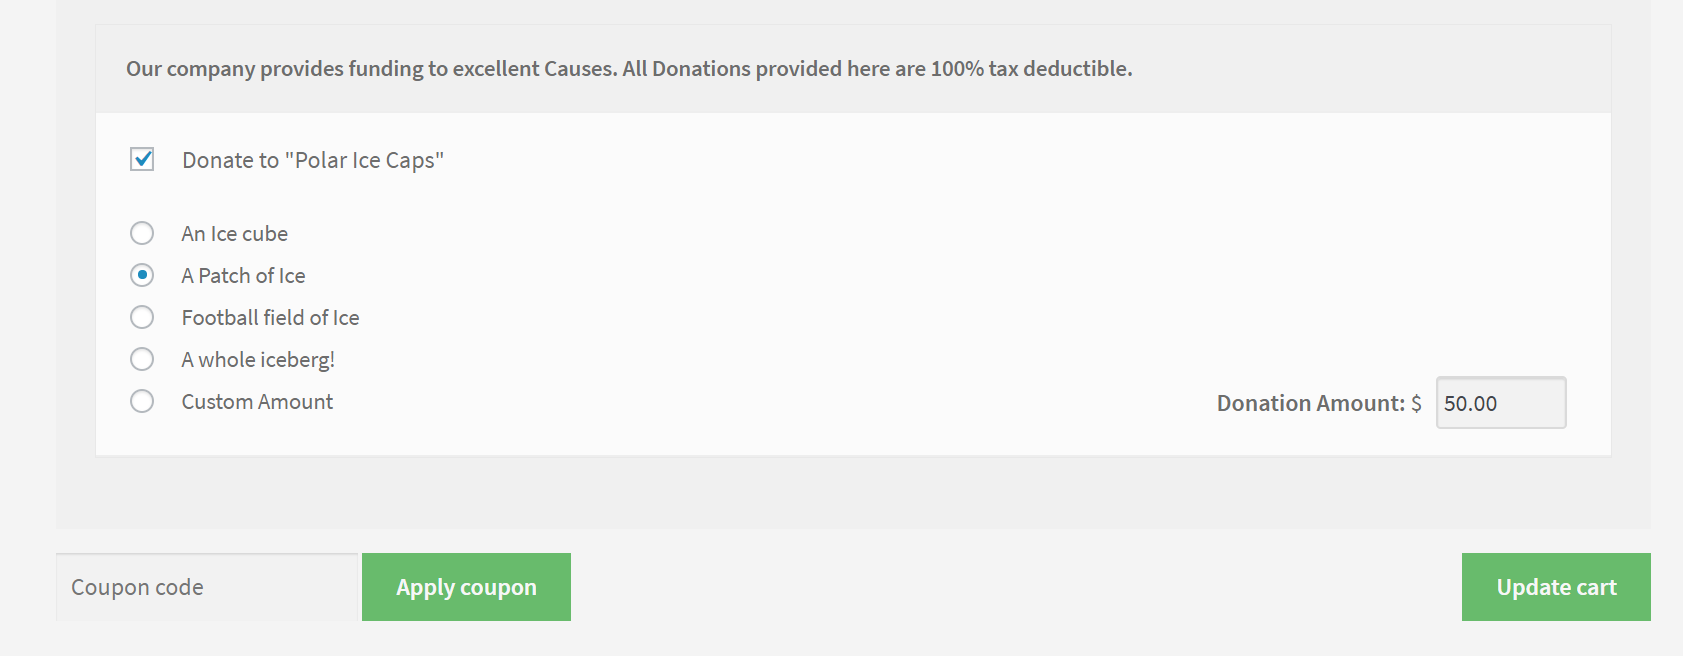
Accept Donations at Checkout
With our Donation Upsells for WooCommerce add-on, you can let your purchasers make an additional donation directly in their cart. So not only can donors support your mission by purchasing merchandise, they can also make an additional donation to your cause, all during the checkout process.
It’s shockingly easy to get started, and is included in your GiveWP Pro, Plus, or Agency pricing plan.
Amplify your fundraising with a GiveWP Plan
How to Begin
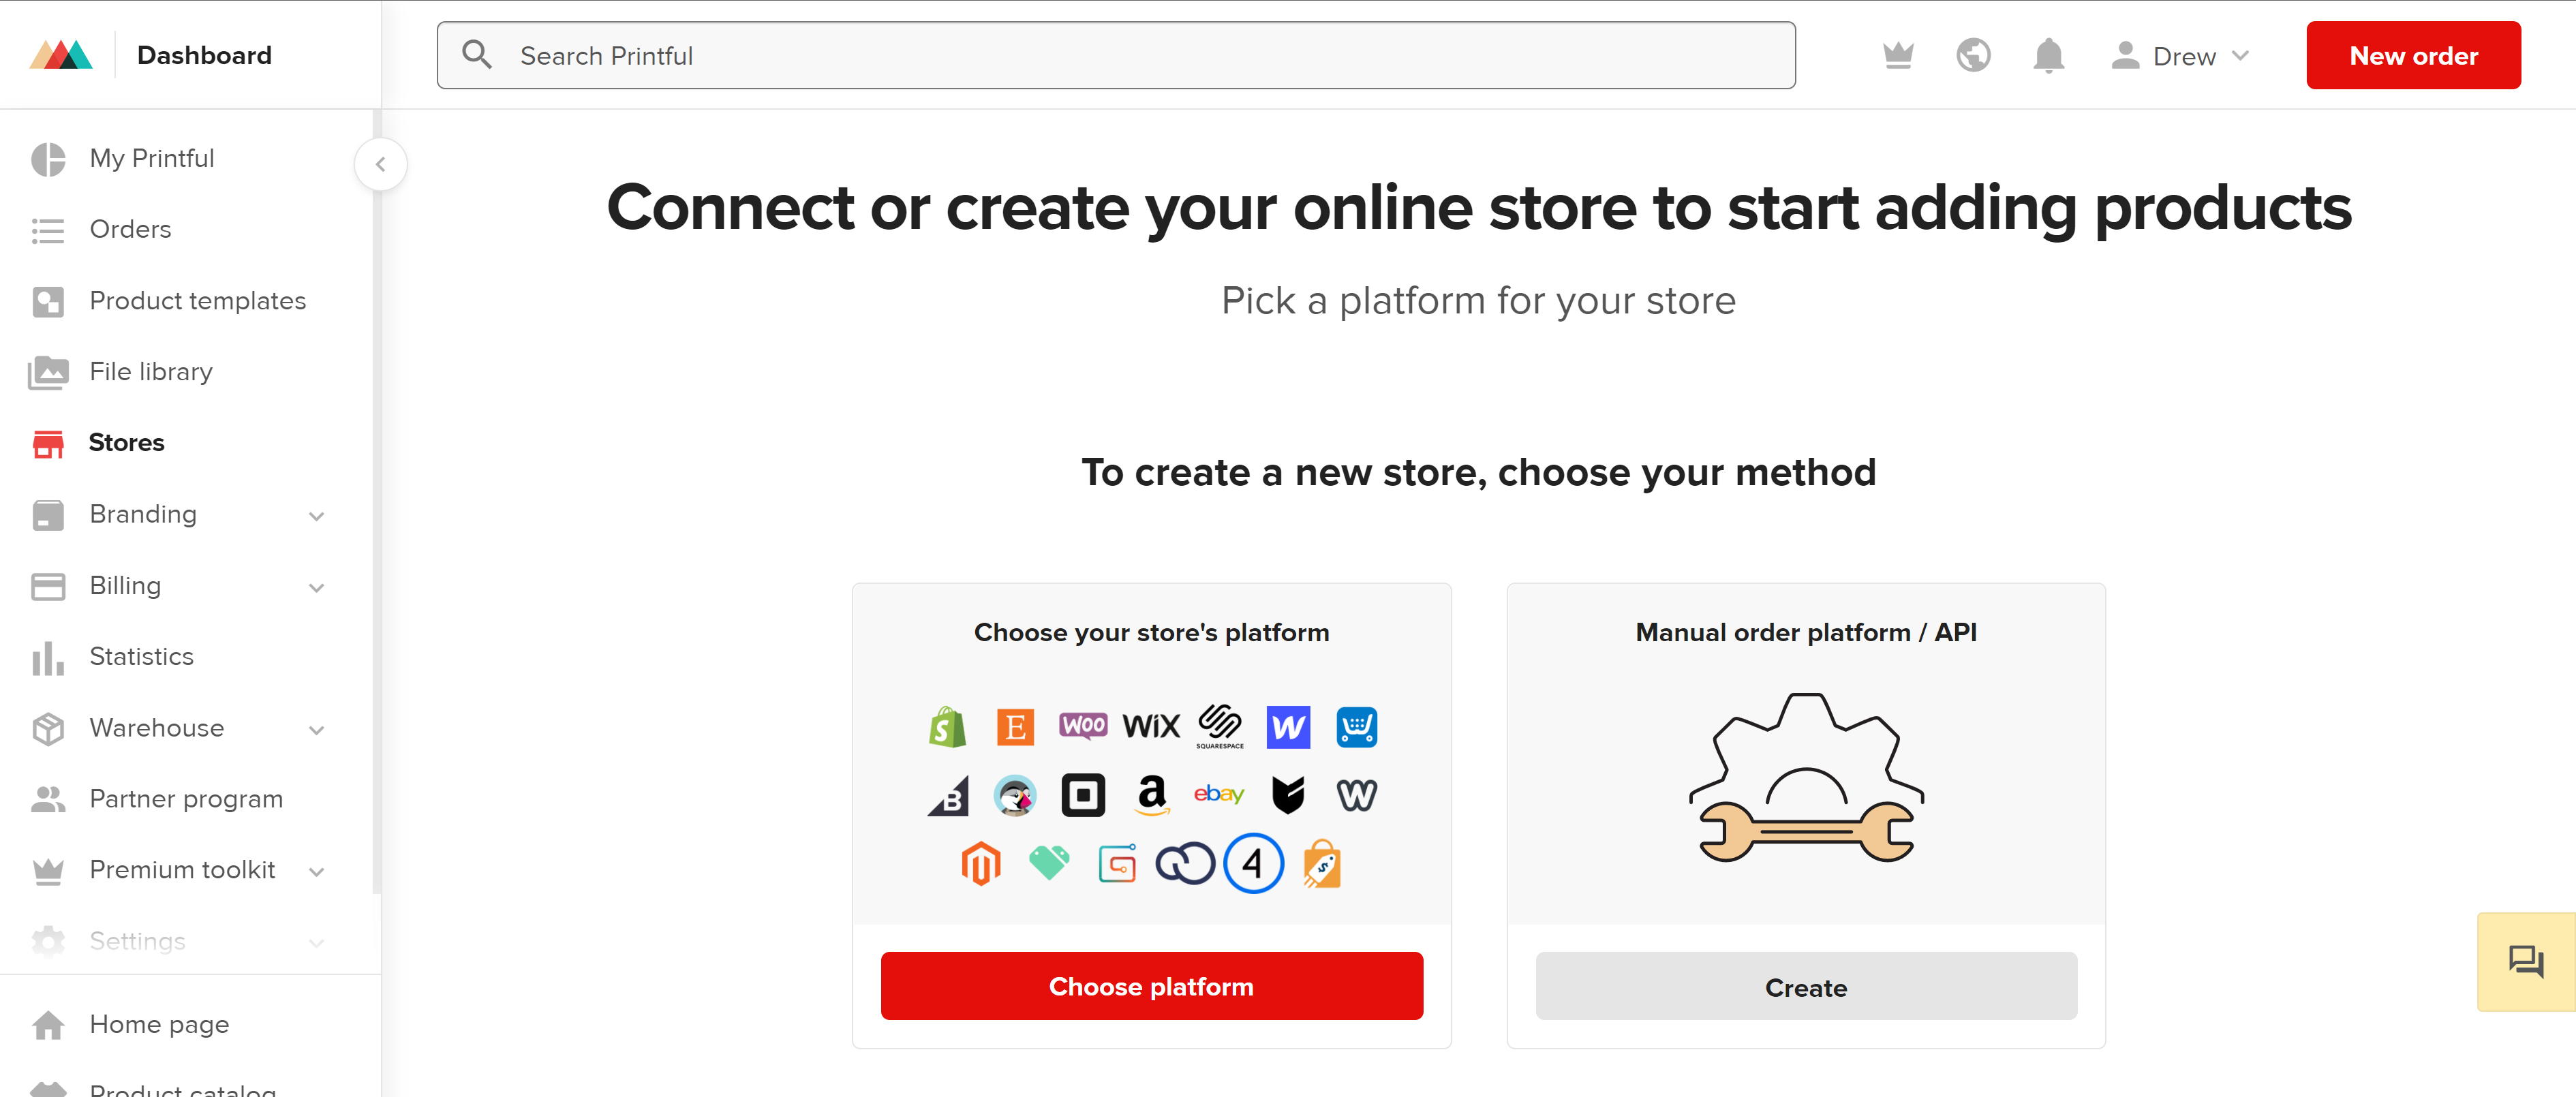
First, register and enable the tools of your choosing from above. Once you have your website operational, and are ready to start building your shop and adding products to your store – head over to Printful.
1) Connect Printful + WooCommerce
On Printful you can start by creating an account and linking it to your website via Printful’s WooCommerce integration.
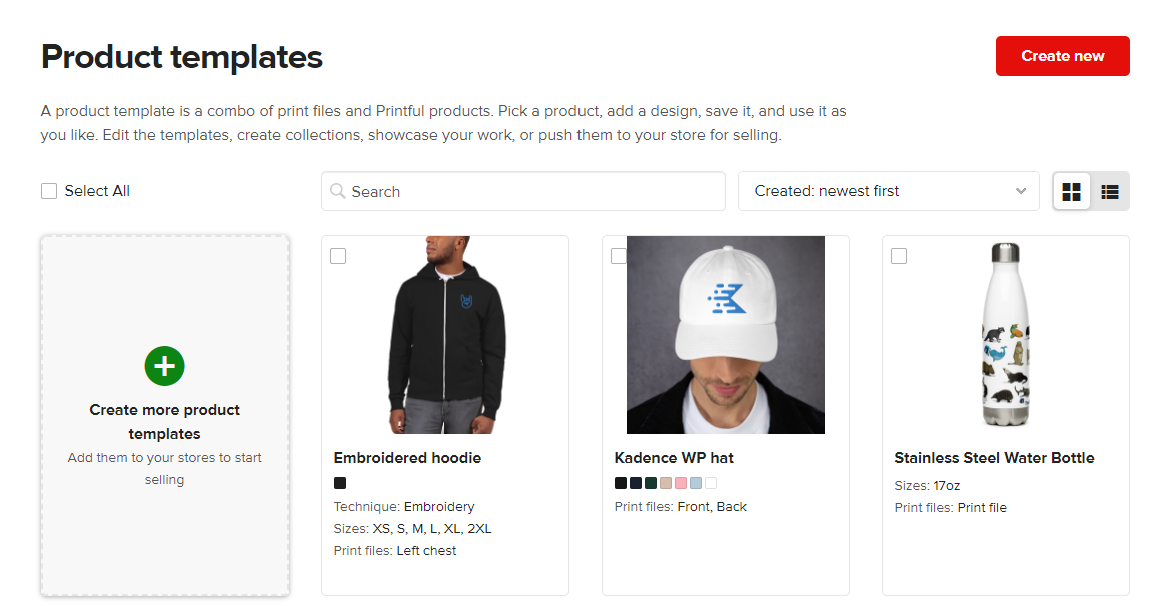
2) Add Your Products
Once your store is linked, you can start designing your products via their amazing product builder tool. Start by clicking on the “Product Templates” tab, and “click “create more product templates”. Select the item you want to design, and then follow their guided design process to get the template made.
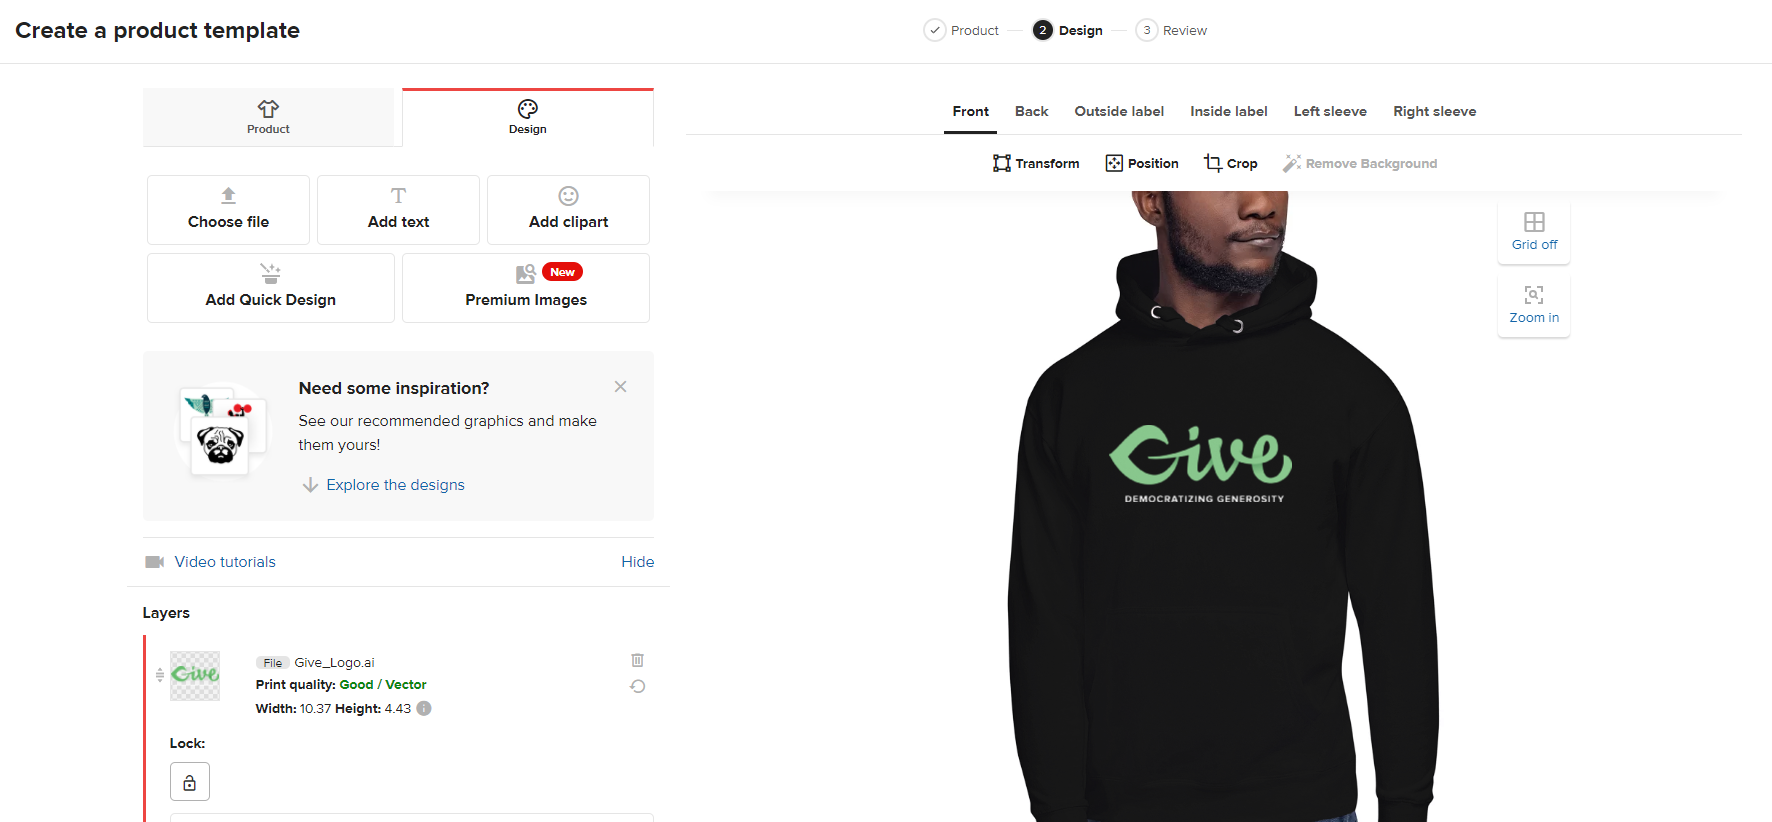
Drop in your designs, make sure they are properly sized. Be sure to select printing options (if you want) for side and back prints! Once your design is set, continue and set your pricing, and download your mockups. When you’re happy with the product template you’ve created on Printful, add it to your linked WooCommerce store by hovering over the product template in the template gallery and clicking “Add to Store”.
3) Edit Your WooCommerce Settings + Add-ons
Once you add a product to your store via Printful, you will see them quickly in your WordPress + WooCommerce product menu. Once you see your products in the WooCommerce product menu, be sure to go through and toggle all the appropriate settings for shipping, product images, descriptions, categories, tags, etc.
Here is also where you’ll want to add tags to build collections so that visitors can easily find the product types they are looking for. This is also where you’ll want to implement some of the super powerful IconicWP plugins like Image Swap for WooCommerce that will let you showcase multiple product variants directly in your thumbnail images.
4) Add Donation Upsells
Adding the option to donate to your cause at checkout is an awesome way to raise a little extra cash for your mission. If you’re selling merchandise and not letting people add a donation, you’re missing out on some serious cash at the moment people are most likely to spend.
To get started make sure you have Donation Upsells for WooCommerce, which is available as a standalone add-on, or as part of our Pro, Plus and Agency GiveWP pricing plans. Install the add-on, and once activated you can find the Donation Upsell settings in your WooCommerce Settings menu.
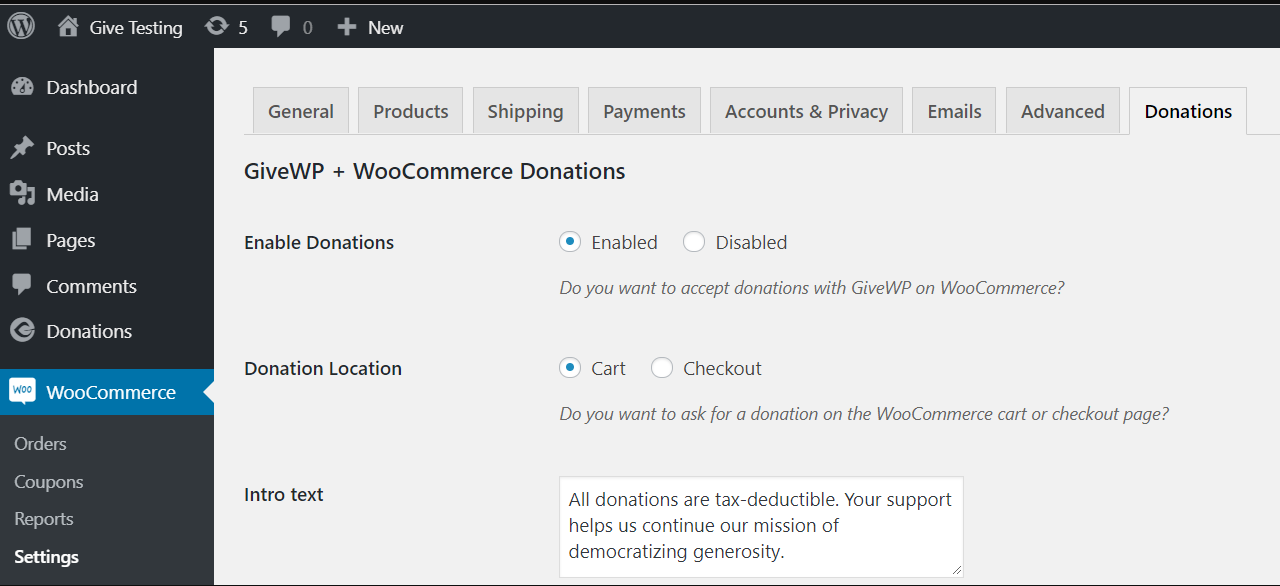
Select the button types you want, the text you want to display, and where you want the donation option to show up in the checkout process. Detailed instructions on all the available settings are available here.
Once you have all your products uploaded to WooCommerce via Printful, and all your add-ons installed and activated, you’re set to go. YES, it’s THAT easy! Now when people order an item from your website, Printful will automatically print and ship the order and you’ll get paid directly from your Printful account.
Amplify your fundraising with a GiveWP Plan
What to Do Next
Now that your store is up and running, it’s time to promote it to generate sales. Be sure to explain how the apparel benefits your mission, and don’t forget to lean on your partners and supporters with larger social followings to help get the word out.
There are a ton of amazing fundraising and awareness ideas on the GiveWP blog. Be sure to subscribe, and in no time you’ll have ideas for your next big fundraiser with your new charity merchandise shop.

Like What You’re Reading? Subscribe Here!
Newsletter Opt-in
About the Author
Drew Griswold
Drew was the Community Outreach Coordinator for GiveWP, and is a small business owner, camp director, and wine fanatic. He has a degree in Journalism and Media Communication from the University of Wisconsin-Milwaukee. He’s a lover of all things WI sports, and has been working with nonprofits in some capacity for over a decade. You can usually find him walking around Milwaukee with his dog Lucy.