Managing Subscriptions via Recurring Donations Page (Legacy)
The Recurring Donation Add-on allows Donors to be able to have a simple overview of all their subscriptions and manage them, on the Recurring Donations page. This is now the legacy option for managing recurring donations. This document covers the various functionality on that page and options for configuring it.
Donor Access to Subscription History
With recurring donations, it is important for donors to be able to have access to their donation history, as well as current and past subscriptions.
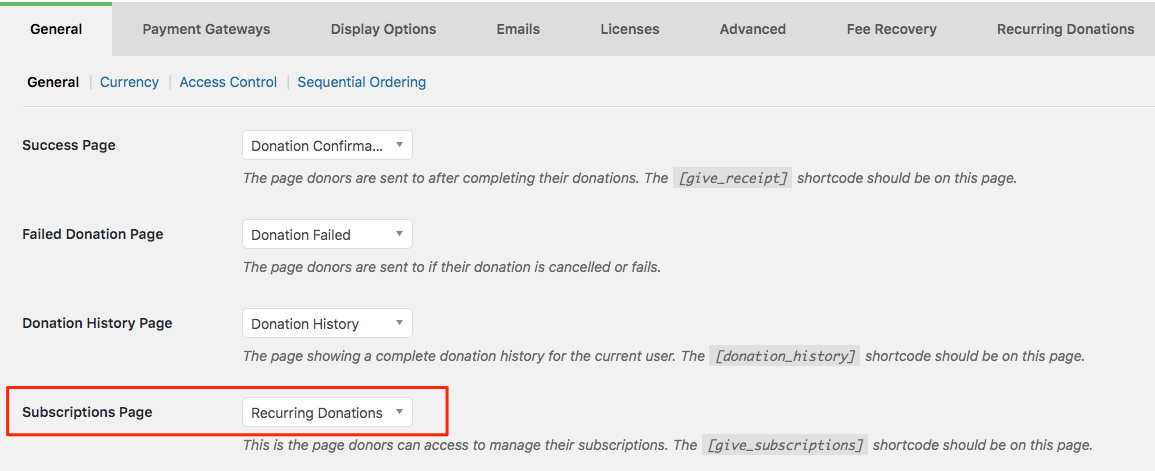
To provide your donors a way to see all their subscriptions, both past and current, and to be able to view them individually or cancel them, the Recurring Donations add-on creates a page called “Recurring Donations” upon install containing the [give_subscriptions] shortcode.
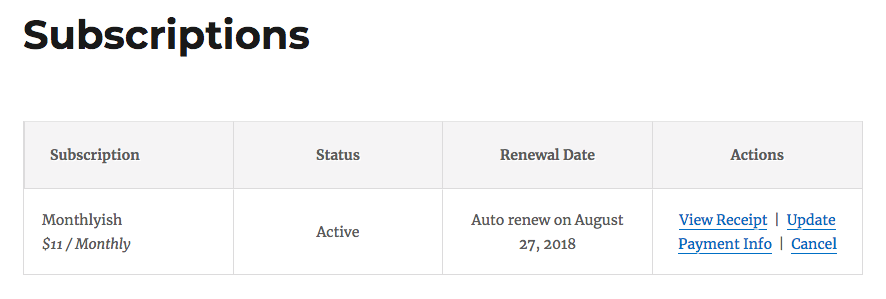
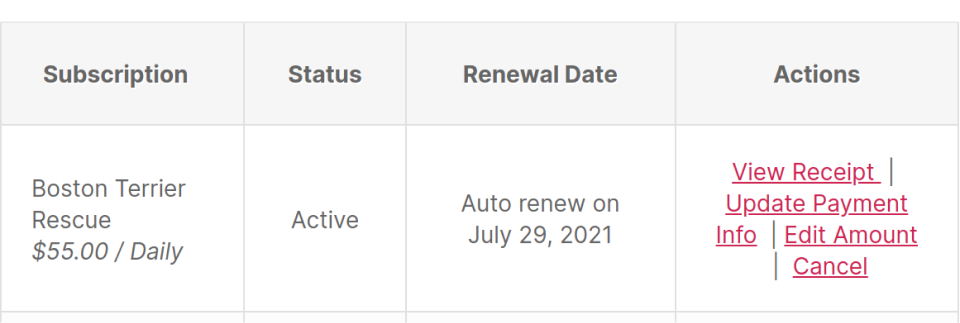
From the Subscriptions Page your donors can do a few things, depending on their subscription history:
- Click the “View Receipt” link in to see the original donation receipt page
- Click “Cancel” to immediately cancel their subscription
- Click the “Update Payment Info” link to change the payment information on file at the payment gateway. (see note below)
If an option doesn’t exist in the list for a specific subscription, that means that either the payment gateway associated with the subscription doesn’t support that functionality, or some other back-end check of GiveWP’s indicated that the process is not possible. For example, if the subscription was made on an older version of the recurring add-on which didn’t support changing the payment information, that option will not show up.
Note: Card/Payment information is never stored on your site, for PCI compliance purposes. Read more about GiveWP and PCI compliance.
How to Donors Sign in To View and Edit Subscriptions?
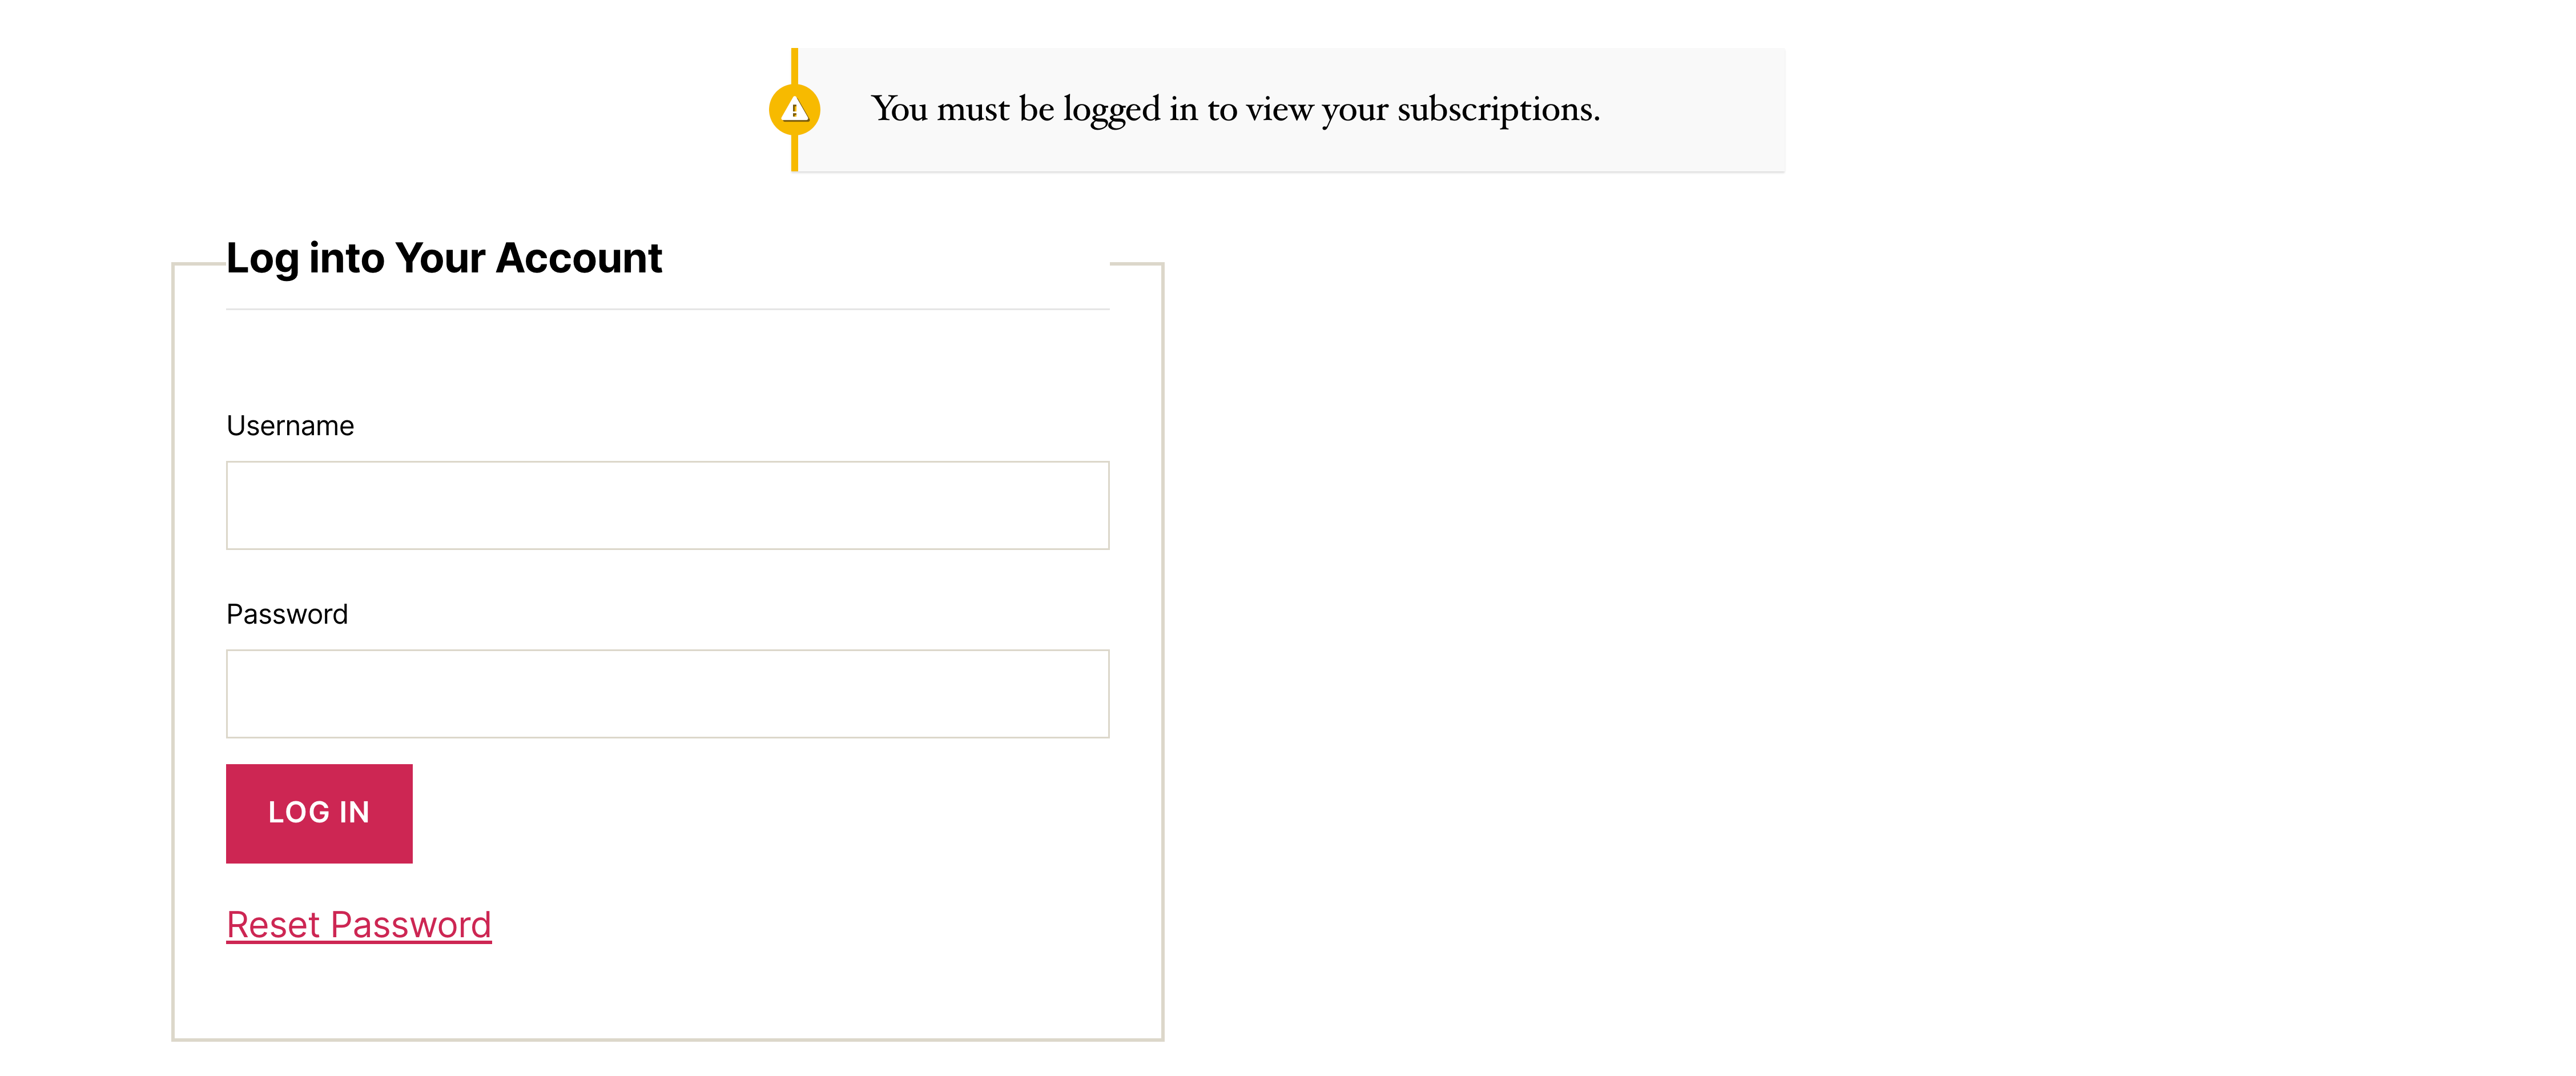
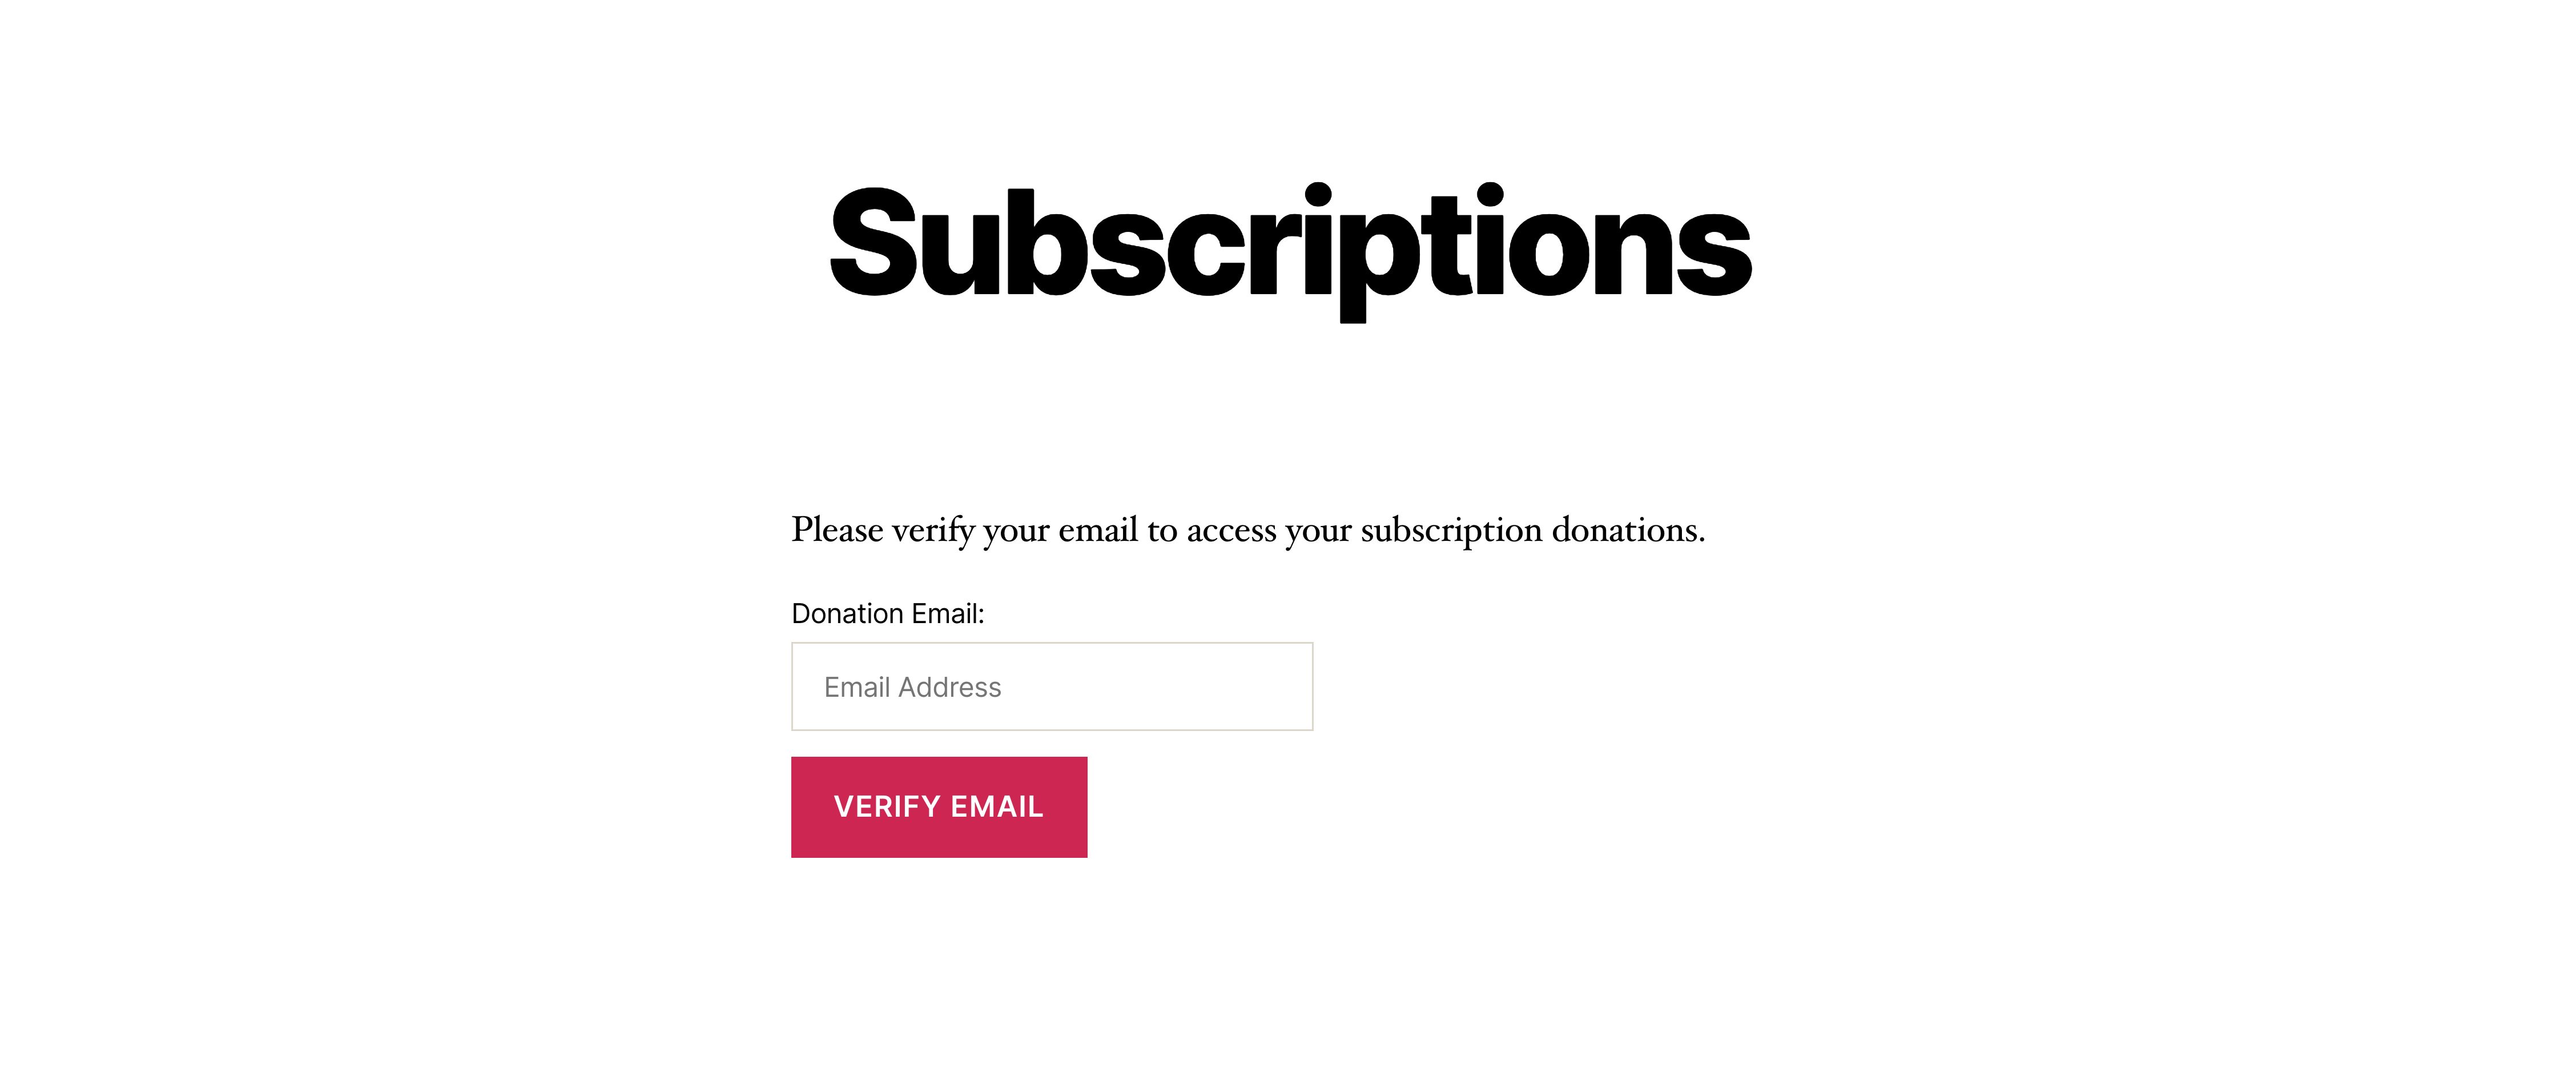
Donor’s can access their subscriptions via the Subscriptions page. In order to have access to the subscription information donors will need to be either logged in or validate their email.
When you initially set up the recurring donation form, you have two options:
- Force all recurring donors to have an account on the site, which they log into in order to view their subscription history.
- Enable email access so that donors can verify their access to their subscriptions using their email inbox.
The great thing about GiveWP is that it allows donors to sign up as WordPress users (on your site) or not, depending on how you configure the form. All of this happens on your site and they should not be given credentials to log into givewp.com.
Log In Option
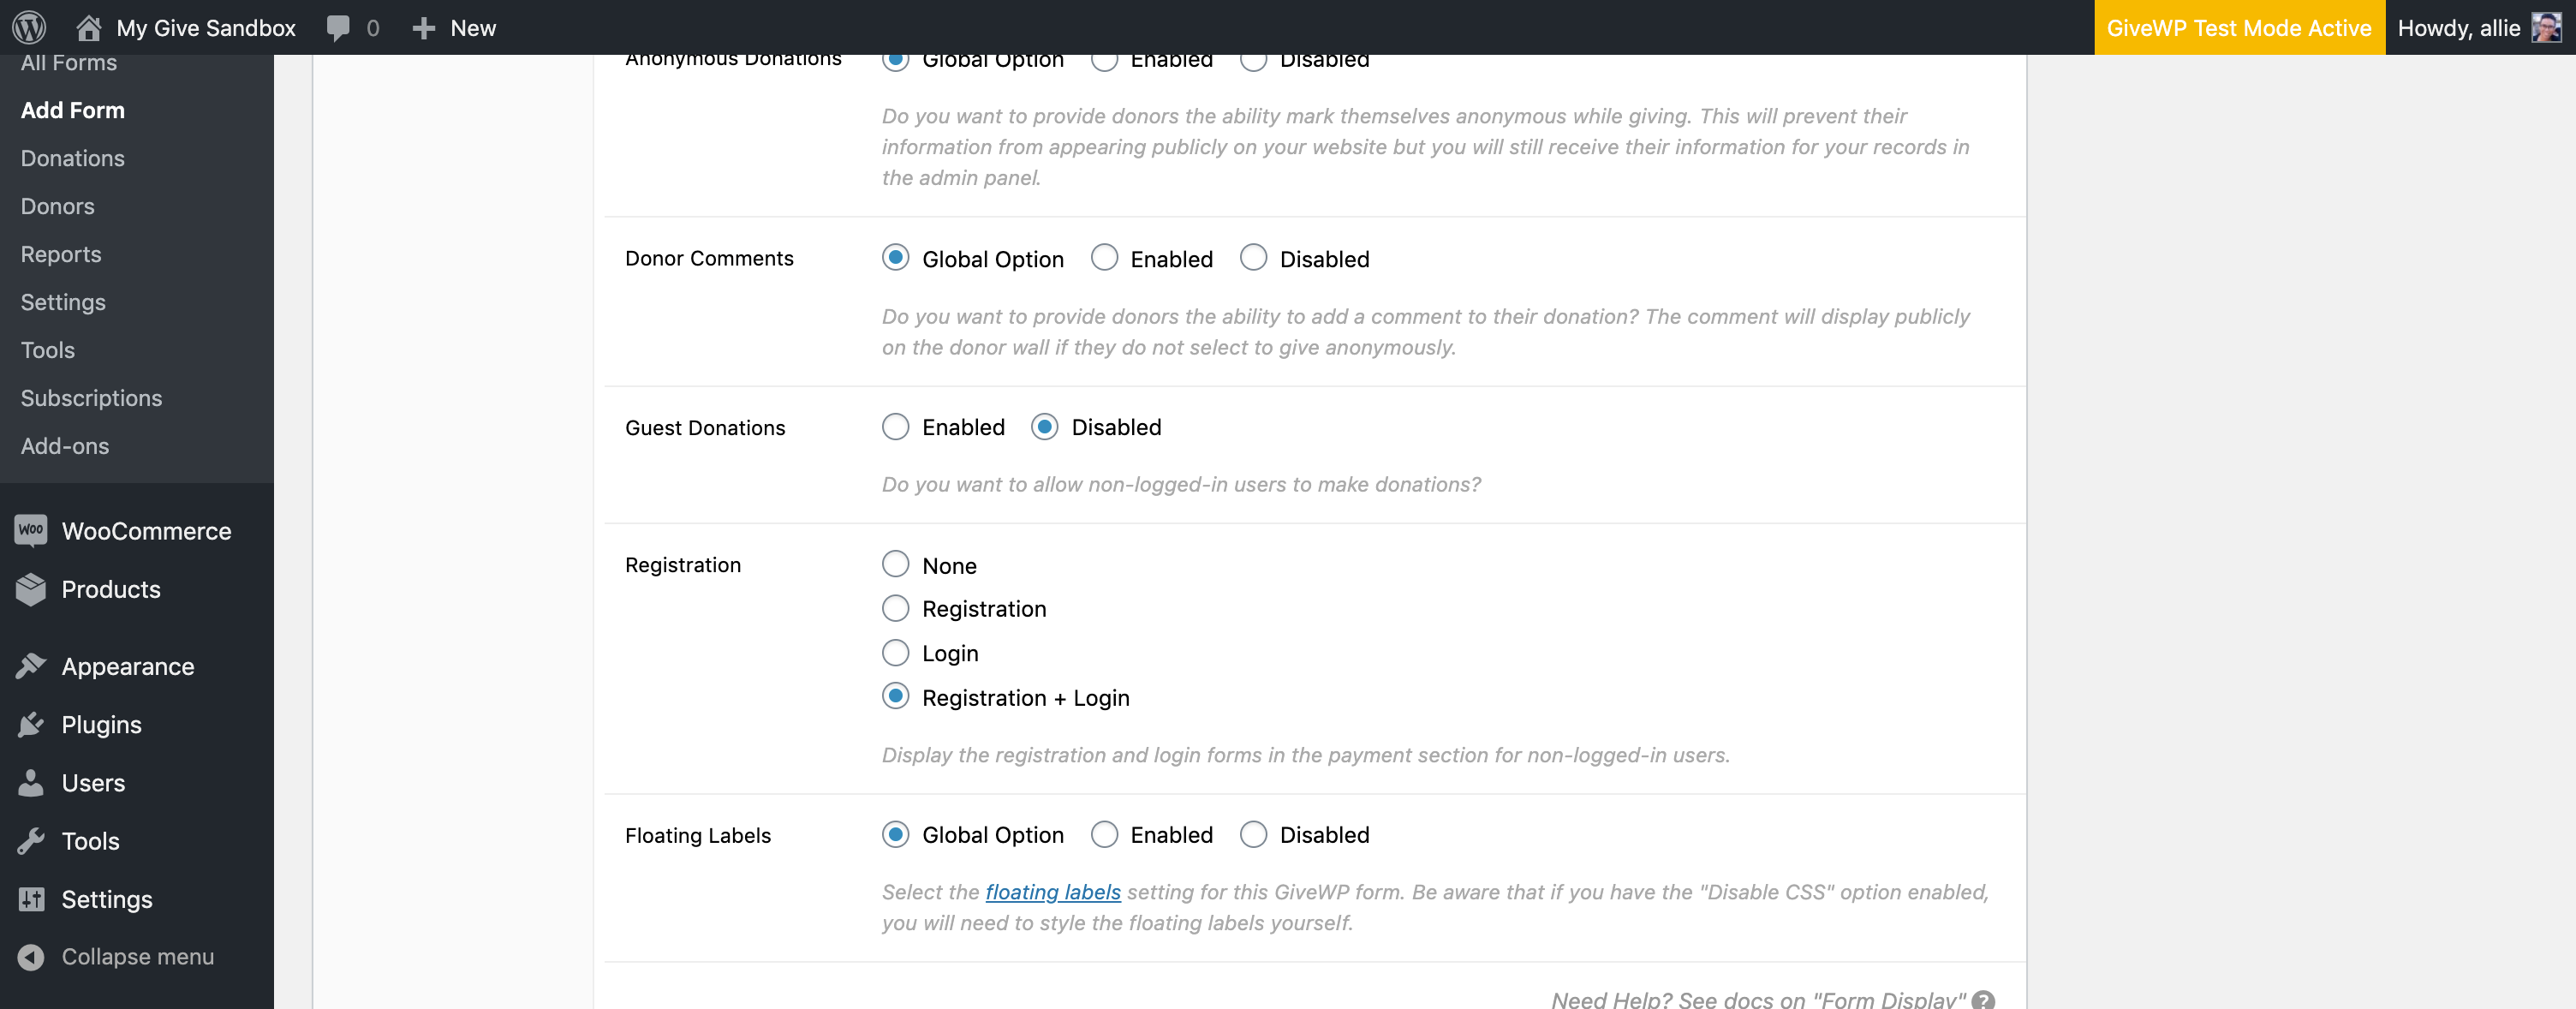
If you disable guest donations on the Form Display tab of the form edit screen, and enable the Registration and Login fields, that will force donors to create an account. This is a seamless background process that happens when they submit the donation.
Then they can log into the account. You can create a page with the [give_login] shortcode that allows them to log in.
See this article on the benefits of requiring login for donors to see why this might be the option for you.
Once they have verified access (either by logging in, or by verifying the email) on any page that has the [give_subscriptions] shortcode, the donor will see an option to edit their active subscriptions.
Validate Email
If you decide to have your donors validate their email instead, you’ll need to enable Email Access.
They can still go directly to the Subscriptions page and then use their email address to verify access to their subscription history. They fill in their email, and your site emails them a special link to be able to access their subscription history.
Once they have verified access (either by logging in, or by verifying the email) on any page that has the [give_subscriptions] shortcode, the donor will see an option to edit their active subscriptions.
Updating where your Manage Subscriptions page is
If you would like to change the location of your “Recurring Donations” page, you can do that by deleting the shortcode from the current page and placing it on any other page you’d like.
You should then change where that page is in the General settings at Donations > Settings > General (tab)
Setting up forms to Allow Logged-out Subscriptions
To enable recurring donors to subscribe without logging in or creating an account, first navigate to Donations > Settings > General > Access control and ensure that “Email Access” is enabled. That will also enable two more options for adding in reCAPTCHA keys, which is recommended to prevent SPAM bots and other unpleasantness. Once you’ve set that up, scroll to the bottom and click “Save Settings.”
Then, on each individual form you create, in the “Form Display” tab, ensure that the option labeled “Guest Donations” is enabled. That option should show up above the “Registration” option.
If you are seeing the yellow “Notice: If you do not have email access enabled…” above the “Registration” options you need to scroll to the top of the form settings and click “Update.” (or ensure that you saved the Access Control settings correctly in the first step) This refreshes the page, and you will then be able to see the “Guest Donations” option. Again, make sure that it is enabled, and that the “Registration” option is set to “None.”
That’s it! You are all set to accept recurring donations from logged-out donors, who are then able to see their donation history using only their email as verification.
Cancelling Subscriptions
Subscriptions can be cancelled directly via the Subscriptions page. The page can be set under Donations > General > Settings. Once on the Subscriptions page, click on “Cancel” and then confirm the action. This will tell the payment gateway to cancel the subscription. It is recommended to double-check your specific gateway afterwards to make sure that the cancel has occurred there.
Alternatively, subscriptions can also be cancelled directly through the Subscriptions page under Donations > Subscriptions > View Details. > “Cancel Subscription” button. This will also trigger a Cancel request to the payment gateway. Just as above, it’s best to make sure that the subscription was cancelled in your payment gateway account.
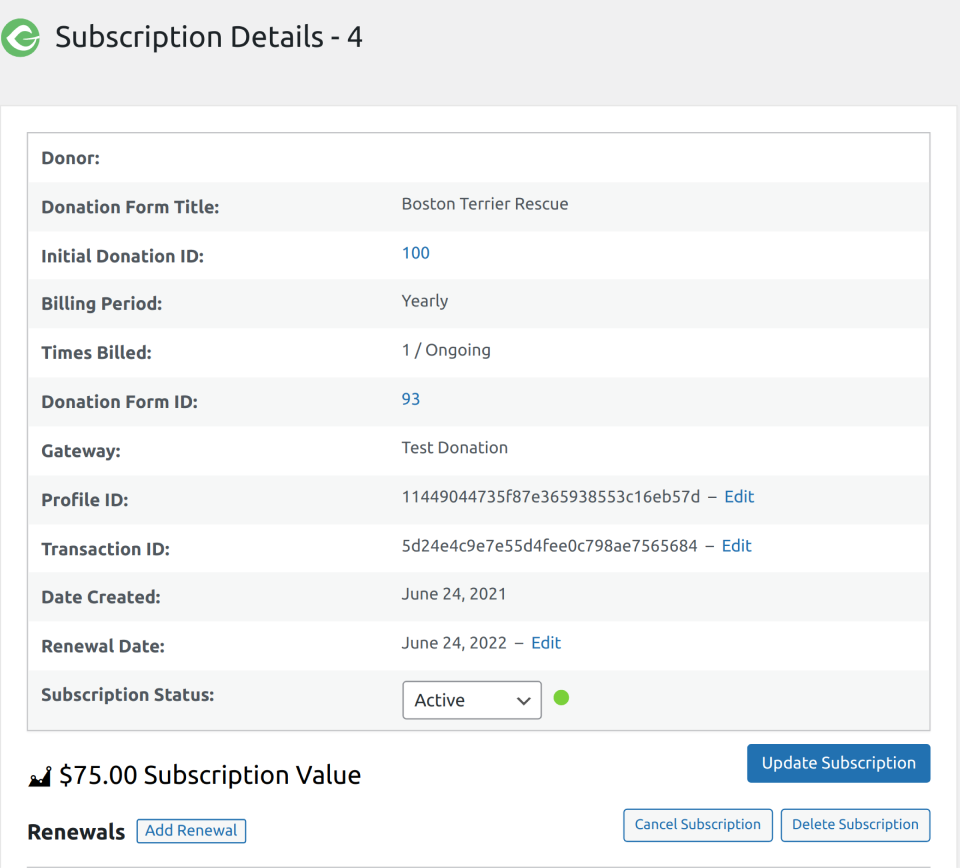
You’ll notice that afterwards, back on the Subscriptions page, the status of the subscription will be set to “Cancelled. While statuses can be changed on the Donations page and within the individual Subscription pages, the status changed there doesn’t actually trigger a Cancel request to the payment gateway. The status changes are read-only for Admin view.
Note: Changing Subscription Statuses to “Cancelled” does not trigger a cancel at the payment gateway, it just changes the viewable status for Admins.
Adding Existing Subscriptions to GiveWP
If you are moving from a different platform to GiveWP and you have existing subscriptions already running in a payment gateway that supports GiveWP (this procedure has been tested with Stripe and Authorize.Net, so your mileage may vary with others), there is a way to pull in those existing subscriptions to GiveWP so that future renewals show up in the records on your GiveWP site.
Note: This procedure is not something the GiveWP priority support team can help with, and there are steps here that may mess with the donation data on your site. ALWAYS perform data migrations in a way that you can recover from with site backups, and it’s recommended to perform these steps in a staging or test environment before doing it on the live site.
The steps below require the Manual Donations add-on to be installed and active on your site.
- Make sure that a form on your site is set for the frequency and amount (or allows custom amounts) of the subscription(s) you are importing.
- Add a new donation by navigating to Donations > Donations and clicking “Add New” at the top of the page.
- The data you need for this donation should match the initial donation on the subscription. The important bits are the Date, Amount, and Payment Gateway. Creating this donation will also create a new subscription.
- Now you need to associate the new subscription with the existing subscriptions in your payment gateway. The way GiveWP makes that association is the “Profile ID” which is the same as the “subscription ID” from the payment gateway side. Navigate to “Donations > Subscriptions” and click on the new Subscription. From there you’ll need to edit the “Profile ID” to match the customer Profile.
Once the subscription has a valid profile ID, you can use the “sync subscription” button to pull in all existing renewals from the gateway. In the case of Authorize.Net renewals, it will generally only pull the last 6 months of renewals, as a limitation of the API that is used to sync things.
That’s it! Going forward new renewals should show and associate with the subscription, as long as the webhooks are configured correctly.


